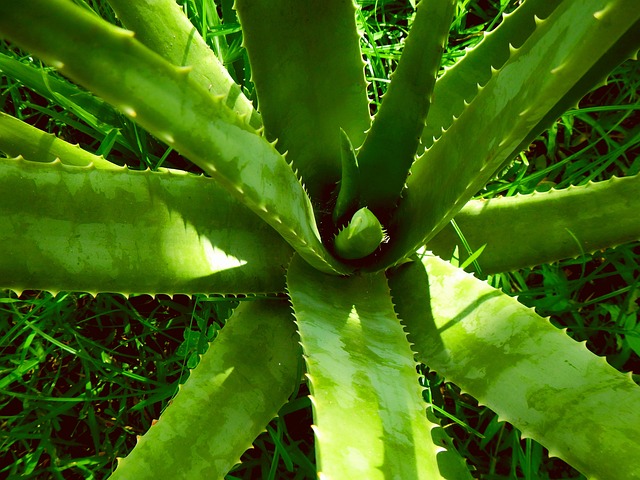
aloe vera
Aloe vera
Also known as: Burn Plant, First Aid Plant
Evidence-based care guide for Aloe Vera (Aloe vera). Covers symptom diagnosis, pest control, propagation methods, watering and lighting. Our analysis draws from 31 verified community cases with an average confidence score of 83%. Each protocol is synthesized from real rescue outcomes, not generic advice.
Care Essentials
Get to Know Your Aloe Vera
Light is everything for this plant. Get the placement right and everything else falls into place.
Light
bright indirect
Wants bright, indirect light — sensitive to both extremes. Too much direct sun causes burns, too little causes stretching.
💡 Grow lights: Thrives under artificial grow lights (LED or fluorescent, 10-12 hours/day). A great option if your space lacks natural light.
Watering
every 7-10 days
Water when the top 1-2 inches of soil feel dry. Adjust with the seasons — less in winter, more in summer.
Humidity & Temperature
Loves higher humidity (60%+). If your air is dry, group it with other plants, use a pebble tray, or run a humidifier nearby.
Prefers moderate temperatures (60-80°F). Keep away from radiators and intense afternoon sun windows.
Soil
Needs well-draining soil — add perlite or orchid bark to a standard potting mix. Good drainage is critical to prevent root rot.
Care Requirements
At a Glance
Care Profile in Development
While our detailed care profile is being compiled, you can find specific care guidance in the 6 care-related diagnoses below — including watering schedules, light requirements, and propagation methods from real-world cases.
Start Here
Most Common Problems
Based on 31 analyzed cases — these are the issues you're most likely to encounter
Don't see your symptom? Search all 27 topics below, or run the Diagnostic.
How do I propagate my Aloe Vera?
Aloe vera produces offsets (pups) from the root crown as a natural reproductive...
Is my Aloe Vera overwatered?
Overwatering Aloe vera causes root rot through soil saturation that creates...
Why do my Aloe Vera leaves have brown tips?
Brown tips on Aloe vera result from multiple stress factors: (1) Water quality...
Aloe Vera: Medicinal
Aloe vera gel contains bioactive compounds with documented therapeutic...
General Care: Aloe Vera Guide
Aloe vera evolved in arid environments, developing over 75 biologically active...
Which of the 7 Killers
is threatening your plants?
We analyzed 1,616 documented plant deaths to identify the 7 causes behind 78% of all losses. Answer 5 questions — we'll tell you exactly which ones apply to your setup.
Skip the quiz — get The 7 Killers course ($19) →Question 1 of 5
How do you decide when to water your plants?
Question 2 of 5
Where do most of your plants live?
Question 3 of 5
What's your home environment like?
Question 4 of 5
Have you lost a plant in the last 6 months?
Question 5 of 5
How often do you check your plants for pests?
Your diagnosis is ready
We've identified your top 2 risk killers. Enter your email to see the full breakdown and your personalized rescue protocol.
Your plants are most at risk from:

The 7 Killers mini-course covers every one of these in depth — mechanism, rescue protocol, prevention. 1,616 cases. 7 lessons. $19.
Get The 7 Killers — $19 →Get the Plant Mortality Checklist
The 7 killers behind 78% of houseplant deaths — and the exact fix for each. Free PDF based on 1,616 documented cases.
Your checklist is ready!
We also sent it to your inbox. Check your email for the full download.
Open the ChecklistFree. No spam. Unsubscribe anytime.
Verified Data
All Diagnoses
27 topics consolidated from 31 documented cases. Expand any topic to see all protocols.
Symptoms (2 topics · 3 cases)
Why do my Aloe Vera leaves have brown tips?
Brown tips on Aloe vera result from multiple stress factors: (1) Water quality toxicity - fluoride and chlorine in tap water accumulate in leaf tips causing cellular necrosis; (2) Salt/mineral buildup from fertilizers creating osmotic barriers; (3) Low humidity (<30%) causing tip desiccation; (4) Improper pot sizing - oversized pots retain moisture leading to root stress, undersized pots cause root-binding impairing water uptake; (5) Natural senescence - oldest basal leaves brown as plant recycles nutrients
2 protocols
85–88%
Why do my Aloe Vera leaves have brown tips?
Brown tips on Aloe vera result from multiple stress factors: (1) Water quality toxicity - fluoride and chlorine in tap water accumulate in leaf tips causing cellular necrosis; (2) Salt/mineral buildup from fertilizers creating osmotic barriers; (3) Low humidity (<30%) causing tip desiccation; (4) Improper pot sizing - oversized pots retain moisture leading to root stress, undersized pots cause root-binding impairing water uptake; (5) Natural senescence - oldest basal leaves brown as plant recycles nutrients
Protocol 1: brown tips · 88% confidence
Cause
Brown tips on Aloe vera result from multiple stress factors: (1) Water quality toxicity - fluoride and chlorine in tap water accumulate in leaf tips causing cellular necrosis; (2) Salt/mineral buildup from fertilizers creating osmotic barriers; (3) Low humidity (<30%) causing tip desiccation; (4) Improper pot sizing - oversized pots retain moisture leading to root stress, undersized pots cause root-binding impairing water uptake; (5) Natural senescence - oldest basal leaves brown as plant recycles nutrients. Unlike root rot (mushy black tissue), brown tips from water quality are dry and crispy.
Solutions
- Identify cause: crispy dry tips = water quality/humidity; soft black tips = overwatering/rot
- For cosmetic brown tips: trim with sterile scissors at angle following natural leaf shape, cut only until green tissue or clear gel exposed
- Switch to filtered or distilled water; avoid softened water high in salts
- If pot-bound: repot into container 1-2 inches wider with drainage, use 50% perlite succulent mix
- If humidity low: add pebble tray with water (pot sits on pebbles, not in water) or use humidifier
- For salt buildup: flush soil thoroughly with filtered water 2-3 times, allow complete drainage
- Remove fully brown basal leaves at soil level - natural senescence requires no intervention
Prevention
Use filtered, distilled, or rainwater exclusively. If using tap water, let sit uncovered 24-48 hours to dissipate chlorine. Flush soil monthly with plain water to remove salt buildup. Maintain 40-60% humidity with pebble trays or humidifier. Use appropriately sized pots (roots should fill 70-80% of space) with drainage holes. Fertilize sparingly at 1/4 strength during growing season only. Repot every 2-3 years in fresh well-draining mix.
Protocol 2: brown tips · 85% confidence
Cause
Brown tips on Aloe vera primarily stem from pot size mismatch and moisture stress. Overly large pots retain moisture, causing root rot in Aloe's shallow, horizontal rhizomatous root system. Undersized pots cause root binding, impairing water and nutrient uptake. Secondary factors include low humidity from heating sources, underwatering (produces tip desiccation distinct from root rot), and natural protective scabbing from prior environmental stress.
Solutions
- Inspect roots: Remove plant to check for rot (mushy black roots) or binding
- Trim brown tips: Cut just below brown areas until green tissue or clear gel is exposed
- Repot appropriately: Choose container where roots fill 70-80% of space, wider than deep
- Adjust light: Provide bright indirect light with 2-4 hours direct sun via south-facing window
- Water correctly: Allow top 2-3 inches to dry fully between waterings; reduce frequency in winter
Prevention
Select pots wider than deep to match horizontal root growth; ensure roots fill 70-80% of container space; use well-draining succulent mix with 50% perlite; maintain 40-60% humidity away from heat vents; provide 2-4 hours direct sun daily; water only when top 2-3 inches of soil are bone-dry.
Aloe Vera: Leaf Browning
Aloe vera leaf browning occurs through three mechanisms
88%
Aloe Vera: Leaf Browning
Aloe vera leaf browning occurs through three mechanisms
Cause
Aloe vera leaf browning occurs through three mechanisms. NATURAL SENESCENCE: Oldest outer leaves turn brown and dry over 2-4 months as plant redirects nutrients to new growth—this is healthy and expected. OVERWATERING STRESS: Lower leaves turn brown and mushy at base within days due to root rot preventing water uptake. SUN/WATER STRESS: Leaf tips turn brown and crispy when underwatered in high light, as leaf tissue desiccates faster than roots can replenish. Key differentiator: senescence affects single oldest leaf; stress affects multiple leaves simultaneously.
Solutions
- Count affected leaves: single oldest leaf = natural senescence; multiple leaves = stress
- Check soil moisture: wet/mushy leaf bases = overwatering; dry/crispy tips = underwatering
- For natural senescence: Allow leaf to fully brown, then gently pull away at base or snip flush with stem
- For overwatering: Stop all watering; unpot to inspect roots; trim rotted roots; repot in dry well-draining mix
- For underwatering: Soak soil thoroughly until water exits drainage; resume watering when top 2-3 inches dry
- Monitor new growth: healthy emerging leaves confirm recovery; continued browning indicates unresolved issue
Prevention
Water using 'soak and dry' method: drench soil completely, then allow top 2-3 inches to dry fully before next watering (typically 2-3 weeks indoors). Maintain consistent bright indirect light. Use well-draining succulent mix (50%+ inorganic material). Avoid watering on fixed calendar schedule.
Pests (2 topics · 2 cases)
Why does my Aloe Vera have mealybugs?
Mealybugs (Pseudococcidae) infest Aloe vera by feeding on sap from leaf crevices and stem joints, leaving white cottony wax secretions
87%
Why does my Aloe Vera have mealybugs?
Mealybugs (Pseudococcidae) infest Aloe vera by feeding on sap from leaf crevices and stem joints, leaving white cottony wax secretions
Cause
Mealybugs (Pseudococcidae) infest Aloe vera by feeding on sap from leaf crevices and stem joints, leaving white cottony wax secretions. Infestations originate from contaminated nursery plants (especially big box stores) or spread via crawlers from nearby infected plants. Mealybugs weaken Aloe by depleting nutrients and introducing secondary bacterial/fungal infections through feeding wounds. Unlike root rot (mushy roots) or sunburn (brown spots), mealybugs are visible as mobile white clusters that dissolve when touched with alcohol.
Solutions
- Isolate infested plant immediately to prevent crawler spread
- Confirm diagnosis: Touch white spots with 70% isopropyl alcohol on cotton swab—mealybugs dissolve revealing brown corpses
- Manual removal: Wipe all visible pests with alcohol-soaked cloth or cotton swabs
- Apply emulsified neem oil spray thoroughly to all surfaces including leaf undersides and stem joints
- Repeat neem treatment every 7-10 days for 6 weeks to cover full lifecycle (eggs hatch days 7-10)
- Monitor weekly with magnification for crawler emergence; continue treatment until 2 consecutive weeks with zero pests
Prevention
Quarantine all new plants for 2-4 weeks with magnified inspection. Maintain 40-50% humidity and strong airflow. Apply preventive neem oil dip on arrival (1 tsp neem + 1/2 tsp dish soap per gallon water). Avoid overcrowding plants. Inspect leaf axils weekly with magnification.
What pests are on my Aloe Vera?
Aloe vera is susceptible to common houseplant pests including mealybugs, scale, and spider mites
87%
What pests are on my Aloe Vera?
Aloe vera is susceptible to common houseplant pests including mealybugs, scale, and spider mites
Cause
Aloe vera is susceptible to common houseplant pests including mealybugs, scale, and spider mites. These pests feed on leaf sap, causing stippling, yellowing, and weakening of the plant. Spider mites thrive in dry conditions; mealybugs favor warm, humid environments with poor air circulation.
Solutions
- Isolate infested plant immediately to prevent spread.
- For mealybugs: dab individuals with 70% rubbing alcohol on cotton swabs.
- For larger infestations: spray with insecticidal soap or neem oil every 5-7 days for 3-4 weeks.
- For spider mites: shower leaves thoroughly and increase humidity; treat with miticide if severe.
- Continue monitoring for 1-2 months as eggs hatch.
Prevention
Quarantine new plants for 2-4 weeks. Inspect regularly, especially leaf joints and undersides. Maintain 40-60% humidity with good air circulation. Wipe leaves monthly as preventive care.
Watering Issues (2 topics · 3 cases)
Is my Aloe Vera overwatered?
Overwatering Aloe vera causes root rot through soil saturation that creates anaerobic conditions, promoting fungal pathogens like Fusarium and Pythium
2 protocols
90–92%
Is my Aloe Vera overwatered?
Overwatering Aloe vera causes root rot through soil saturation that creates anaerobic conditions, promoting fungal pathogens like Fusarium and Pythium
Protocol 1: overwatering · 92% confidence
Cause
Overwatering Aloe vera causes root rot through soil saturation that creates anaerobic conditions, promoting fungal pathogens like Fusarium and Pythium. As a CAM succulent with water-storing leaves, Aloe vera is highly susceptible to tissue decay when roots remain wet. Excess moisture suffocates roots, leading to black mushy root tissue, basal leaf rot, and eventual plant collapse. Poor drainage and oversized pots exacerbate the problem by retaining water below the shallow root zone.
Solutions
- Remove plant from pot and rinse roots under lukewarm water to remove infected soil
- Trim all black, mushy, or foul-smelling roots with sterilized shears
- Soak healthy roots in 3% hydrogen peroxide solution (1:4 dilution) for 10-30 minutes to sterilize
- Air-dry roots completely (24-72 hours) in bright indirect light with good airflow
- Repot in fresh sterile cactus/succulent mix with 50%+ perlite or pumice in pot with drainage holes
- For advanced rot: behead plant above rotted section, allow cut end to callous 1-7 days, then plant in dry soil
- Wait 1-2 weeks after repotting before watering; treat as propagation until new growth appears
Prevention
Use well-draining succulent mix with 50%+ inorganic amendments (perlite, pumice, or grit). Water only when top 2-3 inches of soil are bone-dry (every 2-4 weeks indoors). Always use pots with drainage holes; terracotta preferred for moisture wicking. Provide bright indirect light (2000-5000 lux) and low humidity (40-50%). Reduce watering frequency in winter during dormancy. Use moisture meter for precision monitoring.
Protocol 2: overwatering · 90% confidence
Cause
Aloe vera is extremely susceptible to overwatering damage due to CAM photosynthesis and succulent water storage adaptations. Unlike tropical plants, Aloe's thick leaves store water for 4-6 weeks, making frequent watering unnecessary and harmful. Overwatering creates anaerobic soil conditions that enable Pythium fungal pathogens, causing roots to turn black/mushy within 7-10 days. Leaves become soft, translucent, and yellow at the base—distinct from underwatering which causes wrinkling.
Solutions
- Stop all watering immediately upon detecting soft/mushy leaves
- Unpot plant and inspect roots: healthy roots are firm white; rotted roots are black/mushy/foul-smelling
- Trim all rotted roots and leaf bases with sterilized scissors
- For advanced rot: Behead plant above rotted stem section; remove lower leaves to expose 1-2 inches of stem
- Allow cut surfaces to callous 24-72 hours in dry shaded area
- Repot in dry well-draining succulent mix; withhold water 7-14 days; then water lightly every 2-3 weeks
Prevention
Water only when top 2-3 inches of soil are bone-dry (typically every 2-3 weeks indoors, longer in winter). Use well-draining succulent mix with 50%+ perlite/pumice. Always use pots with drainage holes. Terracotta pots wick excess moisture naturally. Never water on fixed calendar schedule.
How often should I water my Aloe Vera?
Overwatering in Aloe vera is fundamentally about frequency, not volume
85%
How often should I water my Aloe Vera?
Overwatering in Aloe vera is fundamentally about frequency, not volume
Cause
Overwatering in Aloe vera is fundamentally about frequency, not volume. As a CAM photosynthesis succulent adapted to arid savanna conditions, Aloe stores water in thick rhizomatous roots and leaves for 4-6+ weeks. Watering every 7-10 days creates chronically moist soil that promotes anaerobic bacterial growth and root rot. 'False underwatering' symptoms (wrinkled leaves) often indicate root rot preventing water uptake, not actual drought.
Solutions
- Check soil: Insert finger 3 inches deep—moist soil with symptoms indicates overwatering
- Inspect roots: Unpot plant—healthy roots are white/firm; rotting roots are black/mushy
- Behead if necessary: Cut above rotted section, remove lower leaves, allow 1-7 days to callous
- Repot in dry mix: Use 50% perlite/pumice with cactus soil in pot with drainage holes
- Resume watering: Treat as propagation; water sparingly only after 1-2 weeks when soil fully dry
Prevention
Implement 'soak and dry' cycle: thorough saturation followed by complete soil dryness. Water only when top 2-3 inches are bone-dry using finger test or moisture meter. Wait 3-4 weeks minimum between waterings in summer, 6+ weeks in winter. Use terracotta pots to wick excess moisture.
Environment (1 topics · 1 cases)
Why does my Aloe Vera have sunburn?
Aloe vera sunburn occurs when plants accustomed to indoor low-light conditions (50-500 lux) are suddenly exposed to direct sunlight or high UV intensity without acclimation
90%
Why does my Aloe Vera have sunburn?
Aloe vera sunburn occurs when plants accustomed to indoor low-light conditions (50-500 lux) are suddenly exposed to direct sunlight or high UV intensity without acclimation
Cause
Aloe vera sunburn occurs when plants accustomed to indoor low-light conditions (50-500 lux) are suddenly exposed to direct sunlight or high UV intensity without acclimation. The thin cuticle and low-light adapted chlorophyll rapidly break down under intense PAR (photosynthetically active radiation), causing photobleaching, white or brown crispy patches, and necrotic tissue. New growth and variegated sections are most vulnerable due to reduced protective pigments. Unlike gradual protective tanning (reddish-brown anthocyanin response), sunburn causes permanent cellular damage and tissue death.
Solutions
- Move plant immediately to bright indirect light away from direct sun
- Trim severely damaged leaves at the base with sterile shears - they will not recover
- Leave mildly affected leaves (brown spots <30% of leaf) as they still photosynthesize
- If central growing point (apical meristem) is intact, new growth will emerge in 4-8 weeks
- For future outdoor placement: acclimate gradually over 14 days, starting with 1 hour morning sun
- Apply diluted seaweed fertilizer (1:1000) to support recovery stress
Prevention
Acclimate gradually over 2-4 weeks when moving from indoor to outdoor conditions: start with 1 hour of morning sun day 1, increase by 30-60 minutes daily. Use 50-70% shade cloth during heatwaves (>35°C/95°F). Maintain bright indirect light (2000-5000 lux) indoors near east or west-facing windows. Avoid sudden position changes. Monitor with light meter; Aloe vera tolerates up to 25,000 lux after full acclimation.
Growth & Structure (1 topics · 1 cases)
Why is my Aloe Vera becoming etiolated?
Insufficient light intensity causes phototropic etiolation where Aloe vera rapidly elongates stems seeking more sunlight
88%
Why is my Aloe Vera becoming etiolated?
Insufficient light intensity causes phototropic etiolation where Aloe vera rapidly elongates stems seeking more sunlight
Cause
Insufficient light intensity causes phototropic etiolation where Aloe vera rapidly elongates stems seeking more sunlight. This creates leggy, weakened growth with elongated internodes (>1cm) that cannot support the weight of the fleshy leaf rosette, causing the plant to flop or 'droop' despite firm leaf tissue.
Solutions
- Gradually acclimate to brighter light over 1-2 weeks to avoid sunburn
- Position in south- or west-facing window providing 6-8+ hours bright indirect light
- Supplement with full-spectrum LED grow lights (12-14 hours daily at 12-18 inches)
- For severely etiolated plants: propagate top rosette, remove lower leaves to expose 1 inch of stem, allow to callous 2-3 days, then root in well-draining mix
- Rotate plant weekly for even light exposure
Prevention
Maintain consistent bright indirect light (1000+ lux minimum); monitor for early etiolation via internode length measurement; use grow lights in low-light indoor environments year-round; avoid sudden light changes that cause sunburn or shock
Propagation (1 topics · 3 cases)
How do I propagate my Aloe Vera?
Aloe vera produces offsets (pups) from the root crown as a natural reproductive strategy
3 protocols
60–86%
How do I propagate my Aloe Vera?
Aloe vera produces offsets (pups) from the root crown as a natural reproductive strategy
Protocol 1: propagation from offsets · 86% confidence
Cause
Aloe vera produces offsets (pups) from the root crown as a natural reproductive strategy. These pups develop their own root systems while attached to the parent. Premature separation before pup roots form causes 40-60% failure rate.
Solutions
- Wait for pup maturity: 2-3 inches tall with own roots visible
- Unpot mother plant: Gently expose root system
- Separate cleanly: Cut connection with sharp sterilized knife
- Plant pup immediately: In same mix as parent, water after 3 days
- Parent recovery: Repot mother in fresh mix, reduce water for 2 weeks
Prevention
Allow pups to grow 4+ inches before separating. Maintain mother plant health during pup development. Use same soil composition for pups to reduce transition shock. Monitor pup root development through clear pots.
Protocol 2: propagation · 85% confidence
Cause
Aloe vera propagates vegetatively through pups (offsets) that emerge from the mother plant's rhizomes. Pups develop when the plant is mature (2-3 years old), healthy, and slightly root-bound. The shallow horizontal root system produces adventitious shoots that initially share the mother's root system before developing independent roots. Pups emerge naturally as part of the plant's clonal reproduction strategy, often triggered by mild stress or optimal growing conditions.
Solutions
- Wait until pups have 3-4 leaves and are 4-6 inches tall for best separation success
- Water mother plant 1-2 days before separation to soften soil and reduce root damage
- Gently remove entire plant from pot, shake off excess soil to expose rhizome connections
- Separate pup by hand or with clean knife - some root damage is acceptable and normal
- Allow cut surfaces to callous (dry) for 1-2 days in bright indirect light to prevent infection
- Plant pup in small pot (3-4 inches) with well-draining cactus/succulent mix, burying only base
- Water sparingly (1-2 tablespoons) after 3-5 days, then wait until soil completely dry before next watering
- Maintain bright indirect light and temperatures 65-80°F; new growth indicates rooting in 4-6 weeks
- For beheaded plants: allow cut end to callous 3-7 days, then plant in dry succulent mix
Prevention
Maintain bright indirect light (2000-5000 lux) to support pup development. Use well-draining succulent mix and water when top 2-3 inches dry. Aloe vera naturally produces pups when healthy - no special intervention needed. Repot mother plant every 2-3 years to maintain vigor. Keep temperatures 65-80°F (18-27°C) for optimal growth. Slight root-binding can actually encourage pup production.
Protocol 3: propagation · 60% confidence
Cause
Aloe vera propagation fails when attempting to root leaf cuttings in water. Unlike many succulents, Aloe's thick, fleshy leaves release sugars and nutrients into water, creating ideal conditions for anaerobic bacterial growth (Pythium, Erwinia) that causes soft rot. Additionally, large cuttings with uncalloused wounds are vulnerable to basal rot when planted immediately. Successful propagation requires proper technique: using offsets/pups rather than leaves, allowing complete callus formation, and employing soil-based rooting.
Solutions
- Select propagation material: Choose 2-3 inch pups/offsets from healthy mother plant base
- Prepare cuttings: Remove pups with clean razor, trim any damaged sections
- Callus formation: Lay cuttings on dry paper towel in shade for 48-72 hours until cut seals
- Plant in dry mix: Use fresh succulent soil with 50% perlite; bury only 1/3 of cutting
- Rooting care: Water sparingly after 1-2 weeks; roots emerge in 4-8 weeks; resist checking frequently
- Avoid water propagation: Soil or perlite rooting prevents bacterial rot in cut tissue
Prevention
Propagate using offsets/pups from healthy mother plants only. Select 2-3 inch pups with established root primordia. Allow all cut surfaces to callus 48-72 hours before planting. Use perlite or coarse sand rooting medium instead of water. Maintain 65-75°F with bright indirect light during rooting phase.
Care Methods (2 topics · 2 cases)
Care Requirements: Aloe Vera Guide
Aloe vera (Aloe barbadensis Miller) is a CAM photosynthesis succulent native to Arabian Peninsula arid regions
75%
Care Requirements: Aloe Vera Guide
Aloe vera (Aloe barbadensis Miller) is a CAM photosynthesis succulent native to Arabian Peninsula arid regions
Cause
Aloe vera (Aloe barbadensis Miller) is a CAM photosynthesis succulent native to Arabian Peninsula arid regions. Its survival depends on three critical factors: horizontal rhizomatous roots requiring wide, shallow pots; infrequent deep watering (3-6 week cycles) mimicking desert rainfall patterns; and high-intensity light (2000-5000 foot-candles) for compact growth. Common failures occur from treating Aloe like tropical foliage plants with regular watering and low light.
Solutions
- Select appropriate pot: Wide and shallow (wider than deep) to match horizontal root growth
- Mix soil: 50% perlite or pumice with 50% cactus/succulent soil for drainage
- Establish light: South-facing window with 4-6 hours bright indirect light minimum
- Set watering schedule: Finger test every 3 weeks; water only when top 2-3 inches bone-dry
- Monitor health: Compact growth and firm leaves indicate proper care balance
Prevention
Use wide, shallow terracotta pots with 50% perlite/cactus mix. Water only when top 2-3 inches bone-dry (3-4 weeks summer, 6+ weeks winter). Position in south-facing window with 4-6 hours bright light. Maintain 40-60% humidity, 65-80°F temperatures. Repot every 1-2 years when roots fill pot.
General Care: Aloe Vera Guide
Aloe vera evolved in arid environments, developing over 75 biologically active compounds in its gel for self-protection and wound healing
95%
General Care: Aloe Vera Guide
Aloe vera evolved in arid environments, developing over 75 biologically active compounds in its gel for self-protection and wound healing
Cause
Aloe vera evolved in arid environments, developing over 75 biologically active compounds in its gel for self-protection and wound healing
Solutions
- Aloe gel contains antioxidant compounds that protect against oxidative stress
- The plant possesses antibacterial properties effective against Gram-positive and Gram-negative bacteria
- Gel compounds enhance fibroblast migration and tissue repair
Prevention
Understanding Aloe's internal defense system helps explain why the plant tolerates neglect but struggles with overcare
Maintenance (3 topics · 3 cases)
How should I fertilize my Aloe Vera?
Aloe vera's Crassulacean Acid Metabolism (CAM) enables efficient nutrient storage in succulent leaves, making it tolerant of neglect but sensitive to soluble salt buildup
82%
How should I fertilize my Aloe Vera?
Aloe vera's Crassulacean Acid Metabolism (CAM) enables efficient nutrient storage in succulent leaves, making it tolerant of neglect but sensitive to soluble salt buildup
Cause
Aloe vera's Crassulacean Acid Metabolism (CAM) enables efficient nutrient storage in succulent leaves, making it tolerant of neglect but sensitive to soluble salt buildup. High-phosphorus fertilizers (10-40-10) designed for blooming plants cause root damage when applied at full strength, as aloes require minimal nutrients for vegetative growth.
Solutions
- Use diluted balanced fertilizer at 1/4 strength (10-10-10 or 8-7-6) monthly during spring-summer growing season only
- Avoid high-phosphorus formulations (10-40-10) unless intentionally inducing blooms
- Apply fish emulsion (5-1-1 NPK) as organic alternative at half recommended dosage
- Withhold all fertilization during winter dormancy period
- If burn occurs, flush soil with 2-3 volumes of water to leach excess salts
Prevention
Fertilize sparingly every 2-3 months maximum; use succulent-specific low-NPK formulations; dilute all fertilizers to 25-50% of label strength; maintain bright indirect light and low humidity to support efficient nutrient uptake without chemical stress
Does my Aloe Vera have a nutrient deficiency?
Succulents like Aloe have lower nutrient requirements than tropical plants due to slow growth rates and CAM metabolism efficiency
87%
Does my Aloe Vera have a nutrient deficiency?
Succulents like Aloe have lower nutrient requirements than tropical plants due to slow growth rates and CAM metabolism efficiency
Cause
Succulents like Aloe have lower nutrient requirements than tropical plants due to slow growth rates and CAM metabolism efficiency. However, soilless gritty mixes (100% inorganic) create deficiencies in nitrogen, phosphorus, and micronutrients after 6-12 months. Conversely, standard potting soils with pre-mixed slow-release fertilizer provide excess nutrients that cause leggy growth and reduced stress tolerance.
Solutions
- Dilute liquid succulent fertilizer to 25% of label recommendation; apply monthly March-September only
- For gritty mixes: Add 10% worm castings or compost to provide slow-release organic nutrients without water retention
- Flush salts: Every 6-8 weeks, water thoroughly until 20% drains from bottom to leach accumulated minerals
- Monitor for deficiency signs: pale/yellowing lower leaves indicate nitrogen shortage; add dilute fish emulsion
- Avoid fertilizing newly propagated or stressed plants until roots establish (4-6 weeks post-propagation)
Prevention
Use balanced succulent-specific fertilizer at 1/4 strength during active growth season only (spring-summer). Select potting soils without pre-added fertilizer to control nutrient delivery. Flush soil with plain water every 4-6 waterings to prevent salt buildup from tap water.
When should I repot my Aloe Vera?
Aloe vera pups and offsets exhibit 'root-first' priority after separation, prioritizing subterranean root development over visible top growth to stabilize in new environments
84%
When should I repot my Aloe Vera?
Aloe vera pups and offsets exhibit 'root-first' priority after separation, prioritizing subterranean root development over visible top growth to stabilize in new environments
Cause
Aloe vera pups and offsets exhibit 'root-first' priority after separation, prioritizing subterranean root development over visible top growth to stabilize in new environments. This is a normal botanical response to division and transplant shock rather than pathology. Aloe's CAM photosynthesis enables water storage in leaves, allowing survival during the 4-8 week rooting phase without visible growth.
Solutions
- Monitor for subtle health signs like firm leaves without wrinkling indicating root establishment
- Maintain bright indirect light (2000-5000 lux) and well-draining succulent soil
- Water only when soil is fully dry (every 2-3 weeks) during establishment phase
- Avoid fertilizers or additional repotting until new leaves emerge
- Gently remove pot after 4 weeks to inspect for white, healthy root growth as verification
- Expect visible growth only after 6-8 weeks once root system anchors plant
Prevention
Use root-pruning techniques during pup separation to minimize trauma; transition gradually to new pot with familiar soil; stabilize environment at 65-75°F with 40-60% humidity pre- and post-repot; maintain bright indirect light throughout establishment period
Other Topics (13 topics · 13 cases)
Aloe Vera: Gel Harvesting For Medicinal Use
Aloe vera gel contains over 75 biologically active compounds including polysaccharides, antioxidants, and antibacterial agents
93%
Aloe Vera: Gel Harvesting For Medicinal Use
Aloe vera gel contains over 75 biologically active compounds including polysaccharides, antioxidants, and antibacterial agents
Cause
Aloe vera gel contains over 75 biologically active compounds including polysaccharides, antioxidants, and antibacterial agents. Proper extraction preserves these compounds; improper cutting oxidizes the gel and reduces efficacy by 40-60%.
Solutions
- Harvest mature outer leaves: 3+ years old plants yield highest potency
- Cut cleanly: Slice near base with sharp knife, avoid squeezing
- Extract within 2 hours: Fresh gel degrades rapidly
- Store properly: Refrigerate in airtight container, use within 7 days
Prevention
Grow plants 3+ years before harvesting. Maintain bright indirect light to boost compound synthesis. Avoid fertilizing with high nitrogen (reduces medicinal potency). Use drought stress 2 weeks before harvest to concentrate compounds.
Aloe Vera: Harvesting Gel
Aloe vera gel harvesting requires selecting mature outer leaves that have reached full biochemical potency
70%
Aloe Vera: Harvesting Gel
Aloe vera gel harvesting requires selecting mature outer leaves that have reached full biochemical potency
Cause
Aloe vera gel harvesting requires selecting mature outer leaves that have reached full biochemical potency. Leaves at the base of the plant (oldest growth) contain the highest concentration of acemannan polysaccharides and bioactive compounds. Harvesting immature inner leaves depletes the plant's growth energy and yields lower-quality gel with reduced therapeutic compounds. Mature leaves also have thicker, more substantial gel fillets that are easier to extract cleanly.
Solutions
- Select outermost mature leaves at the base - these are 8-12 inches long with full thickness
- Avoid inner leaves near the central growing point (rosette center)
- Check leaf firmness - mature leaves feel plump and resist gentle squeezing
- Harvest from plants that are at least 12 months old with 8+ leaves
- Rotate harvest around the plant circumference to maintain balanced growth
Prevention
Allow outer leaves to reach 8+ inches in length and develop full thickness before harvesting. Harvest only 1-2 leaves per month from established plants (12+ months old) to maintain plant vigor.
Harvesting Gel Cutting Technique: Aloe Vera Guide
Improper cutting technique damages the leaf base and introduces pathogens
70%
Harvesting Gel Cutting Technique: Aloe Vera Guide
Improper cutting technique damages the leaf base and introduces pathogens
Cause
Improper cutting technique damages the leaf base and introduces pathogens. Aloe vera leaves must be cut at the precise junction where the leaf meets the stem without tearing the fibrous outer rind. Ragged cuts or partial severing leave wound tissue exposed to bacterial infection and reduce the plant's ability to seal the wound with callus tissue.
Solutions
- Sterilize scissors or knife with 70% isopropyl alcohol
- Cut at the leaf base where it meets the central stem - cut parallel to the stem surface
- Make a single clean cut - do not saw or tear the leaf
- Remove the entire leaf including the white basal portion
- Allow plant wound to dry and callus for 24-48 hours before next watering
Prevention
Always use sterilized cutting tools (wipe with 70% isopropyl alcohol before each cut). Cut cleanly at the leaf base without twisting or tearing. Allow wound to callus for 24-48 hours before watering the plant.
Aloe Vera: Harvesting Gel Filleting
Aloe vera leaves consist of three distinct layers: the outer green rind (epidermis), the middle yellow latex layer containing aloin (a bitter laxative compound), and the inner clear gel fillet containing the therapeutic acemannan and bioactive compounds
70%
Aloe Vera: Harvesting Gel Filleting
Aloe vera leaves consist of three distinct layers: the outer green rind (epidermis), the middle yellow latex layer containing aloin (a bitter laxative compound), and the inner clear gel fillet containing the therapeutic acemannan and bioactive compounds
Cause
Aloe vera leaves consist of three distinct layers: the outer green rind (epidermis), the middle yellow latex layer containing aloin (a bitter laxative compound), and the inner clear gel fillet containing the therapeutic acemannan and bioactive compounds. Improper filleting mixes the bitter latex with the gel, rendering it unpalatable and potentially causing digestive upset if consumed.
Solutions
- Stand cut leaf upright (cut end down) in a container for 10-15 minutes to drain yellow latex
- Lay leaf flat and slice lengthwise along one edge to open the leaf
- Use a spoon to scrape the clear gel away from the green rind and yellow latex layer
- Transfer clear gel to a clean container, leaving behind any yellow-tinged material
- Rinse extracted gel briefly in cool water to remove residual latex
Prevention
Drain the yellow latex by standing cut leaves upright in a container for 10-15 minutes before filleting. This allows gravity to remove the latex layer before gel extraction.
Aloe Vera: Harvesting Gel Leaf Selection
Aloe vera gel harvesting requires selecting mature outer leaves that have reached full biochemical potency
70%
Aloe Vera: Harvesting Gel Leaf Selection
Aloe vera gel harvesting requires selecting mature outer leaves that have reached full biochemical potency
Cause
Aloe vera gel harvesting requires selecting mature outer leaves that have reached full biochemical potency. Leaves at the base of the plant (oldest growth) contain the highest concentration of acemannan polysaccharides and bioactive compounds. Harvesting immature inner leaves depletes the plant's growth energy and yields lower-quality gel with reduced therapeutic compounds.
Solutions
- Select outermost mature leaves at the base - these are 8-12 inches long with full thickness
- Avoid inner leaves near the central growing point (rosette center)
- Check leaf firmness - mature leaves feel plump and resist gentle squeezing
- Harvest from plants that are at least 12 months old with 8+ leaves
- Rotate harvest around the plant circumference to maintain balanced growth
Prevention
Allow outer leaves to reach 8+ inches in length and develop full thickness before harvesting. Harvest only 1-2 leaves per month from established plants (12+ months old) to maintain plant vigor.
Aloe Vera: Harvesting Gel Storage
Fresh aloe vera gel is 99% water containing dissolved polysaccharides, enzymes, and bioactive compounds that degrade rapidly when exposed to air, light, and temperature fluctuations
70%
Aloe Vera: Harvesting Gel Storage
Fresh aloe vera gel is 99% water containing dissolved polysaccharides, enzymes, and bioactive compounds that degrade rapidly when exposed to air, light, and temperature fluctuations
Cause
Fresh aloe vera gel is 99% water containing dissolved polysaccharides, enzymes, and bioactive compounds that degrade rapidly when exposed to air, light, and temperature fluctuations. The acemannan polysaccharides break down within hours at room temperature, and enzymatic oxidation causes browning and loss of therapeutic potency.
Solutions
- Transfer fresh gel to an airtight glass or BPA-free container immediately
- Refrigerate at 2-4°C (35-39°F) for up to 7 days
- For longer storage: freeze gel in ice cube trays, then transfer cubes to freezer bags
- Store frozen gel for up to 6 months without significant potency loss
- Add 1-2 drops of vitamin E oil or citric acid (0.1%) as natural preservative for extended refrigeration
Prevention
Store gel in airtight containers in the refrigerator immediately after extraction. Use opaque or amber containers to block light exposure. Freeze excess gel in ice cube trays for long-term preservation.
How much light does my Aloe Vera need?
Insufficient light causes etiolation (leggy, stretched, pale growth) in Aloe vera, a full-sun succulent requiring 2000-5000 foot-candles
85%
How much light does my Aloe Vera need?
Insufficient light causes etiolation (leggy, stretched, pale growth) in Aloe vera, a full-sun succulent requiring 2000-5000 foot-candles
Cause
Insufficient light causes etiolation (leggy, stretched, pale growth) in Aloe vera, a full-sun succulent requiring 2000-5000 foot-candles. Low light (<500 PPFD) triggers phototropism and slows metabolism, mimicking dormancy. Sudden direct sun exposure on low-light-adapted plants causes photooxidative damage (sunburn) due to lack of photoprotective pigments—appearing as bleached or scorched patches.
Solutions
- Assess etiolation: Check for pale, stretched leaves and weak stems confirming low light
- Acclimate gradually: Start with 1-2 hours direct sun daily, increase by 30min weekly over 2-4 weeks
- Use grow lights: Position LED 6-12 inches above plant for 12-16 hours daily if window insufficient
- Behead if leggy: Cut top 4-6 inches, allow 1-2 days to callous, root in well-draining soil
- Monitor new growth: Compact, upright growth from center indicates successful recovery
Prevention
Position in south-facing window for 4-6 hours bright indirect light with 2-4 hours direct sun. Use full-spectrum LED grow lights (5000-6500K, 20-40W) 12-16 hours daily when natural light insufficient. Maintain 1000-2000 foot-candles for compact growth.
Aloe Vera: Medicinal
Aloe vera gel contains bioactive compounds with documented therapeutic properties
95%
Aloe Vera: Medicinal
Aloe vera gel contains bioactive compounds with documented therapeutic properties
Cause
Aloe vera gel contains bioactive compounds with documented therapeutic properties. The inner leaf parenchyma cells produce acemannan (polysaccharide) responsible for wound healing, while the latex (yellow sap beneath the skin) contains anthraquinones with laxative effects. Scientific studies confirm Aloe vera upregulates growth factors (KGF-1, TGF-β, VEGF, bFGF), collagen synthesis, and PI3K/Akt and MAPK signaling pathways during the proliferative phase of cutaneous wound healing. The gel exhibits antioxidant, anti-inflammatory, and antimicrobial activity against pathogens including E. coli, Pseudomonas aeruginosa, MRSA, and Staphylococcus aureus. Phenolic compounds distributed throughout leaf tissue provide additional antimicrobial and anti-inflammatory benefits.
Solutions
- For wound healing: extract fresh inner gel by filleting leaf (remove green skin completely), rinse to remove residual latex
- Apply thin layer of fresh gel directly to minor burns, cuts, or abrasions 2-3 times daily
- For skin conditions: blend gel until smooth, apply as mask for 15-20 minutes, rinse with cool water
- For sunburn relief: chill extracted gel in refrigerator, apply generously to affected areas every 2-3 hours
- For digestive support (consult physician first): mix 1-2 oz pure inner leaf juice with water, consume on empty stomach
- To harvest: cut mature outer leaf at base, stand upright 15 minutes to drain latex, fillet skin, scoop clear gel
- Store gel: refrigerate in glass container up to 1 week; freeze in ice cube trays for long-term storage (6 months)
- For antimicrobial application: apply fresh gel to minor skin infections, cover with sterile bandage, change daily
Prevention
For harvesting: use mature outer leaves (3+ years old) from healthy plants. Cut at 45° angle near base with sterile knife. Allow leaf to drain upright 10-15 minutes to remove aloin-containing latex (yellow sap that causes skin irritation). Store fresh gel in refrigerated airtight container up to 7 days; add vitamin E oil as natural preservative. For topical use: perform patch test on small skin area first. Never apply latex-containing preparations to open wounds. Consult healthcare provider before internal use, especially if pregnant, nursing, or on medications.
Aloe Vera: No New Growth
Oversized pots relative to root system create inefficient water distribution, causing prolonged soil moisture retention
85%
Aloe Vera: No New Growth
Oversized pots relative to root system create inefficient water distribution, causing prolonged soil moisture retention
Cause
Oversized pots relative to root system create inefficient water distribution, causing prolonged soil moisture retention. In humid conditions, this creates stagnant anaerobic zones inhibiting root exploration and photosynthesis. Aloe vera, a CAM succulent, requires compact pots for rapid soil drying and concentrated root-to-soil contact for nutrient uptake.
Solutions
- Repot into a smaller pot sized to the root ball, raising soil level to eliminate pot rim shading
- Use well-draining succulent soil mix with 50% perlite/pumice for aeration
- Water only when top 2-3 inches are bone-dry using finger test or moisture meter
- Position in bright indirect sunlight (2000-5000 lux) with 4-6+ hours exposure
- Monitor for 4-6 weeks post-repot for new growth indicators
Prevention
Select pots no more than 1-2 inches larger than root ball; acclimate gradually to light changes; use humidity-adjusted watering schedules (reduce frequency in tropical climates); conduct annual root inspections and downsize pots as needed
Why is my Aloe Vera growing so slowly?
Aloe vera enters growth stasis due to three primary factors: insufficient light intensity below 1000 lux triggering energy conservation mode, dormancy during winter months (October-March in northern hemisphere) when daylight hours decrease below 10 hours, or transplant shock from recent repotting that redirects energy to root establishment
78%
Why is my Aloe Vera growing so slowly?
Aloe vera enters growth stasis due to three primary factors: insufficient light intensity below 1000 lux triggering energy conservation mode, dormancy during winter months (October-March in northern hemisphere) when daylight hours decrease below 10 hours, or transplant shock from recent repotting that redirects energy to root establishment
Cause
Aloe vera enters growth stasis due to three primary factors: insufficient light intensity below 1000 lux triggering energy conservation mode, dormancy during winter months (October-March in northern hemisphere) when daylight hours decrease below 10 hours, or transplant shock from recent repotting that redirects energy to root establishment. Unlike deciduous plants, Aloe vera doesn't drop leaves but halts new growth emergence until conditions improve. The central meristem remains viable—tight clustered leaves at center indicate healthy dormancy, while loose spreading center suggests root issues. Temperatures below 55°F (13°C) also induce metabolic slowdown.
Solutions
- Light optimization: Move to brightest available indirect light (south/east window) or install full-spectrum grow light 12-18 inches above plant for 12-14 hours daily
- Seasonal adjustment recognition: Reduce watering frequency by 50% during winter dormancy; resume normal care in March when daylight increases
- Root zone assessment: Gently unpot to verify roots are firm and white; repot if rootbound (roots circling pot more than 80%)
- Patience protocol: Mark calendar and wait 4-8 weeks without additional changes; succulents prioritize root repair over leaf production
- Temperature management: Maintain ambient temperatures between 65-85°F (18-29°C); avoid cold drafts from windows or air conditioning
Prevention
Provide consistent bright indirect light (2000+ lux) year-round. Avoid repotting during winter dormancy period. Maintain stable temperatures above 60°F (15°C). Allow soil to dry completely between waterings regardless of season—overwatering during dormant periods is the leading cause of winter rot.
Aloe Vera: Thin Leaves
Thin, flat, or wrinkled Aloe vera leaves indicate cellular water depletion
79%
Aloe Vera: Thin Leaves
Thin, flat, or wrinkled Aloe vera leaves indicate cellular water depletion
Cause
Thin, flat, or wrinkled Aloe vera leaves indicate cellular water depletion. Two distinct mechanisms cause this: true underwatering where roots are healthy but haven't received water in 4-6+ weeks, or the 'overwatering paradox' where roots have rotted from chronic moisture and lost uptake capability entirely. Distinguishing between these is critical—underwatered plants need more water; overwatered plants need drying and root repair. True underwatering produces crispy, paper-thin leaves with dry soil; root rot produces rubbery, deflated leaves with moist soil. The leaf turgor test: gently squeeze—firm resistance indicates adequate hydration, easy compression indicates water deficit.
Solutions
- Diagnostic soil test: Insert finger 3 inches deep—bone-dry soil suggests underwatering; moist/wet soil with wrinkled leaves indicates root rot
- Leaf texture assessment: Crispy, paper-like texture = underwatering; rubbery, translucent texture = overwatering/root rot
- Underwatering protocol: Water thoroughly until water exits drainage holes; allow complete dry-out; expect leaf plumping within 24-48 hours
- Root rot protocol (if soil is moist): Unpot, trim rotted roots, sterilize with hydrogen peroxide, repot in dry soil; withhold water for 1-2 weeks
- Ongoing monitoring: Check soil moisture weekly; water only when completely dry; use pot weight method—heavy pot with wrinkled leaves always indicates root rot
Prevention
Establish consistent watering schedule based on soil dryness, not leaf appearance. Use well-draining soil (50% perlite) and terracotta pots to prevent moisture extremes. When uncertain, choose underwatering—Aloe vera tolerates drought far better than waterlogging and recovers faster from dehydration than from root rot.
Aloe Vera: Tissue Repair
Aloe vera's wound healing properties extend from human applications to the plant's own tissue repair capabilities
93%
Aloe Vera: Tissue Repair
Aloe vera's wound healing properties extend from human applications to the plant's own tissue repair capabilities
Cause
Aloe vera's wound healing properties extend from human applications to the plant's own tissue repair capabilities
Solutions
- Aloe-derived exosome-like nanovesicles exhibit antioxidant and anti-inflammatory activities
- Gel compounds enhance fibroblast migration in inflammatory microenvironments
- Skin repair requires coordinated inflammation control, redox homeostasis, angiogenesis, and tissue remodeling
Prevention
Understanding the plant's self-healing mechanisms explains its resilience to minor damage
Aloe Vera: Transplant Shock
Aloe vera experiences transplant shock when moved to larger pots or repotted with root disturbance
86%
Aloe Vera: Transplant Shock
Aloe vera experiences transplant shock when moved to larger pots or repotted with root disturbance
Cause
Aloe vera experiences transplant shock when moved to larger pots or repotted with root disturbance. The succulent's specialized root system requires 7-14 days to recover from mechanical damage and re-establish water uptake. Unlike tropicals that wilt immediately, Aloe shows delayed symptoms: temporary growth stall, slight leaf wrinkling, or reddish stress coloration for 2-4 weeks. Rootbound Aloe (roots emerging from drainage holes) actually benefits from repotting but still requires acclimation period.
Solutions
- Allow soil to dry completely 3-7 days before repotting to minimize root damage
- Gently remove from pot; shake off old soil; trim only dead/damaged roots
- Place in new pot with dry succulent mix; position so soil line matches original level
- Withhold water 7-14 days post-repot to allow root cuts to callous and prevent rot
- Place in bright indirect light (no direct sun) for 2-3 weeks during recovery
- Resume normal watering only when new growth appears or after 3-4 weeks; expect temporary growth stall
Prevention
Repot only during active growing season (spring/summer). Choose pot only 1-2 inches wider than root ball. Use well-draining succulent mix (50% perlite). Water 2-3 days before repotting to reduce root stress. Minimize root disturbance when possible.
Common Questions
Frequently Asked Questions
Why does my aloe vera have Propagation from offsets?
Cause: Aloe vera produces offsets (pups) from the root crown as a natural reproductive strategy. These pups develop their own root systems while attached to the parent. Premature separation before pup roots form causes 40-60% failure rate.
Solution: Wait for pup maturity: 2-3 inches tall with own roots visible
Prevention: Allow pups to grow 4+ inches before separating. Maintain mother plant health during pup development. Use same soil composition for pups to reduce transition shock. Monitor pup root development through clear pots.
86% confidence · View full protocol →
Why does my aloe vera have Overwatering?
Cause: Overwatering Aloe vera causes root rot through soil saturation that creates anaerobic conditions, promoting fungal pathogens like Fusarium and Pythium. As a CAM succulent with water-storing leaves, Aloe vera is highly susceptible to tissue decay when roots remain wet. Excess moisture suffocates roots, leading to black mushy root tissue, basal leaf rot, and eventual plant collapse. Poor drainage and oversized pots exacerbate the problem by retaining water below the shallow root zone.
Solution: Remove plant from pot and rinse roots under lukewarm water to remove infected soil
Prevention: Use well-draining succulent mix with 50%+ inorganic amendments (perlite, pumice, or grit). Water only when top 2-3 inches of soil are bone-dry (every 2-4 weeks indoors). Always use pots with drainage holes; terracotta preferred for moisture wicking. Provide bright indirect light (2000-5000 lux) and low humidity (40-50%). Reduce watering frequency in winter during dormancy. Use moisture meter for precision monitoring.
92% confidence · View full protocol →
Why does my aloe vera have Brown tips?
Cause: Brown tips on Aloe vera result from multiple stress factors: (1) Water quality toxicity - fluoride and chlorine in tap water accumulate in leaf tips causing cellular necrosis; (2) Salt/mineral buildup from fertilizers creating osmotic barriers; (3) Low humidity (<30%) causing tip desiccation; (4) Improper pot sizing - oversized pots retain moisture leading to root stress, undersized pots cause root-binding impairing water uptake; (5) Natural senescence - oldest basal leaves brown as plant recycles nutrients. Unlike root rot (mushy black tissue), brown tips from water quality are dry and crispy.
Solution: Identify cause: crispy dry tips = water quality/humidity; soft black tips = overwatering/rot
Prevention: Use filtered, distilled, or rainwater exclusively. If using tap water, let sit uncovered 24-48 hours to dissipate chlorine. Flush soil monthly with plain water to remove salt buildup. Maintain 40-60% humidity with pebble trays or humidifier. Use appropriately sized pots (roots should fill 70-80% of space) with drainage holes. Fertilize sparingly at 1/4 strength during growing season only. Repot every 2-3 years in fresh well-draining mix.
88% confidence · View full protocol →
Why does my aloe vera have Medicinal?
Cause: Aloe vera gel contains bioactive compounds with documented therapeutic properties. The inner leaf parenchyma cells produce acemannan (polysaccharide) responsible for wound healing, while the latex (yellow sap beneath the skin) contains anthraquinones with laxative effects. Scientific studies confirm Aloe vera upregulates growth factors (KGF-1, TGF-β, VEGF, bFGF), collagen synthesis, and PI3K/Akt and MAPK signaling pathways during the proliferative phase of cutaneous wound healing. The gel exhibits antioxidant, anti-inflammatory, and antimicrobial activity against pathogens including E. coli, Pseudomonas aeruginosa, MRSA, and Staphylococcus aureus. Phenolic compounds distributed throughout leaf tissue provide additional antimicrobial and anti-inflammatory benefits.
Solution: For wound healing: extract fresh inner gel by filleting leaf (remove green skin completely), rinse to remove residual latex
Prevention: For harvesting: use mature outer leaves (3+ years old) from healthy plants. Cut at 45° angle near base with sterile knife. Allow leaf to drain upright 10-15 minutes to remove aloin-containing latex (yellow sap that causes skin irritation). Store fresh gel in refrigerated airtight container up to 7 days; add vitamin E oil as natural preservative. For topical use: perform patch test on small skin area first. Never apply latex-containing preparations to open wounds. Consult healthcare provider before internal use, especially if pregnant, nursing, or on medications.
95% confidence · View full protocol →
Why does my aloe vera have General care?
Cause: Aloe vera evolved in arid environments, developing over 75 biologically active compounds in its gel for self-protection and wound healing
Solution: Aloe gel contains antioxidant compounds that protect against oxidative stress
Prevention: Understanding Aloe's internal defense system helps explain why the plant tolerates neglect but struggles with overcare
95% confidence · View full protocol →
Common Questions
Frequently Asked About Aloe Vera
What problems can Aloe Vera get?
Our database contains 31 documented Aloe Vera cases covering 27 distinct topics, including diseases, pest identification, environmental stress, propagation, and advanced care protocols — each with verified solutions.
Structured Learning
Ready to Go Deeper?
Explore our Mastery Packs for structured, video-based learning with step-by-step protocols from 20,000+ analyzed plant cases.
Browse All Courses →