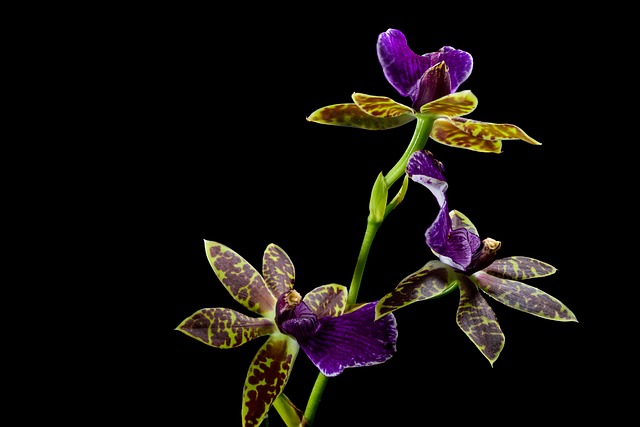
orchid
Phalaenopsis spp.
Evidence-based care guide for Orchid (Phalaenopsis spp.). Covers disease treatment, symptom diagnosis, pest control, propagation methods, care and watering. Our analysis draws from 48 verified community cases with an average confidence score of 84%. Each protocol is synthesized from real rescue outcomes, not generic advice.
Care Essentials
Get to Know Your Orchid
The #1 killer? Overwatering. Let the soil dry between waterings and your Orchid will thrive.
Light
bright indirect
Wants bright, indirect light — sensitive to both extremes. Too much direct sun causes burns, too little causes stretching.
💡 Grow lights: Thrives under artificial grow lights (LED or fluorescent, 10-12 hours/day). A great option if your space lacks natural light.
Watering
every 10-14 days
Let the soil dry out significantly between waterings — this plant is very sensitive to overwatering. When in doubt, wait another day.
Humidity & Temperature
Loves higher humidity (60%+). If your air is dry, group it with other plants, use a pebble tray, or run a humidifier nearby.
Sensitive to cold — keep above 55°F (13°C). Avoid placing near drafty windows or exterior doors in winter.
Soil
Needs well-draining soil — add perlite or orchid bark to a standard potting mix. Good drainage is critical to prevent root rot.
Care Requirements
At a Glance
Care Profile in Development
While our detailed care profile is being compiled, you can find specific care guidance in the 6 care-related diagnoses below — including watering schedules, light requirements, and propagation methods from real-world cases.
Start Here
Most Common Problems
Based on 48 analyzed cases — these are the issues you're most likely to encounter
Don't see your symptom? Search all 36 topics below, or run the Diagnostic.
Why does my Orchid have root rot?
Orchid velamen (outer root sheath) rot develops when roots remain saturated for...
Does my Orchid need more humidity?
Orchids as epiphytes require 50-70% relative humidity to support their...
Hydrogen Peroxide Drench: How to Use for Orchid
The primary issue stems from conflicting care advice: store maintenance cut the...
Orchid: Root Surgery
The primary issue stems from conflicting care advice: store maintenance cut the...
How should I fertilize my Orchid?
Orchids experience distinct growth phases requiring different nutrient ratios....
Which of the 7 Killers
is threatening your plants?
We analyzed 1,616 documented plant deaths to identify the 7 causes behind 78% of all losses. Answer 5 questions — we'll tell you exactly which ones apply to your setup.
Skip the quiz — get The 7 Killers course ($19) →Question 1 of 5
How do you decide when to water your plants?
Question 2 of 5
Where do most of your plants live?
Question 3 of 5
What's your home environment like?
Question 4 of 5
Have you lost a plant in the last 6 months?
Question 5 of 5
How often do you check your plants for pests?
Your diagnosis is ready
We've identified your top 2 risk killers. Enter your email to see the full breakdown and your personalized rescue protocol.
Your plants are most at risk from:

The 7 Killers mini-course covers every one of these in depth — mechanism, rescue protocol, prevention. 1,616 cases. 7 lessons. $19.
Get The 7 Killers — $19 →Get the Plant Mortality Checklist
The 7 killers behind 78% of houseplant deaths — and the exact fix for each. Free PDF based on 1,616 documented cases.
Your checklist is ready!
We also sent it to your inbox. Check your email for the full download.
Open the ChecklistFree. No spam. Unsubscribe anytime.
Verified Data
All Diagnoses
36 topics consolidated from 48 documented cases. Expand any topic to see all protocols.
Symptoms (2 topics · 4 cases)
What are these brown spots on my Orchid?
Brown spots on orchid leaves are frequently caused by bacterial infection, primarily Acidovorax (formerly Pseudomonas) species that thrive in warm, humid conditions with poor air circulation
2 protocols
86–88%
What are these brown spots on my Orchid?
Brown spots on orchid leaves are frequently caused by bacterial infection, primarily Acidovorax (formerly Pseudomonas) species that thrive in warm, humid conditions with poor air circulation
Protocol 1: brown spots · 88% confidence
Cause
Brown spots on orchid leaves are frequently caused by bacterial infection, primarily Acidovorax (formerly Pseudomonas) species that thrive in warm, humid conditions with poor air circulation. These bacteria enter through natural stomata, hydathodes (water pores at leaf margins), or mechanical wounds. High humidity (above 80%) combined with stagnant air creates a microclimate where bacterial colonies multiply exponentially, producing characteristic water-soaked lesions that expand rapidly into necrotic brown spots with yellow halos. Unlike fungal infections, bacterial spots are angular and bounded by leaf veins. The pathogen spreads through splashing water, contaminated tools, and physical contact between plants.
Solutions
- Immediate isolation: Move affected plant away from other orchids to prevent bacterial spread
- Sanitize all tools with 70% isopropyl alcohol or 10% bleach solution before and after contact
- Wipe affected leaves with bactericide: Use Physan 20 (1 tsp per gallon), copper-based fungicide/bactericide, or 3% hydrogen peroxide applied with soft cloth or cotton pad
- For advanced infection: Remove severely affected leaves entirely with sterile scissors, cutting 1/2 inch into healthy tissue; dust cut with cinnamon to seal wound
- Improve air circulation immediately: Add oscillating fan to increase airflow; target gentle breeze that rustles leaves without desiccating
- Reduce leaf wetness: Switch from overhead watering/misting to bottom-watering or soak methods; ensure leaves dry within 2 hours of any water contact
- Repeat treatment every 5-7 days for 3-4 weeks until no new spots appear; continue monitoring for 30 days post-recovery
Prevention
Maintain 50-70% humidity with constant air movement (small fan on low); water in morning so leaves dry by evening; space plants 12+ inches apart for airflow; quarantine new plants for 14 days; sterilize tools between plants; avoid working with wet plants; use copper preventative sprays monthly during humid seasons.
Protocol 2: brown spots · 86% confidence
Cause
Brown spots on orchid leaves typically indicate bacterial brown spot (Acidovorax or Xanthomonas) thriving in high humidity without adequate air circulation, or sunburn from direct light exposure causing cellular damage. The thin, photosynthetic leaves of epiphytic orchids are vulnerable to both pathogen entry through wounds and thermal damage from intensified sunlight, especially when water droplets magnify light.
Solutions
- Isolate affected plant immediately to prevent spread to collection
- For bacterial spots: wipe leaves with 1:20 Physan 20 solution or 3% hydrogen peroxide; trim severely affected leaves with sterile shears
- For sunburn: relocate plant to bright indirect light only; remove leaves with crispy edges if severe
- Increase air circulation with oscillating fan to prevent stagnant humid conditions
- Seal cut surfaces with ground cinnamon to prevent secondary infection
Prevention
Maintain 50-70% humidity with constant gentle airflow from fans. Provide bright indirect light only (1000-2000 foot-candles), never direct sun. Water at soil level avoiding leaf wetness, or ensure leaves dry quickly. Inspect leaves weekly for early spot detection.
Why are my Orchid leaves turning yellow?
Yellowing leaves in orchids indicate the plant is catabolizing nutrients from older foliage due to root system failure in water or nutrient uptake
2 protocols
87–87%
Why are my Orchid leaves turning yellow?
Yellowing leaves in orchids indicate the plant is catabolizing nutrients from older foliage due to root system failure in water or nutrient uptake
Protocol 1: yellow leaves · 87% confidence
Cause
Yellowing leaves in orchids indicate the plant is catabolizing nutrients from older foliage due to root system failure in water or nutrient uptake. Without pseudobulbs for storage (in Phalaenopsis), the plant mobilizes reserves from basal leaves when roots cannot support current biomass. Natural senescence of oldest leaves occurs post-bloom, but premature yellowing signals compromised roots from overwatering, anaerobic media, or dehydration.
Solutions
- Remove plant from pot to inspect root health: healthy roots are firm and white/green; black/mushy roots indicate rot
- Trim all dead roots with sterilized scissors, treat cuts with hydrogen peroxide or cinnamon powder
- Repot in fresh orchid bark mix with excellent drainage; avoid compacted nursery moss
- Water based on root appearance: silvery-white roots need water; green/plump roots are hydrated
- Provide bright indirect light (1500-2500 foot-candles) to support photosynthesis and new growth
Prevention
Establish root-centric monitoring: use transparent pots to observe root color changes. Water only when roots are silvery-white dry, not on a calendar schedule. Maintain 50-70% humidity with good airflow. Repot annually or when media breaks down to prevent anaerobic conditions.
Protocol 2: yellow leaves · 87% confidence
Cause
Yellowing orchid leaves indicate either natural aging or underlying physiological stress. Natural senescence affects only the oldest, lowest leaf, progressing over 4-8 weeks as the plant reabsorbs nutrients before shedding. Pathological yellowing from root rot, nutrient deficiency, or overwatering affects multiple leaves simultaneously, with rapid progression (days to 2 weeks). Root dysfunction prevents nutrient uptake, causing generalized chlorosis beginning at leaf tips and margins. Crown rot produces yellowing at the leaf base where it meets the stem. Accurate diagnosis prevents inappropriate treatment—natural senescence requires no intervention while root issues demand immediate action.
Solutions
- Identify pattern: single oldest leaf yellowing from tip downward over weeks = natural senescence
- Multiple leaves yellowing rapidly, especially with dark green leaves = root rot or nutrient deficiency
- Yellowing starting at leaf base spreading upward = crown rot from water pooling in growth center
- For natural senescence: allow leaf to fully yellow, then remove with sterile scissors at base
- For root issues: unpot, trim rotted roots, repot in fresh bark, adjust watering schedule to allow drying
Prevention
Inspect orchid monthly for leaf color changes. Natural aging is normal and healthy. Prevent root rot by using coarse bark and watering only when roots are silvery. Maintain proper fertilization to prevent nutrient deficiency chlorosis. Avoid water entering leaf crown during watering.
Diseases (3 topics · 7 cases)
What disease does my Orchid have?
Fungal infections in orchids typically develop when prolonged leaf wetness combines with poor air circulation and warm temperatures
88%
What disease does my Orchid have?
Fungal infections in orchids typically develop when prolonged leaf wetness combines with poor air circulation and warm temperatures
Cause
Fungal infections in orchids typically develop when prolonged leaf wetness combines with poor air circulation and warm temperatures. Common pathogens include Botrytis (gray mold), Colletotrichum (anthracnose), and various leaf spot fungi. The epiphytic nature of orchids makes them particularly susceptible as their thin leaves lack the thick cuticle of terrestrial plants. Infections often start at wounds or stressed tissue, spreading rapidly in crowded, humid growing conditions.
Solutions
- Remove severely infected leaves with sterile scissors, cutting well below visible symptoms
- Apply fungicide containing chlorothalonil or copper-based compounds to remaining foliage
- Improve air circulation immediately with fans to reduce humidity around plants
- Water early morning only, ensuring leaves dry completely before evening
- Reduce humidity temporarily to 40-50% during treatment to slow fungal spread
- Disinfect all tools between plants with 70% alcohol or bleach solution
Prevention
Maintain 50-70% humidity with constant gentle airflow; water at soil level avoiding leaf wetness; space orchids adequately to ensure air movement; quarantine new plants for 2-4 weeks; remove spent flowers and damaged tissue promptly; sterilize cutting tools between plants
What is the best soil mix for Orchid?
Mold develops in orchid potting media when organic components like sphagnum moss or bark remain consistently moist without adequate airflow
2 protocols
85–88%
What is the best soil mix for Orchid?
Mold develops in orchid potting media when organic components like sphagnum moss or bark remain consistently moist without adequate airflow
Protocol 1: moldy soil · 88% confidence
Cause
Mold develops in orchid potting media when organic components like sphagnum moss or bark remain consistently moist without adequate airflow. The combination of high humidity, poor ventilation, and decomposing organic matter creates ideal conditions for fungal spores to germinate and colonize the media surface. This often indicates overwatering or breakdown of potting materials that have exceeded their useful lifespan (typically 12-18 months for bark, 6-12 months for sphagnum).
Solutions
- Remove orchid from pot and discard all contaminated potting media immediately
- Inspect roots thoroughly: trim any rotted roots with sterile scissors and treat with hydrogen peroxide
- Repot in completely fresh, dry orchid bark mix - never reuse moldy media
- Ensure pot has adequate drainage holes and air slats for ventilation
- Reduce watering frequency: allow bark to dry completely between waterings
- Improve air circulation with small fan to prevent recurrence
Prevention
Use well-draining orchid-specific bark mixes; repot annually or when media begins to decompose; water only when potting material is dry; maintain good air circulation around plants; use transparent pots to visually monitor root and media health before surface mold becomes visible.
Protocol 2: moldy soil · 85% confidence
Cause
White fuzzy mold on orchid potting medium surface typically indicates saprophytic fungi decomposing organic matter in the bark mix, often triggered by overwatering, poor air circulation, or decaying organic material. While generally harmless to healthy orchids, surface fungus indicates conditions conducive to more serious root rot pathogens and can indicate media breakdown requiring attention.
Solutions
- Scrape off surface mold with sterile spoon and dispose of affected top layer
- Allow potting medium to dry completely before next watering to reduce fungal food source
- Improve air circulation around plant with small fan to prevent stagnant humid conditions
- Top-dress with coarse orchid bark, perlite, or gravel to suppress fungal regrowth on surface
- If mold recurs: unpot, inspect roots for rot, replace all media with fresh bark mix
- Apply diluted hydrogen peroxide (3%) to surface as antifungal treatment
Prevention
Use well-draining orchid bark mix rather than moisture-retentive media. Water only when medium is dry to prevent sustained dampness. Maintain good air circulation with fans. Top-dress with inorganic material (perlite/gravel) to discourage surface fungal growth.
Why does my Orchid have root rot?
Orchid velamen (outer root sheath) rot develops when roots remain saturated for extended periods in moisture-retentive sphagnum moss or compacted media, creating anaerobic conditions that suffocate the epiphytic root system
4 protocols
83–92%
Why does my Orchid have root rot?
Orchid velamen (outer root sheath) rot develops when roots remain saturated for extended periods in moisture-retentive sphagnum moss or compacted media, creating anaerobic conditions that suffocate the epiphytic root system
Protocol 1: root rot · 92% confidence
Cause
Orchid velamen (outer root sheath) rot develops when roots remain saturated for extended periods in moisture-retentive sphagnum moss or compacted media, creating anaerobic conditions that suffocate the epiphytic root system. The velamen layer, designed for rapid water absorption and gas exchange in airy environments, breaks down when deprived of oxygen, leading to brown/black mushy roots and compromised nutrient uptake.
Solutions
- Unpot orchid and gently remove all potting medium from root ball, including debris trapped in root crevices
- Inspect roots: retain firm, white/yellow/green roots; trim all squishy, brown, or black roots at the base with sterile shears
- Sterilize remaining roots and cuts with 3% hydrogen peroxide to eliminate fungal pathogens
- Repot in transparent plastic pot using coarse orchid bark mix (Orchiata, fir bark, or Better-Gro) for maximum aeration and visibility
- Water only when roots appear silvery-white dry; maintain 50-70% humidity with fans for air circulation
Prevention
Water only when velamen turns silvery-white indicating dryness. Use orchid-specific bark mixes that mimic epiphytic conditions rather than moisture-retentive moss. Maintain high air circulation with fans to prevent stagnant humidity around roots. Monitor root color through clear pots to catch early stress signals.
Protocol 2: root rot in moss · 91% confidence
Cause
Phalaenopsis orchids are epiphytes requiring constant airflow around their specialized aerial roots. Sphagnum moss, while excellent at moisture retention, becomes compacted over 8-12 weeks, eliminating air pockets essential for root respiration. When moss remains constantly damp—common in plastic pots without drainage or with automated watering—the oxygen levels around roots drop below 2mg/L, creating anaerobic conditions that promote bacterial and fungal pathogens. Roots suffocate, turn black, and become mushy, losing their ability to absorb water and nutrients. The plant enters survival mode, halting new growth while relying on stored energy in pseudobulbs.
Solutions
- Immediately unpot orchid and inspect all roots—healthy roots are firm, silvery-green or white
- Trim all black, mushy, or hollow roots with sterile scissors—cut until only firm white tissue remains
- Repot in coarse orchid bark mix (not moss) with 50% bark, 30% perlite, 20% charcoal for maximum aeration
- Switch to soak-dry watering method: submerge pot 15 minutes when roots appear silvery, then drain completely
- Provide bright indirect light and increase airflow with fan to accelerate drying between waterings
Prevention
Never use compacted sphagnum moss in enclosed containers for long-term orchid culture. If using moss, repot every 6 months. Choose coarse bark in pots with ample drainage holes. Water only when roots are silvery-dry. Maintain 50-70% humidity with fans for airflow.
Protocol 3: root rot · 91% confidence
Cause
Orchid roots are specialized epiphytic organs covered in velamen—a porous, sponge-like tissue that absorbs atmospheric moisture and nutrients. When potted in moisture-retentive media (compacted sphagnum moss, fine bark, or dense soil), the velamen remains constantly saturated, creating anaerobic conditions that suffocate the underlying root tissue. Unlike terrestrial plants, orchids evolved for rapid wet-dry cycles in tree canopy environments; 7+ days of saturation triggers anaerobic bacterial proliferation (Pythium, Phytophthora) and root tissue necrosis. The velamen turns from silvery-white (dry) or green (photosynthetically active) to brown/black and mushy when compromised.
Solutions
- Unpot immediately and gently remove all old potting medium from the root ball—do not rush this step as damaged velamen tears easily
- Inspect each root: Firm, plump roots with intact velamen (any color) are healthy; trim ALL squishy, papery, or hollow roots with sterilized scissors
- Sterilize remaining roots with 3% hydrogen peroxide spray or soak for 20 minutes to eliminate surface pathogens
- Allow cut roots to callus in open air for 2-4 hours before repotting
- Repot in fresh, coarse orchid bark mix (pine or fir bark chunks 1/2-1 inch) or sphagnum moss ONLY if you can monitor moisture closely; ensure pot has generous drainage holes
- Position plant to maximize airflow around roots; avoid decorative cache pots that trap humidity
- Resume watering only when velamen turns silvery (indicating dry state)—typically 5-7 days in bark, 10-14 days in moss
Prevention
Water only when aerial roots display silvery-white velamen coloration; maintain 50-70% ambient humidity to reduce root water demand; use transparent pots for visual root monitoring; repot every 12-18 months before medium breaks down; ensure strong air circulation with fans to accelerate velamen drying between waterings.
Protocol 4: root rot media prevention · 83% confidence
Cause
Root rot in Phalaenopsis develops when roots remain in anaerobic (oxygen-depleted) conditions for 72+ hours. Moss causes rot through structural breakdown and compaction over time, not inherent properties—fresh moss provides excellent aeration. Bark causes rot through inappropriate grade selection (too fine) or pot size mismatch. The critical error is choosing media based on convenience rather than root health requirements—both media work when matched to care patterns.
Solutions
- Test media aeration: Pack dry media into clear cup, add water—water should flow through within 10 seconds; if it pools, media is too fine or compacted
- Match media to pot type: Moss works best in open baskets or net pots; bark works in any container with drainage holes
- Seasonal adjustment: Many orchid parents switch to bark in summer (faster drying) and moss in winter (slower drying) to match environmental conditions
- Repotting trigger: When moss turns dark brown/black or bark shows green algae/fungal growth on surface, anaerobic conditions exist—repot immediately
Prevention
Clear orchid pots (slotted sides) eliminate media-choice guesswork by allowing visual root monitoring—roots should appear silvery-green when dry, bright green when hydrated, never brown or mushy regardless of media choice.
Pests (2 topics · 2 cases)
Why does my Orchid have mealybugs?
Mealybugs (Pseudococcidae family) colonize orchid leaf axils, crowns, and root systems where they extract sap and excrete honeydew
90%
Why does my Orchid have mealybugs?
Mealybugs (Pseudococcidae family) colonize orchid leaf axils, crowns, and root systems where they extract sap and excrete honeydew
Cause
Mealybugs (Pseudococcidae family) colonize orchid leaf axils, crowns, and root systems where they extract sap and excrete honeydew. The waxy protective coating prevents standard sprays from penetrating. Infestations begin with crawlers from contaminated nursery stock or adjacent plants, establishing in the humid microclimates orchids prefer. Without intervention, populations explode within 4-6 weeks, causing leaf yellowing, stunted growth, and secondary fungal infections from honeydew residue.
Solutions
- Isolate infested plant immediately to prevent crawler spread to collection
- Mix 70% isopropyl alcohol 1:1 with water in spray bottle
- Apply directly to visible mealybugs using cotton swab—target leaf axils, crown crevices, and root bases
- Repeat treatment every 5-7 days for 4-6 weeks to break lifecycle
- Increase airflow with oscillating fan to reduce humidity that favors reinfestation
Prevention
Quarantine all new orchids 2-4 weeks before introducing to collection. Inspect weekly with 3x magnification, focusing on leaf joints and crown. Maintain 40-60% humidity with strong airflow—mealybugs thrive in stagnant, humid conditions. Avoid over-fertilization which produces soft growth attractive to pests.
Why does my Orchid have scale insects?
Armored scale insects (Diaspididae family) attach permanently to orchid leaves, stems, and pseudobulbs, feeding through piercing-sucking mouthparts while protected by a hard waxy cover
88%
Why does my Orchid have scale insects?
Armored scale insects (Diaspididae family) attach permanently to orchid leaves, stems, and pseudobulbs, feeding through piercing-sucking mouthparts while protected by a hard waxy cover
Cause
Armored scale insects (Diaspididae family) attach permanently to orchid leaves, stems, and pseudobulbs, feeding through piercing-sucking mouthparts while protected by a hard waxy cover. Unlike mealybugs, scales do not move once settled and reproduce under their protective shell. The covering makes topical treatments ineffective—alcohol and soaps cannot penetrate. Heavy infestations cause chlorotic spotting, leaf drop, and plant decline as the insect drains photosynthates.
Solutions
- Identify scale type: brown soft scale is removable with fingernail; armored scale requires systemic treatment
- For light infestations: dab individual scales with 70% isopropyl alcohol using cotton swab
- For heavy infestations: apply systemic insecticide containing imidacloprid via soil drench per label instructions
- Repeat systemic application every 4-6 weeks during growing season
- Remove heavily infested leaves if treatment fails after two cycles—scales cannot reattach once removed
Prevention
Inspect all new orchids thoroughly before purchase—check undersides of leaves and pseudobulb bases. Quarantine 3-4 weeks minimum. Maintain plant vigor with proper light and nutrition—stressed plants are more susceptible. Apply preventive neem oil monthly during high-risk seasons.
Watering Issues (4 topics · 4 cases)
How often should I water my Orchid?
Phalaenopsis orchids are epiphytes adapted to pure rainwater with near-zero dissolved solids
58%
How often should I water my Orchid?
Phalaenopsis orchids are epiphytes adapted to pure rainwater with near-zero dissolved solids
Cause
Phalaenopsis orchids are epiphytes adapted to pure rainwater with near-zero dissolved solids. Municipal tap water contains fluoride, chlorine, and mineral salts (calcium, magnesium) that accumulate in the sensitive root hairs and vascular tissue. When these compounds reach developing flower buds, they disrupt cellular osmotic balance, causing the buds to abort as the plant diverts energy to filtering and expelling toxins.
Solutions
- Switch immediately to distilled or RO water for all irrigation
- Flush growing medium thoroughly: pour 3-4 cups pure water through pot to leach accumulated salts
- Remove any buds showing yellowing or translucency
- Do not fertilize for 4-6 weeks while roots detoxify existing mineral buildup
- Consider repotting in fresh bark mix if water quality issues have persisted long-term
Prevention
Use only distilled water, reverse osmosis (RO) water, or collected rainwater for orchid irrigation. If tap water is necessary, let it sit uncovered for 24 hours to allow chlorine evaporation. Flush pots monthly with 3x volume of pure water to leach accumulated salts.
Is my Orchid overwatered?
When orchids lose 70%+ of their root system to rot, the remaining roots cannot support transpiration demand
86%
Is my Orchid overwatered?
When orchids lose 70%+ of their root system to rot, the remaining roots cannot support transpiration demand
Cause
When orchids lose 70%+ of their root system to rot, the remaining roots cannot support transpiration demand. The plant enters survival mode, prioritizing crown and leaf preservation over growth. Without intervention, leaf desiccation cascades as remaining roots become overworked.
Solutions
- Trim all rotted roots leaving only firm, healthy tissue
- Apply Rick L's tea bag method: soak roots in cooled weak black tea (tannins aid rehydration and provide mild antifungal action)
- Use wicking system: suspend orchid in glass jar with water wick for passive humidity and consistent moisture
- Maintain 60-80% humidity with good airflow to encourage aerial root growth
- Withhold fertilizer until 3+ new roots reach 2 inches length
- Recovery timeline: expect 4-8 weeks for new root nubs, 3-6 months for functional root mass
Prevention
Implement passive watering systems (wicking, semi-hydro) for plants prone to overwatering. These maintain optimal moisture without manual intervention risk.
Is my Orchid underwatered?
Orchid underwatering occurs when the potting medium dries completely for extended periods, causing the velamen (spongy outer root covering) to desiccate and shrink
88%
Is my Orchid underwatered?
Orchid underwatering occurs when the potting medium dries completely for extended periods, causing the velamen (spongy outer root covering) to desiccate and shrink
Cause
Orchid underwatering occurs when the potting medium dries completely for extended periods, causing the velamen (spongy outer root covering) to desiccate and shrink. Unlike typical houseplants, orchid roots are designed to dry between waterings, but prolonged drought damages the velamen's ability to absorb water when it becomes available again. Dehydrated roots appear silvery-white and shriveled, while healthy hydrated roots are green or white and plump. The plant responds by using stored water from leaves and pseudobulbs, causing wrinkling and loss of turgor.
Solutions
- Inspect root color: silvery-white roots indicate dehydration while green/white plump roots indicate adequate hydration
- Water thoroughly by soaking the pot in room-temperature water for 10-15 minutes until the potting medium is fully saturated
- Allow complete drainage before returning to decorative outer pot - never let orchid sit in standing water
- Increase humidity temporarily to 60-70% during recovery to reduce additional water stress
- Resume normal watering schedule: soak when velamen appears silvery-dry, typically every 7-14 days
- Monitor recovery: leaves should plump within 24-48 hours of proper watering; persistent wrinkling indicates root system damage requiring repotting
Prevention
Check root color weekly through transparent pot - water when roots turn silvery-white; maintain consistent watering schedule rather than calendar-based timing; use clear pots to visually monitor root hydration status; adjust watering frequency seasonally - more frequent in warm/active growth, less in cool/dormant periods
How often should I water my Orchid?
Phalaenopsis watering needs cannot be set by one calendar
94%
How often should I water my Orchid?
Phalaenopsis watering needs cannot be set by one calendar
Cause
Phalaenopsis watering needs cannot be set by one calendar. Root condition, potting-medium dryness, drainage, and medium breakdown determine whether the plant needs water or a corrected root environment.
Solutions
- When roots are healthy and the medium is dry, water thoroughly and allow excess water to drain.
- When roots are poor or the medium has broken down, correct the root environment and repot in fresh, airy orchid medium when needed.
- Avoid keeping roots continuously wet and do not use wrinkled leaves alone to diagnose underwatering.
- Humidity can reduce stress during root-loss recovery when paired with airflow and a medium that is not kept soggy.
Prevention
Use a porous orchid medium and a free-draining container. Check roots and medium together, water as the medium approaches dryness, and replace medium that has broken down and begun holding too much water.
Environment (4 topics · 6 cases)
Orchid: Bud Blast Draft Damage
Drafts from windows, doors, or HVAC systems create localized microclimate fluctuations that orchid flower buds cannot tolerate
52%
Orchid: Bud Blast Draft Damage
Drafts from windows, doors, or HVAC systems create localized microclimate fluctuations that orchid flower buds cannot tolerate
Cause
Drafts from windows, doors, or HVAC systems create localized microclimate fluctuations that orchid flower buds cannot tolerate. While the ambient room temperature may read 72°F, drafts can drop bud-level temperatures to 55-60°F intermittently. These rapid micro-fluctuations desiccate the delicate column tissue connecting bud to stem, triggering abscission as a defense mechanism.
Solutions
- Relocate plant immediately to draft-free zone—test by holding a lit candle near the location; flickering indicates problematic air movement
- If buds are still firm and green, stabilize environment immediately to prevent further loss
- Remove dropped buds to prevent fungal growth on the spike
- Apply cinnamon powder to cut spike tips to prevent infection entry
- Do not move plant again for 4+ weeks
Prevention
Position orchids 3-5 feet from windows and exterior doors. Use draft stoppers on door bottoms. Redirect HVAC vents away from plant locations with deflectors. Monitor with thermometer at plant level.
Is my Orchid suffering from cold damage?
Orchids are tropical plants adapted to temperatures between 65-85°F (18-29°C)
87%
Is my Orchid suffering from cold damage?
Orchids are tropical plants adapted to temperatures between 65-85°F (18-29°C)
Cause
Orchids are tropical plants adapted to temperatures between 65-85°F (18-29°C). Exposure to temperatures below 55°F (13°C) causes cellular damage as water within plant cells freezes and expands, rupturing cell walls. Cold drafts from windows, doors, or air conditioning vents can cause localized damage even when ambient temperatures appear safe. Phalaenopsis orchids are particularly susceptible, showing damage at temperatures as mild as 60°F (15°C) when exposed to cold drafts.
Solutions
- Move orchid immediately to stable temperature location away from cold drafts
- Remove damaged tissue: trim black, mushy, or translucent leaves with sterile scissors
- Increase humidity to 60-70% to reduce additional stress on damaged plant
- Withhold fertilizer until new healthy growth appears
- Maintain consistent temperatures 65-80°F with minimal fluctuation
- Be patient: recovery takes 4-8 weeks as plant regenerates damaged tissue
Prevention
Position orchids away from windows during winter months; avoid placement near exterior doors or drafty areas; use thermal curtains on windows; maintain minimum 65°F nighttime temperatures; monitor with thermometer in orchid location; consider supplemental heat mats during cold snaps for sensitive species
Does my Orchid need more humidity?
Orchids as epiphytes require 50-70% relative humidity to support their specialized aerial root systems adapted to tropical canopy environments
3 protocols
54–88%
Does my Orchid need more humidity?
Orchids as epiphytes require 50-70% relative humidity to support their specialized aerial root systems adapted to tropical canopy environments
Protocol 1: humidity · 88% confidence
Cause
Orchids as epiphytes require 50-70% relative humidity to support their specialized aerial root systems adapted to tropical canopy environments. Low humidity causes velamen desiccation, leading to silvery, wrinkled roots and poor nutrient uptake. Conversely, high humidity without adequate air circulation creates stagnant conditions promoting bacterial and fungal infections on leaves and roots.
Solutions
- Monitor humidity with hygrometer; maintain 50-70% RH for most orchid species
- Increase humidity using pebble trays filled with water placed beneath pots (not touching)
- Group orchids together to create microclimate with shared transpiration
- Use cool-mist humidifiers in dry climates or winter heating seasons
- Ensure constant gentle airflow with fans to prevent fungal issues in high humidity
- Mist leaves only if accompanied by good air circulation and morning timing to ensure rapid drying
Prevention
Maintain consistent 50-70% humidity year-round. Use humidity trays or humidifiers rather than frequent misting. Always pair humidity increases with air circulation. Avoid placing orchids near heating vents or air conditioning units that create dry microclimates.
Protocol 2: humidity · 87% confidence
Cause
Orchids are epiphytes evolved in tropical environments with 60-80% ambient humidity. In typical indoor conditions (30-50% humidity), orchids lose moisture through transpiration faster than roots can uptake water, causing chronic water stress. The velamen (outer root sheath) dries too quickly, reducing its ability to absorb atmospheric moisture and nutrients. Low humidity also increases susceptibility to spider mites and reduces the plant's ability to produce aerial roots.
Solutions
- Install humidity tray or pebble tray beneath orchid pot (fill with water but keep pot above water line)
- Group orchids together to create localized humidity microclimate around plants
- Use room humidifier to maintain 50-70% relative humidity, particularly during winter heating season
- Mist orchids in early morning only, allowing leaves to dry before evening to prevent fungal issues
- Monitor humidity with hygrometer and adjust care seasonally - lower in summer, critical in winter
Prevention
Maintain consistent 50-70% humidity year-round using humidifiers, pebble trays, or grouping plants; avoid placing orchids near heating vents, air conditioners, or drafty windows; increase humidity monitoring during winter when indoor heating reduces ambient moisture to dangerous levels.
Protocol 3: bud blast low humidity · 54% confidence
Cause
Phalaenopsis orchids require 50-70% humidity to maintain turgidity in developing flower buds. When ambient humidity drops below 40%—common in heated indoor environments during winter—the buds lose moisture faster than roots can replenish it. This desiccation stress triggers ethylene production, which accelerates bud senescence and drop. The first sign is often bud wrinkling or yellowing at the base before sudden drop.
Solutions
- Increase humidity immediately: use humidifier set to 60%+ within 3 feet of plant
- Group orchids together—collective transpiration creates localized humidity boost
- Use pebble trays filled with water placed beneath pots (do NOT let pots sit in water)
- Mist buds DAILY with distilled water if humidifier unavailable
- Remove yellowing buds to redirect plant energy to remaining viable flowers
Prevention
Maintain 50-70% humidity year-round using humidifiers, pebble trays, or grouping plants to create microclimates. Avoid placing orchids near heating vents or radiators. Monitor with hygrometer positioned at plant level.
Why does my Orchid have sunburn?
Orchid sunburn occurs when leaves are exposed to direct sunlight, particularly intense afternoon sun, causing photo-oxidative damage to leaf cells
87%
Why does my Orchid have sunburn?
Orchid sunburn occurs when leaves are exposed to direct sunlight, particularly intense afternoon sun, causing photo-oxidative damage to leaf cells
Cause
Orchid sunburn occurs when leaves are exposed to direct sunlight, particularly intense afternoon sun, causing photo-oxidative damage to leaf cells. The damage is exacerbated when water droplets on leaves act as magnifying lenses, focusing sunlight onto specific spots and creating localized burns. Unlike terrestrial plants, orchids evolved as epiphytes in forest canopies where they receive filtered, dappled light. Their thin, photosynthetic leaves lack the protective structures needed for direct sun exposure.
Solutions
- Immediately relocate orchid to bright indirect light only - east-facing windows with sheer curtains are ideal
- Avoid misting or overhead watering during peak light hours (10am-4pm) to prevent water droplet lens effects
- Trim severely damaged leaf portions with sterile scissors to improve aesthetics and prevent secondary infection
- Gradually acclimate orchids to any light changes over 7-10 days to prevent shock
- Monitor with light meter: target 1500-2500 foot-candles for Phalaenopsis, 2000-4000 for Cattleya
Prevention
Position orchids 3-5 feet from south/west windows or use UV-filtering window film; maintain consistent bright indirect light without direct sun exposure; water early morning so leaves dry before peak light hours; use light meters to verify intensity stays within species-specific ranges.
Propagation (1 topics · 1 cases)
How do I propagate my Orchid?
The primary issue is not the yellowing spikes (normal post-bloom senescence in orchids like Phalaenopsis), but an unsuitable potting medium causing poor root aeration and health, compounded by insufficient leaves for photosynthesis, leading to overall plant stress and risk of root rot
90%
How do I propagate my Orchid?
The primary issue is not the yellowing spikes (normal post-bloom senescence in orchids like Phalaenopsis), but an unsuitable potting medium causing poor root aeration and health, compounded by insufficient leaves for photosynthesis, leading to overall plant stress and risk of root rot
Cause
The primary issue is not the yellowing spikes (normal post-bloom senescence in orchids like Phalaenopsis), but an unsuitable potting medium causing poor root aeration and health, compounded by insufficient leaves for photosynthesis, leading to overall plant stress and risk of root rot.
Solutions
- Cut yellow spike back to 1 inch above healthy tissue to prevent wet wounds.
- Cut second spike just below blooms and above the top node to redirect energy.
- Remove plant from pot, discard seedling plug if present, soak and clean roots, trim mushy or papery roots with sterile snips.
- Repot in clear, ventilated plastic pot (snug fit to healthy roots) using pure pine orchid bark or bark+moss in hot/arid conditions.
- Flush pot with water to remove bark dust, then water only when bark is fully dry and roots appear silver.
Prevention
Use orchid-specific bark medium from the start for optimal aeration; monitor root color (silver = dry) and medium dryness; provide bright indirect light (1500-2500 fc) to promote leaf growth; maintain 50-70% humidity without overwatering in low-ventilation spaces.
Care Methods (4 topics · 6 cases)
Should I be concerned about my Orchid's aerial roots?
Aerial orchid roots photosynthesize through chloroplast-containing velamen cells and absorb atmospheric moisture
85%
Should I be concerned about my Orchid's aerial roots?
Aerial orchid roots photosynthesize through chloroplast-containing velamen cells and absorb atmospheric moisture
Cause
Aerial orchid roots photosynthesize through chloroplast-containing velamen cells and absorb atmospheric moisture. When forced into pots, aerial roots often rot from lack of airflow, or desiccate from low humidity. Indoor environments below 40% relative humidity cause aerial root tips to desiccate within 72 hours.
Solutions
- Do not trim healthy aerial roots—they photosynthesize and absorb moisture
- For aerial roots remaining outside pot: mist daily or use humidity trays
- For repotting: position plant so newest aerial roots can emerge freely
- Maintain 50-70% humidity for aerial root function; use humidifiers in dry climates
- If aerial roots shrivel: increase humidity before watering more frequently
Prevention
Mount orchids on cork bark or use open baskets for epiphytic species. Clear pots allow aerial root observation without forcing them into media.
Hydrogen Peroxide Drench: How to Use for Orchid
The primary issue stems from conflicting care advice: store maintenance cut the drying spike and applied cinnamon (which seals wounds but is unnecessary for natural spike senescence), while optimal practice is to fully remove the spike to redirect energy
2 protocols
90–98%
Hydrogen Peroxide Drench: How to Use for Orchid
The primary issue stems from conflicting care advice: store maintenance cut the drying spike and applied cinnamon (which seals wounds but is unnecessary for natural spike senescence), while optimal practice is to fully remove the spike to redirect energy
Protocol 1: hydrogen peroxide drench · 98% confidence
Cause
The primary issue stems from conflicting care advice: store maintenance cut the drying spike and applied cinnamon (which seals wounds but is unnecessary for natural spike senescence), while optimal practice is to fully remove the spike to redirect energy. Dark leaf spots are likely sunburn (diagnosed by warm leaves), not infection, exacerbated by winter stress in humid-cold tropical conditions (low light, potential direct exposure via window). The plant is energy-drained maintaining a dying spike during suboptimal season, mimicking disease.
Solutions
- Sanitize pruning shears with hydrogen peroxide.
- Cut the drying spike close to the plant's base to conserve energy—no cinnamon needed, as spikes naturally desiccate.
- Assess light: feel leaves during exposure; if warm, confirm sunburn and relocate to strictly indirect bright light.
- Boost humidity (60-80%) with pebble tray or humidifier; maintain temps >18°C, avoid drafts.
- Monitor for new basal growth; repot if roots are healthy post-recovery, using orchid bark.
Prevention
Install light meter or use app for PAR levels (5000-15000 lux indirect); seasonal automation to flag spike removal in winter; consistent 12-14hr photoperiod with grow lights if cloudy; humidity/temp sensors to alert deviations.
Protocol 2: hydrogen peroxide drench · 90% confidence
Cause
The primary issue is not the yellowing spikes (normal post-bloom senescence in orchids like Phalaenopsis), but an unsuitable potting medium causing poor root aeration and health, compounded by insufficient leaves for photosynthesis, leading to overall plant stress and risk of root rot.
Solutions
- Cut yellow spike back to 1 inch above healthy tissue to prevent wet wounds.
- Cut second spike just below blooms and above the top node to redirect energy.
- Remove plant from pot, discard seedling plug if present, soak and clean roots, trim mushy or papery roots with sterile snips.
- Repot in clear, ventilated plastic pot (snug fit to healthy roots) using pure pine orchid bark or bark+moss in hot/arid conditions.
- Flush pot with water to remove bark dust, then water only when bark is fully dry and roots appear silver.
Prevention
Use orchid-specific bark medium from the start for optimal aeration; monitor root color (silver = dry) and medium dryness; provide bright indirect light (1500-2500 fc) to promote leaf growth; maintain 50-70% humidity without overwatering in low-ventilation spaces.
Orchid: Root Surgery
The primary issue stems from conflicting care advice: store maintenance cut the drying spike and applied cinnamon (which seals wounds but is unnecessary for natural spike senescence), while optimal practice is to fully remove the spike to redirect energy
2 protocols
90–98%
Orchid: Root Surgery
The primary issue stems from conflicting care advice: store maintenance cut the drying spike and applied cinnamon (which seals wounds but is unnecessary for natural spike senescence), while optimal practice is to fully remove the spike to redirect energy
Protocol 1: root surgery · 98% confidence
Cause
The primary issue stems from conflicting care advice: store maintenance cut the drying spike and applied cinnamon (which seals wounds but is unnecessary for natural spike senescence), while optimal practice is to fully remove the spike to redirect energy. Dark leaf spots are likely sunburn (diagnosed by warm leaves), not infection, exacerbated by winter stress in humid-cold tropical conditions (low light, potential direct exposure via window). The plant is energy-drained maintaining a dying spike during suboptimal season, mimicking disease.
Solutions
- Sanitize pruning shears with hydrogen peroxide.
- Cut the drying spike close to the plant's base to conserve energy—no cinnamon needed, as spikes naturally desiccate.
- Assess light: feel leaves during exposure; if warm, confirm sunburn and relocate to strictly indirect bright light.
- Boost humidity (60-80%) with pebble tray or humidifier; maintain temps >18°C, avoid drafts.
- Monitor for new basal growth; repot if roots are healthy post-recovery, using orchid bark.
Prevention
Install light meter or use app for PAR levels (5000-15000 lux indirect); seasonal automation to flag spike removal in winter; consistent 12-14hr photoperiod with grow lights if cloudy; humidity/temp sensors to alert deviations.
Protocol 2: root surgery · 90% confidence
Cause
The primary issue is not the yellowing spikes (normal post-bloom senescence in orchids like Phalaenopsis), but an unsuitable potting medium causing poor root aeration and health, compounded by insufficient leaves for photosynthesis, leading to overall plant stress and risk of root rot.
Solutions
- Cut yellow spike back to 1 inch above healthy tissue to prevent wet wounds.
- Cut second spike just below blooms and above the top node to redirect energy.
- Remove plant from pot, discard seedling plug if present, soak and clean roots, trim mushy or papery roots with sterile snips.
- Repot in clear, ventilated plastic pot (snug fit to healthy roots) using pure pine orchid bark or bark+moss in hot/arid conditions.
- Flush pot with water to remove bark dust, then water only when bark is fully dry and roots appear silver.
Prevention
Use orchid-specific bark medium from the start for optimal aeration; monitor root color (silver = dry) and medium dryness; provide bright indirect light (1500-2500 fc) to promote leaf growth; maintain 50-70% humidity without overwatering in low-ventilation spaces.
Systemic Granules: How to Use for Orchid
The primary issue is not the yellowing spikes (normal post-bloom senescence in orchids like Phalaenopsis), but an unsuitable potting medium causing poor root aeration and health, compounded by insufficient leaves for photosynthesis, leading to overall plant stress and risk of root rot
90%
Systemic Granules: How to Use for Orchid
The primary issue is not the yellowing spikes (normal post-bloom senescence in orchids like Phalaenopsis), but an unsuitable potting medium causing poor root aeration and health, compounded by insufficient leaves for photosynthesis, leading to overall plant stress and risk of root rot
Cause
The primary issue is not the yellowing spikes (normal post-bloom senescence in orchids like Phalaenopsis), but an unsuitable potting medium causing poor root aeration and health, compounded by insufficient leaves for photosynthesis, leading to overall plant stress and risk of root rot.
Solutions
- Cut yellow spike back to 1 inch above healthy tissue to prevent wet wounds.
- Cut second spike just below blooms and above the top node to redirect energy.
- Remove plant from pot, discard seedling plug if present, soak and clean roots, trim mushy or papery roots with sterile snips.
- Repot in clear, ventilated plastic pot (snug fit to healthy roots) using pure pine orchid bark or bark+moss in hot/arid conditions.
- Flush pot with water to remove bark dust, then water only when bark is fully dry and roots appear silver.
Prevention
Use orchid-specific bark medium from the start for optimal aeration; monitor root color (silver = dry) and medium dryness; provide bright indirect light (1500-2500 fc) to promote leaf growth; maintain 50-70% humidity without overwatering in low-ventilation spaces.
Maintenance (2 topics · 3 cases)
How should I fertilize my Orchid?
Orchids experience distinct growth phases requiring different nutrient ratios
2 protocols
89–90%
How should I fertilize my Orchid?
Orchids experience distinct growth phases requiring different nutrient ratios
Protocol 1: fertilizer timing · 90% confidence
Cause
Orchids experience distinct growth phases requiring different nutrient ratios. During vegetative growth (spring-summer), roots and leaves develop requiring balanced nitrogen-phosphorus-potassium (NPK) for structural development. During reproductive phase (fall-winter), phosphorus becomes critical for flower spike development and bloom production. Incorrect timing—applying high-nitrogen fertilizer during bloom initiation or bloom-booster during vegetative growth—reduces both leaf development and flowering capacity. Additionally, salt accumulation from year-round full-strength fertilization damages epiphytic root systems adapted to nutrient-poor conditions.
Solutions
- Vegetative phase (March-August): Apply balanced 20-20-20 fertilizer at 1/4 strength every 2 weeks
- Pre-bloom phase (September-October): Switch to bloom formula 10-30-20 to support spike development
- Blooming phase (November-February): Reduce fertilizing to 1x monthly with bloom formula to extend flower life
- Monthly flush: Water with plain distilled water once monthly to leach accumulated salts from bark medium
- Post-bloom recovery (after flowers drop): Return to balanced fertilizer to rebuild vegetative strength
Prevention
Mark calendar with seasonal fertilizer transitions. Use weakly-weekly approach (1/4 strength, every watering) rather than full-strength monthly applications. Flush monthly with plain water. Repot annually to remove salt-laden old bark.
Protocol 2: fertilizer burn · 89% confidence
Cause
Orchid roots are specialized for low-nutrient epiphytic conditions and rapidly accumulate fertilizer salts when fed at standard houseplant concentrations. Excess nitrogen, phosphorus, and potassium crystallize on root surfaces and in potting medium, creating hypertonic conditions that draw water out of root cells via osmosis. This causes root desiccation, tip burn, and eventual root death despite adequate watering. Symptoms appear as brown or black root tips, leaf tip necrosis, and stalled growth.
Solutions
- Flush potting medium thoroughly with room-temperature water—pour through 3x pot volume to dissolve and wash away salts
- Trim damaged roots: remove all blackened or crispy root tips with sterile scissors
- Repot in fresh orchid bark mix if medium is more than 12 months old—old bark retains salts
- Resume fertilizing at 1/4 recommended strength (weakly, weekly approach)
- Monitor new root growth—healthy regrowth indicates successful salt removal
Prevention
Adopt 'weakly, weekly' fertilizing schedule: 1/4 strength balanced orchid fertilizer every watering during active growth. Flush monthly with plain water to prevent salt buildup. Use orchid-specific fertilizer formulations lower in urea nitrogen. Repot annually to refresh medium and remove accumulated salts.
When should I repot my Orchid?
Orchid roots adapt their physiology to consistent moisture patterns—roots grown in moss develop velamen (spongy outer layer) optimized for sustained moisture contact, while bark-grown roots develop more robust lignified cores for structural support in loose substrate
77%
When should I repot my Orchid?
Orchid roots adapt their physiology to consistent moisture patterns—roots grown in moss develop velamen (spongy outer layer) optimized for sustained moisture contact, while bark-grown roots develop more robust lignified cores for structural support in loose substrate
Cause
Orchid roots adapt their physiology to consistent moisture patterns—roots grown in moss develop velamen (spongy outer layer) optimized for sustained moisture contact, while bark-grown roots develop more robust lignified cores for structural support in loose substrate. Sudden media switches shock root systems accustomed to specific hydration rhythms. Transitional stress manifests as root tip dieback, leaf wilting, and growth pause lasting 4-6 weeks.
Solutions
- Step 1: Time transitions to coincide with new root growth (visible as green tips) rather than during blooming or dormancy
- Step 2: Soak old media thoroughly 24 hours before repotting to hydrate roots and reduce transplant shock
- Step 3: When switching moss to bark: Increase initial watering frequency to every 3-4 days for first month as roots adjust to faster drying
- Step 4: When switching bark to moss: Reduce initial watering by 50% and check center of root ball—moss traps moisture in core while surface appears dry
- Step 5: Maintain 70%+ humidity during transition period to buffer root stress regardless of media direction
Prevention
Avoid mixing moss and bark in same pot—moisture differential between media creates uneven hydration zones that stress root systems. Choose one media per pot and stick with it for the 12-18 month potting cycle.
Other Topics (14 topics · 15 cases)
Orchid: Bark Mix Potting
Fir bark (Pseudotsuga menziesii) mixed with perlite and charcoal creates an aerated substrate that dries within 24-48 hours after watering, forcing orchid roots to undergo natural wet-dry cycles that stimulate root tip growth and prevent anaerobic bacterial proliferation
80%
Orchid: Bark Mix Potting
Fir bark (Pseudotsuga menziesii) mixed with perlite and charcoal creates an aerated substrate that dries within 24-48 hours after watering, forcing orchid roots to undergo natural wet-dry cycles that stimulate root tip growth and prevent anaerobic bacterial proliferation
Cause
Fir bark (Pseudotsuga menziesii) mixed with perlite and charcoal creates an aerated substrate that dries within 24-48 hours after watering, forcing orchid roots to undergo natural wet-dry cycles that stimulate root tip growth and prevent anaerobic bacterial proliferation. This challenge-response mechanism strengthens root systems and promotes active metabolism. The coarse texture (medium grade: 1-2cm chunks) prevents compaction while providing mechanical stability for epiphytic root attachment.
Solutions
- Standard bark mix ratio: 5 parts fir bark + 1 part perlite + 1 part horticultural charcoal for standard Phalaenopsis
- For heavy waterers: Increase perlite to 2 parts to accelerate drainage and provide forgiveness for overwatering tendencies
- For humid climates: Pure bark without additives works best—excess perlite creates too-rapid drying in already-humid air
- Pot size correlation: Bark requires pots only 1-2 inches larger than root ball; oversized bark-filled pots stay too wet in center
Prevention
Water bark-grown orchids thoroughly until water exits drainage holes, then allow complete surface dryness before next watering—typically 5-7 days in home conditions, 3-5 days in summer heat.
Orchid: Bud Blast
Orchid flower buds (particularly Phalaenopsis) are highly sensitive to environmental fluctuations and abort development when stressed—a phenomenon called bud blast
89%
Orchid: Bud Blast
Orchid flower buds (particularly Phalaenopsis) are highly sensitive to environmental fluctuations and abort development when stressed—a phenomenon called bud blast
Cause
Orchid flower buds (particularly Phalaenopsis) are highly sensitive to environmental fluctuations and abort development when stressed—a phenomenon called bud blast. Common triggers include temperature swings greater than 15°F in 24 hours, exposure to ethylene gas from ripening fruit or vehicle exhaust, relocation to significantly different light conditions, or underwatering during critical bud development. The plant prioritizes survival over reproduction, redirecting resources from flower production to vegetative maintenance. Buds turn yellow, soften, and drop before opening, typically 2-4 weeks after the stress event occurred.
Solutions
- Maintain stable temperatures: avoid moving orchid between rooms with greater than 10°F difference
- Remove from vicinity of fruit bowls—ripening apples, bananas, and tomatoes emit ethylene
- Keep away from heating/cooling vents and exterior doors with draft exposure
- Maintain consistent watering—never allow medium to become bone dry when flower spikes are present
- Position in permanent location with bright indirect light (1000-2000 foot-candles) 3+ months before expected bloom
Prevention
Plan orchid placement seasonally—avoid areas with temperature fluctuations. Keep 3+ feet from fruit storage. Water consistently when spikes are developing. Acclimate gradually over 7-10 days if relocation is necessary. Maintain 60-70% humidity to buffer environmental stress.
Orchid: Bud Blast Physical Damage
Orchid flower spikes are structural extensions containing delicate vascular connections
51%
Orchid: Bud Blast Physical Damage
Orchid flower spikes are structural extensions containing delicate vascular connections
Cause
Orchid flower spikes are structural extensions containing delicate vascular connections. Physical disturbance—such as rough handling during repotting, bumping while dusting leaves, or sudden rotation for 'even light'—creates micro-tears in the vascular tissue feeding developing buds. Unlike stems that can callus and heal, flower spike vascular bundles are too slender to recover. Once severed, the bud loses nutrient/water supply and drops within 24-48 hours.
Solutions
- Stake unstable spikes immediately using orchid clips and thin bamboo stakes
- Do NOT repot orchids with developing buds or open flowers—wait until flowering completes
- When rotating for light, move maximum 45° per week; never spin 180° suddenly
- Remove buds below any visible cracks or tears in the spike
- Allow damaged spikes to finish flowering naturally rather than cutting prematurely
Prevention
Minimize disturbance during flowering: avoid repotting with active spikes, stake tall spikes for stability, and rotate plants only 45° weekly rather than 180°. Choose stable locations where plants won't be brushed by passing people or pets.
Orchid: Bud Blast Temperature Shock
Phalaenopsis orchids evolved in stable tropical environments where temperature fluctuates only 5-10°F daily
55%
Orchid: Bud Blast Temperature Shock
Phalaenopsis orchids evolved in stable tropical environments where temperature fluctuates only 5-10°F daily
Cause
Phalaenopsis orchids evolved in stable tropical environments where temperature fluctuates only 5-10°F daily. Sudden temperature shifts exceeding 15°F—common when plants are moved from stores to homes, placed near heating/cooling vents, or exposed to seasonal drafts—trigger ethylene production in developing flower buds. Ethylene is a gaseous hormone that accelerates senescence, causing buds to yellow and drop within 24-72 hours of exposure.
Solutions
- Stabilize temperature immediately: move plant to location with consistent 65-75°F temperatures
- Remove any buds showing yellowing to redirect plant energy to remaining healthy buds
- Increase humidity to 50-60% to reduce transpiration stress during recovery
- Avoid fertilizing until new growth appears
- Expect 4-6 week recovery period before new flower spikes initiate
Prevention
Maintain stable temperatures between 65-80°F year-round. When purchasing orchids, insulate them during transport home. Position plants away from heating/cooling vents, exterior doors, and windows with poor weather sealing. Acclimate new plants gradually over 7-10 days.
Orchid: Epiphytic Vs Terrestrial Confusion
Orchid roots feature velamen—a multi-layered epidermis that requires gas exchange
92%
Orchid: Epiphytic Vs Terrestrial Confusion
Orchid roots feature velamen—a multi-layered epidermis that requires gas exchange
Cause
Orchid roots feature velamen—a multi-layered epidermis that requires gas exchange. Regular potting soil eliminates the air pockets epiphytes need, creating anaerobic conditions within 48-72 hours. Soil particles compact around roots, blocking oxygen diffusion and promoting bacterial colonization (Pectobacterium spp.) that destroys root cortex cells.
Solutions
- Remove orchid and rinse all soil from roots under lukewarm water
- Inspect root firmness: retain any firm inner core even if velamen appears deflated
- Trim only roots that are black, hollow, or emit foul odor
- Repot in coarse orchid bark (¼-½ inch chunks) with 30% perlite for aeration
- Use clear plastic pot to monitor root color changes
Prevention
Always use epiphyte-specific media (orchid bark, sphagnum moss, or mounted setups). Soil moisture sensors cannot replace visual root monitoring—orchids require air-filled porosity above 35%.
Why isn't my Orchid flowering?
Orchids, particularly Phalaenopsis, require specific environmental cues to initiate flower spike development
88%
Why isn't my Orchid flowering?
Orchids, particularly Phalaenopsis, require specific environmental cues to initiate flower spike development
Cause
Orchids, particularly Phalaenopsis, require specific environmental cues to initiate flower spike development. A 10-15°F temperature differential between day (70-80°F) and night (55-65°F) sustained for 2-4 weeks triggers hormonal changes that initiate reproductive growth. Insufficient light (below 1000 foot-candles) prevents adequate energy reserves for blooming, while excessive nitrogen fertilization promotes vegetative growth at the expense of flowers. The plant must also reach maturity—typically 8-12 months post-repotting with established root systems—before blooming capacity develops.
Solutions
- Expose orchid to nighttime temperatures of 55-65°F for 2-4 consecutive weeks to trigger spike initiation
- Maintain day temperatures of 70-80°F with bright indirect light of 1000-2000 foot-candles during photoperiod
- Switch fertilizer formula: use bloom-booster (higher phosphorus, lower nitrogen) 6 weeks before desired bloom period
- Ensure plant has at least 3-5 healthy mature leaves and established root system before expecting blooms
- Maintain consistent care without repotting for 6+ months prior to blooming season—root disturbance delays flowering
Prevention
Maintain stable orchid care year-round with seasonal temperature drops to trigger blooming. Use east-facing windows for consistent light without heat stress. Switch to bloom-booster fertilizer seasonally. Allow orchids 6-12 months recovery after repotting before expecting flowers.
Orchid: Leaf Wrinkle
Wrinkled or leathery orchid leaves mean that insufficient water is reaching the leaf tissue, but the cause is not always underwatering
94%
Orchid: Leaf Wrinkle
Wrinkled or leathery orchid leaves mean that insufficient water is reaching the leaf tissue, but the cause is not always underwatering
Cause
Wrinkled or leathery orchid leaves mean that insufficient water is reaching the leaf tissue, but the cause is not always underwatering. Healthy, plump roots with a dry medium point toward insufficient watering, while brown, mushy, shriveled, or otherwise poor roots point toward root loss from excess water or deteriorated potting medium.
Solutions
- Inspect the roots and potting medium before changing the watering routine. Healthy roots are plump and white or green; dry roots may look white or gray; rotted roots are commonly brown and mushy or shriveled.
- If roots are healthy and the medium is dry, water thoroughly and allow excess water to drain. Water as the medium approaches dryness rather than following a universal calendar schedule.
- If roots are in poor condition or the medium has broken down, address the root loss and repot in fresh, airy orchid medium when needed. More water alone cannot help a plant that has lost functional roots.
- For an orchid recovering from root loss, raise humidity around the plant to reduce stress while the remaining or new roots establish, while maintaining airflow and avoiding a persistently soggy medium.
Prevention
Check root condition and medium dryness together when deciding to water. Use a porous orchid medium and free-draining container, avoid keeping roots continuously wet, and replace medium that has broken down and begun retaining too much water.
How much light does my Orchid need?
Orchids occupy a unique ecological niche in forest canopies where they receive filtered, dappled light that varies dramatically throughout the day
87%
How much light does my Orchid need?
Orchids occupy a unique ecological niche in forest canopies where they receive filtered, dappled light that varies dramatically throughout the day
Cause
Orchids occupy a unique ecological niche in forest canopies where they receive filtered, dappled light that varies dramatically throughout the day. Their photosynthetic apparatus evolved for bright indirect light (2000-4000 foot-candles for Phalaenopsis, higher for Cattleya/Oncidium), not the deep shade most houseplant owners assume. Insufficient light (<1000 fc) triggers etiolation—stretching growth with elongated, thin leaves that are pale green and floppy. The plant attempts to increase light capture surface area while reducing chlorophyll density per cell, resulting in weak, structurally compromised foliage. Paradoxically, orchids also cannot tolerate direct sun exposure which causes photoinhibition and cellular damage. The ideal mimics their native canopy environment: bright, diffused light with brief sunflecks.
Solutions
- Measure current light: Use light meter app or device; orchids need 2000-4000 fc for optimal growth (Phalaenopsis) or 3000-5000 fc (Cattleya/Dendrobium)
- Relocate to bright indirect light: East-facing windows are ideal; south/west windows require sheer curtain diffusion; north windows often insufficient except in summer
- Rotate weekly: Quarter-turn rotation ensures even light distribution and prevents lopsided growth toward window
- Supplement with grow lights: If natural light is inadequate, use full-spectrum LED grow lights positioned 12-18 inches above foliage; provide 12-14 hours daily with timer
- Acclimate gradually: When increasing light levels, do so over 7-10 days to prevent sunburn; sudden bright light exposure damages leaves adapted to low light
- Monitor leaf color: Dark green, floppy leaves indicate insufficient light; aim for lighter grass-green with firm texture
Prevention
Position orchids within 3 feet of east-facing windows or 4-6 feet of south/west windows with diffusion; use light-colored walls/reflectors to maximize available light; avoid deep interior locations; supplement with grow lights October-March when natural light diminishes; maintain consistent light levels rather than dramatic seasonal variations.
Orchid: Moss Vs Bark
Sphagnum moss retains 8-12x its dry weight in water through capillary action and cellular sponge structure, creating consistently moist conditions ideal for epiphytic orchid roots that evolved in humid cloud forest environments
82%
Orchid: Moss Vs Bark
Sphagnum moss retains 8-12x its dry weight in water through capillary action and cellular sponge structure, creating consistently moist conditions ideal for epiphytic orchid roots that evolved in humid cloud forest environments
Cause
Sphagnum moss retains 8-12x its dry weight in water through capillary action and cellular sponge structure, creating consistently moist conditions ideal for epiphytic orchid roots that evolved in humid cloud forest environments. Fir bark mixtures retain only 1.5-2x their weight, providing rapid drainage and air pockets that mimic tree branch conditions. The critical distinction is water availability duration: moss keeps roots hydrated for 10-14 days between waterings while bark requires watering every 5-7 days in typical home conditions.
Solutions
- Assess your environment humidity with a hygrometer—below 40% humidity favors moss, above 60% favors bark
- Evaluate your watering consistency: if you travel frequently or forget waterings, moss provides buffer; bark requires disciplined schedules
- Test your water quality: moss is more forgiving of mineral buildup from hard water due to its acidity; bark requires rainwater or filtered water to prevent salt accumulation
- Consider plant maturity: seedlings and stressed orchids benefit from moss stability; established plants thrive in bark's challenge-response growth pattern
Prevention
Select potting media based on environmental conditions and care habits rather than arbitrary preference. Match moss to dry climates, inconsistent schedules, and high-stress recoveries; match bark to humid environments, disciplined waterers, and routine maintenance schedules.
What is the best soil mix for Orchid?
Sphagnum moss has a functional lifespan of 12-18 months in orchid culture
88%
What is the best soil mix for Orchid?
Sphagnum moss has a functional lifespan of 12-18 months in orchid culture
Cause
Sphagnum moss has a functional lifespan of 12-18 months in orchid culture. As it decomposes, the cellular structure collapses, reducing air porosity from 85% to under 20%. This creates perched water tables where roots sit in saturated zones for 5-7 days, triggering hypoxic stress and Pythium root rot.
Solutions
- Remove orchid and gently extract all old moss (may need soaking to loosen)
- Inspect root velamen: firm and white/green indicates healthy; squishy brown indicates rot
- Trim rotted roots with sterile tools, applying 3% hydrogen peroxide to cuts
- Repot in fresh long-fiber sphagnum (for high humidity environments) or coarse bark (for standard conditions)
- Allow 7-day dry period before first watering to encourage new root growth
Prevention
Replace moss media every 12-18 months regardless of appearance. Test media by squeezing—if water drips out without pressure, porosity is compromised.
Orchid: No New Growth
Orchids enter prolonged growth dormancy when light intensity drops below 800-1000 foot-candles or when exposed to temperature fluctuations outside 65-80°F optimal range
2 protocols
84–90%
Orchid: No New Growth
Orchids enter prolonged growth dormancy when light intensity drops below 800-1000 foot-candles or when exposed to temperature fluctuations outside 65-80°F optimal range
Protocol 1: no new growth · 90% confidence
Cause
Orchids enter prolonged growth dormancy when light intensity drops below 800-1000 foot-candles or when exposed to temperature fluctuations outside 65-80°F optimal range. Insufficient light prevents photosynthetic production of carbohydrates needed for new leaf and root development. Overwatering in low-light conditions compounds the issue by causing root rot, further reducing the plant's capacity to support new growth. The plant prioritizes survival over reproduction and vegetative expansion.
Solutions
- Relocate to bright indirect light location achieving 1000-2000 foot-candles—east-facing window ideal
- Check roots: remove any black, mushy, or hollow roots that cannot support nutrient uptake
- Reduce watering frequency: allow potting medium to dry completely between waterings in low-growth periods
- Maintain consistent temperatures between 65-80°F with minimal daily fluctuation
- Apply dilute orchid fertilizer (1/4 strength) monthly during recovery to support new growth initiation
Prevention
Position orchids in stable east or west-facing windows with consistent 1000-2000 foot-candles. Maintain 65-80°F temperatures year-round. Water based on root color—silvery roots indicate need, green roots indicate hydration. Repot annually in spring to refresh medium and inspect root health.
Protocol 2: no new growth · 84% confidence
Cause
Orchids enter growth dormancy or stagnation when environmental conditions fall outside their optimal range: insufficient light prevents photosynthesis needed for new tissue production, low humidity stresses the epiphytic root system, and temperature fluctuations disrupt metabolic processes. Unlike fast-growing houseplants, orchids naturally grow slowly, but prolonged absence of new roots, leaves, or spikes indicates chronic stress rather than normal rest.
Solutions
- Increase light to 1500-3000 foot-candles of bright indirect light; consider supplemental grow lights in winter or low-light environments
- Maintain consistent temperatures between 65-80°F (18-27°C) days and 55-65°F (13-18°C) nights to support metabolic activity
- Boost humidity to 50-70% using pebble trays or humidifiers while ensuring air circulation with fans
- Apply diluted orchid fertilizer (20-20-20 at 1/4 strength) every 2 weeks during active growth periods
- Repot in fresh bark mix if media has broken down, as decomposed medium prevents proper root function
Prevention
Provide consistent bright indirect light year-round. Maintain stable environmental conditions avoiding cold drafts and heat sources. Fertilize regularly but weakly during growing season. Repot every 1-2 years to refresh media and inspect root health.
Orchid: Pot Too Small
Orchids evolved as epiphytes with aerial root systems adapted to cling to tree bark
88%
Orchid: Pot Too Small
Orchids evolved as epiphytes with aerial root systems adapted to cling to tree bark
Cause
Orchids evolved as epiphytes with aerial root systems adapted to cling to tree bark. Oversized pots create excess media volume that retains moisture for 10-14 days, far exceeding the 3-5 day drying cycles orchid roots require. The center of large pots remains soggy while surface appears dry, creating hidden anaerobic zones.
Solutions
- Select pot 1-2 cm wider than current root ball only—never jump more than one size up
- Use clear plastic pots with side air holes for oxygen diffusion and root monitoring
- Root ball should fill 80-100% of pot volume; visible circling roots indicate readiness for repot
- For decorative display: place plastic inner pot inside ceramic outer pot, removing for watering
- Media volume formula: 1 liter bark per 4-6 inch pot diameter maximum
Prevention
Orchids bloom best when slightly root-bound. Repot only when media breaks down or roots overflow pot, typically every 1-2 years for Phalaenopsis.
Orchid: Sphagnum Moss Potting
Sphagnum moss (Sphagnum spp
78%
Orchid: Sphagnum Moss Potting
Sphagnum moss (Sphagnum spp
Cause
Sphagnum moss (Sphagnum spp.) creates a microhabitat with sustained 85-95% humidity at the root surface through controlled water release from hyaline cells. This stability benefits Phalaenopsis orchids recovering from root loss, dehydration stress, or import shock by preventing the wet-dry cycles that stress compromised root systems. The moss structure also promotes aerial root adaptation by maintaining consistent contact moisture without saturation.
Solutions
- For recovery orchids: Use premium long-fiber sphagnum moss (not garden center peat moss) loosely packed around roots—never compress
- For mounted orchids: Wrap root ball in moss secured with fishing line, mist daily or soak weekly for 15 minutes
- For dry climates: Double-pot system—orchid in moss nested in larger cache pot maintains humidity zone around roots
- For inconsistent waterers: Moss extends watering tolerance to 14-21 days vs bark's 7-day limit, forgiving missed schedules
Prevention
Moss requires replacement every 12-18 months as it breaks down and compacts, creating anaerobic conditions. Never reuse old moss—its structural collapse eliminates air pockets and promotes bacterial rot.
Orchid: Spike Vs Root Confusion
Orchid flower spikes and aerial roots emerge from similar locations on Phalaenopsis, causing diagnostic confusion
88%
Orchid: Spike Vs Root Confusion
Orchid flower spikes and aerial roots emerge from similar locations on Phalaenopsis, causing diagnostic confusion
Cause
Orchid flower spikes and aerial roots emerge from similar locations on Phalaenopsis, causing diagnostic confusion. Spikes are cylindrical, pointed, and grow upward with alternating bracts that will develop into flower nodes. Roots are thicker, round-tipped, and emerge horizontally with a silvery-green velamen covering. Spikes appear from leaf axils on the stem between leaves, while roots emerge from the base or along the stem. Early misidentification leads to premature pruning of reproductive structures or failure to support developing spikes properly.
Solutions
- Wait 2-3 weeks after emergence to observe growth direction—spikes grow upward toward light while roots extend horizontally or downward
- Examine the tip: pointed and cylindrical = spike; rounded and blunt = root
- Check for mitten-shaped bracts: spikes develop small triangular bracts along their length; roots have no bracts
- Observe color progression: spikes maintain uniform green color; roots develop silvery velamen as they mature
- Touch gently: spikes are firm and rigid; roots have slight give and feel papery due to velamen layer
Prevention
Document growth patterns monthly with photos to train eye for distinction. Position orchids where emerging structures are visible—avoid overcrowding. Mark suspected spikes with soft plant ties for tracking without disturbing development.
Common Questions
Frequently Asked Questions
Why does my orchid have Root rot?
Cause: Orchid velamen (outer root sheath) rot develops when roots remain saturated for extended periods in moisture-retentive sphagnum moss or compacted media, creating anaerobic conditions that suffocate the epiphytic root system. The velamen layer, designed for rapid water absorption and gas exchange in airy environments, breaks down when deprived of oxygen, leading to brown/black mushy roots and compromised nutrient uptake.
Solution: Unpot orchid and gently remove all potting medium from root ball, including debris trapped in root crevices
Prevention: Water only when velamen turns silvery-white indicating dryness. Use orchid-specific bark mixes that mimic epiphytic conditions rather than moisture-retentive moss. Maintain high air circulation with fans to prevent stagnant humidity around roots. Monitor root color through clear pots to catch early stress signals.
92% confidence · View full protocol →
Why does my orchid have Humidity?
Cause: Orchids as epiphytes require 50-70% relative humidity to support their specialized aerial root systems adapted to tropical canopy environments. Low humidity causes velamen desiccation, leading to silvery, wrinkled roots and poor nutrient uptake. Conversely, high humidity without adequate air circulation creates stagnant conditions promoting bacterial and fungal infections on leaves and roots.
Solution: Monitor humidity with hygrometer; maintain 50-70% RH for most orchid species
Prevention: Maintain consistent 50-70% humidity year-round. Use humidity trays or humidifiers rather than frequent misting. Always pair humidity increases with air circulation. Avoid placing orchids near heating vents or air conditioning units that create dry microclimates.
88% confidence · View full protocol →
Why does my orchid have Hydrogen peroxide drench?
Cause: The primary issue stems from conflicting care advice: store maintenance cut the drying spike and applied cinnamon (which seals wounds but is unnecessary for natural spike senescence), while optimal practice is to fully remove the spike to redirect energy. Dark leaf spots are likely sunburn (diagnosed by warm leaves), not infection, exacerbated by winter stress in humid-cold tropical conditions (low light, potential direct exposure via window). The plant is energy-drained maintaining a dying spike during suboptimal season, mimicking disease.
Solution: Sanitize pruning shears with hydrogen peroxide.
Prevention: Install light meter or use app for PAR levels (5000-15000 lux indirect); seasonal automation to flag spike removal in winter; consistent 12-14hr photoperiod with grow lights if cloudy; humidity/temp sensors to alert deviations.
98% confidence · View full protocol →
Why does my orchid have Root surgery?
Cause: The primary issue stems from conflicting care advice: store maintenance cut the drying spike and applied cinnamon (which seals wounds but is unnecessary for natural spike senescence), while optimal practice is to fully remove the spike to redirect energy. Dark leaf spots are likely sunburn (diagnosed by warm leaves), not infection, exacerbated by winter stress in humid-cold tropical conditions (low light, potential direct exposure via window). The plant is energy-drained maintaining a dying spike during suboptimal season, mimicking disease.
Solution: Sanitize pruning shears with hydrogen peroxide.
Prevention: Install light meter or use app for PAR levels (5000-15000 lux indirect); seasonal automation to flag spike removal in winter; consistent 12-14hr photoperiod with grow lights if cloudy; humidity/temp sensors to alert deviations.
98% confidence · View full protocol →
Why does my orchid have Fertilizer timing?
Cause: Orchids experience distinct growth phases requiring different nutrient ratios. During vegetative growth (spring-summer), roots and leaves develop requiring balanced nitrogen-phosphorus-potassium (NPK) for structural development. During reproductive phase (fall-winter), phosphorus becomes critical for flower spike development and bloom production. Incorrect timing—applying high-nitrogen fertilizer during bloom initiation or bloom-booster during vegetative growth—reduces both leaf development and flowering capacity. Additionally, salt accumulation from year-round full-strength fertilization damages epiphytic root systems adapted to nutrient-poor conditions.
Solution: Vegetative phase (March-August): Apply balanced 20-20-20 fertilizer at 1/4 strength every 2 weeks
Prevention: Mark calendar with seasonal fertilizer transitions. Use weakly-weekly approach (1/4 strength, every watering) rather than full-strength monthly applications. Flush monthly with plain water. Repot annually to remove salt-laden old bark.
90% confidence · View full protocol →
Common Questions
Frequently Asked About Orchid
What problems can Orchid get?
Our database contains 48 documented Orchid cases covering 36 distinct topics, including diseases, pest identification, environmental stress, propagation, and advanced care protocols — each with verified solutions.
Structured Learning
Ready to Go Deeper?
Explore our Mastery Packs for structured, video-based learning with step-by-step protocols from 20,000+ analyzed plant cases.
Browse All Courses →