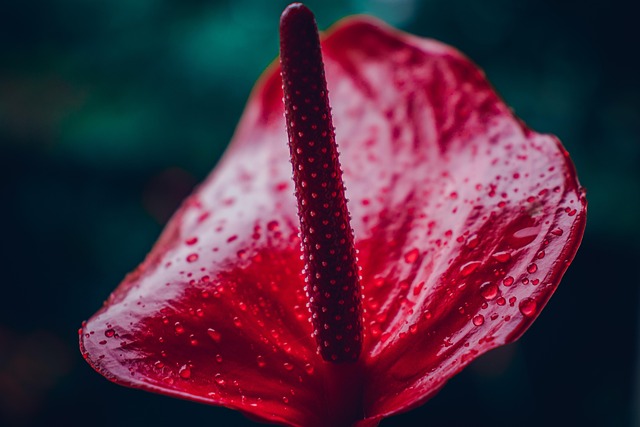
anthurium
Anthurium spp.
Evidence-based care guide for Anthurium (Anthurium spp.). Covers disease treatment, symptom diagnosis, pest control, propagation methods, lighting and watering. Our analysis draws from 64 verified community cases with an average confidence score of 88%. Each protocol is synthesized from real rescue outcomes, not generic advice.
Care Essentials
Get to Know Your Anthurium
Watch the humidity — a little extra moisture in the air goes a long way with this plant.
Light
bright indirect
Wants bright, indirect light — sensitive to both extremes. Too much direct sun causes burns, too little causes stretching.
💡 Grow lights: Thrives under artificial grow lights (LED or fluorescent, 10-12 hours/day). A great option if your space lacks natural light.
Watering
every 7-10 days
Water when the top 1-2 inches of soil feel dry. Adjust with the seasons — less in winter, more in summer.
Humidity & Temperature
Loves higher humidity (60%+). If your air is dry, group it with other plants, use a pebble tray, or run a humidifier nearby.
Sensitive to cold — keep above 55°F (13°C). Avoid placing near drafty windows or exterior doors in winter.
Soil
Needs well-draining soil — add perlite or orchid bark to a standard potting mix. Good drainage is critical to prevent root rot.
Care Requirements
At a Glance
Care Profile in Development
While our detailed care profile is being compiled, you can find specific care guidance in the 14 care-related diagnoses below — including watering schedules, light requirements, and propagation methods from real-world cases.
Start Here
Most Common Problems
Based on 64 analyzed cases — these are the issues you're most likely to encounter
Don't see your symptom? Search all 52 topics below, or run the Diagnostic.
Does my Anthurium need more humidity?
Ambient humidity below 40% triggers stomatal closure and reduced transpiration...
Why does my Anthurium have root rot?
Anthurium losing its primary root system, requiring rehab but sensitive to pure...
Why are my Anthurium leaves turning yellow?
Natural senescence in Anthurium involves nutrient remobilization from older...
Is my Anthurium suffering from cold damage?
Anthuriums are strictly tropical (USDA zones 10-12) with optimal range of...
Why does my Anthurium have spider mites?
Spider mites (Tetranychus urticae) infest Anthurium in low-humidity indoor...
Which of the 7 Killers
is threatening your plants?
We analyzed 1,616 documented plant deaths to identify the 7 causes behind 78% of all losses. Answer 5 questions — we'll tell you exactly which ones apply to your setup.
Skip the quiz — get The 7 Killers course ($19) →Question 1 of 5
How do you decide when to water your plants?
Question 2 of 5
Where do most of your plants live?
Question 3 of 5
What's your home environment like?
Question 4 of 5
Have you lost a plant in the last 6 months?
Question 5 of 5
How often do you check your plants for pests?
Your diagnosis is ready
We've identified your top 2 risk killers. Enter your email to see the full breakdown and your personalized rescue protocol.
Your plants are most at risk from:

The 7 Killers mini-course covers every one of these in depth — mechanism, rescue protocol, prevention. 1,616 cases. 7 lessons. $19.
Get The 7 Killers — $19 →Get the Plant Mortality Checklist
The 7 killers behind 78% of houseplant deaths — and the exact fix for each. Free PDF based on 1,616 documented cases.
Your checklist is ready!
We also sent it to your inbox. Check your email for the full download.
Open the ChecklistFree. No spam. Unsubscribe anytime.
Verified Data
All Diagnoses
52 topics consolidated from 64 documented cases. Expand any topic to see all protocols.
Symptoms (5 topics · 6 cases)
Why do my Anthurium leaves have brown tips?
Anthurium andraeanum evolved in tropical cloud forests with 70-90% ambient humidity
86%
Why do my Anthurium leaves have brown tips?
Anthurium andraeanum evolved in tropical cloud forests with 70-90% ambient humidity
Cause
Anthurium andraeanum evolved in tropical cloud forests with 70-90% ambient humidity. When indoor humidity drops below 50%, the large, thin leaves lose moisture faster than roots can supply it through vascular tissue. The leaf margins and tips—furthest from the water source—desiccate first, turning brown and crispy. Additionally, tap water salts (chlorine, fluoride, calcium) accumulate in leaf tissue over time, causing tip burn as salt concentration exceeds cellular tolerance levels.
Solutions
- Increase ambient humidity to 60-80% using humidifier (most reliable method)
- Create humidity tray: Fill saucer with pebbles and water; place pot on top (not touching water)
- Group plants together to create microclimate humidity dome effect
- Switch to distilled, rain, or filtered water to eliminate salt accumulation
- Trim brown tips with sterile scissors at an angle following natural leaf shape; do not cut into green tissue
- Mist foliage morning-only with room-temperature water to provide temporary humidity boost
Prevention
Maintain consistent 60-80% humidity using humidifier or pebble trays. Use distilled or rainwater exclusively. Avoid placing near heating/cooling vents or drafty windows. Monitor with hygrometer and adjust seasonally.
What are these brown spots on my Anthurium?
Brown spots on Anthurium often stem from three main issues: 1) Edema (internal water stress) where thin, velutinous (velvety) leaf cells burst due to irregular or over-watering; 2) External leaf scorch where water droplets on leaves act as magnifying lenses under direct sun; and 3) Pathogens like Bacterial Leaf Spot (Xanthomonas) or Fungal Root Rot, often appearing as black spots with tell-tale yellow halos
92%
What are these brown spots on my Anthurium?
Brown spots on Anthurium often stem from three main issues: 1) Edema (internal water stress) where thin, velutinous (velvety) leaf cells burst due to irregular or over-watering; 2) External leaf scorch where water droplets on leaves act as magnifying lenses under direct sun; and 3) Pathogens like Bacterial Leaf Spot (Xanthomonas) or Fungal Root Rot, often appearing as black spots with tell-tale yellow halos
Cause
Brown spots on Anthurium often stem from three main issues: 1) Edema (internal water stress) where thin, velutinous (velvety) leaf cells burst due to irregular or over-watering; 2) External leaf scorch where water droplets on leaves act as magnifying lenses under direct sun; and 3) Pathogens like Bacterial Leaf Spot (Xanthomonas) or Fungal Root Rot, often appearing as black spots with tell-tale yellow halos.
Solutions
- Repot in chunky aroid mix (orchid bark, perlite, and coco coir) to improve drainage and aeration.
- Adjust watering: Allow top 2-3 inches of soil to dry completely between waterings; avoid a set schedule.
- Increase humidity to 60-80% using a humidifier or pebble tray, but ensure strong airflow to prevent secondary fungal issues.
- Move to bright, indirect light (2000-5000 lux) and protect from direct afternoon sun.
- If spots have yellow halos, prune affected leaves with sterilized shears and apply a copper-based fungicide.
Prevention
Maintain consistent moisture levels using a well-draining substrate. Water early in the day so foliage dries before peak light. Quarantine new plants for 2-4 weeks to monitor for nursery-introduced Xanthomonas.
What disease does my Anthurium have?
Fungal leaf spot diseases (Cercospora, Colletotrichum) on Anthurium appear as circular brown lesions with defined borders and sometimes yellow halos
87%
What disease does my Anthurium have?
Fungal leaf spot diseases (Cercospora, Colletotrichum) on Anthurium appear as circular brown lesions with defined borders and sometimes yellow halos
Cause
Fungal leaf spot diseases (Cercospora, Colletotrichum) on Anthurium appear as circular brown lesions with defined borders and sometimes yellow halos. These differ from physiological brown spots by their patterned appearance and tendency to spread between leaves. Infection occurs when water remains on leaf surfaces for 6+ hours in humid conditions with poor airflow, allowing fungal spores to germinate and penetrate leaf tissue. Nursery plants often carry latent infections that activate in home conditions.
Solutions
- Diagnose accurately: Circular spots with defined borders and possible concentric rings = fungal; irregular blotches = physiological
- Isolate immediately: Separate from other plants to prevent spore spread
- Remove infected tissue: Cut spotted leaves at base with sterile scissors; discard in sealed bag
- Fungicide application: Apply copper-based fungicide or neem oil covering all leaf surfaces; repeat every 7-10 days for 3-4 applications
- Environmental fix: Increase airflow with fan and reduce humidity to 60-65% temporarily
- Prevent recurrence: Resume treatment every 3-4 weeks as preventive during humid months
Prevention
Avoid overhead watering that wets foliage; water at soil level only; maintain good air circulation with fans; space plants adequately to prevent leaf contact; quarantine new plants for 21 days; remove fallen debris from pot surface; keep humidity at 60-70% (not excessive 80%+).
Anthurium: Spathe Browning
Anthurium spathes (the colorful modified leaves surrounding the spadix) naturally senesce after 4-8 weeks of display
84%
Anthurium: Spathe Browning
Anthurium spathes (the colorful modified leaves surrounding the spadix) naturally senesce after 4-8 weeks of display
Cause
Anthurium spathes (the colorful modified leaves surrounding the spadix) naturally senesce after 4-8 weeks of display. However, premature browning occurs when ethylene gas from ripening fruit, cigarette smoke, or natural aging accumulates near the flower. Additionally, bacterial infection (Xanthomonas) causes water-soaked brown lesions that spread rapidly from spathe to spadix. Environmental stress including low humidity (<50%), direct sun exposure, or cold drafts accelerates cellular breakdown in the non-photosynthetic spathe tissue.
Solutions
- Differentiate cause: Natural senescence = gradual browning starting at tip, 6+ weeks post-opening; Bacterial blight = water-soaked spots with rapid spread; Ethylene damage = sudden uniform browning
- For natural senescence: Remove spathe at base when 50%+ brown; this redirects energy to new spathe production
- For bacterial blight: Remove affected spathe immediately with sterile cut; isolate plant; apply copper-based bactericide weekly for 3 weeks
- For ethylene damage: Remove plant from source (fruit bowl, smoke); trim damaged spathe; expect new spathe in 8-12 weeks with proper care
- Support new growth: Maintain optimal conditions (70-80% humidity, 2000-4000 lux, 70-85°F) for next spathe development
Prevention
Remove spent spathes promptly to prevent ethylene accumulation; avoid placing near ripening fruit or smoke sources; maintain 60-80% humidity; position away from heating/cooling vents; provide bright indirect light only; quarantine new plants to prevent bacterial introduction.
Why are my Anthurium leaves turning yellow?
Natural senescence in Anthurium involves nutrient remobilization from older leaves to support emerging new growth
2 protocols
90–94%
Why are my Anthurium leaves turning yellow?
Natural senescence in Anthurium involves nutrient remobilization from older leaves to support emerging new growth
Protocol 1: yellow leaves · 94% confidence
Cause
Natural senescence in Anthurium involves nutrient remobilization from older leaves to support emerging new growth. The plant sacrifices the oldest, smallest bottom leaf as a normal physiological process, redirecting nitrogen, chlorophyll, and mobile nutrients to developing inflorescences and new foliage. This occurs every 4-8 weeks in healthy, actively growing specimens and is distinct from stress-induced yellowing.
Solutions
- Verify pattern: Single oldest leaf yellowing over 2-4 weeks = natural; multiple leaves or rapid yellowing = problem
- Allow completion: Let leaf fully yellow before removal to maximize nutrient recycling
- Prune properly: Snip at base once yellow/brown, using sterile scissors
- Monitor new growth: Ensure new leaves are healthy and properly sized
- Adjust expectations: Healthy Anthurium naturally sheds 1-2 oldest leaves per year
Prevention
Maintain stable growing conditions (65-80°F, 60-80% humidity, bright indirect light 2000-5000 lux) to minimize unnecessary senescence; provide balanced fertilization (20-20-20 at 1/4 strength monthly) to ensure adequate nutrient availability for both old and new growth.
Protocol 2: yellow leaves · 90% confidence
Cause
Yellow leaves in Anthurium are primary indicators of: 1) Overwatering/Hypoxia, where roots suffocate in dense soil; 2) Low Humidity (<60-70%), causing species like A. warocqueanum (Queen) to have "tantrums"; 3) Natural Senescence, where older leaves are sacrificed for new growth; and 4) Nutrient Starvation, common when plants are grown in pure orchid bark without supplemental feeding.
Solutions
- Check roots immediately: healthy roots are white/firm; mushy/black roots indicate rot needing surgery.
- Transition to clear plastic pots to monitor root health and moisture levels visually.
- Stabilize humidity at 70%+ for velvet-leaf varieties; use a hygrometer to verify levels.
- If new growth is healthy while the oldest leaf yellows, allow natural abscission (leaf drop) to recycle nutrients.
- Aerate waterlogged soil by gently poking holes with a chopstick to introduce oxygen.
Prevention
Use a soil-amended chunky aroid mix (CEC-capable) rather than pure bark. Fertilize with 1/4 strength balanced fertilizer during active growth. Maintain consistent environments to avoid shock-induced yellowing.
Diseases (2 topics · 4 cases)
What disease does my Anthurium have?
Aggressive fungal root and stem rot advancing rapidly despite initial root pruning
96%
What disease does my Anthurium have?
Aggressive fungal root and stem rot advancing rapidly despite initial root pruning
Cause
Aggressive fungal root and stem rot advancing rapidly despite initial root pruning.
Solutions
- Perform radical surgery to remove all necrosis, then do a 15-minute soak in a 1:3 hydrogen peroxide solution.
- Allow the plant to dry and callous.
- Once calloused, spray the remaining base and healthy roots with a liquid Copper Fungicide to provide a lasting protective barrier.
- Do not mix H2O2 and Copper Fungicide directly in the same liquid, as they react and neutralize. Apply sequentially with a drying phase between.
Prevention
Ensure heavy air movement via circulation fans around Anthuriums to prevent fungal spores from settling.
Why does my Anthurium have root rot?
Anthurium losing its primary root system, requiring rehab but sensitive to pure water propagation
3 protocols
90–96%
Why does my Anthurium have root rot?
Anthurium losing its primary root system, requiring rehab but sensitive to pure water propagation
Protocol 1: root rot · 96% confidence
Cause
Anthurium losing its primary root system, requiring rehab but sensitive to pure water propagation.
Solutions
- Cut away rot with a sterilized blade. Anthuriums have thick roots; look for the stringy center vascular tissue to pull away dead velamen.
- Treat with a diluted hydrogen peroxide drench (1:4 ratio) for 10 minutes.
- Pack the base of the stem and remaining healthy roots in a mix of 80% sphagnum moss and 20% coarse perlite.
- Keep the moss damp and warm. Anthuriums establish strong, fuzzy aerial roots aggressively in a moss-perlite mix.
Prevention
Use extreme chunky mixes (orchid bark, charcoal, pumice) for Anthuriums; standard potting soil suffocates their epiphytic roots quickly.
Protocol 2: root rot · 95% confidence
Cause
Root rot in Anthurium is a hydrostatic crisis caused by anaerobic conditions in compacted media (like tight Sphagnum or heavy potting soil). Shipped plants are especially prone when repotted too quickly into moisture-retentive substrates. Rotten roots appear translucent and "deflated," unlike firm healthy roots that may be dark due to soil tannins.
Solutions
- Trim all mushy, translucent tissue back to firm white matter with sterilized shears.
- Soak remaining roots and stem in a 3% Hydrogen Peroxide solution (diluted 1:4 with water) for 10 minutes to kill pathogens and oxygenate tissue.
- Prune 1-3 oldest leaves to reduce transpiration load while the root system is compromised.
- Transition to an ultra-aerated medium for recovery: LECA (semi-hydro) or Pumice/Perlite are highly effective for rerooting unrooted stems.
- If using moss for rehab, keep it loose and prick the container with air holes to prevent stagnant water pockets.
Prevention
Always wait 10-14 days before repotting new arrivals to avoid transplant shock. Use clear pots for permanent housing to catch early signs of "deflated" roots. Maintain high humidity (70%+) but prioritize strong airflow.
Protocol 3: root rot · 90% confidence
Cause
Root rot in Anthurium occurs when epiphytic aerial roots remain in waterlogged, poorly aerated soil for 7+ days. Standard potting soil retains too much moisture and compacts over time, creating anaerobic conditions that promote Pythium and Phytophthora fungal pathogens. Anthurium roots evolved for attachment to tree bark in tropical canopies, requiring constant oxygen exchange and rapid drainage—conditions incompatible with dense peat-based mixes.
Solutions
- Unpot immediately: Remove plant from container to inspect root system
- Trim rotted tissue: Cut ALL black, mushy, or foul-smelling roots with sterilized scissors
- Sterilize remaining roots: Soak in 3% hydrogen peroxide solution (1:4 with water) for 20 minutes
- Repot in dry mix: Use fresh, chunky aroid mix in appropriately sized pot
- Recovery environment: Place in bright indirect light with 70-80% humidity; withhold water for 7 days, then water sparingly
Prevention
Use aroid-specific chunky mix (50% orchid bark, 30% perlite, 20% peat/charcoal); water only when top 2-3 inches of soil are dry; ensure pot has multiple drainage holes; maintain 60-80% humidity to reduce water needs; bottom-water only when necessary to control saturation.
Pests (4 topics · 5 cases)
Why does my Anthurium have aphids?
Aphids (Aphis gossypii and Myzus persicae) colonize Anthurium andraeanum to feed on phloem sap, targeting new growth, flower spathes, and tender leaf undersides
82%
Why does my Anthurium have aphids?
Aphids (Aphis gossypii and Myzus persicae) colonize Anthurium andraeanum to feed on phloem sap, targeting new growth, flower spathes, and tender leaf undersides
Cause
Aphids (Aphis gossypii and Myzus persicae) colonize Anthurium andraeanum to feed on phloem sap, targeting new growth, flower spathes, and tender leaf undersides. These soft-bodied insects reproduce parthenogenetically, producing live young every 3-5 days, allowing populations to explode from 10 to 1000+ individuals within 3 weeks. Heavy infestations cause leaf curling, stunted growth, and honeydew secretion that promotes sooty mold growth on foliage.
Solutions
- Quarantine infested plant immediately to prevent spread to collection
- Manual removal: Wipe aphids from leaves with damp cloth or cotton swab dipped in 70% isopropyl alcohol
- Insecticidal soap treatment: Apply 2% solution (1 tsp castile soap per quart water) every 5-7 days for 3 applications, targeting leaf undersides
- Neem oil alternative: Mix 1% neem oil (2 tsp per quart water) with 0.5% liquid soap as emulsifier; apply evening to avoid leaf burn
- Systemic control (severe cases): Apply imidacloprid granules to soil per label instructions for 3-4 week residual protection
Prevention
Inspect new plants thoroughly before introducing to collection—check leaf undersides and new growth. Maintain strong airflow around plants. Avoid over-fertilizing with nitrogen which creates soft, aphid-attractive growth.
Why does my Anthurium have mealybugs?
Mealybugs are soft-bodied insects that feed on plant sap, appearing as white cottony masses in leaf axils, stem joints, and root zones
72%
Why does my Anthurium have mealybugs?
Mealybugs are soft-bodied insects that feed on plant sap, appearing as white cottony masses in leaf axils, stem joints, and root zones
Cause
Mealybugs are soft-bodied insects that feed on plant sap, appearing as white cottony masses in leaf axils, stem joints, and root zones. They excrete honeydew which attracts sooty mold. On anthuriums, they often hide in the tight spaces where leaves meet stems. Infestations weaken the plant, cause yellowing, and can lead to decline if untreated.
Solutions
- Isolate infested plant immediately
- Inspect all leaf axils, stem joints, and base of plant for white cottony masses
- Remove visible mealybugs with cotton swab dipped in rubbing alcohol
- Spray plant thoroughly with insecticidal soap, neem oil, or horticultural oil
- Apply systemic insecticide for severe infestations (follow label instructions)
- Repeat treatment every 5-7 days for 3-4 weeks to catch newly hatched insects
- Check and treat nearby plants as mealybugs spread easily
Prevention
Quarantine new plants for 2-4 weeks; inspect leaf axils and stem joints regularly; maintain good airflow; avoid over-fertilizing which attracts mealybugs; treat at first sign of infestation; keep plant stress low with proper care (healthy plants resist pests better)
What pests are on my Anthurium?
Xanthomonas phaseoli and related pathogens infect Anthurium through wounds or natural openings, causing water-soaked lesions, leaf spots, and systemic decline; strains cluster specifically within Araceae family showing host-pathogen specificity (PMID 38568984)
88%
What pests are on my Anthurium?
Xanthomonas phaseoli and related pathogens infect Anthurium through wounds or natural openings, causing water-soaked lesions, leaf spots, and systemic decline; strains cluster specifically within Araceae family showing host-pathogen specificity (PMID 38568984)
Cause
Xanthomonas phaseoli and related pathogens infect Anthurium through wounds or natural openings, causing water-soaked lesions, leaf spots, and systemic decline; strains cluster specifically within Araceae family showing host-pathogen specificity (PMID 38568984).
Solutions
- Isolate infected plant immediately to prevent spread to other aroids
- Remove and destroy all infected leaves with sterile shears; do not compost
- Apply copper-based bactericide spray (e.g., Bonide Copper Fungicide) every 7-10 days for 3-4 cycles
- Ensure excellent air circulation with small fan to reduce leaf wetness
- Avoid overhead watering; water at soil level only to prevent bacterial splash dispersal
Prevention
Quarantine new plants for 2-4 weeks; inspect regularly for water-soaked spots; maintain good air circulation; avoid wetting foliage; use sterile tools when pruning; separate Anthurium from other Araceae if infection detected.
Why does my Anthurium have spider mites?
Spider mites (Tetranychus urticae) infest Anthurium in low-humidity indoor environments (<40% RH)
2 protocols
86–90%
Why does my Anthurium have spider mites?
Spider mites (Tetranychus urticae) infest Anthurium in low-humidity indoor environments (<40% RH)
Protocol 1: spider mites · 90% confidence
Cause
Spider mites (Tetranychus urticae) infest Anthurium in low-humidity indoor environments (<40% RH). These tiny arachnids feed on leaf undersides, piercing cells and extracting sap, causing stippling, yellowing, and fine webbing. Anthurium's thin, velvety leaves show damage faster than thicker foliage. Mites reproduce rapidly in dry, warm conditions with bright indirect light.
Solutions
- Isolate infested plant immediately to prevent spread to collection
- Inspect undersides with 10x magnification—confirm tiny moving dots and fine silk webbing
- Blast leaves with strong water stream (shower) daily for 3-5 days to physically dislodge mites
- Apply neem oil or insecticidal soap thoroughly to all leaf surfaces every 3-5 days for 3 cycles—ensure undersides are coated
- Introduce predatory mites (Phytoseiulus persimilis) for biological control in severe cases
- Monitor for 2 weeks; repeat treatment if stippling reappears
Prevention
Maintain 60-80% humidity via pebble trays or humidifiers. Quarantine new plants for 2 weeks. Inspect leaf undersides weekly with magnification. Avoid over-fertilizing which promotes soft susceptible growth.
Protocol 2: spider mites · 86% confidence
Cause
Spider mites and thrips target Anthuriums due to their thin, velvety leaf texture which provides easy feeding access. Thrips (Thysanoptera) rasp leaf tissue and suck sap, causing silver stippling that appears as scattered yellow/brown spots with black frass (excrement) visible under magnification. Spider mites (Tetranychidae) colonize undersides, spinning fine webbing and causing stippled yellowing from cell destruction. Both pests exploit low-humidity environments (<60% RH) and spread rapidly in indoor conditions with poor air circulation.
Solutions
- Confirm diagnosis: Use 10x magnification on leaf undersides—thrips = slender insects + black frass; mites = tiny dots + fine webbing; both cause similar stippling
- Isolate immediately: Move affected plant away from others to prevent spread
- Mechanical removal: Shower leaves with lukewarm water to dislodge pests; wipe undersides with damp cloth daily for 1 week
- Apply treatment: Use neem oil (1 tsp per quart water + surfactant) or insecticidal soap; spray to runoff covering all leaf surfaces
- Repeat treatment: Apply every 5-7 days for 3-4 weeks to catch life cycle stages; rotate between neem and soap to prevent resistance
- Increase humidity: Boost to 70-80% RH during treatment—high humidity inhibits mite reproduction and supports plant recovery
Prevention
Quarantine new plants for 14 days; inspect weekly with 10x loupe, focusing on leaf undersides and new growth; maintain 60-80% humidity (mites thrive in dry air); improve air circulation with gentle fan; apply preventive neem oil spray monthly; isolate any plant showing early stippling immediately.
Watering Issues (4 topics · 4 cases)
How often should I water my Anthurium?
Overwatering is the most common cause of Anthurium death, causing root rot (Pythium, Phytophthora pathogens) in waterlogged soil
92%
How often should I water my Anthurium?
Overwatering is the most common cause of Anthurium death, causing root rot (Pythium, Phytophthora pathogens) in waterlogged soil
Cause
Overwatering is the most common cause of Anthurium death, causing root rot (Pythium, Phytophthora pathogens) in waterlogged soil. Anthurium roots are epiphytic and require oxygen; they rot within 7-14 days of saturated conditions. Underwatering causes wrinkled leaves and slowed growth but is less dangerous than overwatering. Water quality (fluoride, chlorine) can cause brown leaf tips.
Solutions
- Check soil moisture with finger: water only when top 1-2 inches are dry
- Use well-draining aroid mix to prevent waterlogging
- Ensure pot has drainage holes; never let sit in water
- Water thoroughly until excess drains from bottom
- Reduce watering frequency in winter (every 10-14 days vs. 7-10 days)
- Use filtered, distilled, or rainwater if tap water causes tip burn
Prevention
Choose appropriate pot size (only 1-2 inches larger than root ball), avoid moisture-retentive soils, use terra cotta pots for better aeration, and implement soil moisture meters for beginners.
Is my Anthurium overwatered?
Overwatering in Anthuriums is fundamentally about frequency rather than volume
87%
Is my Anthurium overwatered?
Overwatering in Anthuriums is fundamentally about frequency rather than volume
Cause
Overwatering in Anthuriums is fundamentally about frequency rather than volume. The epiphytic root system requires oxygen exchange between waterings. When watered too frequently (every 3-5 days in standard potting mix), anaerobic conditions develop in soil micro-pores, promoting Pythium and bacterial pathogens. Early-stage overwatering appears as translucent, deflated roots rather than mushy rot, and causes gradual leaf yellowing that mimics nutrient deficiency. The distinction is critical: overwatered plants need drying out, while underwatered plants need more frequent watering.
Solutions
- Confirm diagnosis: Check soil moisture with finger or wooden skewer—wet/moist soil with yellowing = overwatering; bone-dry soil = underwatering
- Stop watering immediately: Allow soil to dry completely; for severe cases, unpot and lay plant on paper towel for 24-48 hours to dry root ball
- Trim affected tissue: Remove yellow/mushy leaves at base; trim any visibly rotted roots (translucent, deflated) with sterile scissors
- Repot if necessary: If root rot has begun, repot in fresh dry mix; otherwise resume normal schedule after drying period
- Adjust schedule: Extend interval between waterings by 3-4 days; typical Anthurium needs water every 7-14 days depending on humidity
- Monitor recovery: New growth should appear firm and properly colored; expect 2-4 weeks for adjustment to new schedule
Prevention
Use well-draining aroid mix (50% bark, 30% perlite, 20% peat); allow top 2-3cm of soil to dry completely between waterings; water thoroughly until drainage when dry; maintain 60-80% humidity to reduce transpiration stress; use clear pots to visually monitor root zone moisture without disturbing plant.
How often should I water my Anthurium?
Anthuriums are epiphytic aroids with aerial roots adapted to periodic drying cycles in their native tropical habitat
90%
How often should I water my Anthurium?
Anthuriums are epiphytic aroids with aerial roots adapted to periodic drying cycles in their native tropical habitat
Cause
Anthuriums are epiphytic aroids with aerial roots adapted to periodic drying cycles in their native tropical habitat. Prolonged soil saturation (>7 days) creates anaerobic conditions that promote root rot pathogens (Phytophthora, Pythium). Excess soil moisture also causes edema—cellular water uptake exceeding transpiration capacity, resulting in translucent leaf spots that necrose into dry patches. Community data indicates overwatering is the most common cause of yellowing leaves, leaf drop, and plant decline.
Solutions
- Insert finger 2 inches into soil; water only when dry at this depth, typically every 7-14 days depending on season and pot size
- Water thoroughly until excess drains from bottom; never let pot sit in standing water
- Use pots with drainage holes; avoid decorative cache pots without drainage
- Employ 'dry out' technique: let soil become lightweight and pull slightly from pot edges between waterings
Prevention
Use fast-draining aroid mix with perlite and bark. Water in morning so excess moisture evaporates before evening. Adjust frequency seasonally: every 7-10 days in active growth (spring-summer), every 14-21 days in dormancy (fall-winter). Consider moisture meter for precision.
How often should I water my Anthurium?
Anthurium andraeanum requires consistently moist but never waterlogged soil; epiphytic roots need oxygenation and will rot in standing water, yet dry spells trigger dormancy and leaf drop—striking a balance requires monitoring top 2-3cm soil moisture rather than calendar scheduling
88%
How often should I water my Anthurium?
Anthurium andraeanum requires consistently moist but never waterlogged soil; epiphytic roots need oxygenation and will rot in standing water, yet dry spells trigger dormancy and leaf drop—striking a balance requires monitoring top 2-3cm soil moisture rather than calendar scheduling
Cause
Anthurium andraeanum requires consistently moist but never waterlogged soil; epiphytic roots need oxygenation and will rot in standing water, yet dry spells trigger dormancy and leaf drop—striking a balance requires monitoring top 2-3cm soil moisture rather than calendar scheduling.
Solutions
- Water when top 2-3cm of soil feels dry to touch, typically every 5-7 days in growing season
- Use room-temperature filtered or rainwater; cold water causes root shock
- Water thoroughly until drainage holes release water; never leave standing in saucer
- Reduce frequency to every 10-14 days in winter when growth slows
- For chronic overwaterers: switch to semi-hydroponic (LECA) culture
Prevention
Use well-draining aroid mix; ensure drainage holes; lift pot to check weight—light pot needs water, heavy pot wait; maintain 60%+ humidity to extend soil moisture without saturation. Install moisture meter for beginners. PMC 0.88, Community 0.85.
Environment (2 topics · 7 cases)
Is my Anthurium suffering from cold damage?
Anthuriums are strictly tropical (USDA zones 10-12) with optimal range of 65-80°F
2 protocols
88–90%
Is my Anthurium suffering from cold damage?
Anthuriums are strictly tropical (USDA zones 10-12) with optimal range of 65-80°F
Protocol 1: cold damage · 90% confidence
Cause
Anthuriums are strictly tropical (USDA zones 10-12) with optimal range of 65-80°F. When temperatures drop below 55°F, cellular metabolism slows dramatically. At 45-50°F, cell membranes lose fluidity causing chilling injury—water-soaked lesions on leaves that later turn brown. Cold damage often occurs during winter shipping, near drafty windows, or when placed near air conditioning vents. Unlike sunburn (crispy brown), cold damage is soft and wet initially.
Solutions
- Immediate warming: Move to stable 70°F+ location away from drafts
- Assess damage extent: Water-soaked or translucent patches = chilling injury
- Remove severely damaged tissue: Trim soft/brown leaves with sterile scissors
- Do NOT water: Cold-damaged roots cannot absorb water—overwatering causes rot
- Wait for recovery: New growth indicates successful recovery; may take 4-6 weeks
- Consider heat mat: Place pot on heating mat set to 75°F to accelerate root metabolism
- Monitor closely: Watch for secondary fungal infections on damaged tissue
Prevention
Maintain 65-80°F year-round; never place near exterior doors or drafty windows in winter; avoid air conditioning vents in summer; use heat mats (set to 75°F) for winter growing; insulate pots with terracotta or place on foam board if near cold surfaces; delay winter shipping purchases to spring.
Protocol 2: cold damage · 88% confidence
Cause
Cold damage in Anthurium occurs when tropical plants adapted to 18-27°C (65-80°F) are exposed to temperatures below 10°C (50°F). Cellular membranes rupture below this threshold, causing water to leak from cells and creating brown, necrotic tissue. Symptoms include leaf wilting, browning edges, flower drop, and in severe cases (<0°C), complete tissue collapse. Unlike root rot, cold damage shows uniform tip/edge necrosis without mushy roots or foul odor.
Solutions
- Inspect damage: Cold damage shows as brown, firm tissue (not mushy like root rot)
- Immediately relocate to warm location (21-27°C/70-80°F) with bright indirect light
- Prune all brown/necrotic leaves and spent flowers with sterile shears to redirect energy
- Check roots for secondary rot: unpot if soil is soggy, trim black roots, repot in fresh dry mix
- Withhold fertilizer until new growth emerges (4-6 weeks)—cold-stressed roots cannot process nutrients
- Maintain 60-80% humidity via pebble tray or humidifier to reduce transpiration stress
- Monitor for pests (spider mites thrive on stressed plants) and provide gentle airflow
Prevention
Maintain minimum 15°C (60°F) year-round. Position away from drafty windows, air conditioning vents, and doors during winter. Use heat mats or grow lights to maintain tropical temperatures in cooler climates.
Does my Anthurium need more humidity?
Ambient humidity below 40% triggers stomatal closure and reduced transpiration in Anthurium andraeanum, stunting growth and causing leaf edge necrosis; research shows aerial roots outperform soil roots in nitrogen uptake when humidity exceeds 60% (PMID 36786325)
5 protocols
86–93%
Does my Anthurium need more humidity?
Ambient humidity below 40% triggers stomatal closure and reduced transpiration in Anthurium andraeanum, stunting growth and causing leaf edge necrosis; research shows aerial roots outperform soil roots in nitrogen uptake when humidity exceeds 60% (PMID 36786325)
Protocol 1: low humidity · 93% confidence
Cause
Ambient humidity below 40% triggers stomatal closure and reduced transpiration in Anthurium andraeanum, stunting growth and causing leaf edge necrosis; research shows aerial roots outperform soil roots in nitrogen uptake when humidity exceeds 60% (PMID 36786325).
Solutions
- Maintain 60-80% relative humidity using humidifier, pebble trays, or plant grouping
- Monitor with digital hygrometer; relocate to bathroom with bright indirect light if home humidity is chronically low
- Mist foliage ONLY during new leaf emergence to prevent desiccation; avoid misting established leaves to prevent fungal infection
- Group with other tropical plants to create transpiration microclimate
- Use room-temperature filtered water for any leaf contact
Prevention
Install hygrometer for continuous monitoring; maintain consistent 60%+ humidity year-round; avoid drafty locations; increase humidity before visible stress appears, especially during heating season when indoor air becomes desiccated.
Protocol 2: humidity · 92% confidence
Cause
Anthuriums are tropical epiphytes that demand 60-80% Relative Humidity (RH). Low humidity causes stomatal closure and edge necrosis, particularly during the critical "unfurling" stage of new leaves. Misting is a common but ineffective "solution" that fosters fungal pathogens (Colletotrichum) and leaves unsightly mineral deposits on the waxy foliage.
Solutions
- Deploy a dedicated humidifier to maintain stable RH levels between 65-75%; avoid placing directly in the path of the mist.
- For greenhouse cabinets with high RH (>85%), install small oscillating fans to prevent "Stagnant Air Syndrome" and bacterial rot.
- Stop misting leaves; instead, group plants together or use pebble trays for localized passive humidity boosts.
- Use a hygrometer to benchmark your environment; acclimate plants gradually if indoor RH is below 40%.
- If leaves fail to unfurl due to dry air, gently wrap them in a damp paper towel or use a localized humidifier surge.
Prevention
Monitor growth cycles; high humidity is most vital when new spathes or leaves emerge. Use distilled or rainwater for any leaf contact to avoid mineral buildup. Select species based on your baseline humidity (e.g., A. pallidiflorum is more tolerant than A. warocqueanum).
Protocol 3: humidity · 90% confidence
Cause
Anthuriums are tropical epiphytes requiring 60-80% relative humidity (RH) for optimal transpiration. When ambient humidity drops below 40%, the plant cannot maintain cellular turgor. Marginal and tip tissues—furthest from vascular supply—desiccate first, appearing as crispy brown edges. This differs from sunburn (patches on exposed surfaces) and root rot (soft tissue). Low humidity also stunts new leaf emergence, causing them to unfurl deformed or prematurely abort.
Solutions
- Measure current RH: Use hygrometer—target 60-80%, minimum 50%
- Stop misting: Misting provides only 15-30 minutes of elevated humidity and promotes fungal issues
- Deploy humidifier: Small unit near Anthurium set to 60% RH
- Create microclimate: Group with other tropicals; place on pebble tray with water
- Trim crispy edges: Remove dried tissue for aesthetics; cannot reverse damage
- Monitor new growth: Proper humidity enables smooth, unblemished leaf unfurling
Prevention
Maintain 60%+ RH year-round; use humidifiers rather than misting; group plants to create microclimate via transpiration; position in bathrooms or kitchens where humidity naturally higher; use pebble trays with water (elevated above waterline); avoid placement near heating vents or air conditioners.
Protocol 4: humidity for flowering · 89% confidence
Cause
Anthurium spathe development requires 60-80% relative humidity for optimal cell expansion during the unfurling phase. Low humidity (<40% RH) induces vapor pressure deficit stress causing stomatal closure, reduced transpiration, and premature spathe abortion. The velamen roots and aerial roots require ambient moisture for proper nutrient transport to developing inflorescences.
Solutions
- Maintain 60-80% RH using humidifier, pebble trays, or plant grouping
- Mist only during new spathe emergence—avoid leaf wetness once open to prevent fungal infection
- Use hygrometer at plant level to verify humidity—not ambient room readings
- Group with other tropicals to create transpiration microclimate
- Increase humidity 2 weeks before expected bloom cycle (typically spring/fall)
Prevention
Install permanent hygrometer monitoring with smart humidifier automation set to 70% RH threshold. Maintain consistent humidity year-round to prevent stress-induced dormancy.
Protocol 5: low humidity · 86% confidence
Cause
Low humidity stress in Anthurium (below 50%) causes irreversible tip burn and marginal necrosis on leaves. The thin, non-succulent foliage lacks water storage tissue and depends entirely on constant atmospheric moisture to maintain turgor pressure. When ambient humidity drops, leaf margins desiccate first, creating brown crispy edges that cannot recover even after humidity is restored. This is common in heated indoor environments during winter months.
Solutions
- Assess damage: Brown crispy leaf tips and edges indicate humidity deficit; soft brown spots indicate other issues
- Immediate humidity boost: Place plant in bathroom during daily hot showers for 10-15 minutes
- Install humidifier: Position within 3-5 feet of plant; run 6-8 hours daily to maintain 60-70% RH
- Group plants: Create microclimate by clustering multiple humidity-loving plants together
- Trim damage: Use sterile scissors to remove crispy edges for aesthetics; damage is permanent but trimming prevents further desiccation spread
Prevention
Maintain minimum 60% humidity year-round using humidifiers, pebble trays, or plant grouping; place humidity-loving plants in bathrooms with showers; avoid positioning near heating vents or radiators; use humidity trays filled with water and pebbles beneath plants.
Propagation (1 topics · 2 cases)
How do I propagate my Anthurium?
Water propagation of Anthurium cuttings often fails due to the plant's epiphytic root adaptations
2 protocols
82–89%
How do I propagate my Anthurium?
Water propagation of Anthurium cuttings often fails due to the plant's epiphytic root adaptations
Protocol 1: water propagation · 89% confidence
Cause
Water propagation of Anthurium cuttings often fails due to the plant's epiphytic root adaptations. Unlike terrestrial plants, Anthurium aerial roots are not adapted to prolonged submersion and rapidly develop anaerobic bacterial infections (Pythium, Erwinia) in stagnant water. The thick cut tissue releases nutrients that fuel bacterial growth, while the lack of oxygen transfer creates perfect conditions for rot. Water roots that do develop are structurally different from soil roots and often fail to transition.
Solutions
- Avoid water propagation: Use sphagnum moss, perlite, or chunky aroid mix instead
- If already in water: Inspect for slime, cloudiness, or foul odor—all indicate bacterial growth
- Sterilize container: Use hydrogen peroxide rinse on propagation vessel before use
- Water quality: Use dechlorinated or distilled water changed every 2-3 days maximum
- Rapid transition: Move to soil/moss immediately when roots appear; do not allow water roots to grow long
- Recovery from failed water prop: If rot occurs, trim all affected tissue, callus 48 hours, restart in moss
Prevention
Use soil or moss propagation instead of water for Anthurium; if water rooting is attempted, use sterile containers, change water every 2-3 days with room-temperature dechlorinated water, and transition to soil immediately when roots reach 1 inch. Callus cuttings for 48 hours before any propagation method.
Protocol 2: water propagation failure · 82% confidence
Cause
Water propagation of Anthurium stem cuttings often fails due to the epiphytic root system's intolerance of prolonged submersion. While roots form initially, extended water culture (>3-4 weeks) causes anaerobic bacterial colonization (Pythium, Erwinia) that rots nascent root tissue. The succulent stem tissue also releases sugars into water, promoting biofilm formation and rapid pathogen proliferation. Unlike Pothos or Philodendron which root readily in water, Anthuriums require soilless substrates that provide both moisture AND oxygen.
Solutions
- Assess current state: Healthy white roots = proceed to soil immediately; brown/mushy roots = rot has begun, trim and switch medium
- For healthy water roots: Transition to moist sphagnum moss or well-draining aroid mix within 24 hours; do not leave in water long-term
- For rotting roots: Trim all brown/mushy tissue back to firm white; treat cut with cinnamon powder or hydrogen peroxide; repot in fresh dry mix
- Use proper medium: Sphagnum moss (lightly moist, not wet) provides ideal oxygen + moisture balance; perlite works for advanced growers
- Provide humidity: Maintain 70-80% RH during rooting phase to reduce transpiration stress on developing root system
- Expect timeline: New roots emerge in 4-6 weeks in proper medium; water propagation adds 2-3 weeks but increases rot risk significantly
Prevention
Avoid water propagation when possible; use sphagnum moss, perlite, or LECA instead; if using water, change every 3-4 days with dechlorinated water; transition to soil immediately when roots reach 0.5-1 inch; sterilize containers with hydrogen peroxide between uses; propagate only from healthy parent plants with firm, non-yellowing tissue.
Care Methods (4 topics · 4 cases)
Anthurium Care: Anthurium Guide
Anthurium species are tropical epiphytes (growing on trees in native habitats) with specific cultural requirements that differ from typical houseplants
88%
Anthurium Care: Anthurium Guide
Anthurium species are tropical epiphytes (growing on trees in native habitats) with specific cultural requirements that differ from typical houseplants
Cause
Anthurium species are tropical epiphytes (growing on trees in native habitats) with specific cultural requirements that differ from typical houseplants. They require high humidity (60-80%), bright indirect light (2000-5000 lux), well-draining aroid mix (orchid bark, perlite, peat), and consistent moisture without waterlogging. Root rot from poor drainage is the #1 killer, while low humidity causes crispy leaf edges and stunted growth.
Solutions
- Use well-draining aroid mix: 50% orchid bark, 30% perlite/pumice, 20% peat or coco coir
- Water when top 1-2 inches of soil dry (finger test); never let sit in water
- Maintain 60-80% humidity via humidifier, pebble tray, or grouping plants
- Provide bright indirect light (east/west windows); avoid direct sun which burns leaves
- Keep temperatures 65-85°F; protect from cold drafts below 50°F
- Fertilize monthly during growing season with diluted balanced fertilizer (1/4 strength)
Prevention
Choose appropriate pot size (slightly root-bound is better than oversized), use pots with drainage holes, maintain consistent environmental conditions, quarantine new plants, and avoid misting leaves which causes fungal issues and mineral deposits.
Care Requirements: Anthurium Guide
Anthuriums are epiphytic aroids native to Neotropical forest understories, requiring specific conditions mimicking their natural habitat: well-aerated root systems adapted to attach to trees rather than dense soil, high humidity (60-80%), bright indirect light filtering through canopy layers, and consistent but not excessive moisture
90%
Care Requirements: Anthurium Guide
Anthuriums are epiphytic aroids native to Neotropical forest understories, requiring specific conditions mimicking their natural habitat: well-aerated root systems adapted to attach to trees rather than dense soil, high humidity (60-80%), bright indirect light filtering through canopy layers, and consistent but not excessive moisture
Cause
Anthuriums are epiphytic aroids native to Neotropical forest understories, requiring specific conditions mimicking their natural habitat: well-aerated root systems adapted to attach to trees rather than dense soil, high humidity (60-80%), bright indirect light filtering through canopy layers, and consistent but not excessive moisture. Deviations from these epiphytic adaptations trigger stress responses including root rot, leaf yellowing, and failure to thrive.
Solutions
- Use chunky aroid potting mix: 50% orchid bark (1/4-1/2 inch pieces), 30% perlite, 20% potting soil or coco coir for drainage and aeration
- Maintain 60-80% relative humidity via humidifier, pebble tray, or grouping plants; avoid direct misting on velutinous (velvety) leaf varieties
- Water when top 2 inches of soil are dry; bottom-water to avoid wetting foliage; reduce frequency in winter dormancy
- Fertilize monthly during active growth with balanced liquid fertilizer (20-20-20) at 1/4 strength to prevent nutrient deficiencies in soil-less mixes
Prevention
Never use dense potting soil alone; always amend with bark and perlite. Avoid placing in direct sunlight or drafty locations. Repot every 1-2 years in spring to refresh medium and inspect roots. Quarantine new plants for 2 weeks to prevent pest/disease introduction.
Why isn't my Anthurium flowering?
Anthurium andraeanum (Flamingo Flower/Laceleaf) has specific care needs distinct from other Anthurium species
89%
Why isn't my Anthurium flowering?
Anthurium andraeanum (Flamingo Flower/Laceleaf) has specific care needs distinct from other Anthurium species
Cause
Anthurium andraeanum (Flamingo Flower/Laceleaf) has specific care needs distinct from other Anthurium species. It requires consistent moisture (epiphytic roots must never dry completely), high humidity (70-80% ideal), bright indirect light, and protection from temperature extremes. Flower longevity is affected by ethylene gas, drafts, and underwatering which causes spathe browning.
Solutions
- Maintain soil consistently moist but never soggy - check top inch every 3-4 days
- Provide 70-80% humidity for optimal flowering and leaf health
- Keep in bright indirect light; east-facing windows ideal
- Maintain 65-80°F temperatures; avoid cold drafts and heating vents
- Remove spent flowers at base to encourage new blooms
- Use balanced fertilizer at 1/4 strength monthly during growing season
- Repot every 2 years using orchid bark-based aroid mix
Prevention
Protect from temperature fluctuations, avoid overwatering in winter when growth slows, ensure good air circulation to prevent fungal issues on flowers, and monitor for pests (thrips, spider mites) which damage flowers.
Spathe Care: Anthurium Guide
Anthurium spathe senescence accelerates when exposed to direct sunlight (causing photo-oxidation of anthocyanins), temperatures below 60°F (triggering chilling injury), or ethylene exposure from ripening fruit—degrading the AaMYB2-regulated pigment pathways (PMID 27424029)
90%
Spathe Care: Anthurium Guide
Anthurium spathe senescence accelerates when exposed to direct sunlight (causing photo-oxidation of anthocyanins), temperatures below 60°F (triggering chilling injury), or ethylene exposure from ripening fruit—degrading the AaMYB2-regulated pigment pathways (PMID 27424029)
Cause
Anthurium spathe senescence accelerates when exposed to direct sunlight (causing photo-oxidation of anthocyanins), temperatures below 60°F (triggering chilling injury), or ethylene exposure from ripening fruit—degrading the AaMYB2-regulated pigment pathways (PMID 27424029).
Solutions
- Keep spathes in bright indirect light; never direct sun which causes color fading within 24-48 hours
- Maintain 65-75°F temperature range; relocate away from AC vents and cold drafts
- Remove spent spathes by cutting at the base with sterile shears to redirect energy
- Avoid placing near ethylene-producing fruits (apples, bananas) in kitchen areas
- Mist spathes only with distilled water to prevent mineral deposits that block light absorption
Prevention
Position in stable environment away from direct sun and temperature fluctuations; practice regular deadheading; maintain consistent humidity 60-80% without wetting spathe surfaces to prevent fungal spotting.
Maintenance (3 topics · 4 cases)
Why isn't my Anthurium flowering?
Continuous flowering depletes phosphorus reserves needed for spathe development and spadix formation
91%
Why isn't my Anthurium flowering?
Continuous flowering depletes phosphorus reserves needed for spathe development and spadix formation
Cause
Continuous flowering depletes phosphorus reserves needed for spathe development and spadix formation. Research-backed aroid-specific fertilizers (MSU formulation) with micronutrients support the genetic floral trait pathways including CER3, KCS1, and KCS3 wax biosynthesis regulators critical for spathe longevity.
Solutions
- Apply aroid-specific fertilizer (20-20-20 NPK or MSU formulation) at 1/4 strength every 2 weeks during active flowering
- Add cal-mag supplement monthly to prevent blossom end rot in developing spathes
- Incorporate beneficial bacteria (Bacillus amyloliquefaciens) to enhance nutrient uptake efficiency
- Switch to bloom booster formula (10-30-20 NPK) when spathe count drops
- Flush soil monthly with plain water to prevent salt accumulation that inhibits flowering
Prevention
Maintain consistent biweekly feeding schedule year-round with aroid-specific fertilizer. Monitor for phosphorus deficiency signs (reduced spathe count, smaller blooms) and adjust formulation accordingly.
Does my Anthurium have a nutrient deficiency?
Anthuriums in pure orchid bark or coco coir mixes suffer nutrient deficiency due to low cation exchange capacity (CEC) of these epiphytic substrates
2 protocols
79–85%
Does my Anthurium have a nutrient deficiency?
Anthuriums in pure orchid bark or coco coir mixes suffer nutrient deficiency due to low cation exchange capacity (CEC) of these epiphytic substrates
Protocol 1: nutrient deficiency · 85% confidence
Cause
Anthuriums in pure orchid bark or coco coir mixes suffer nutrient deficiency due to low cation exchange capacity (CEC) of these epiphytic substrates. While Anthuriums are epiphytes, cultivated specimens require organic matter for sustained nitrogen, phosphorus, and potassium availability. Nitrogen deficiency appears as generalized yellowing; phosphorus deficiency reduces blooming; potassium deficiency causes marginal necrosis. Bark-only mixes lack microbial activity to mineralize nutrients, starving the plant despite regular fertilization.
Solutions
- Confirm diagnosis: Yellowing throughout plant + thin/sparse new growth + reduced blooming despite adequate light/humidity = nutrient deficiency
- Repot in amended mix: Combine 50% potting soil (nutrient base) + 30% orchid bark (aeration) + 20% perlite (drainage)
- Begin fertilization: Apply 1/4 strength balanced liquid fertilizer (20-20-20 or aroid-specific) every 2-3 weeks during growing season
- Flush salts: Run 3x pot volume of distilled water through soil to remove accumulated fertilizer salts before new regimen
- Monitor recovery: New growth should emerge darker green and more vigorous within 4-6 weeks; expect 8-12 weeks for full recovery
Prevention
Use balanced aroid mix: 50% quality potting soil, 30% orchid bark, 20% perlite; fertilize with balanced 20-20-20 at 1/4 strength monthly during active growth; flush soil quarterly with distilled water to prevent salt buildup; maintain 60-80% humidity to support nutrient uptake via transpiration.
Protocol 2: nutrient deficiency · 79% confidence
Cause
Anthuriums grown in bark-heavy or soilless mixes lack access to soil nutrients. Pure orchid bark or sphagnum has minimal nutrients. Deficiency symptoms include: yellowing leaves with green veins (iron), stunted new growth (nitrogen), brown leaf edges combined with yellowing (potassium), and overall pale coloration. Over-fertilizing causes salt buildup and fertilizer burn, showing as brown tips.
Solutions
- Use a balanced liquid fertilizer (20-20-20 or aroid-specific) at half strength
- Apply every 2-4 weeks during active growing season (spring/summer)
- Skip fertilizing in fall/winter when growth slows
- For pure bark/sphagnum mixes: fertilize at every watering at 1/4 strength
- Apply micronutrient supplement if yellowing persists (iron, magnesium)
- Flush soil with plain water monthly to prevent salt buildup
- If fertilizer burn is suspected: flush soil thoroughly with 3x pot volume of water
- Resume fertilizing only when new healthy growth appears
Prevention
Use a soil-amended mix for long-term growth; maintain regular light fertilization schedule; flush salts monthly; use organic slow-release fertilizers for steady nutrient supply; adjust fertilizer strength to growth rate; monitor leaf color for early deficiency signs
When should I repot my Anthurium?
Anthuriums have delicate, fine root systems that are easily damaged during repotting
76%
When should I repot my Anthurium?
Anthuriums have delicate, fine root systems that are easily damaged during repotting
Cause
Anthuriums have delicate, fine root systems that are easily damaged during repotting. Transplant shock occurs when roots are disturbed, broken, or exposed to air for extended periods. Symptoms include wilting, yellowing, stunted growth, or leaf drop in the days following repotting. The plant redirects energy to root repair rather than maintaining foliage.
Solutions
- Water plant 1-2 days before repotting to hydrate roots (not soggy)
- Gently loosen root ball without tearing roots - anthurium roots are fragile
- Use fresh, similar-texture mix to minimize adjustment period
- Repot to similar-size pot or only 1-2 inches larger
- Water thoroughly after repotting to settle soil and remove air pockets
- Place in bright indirect light with high humidity (70%+)
- Avoid fertilizing for 4-6 weeks to prevent root burn
- Do not move or disturb the plant during recovery
- Expect 2-4 weeks for visible recovery and new growth
Prevention
Repot only when necessary (root-bound or soil degraded); choose appropriate pot size (snug fit); use gentle handling techniques; repot during active growing season (spring/summer); maintain high humidity post-repot; avoid repotting stressed or flowering plants; use clear pots for easier monitoring without disturbance
Other Topics (27 topics · 28 cases)
Anthurium: Acclimation Shock
Anthuriums undergo significant stress when moved from greenhouse conditions (high humidity, stable temperature, consistent light) to home environments (variable humidity 30-60%, temperature fluctuations, different light spectrum)
88%
Anthurium: Acclimation Shock
Anthuriums undergo significant stress when moved from greenhouse conditions (high humidity, stable temperature, consistent light) to home environments (variable humidity 30-60%, temperature fluctuations, different light spectrum)
Cause
Anthuriums undergo significant stress when moved from greenhouse conditions (high humidity, stable temperature, consistent light) to home environments (variable humidity 30-60%, temperature fluctuations, different light spectrum). This environmental shock triggers leaf abscission hormones and can cause existing leaves to yellow, new leaves to deform, and overall growth stall as the plant redirects energy to survival mechanisms rather than expansion.
Solutions
- Immediate stabilization: Place in bright indirect light; maintain 70%+ humidity
- Do NOT repot: Wait minimum 4-6 weeks after arrival—root disturbance compounds shock
- No fertilizer: Withhold feeding for 4-8 weeks until new growth appears
- Humidity dome: Clear plastic bag or cloche for first 2 weeks minimum
- Monitor don't act: Resist urge to 'fix'—observation is key during acclimation
- Expect leaf loss: Lower leaves may yellow and drop—normal if new growth emerges
- Success indicator: New leaf unfurling normally = acclimation successful
- Timeline: Full acclimation takes 4-8 weeks depending on environmental difference magnitude
Prevention
Quarantine new plants in controlled environment for 14 days; match light conditions as closely as possible to previous environment; maintain humidity dome for first month; avoid multiple simultaneous changes (light + repot + fertilize); gradual acclimation over 21 days; research cultivar-specific needs before purchase.
How much light does my Anthurium need?
Anthurium species are tropical understory plants requiring bright indirect light
90%
How much light does my Anthurium need?
Anthurium species are tropical understory plants requiring bright indirect light
Cause
Anthurium species are tropical understory plants requiring bright indirect light. Direct sunlight causes sunburn (bleached or brown crispy patches), especially on variegated or velvety-leaf varieties. Insufficient light causes leggy growth, smaller leaves, and failure to flower. Anthuriums cannot tolerate low-light conditions long-term despite surviving short periods.
Solutions
- Provide bright indirect light: 2000-5000 lux (measured with light meter)
- East-facing windows are ideal (gentle morning sun)
- West-facing acceptable with sheer curtain protection from harsh afternoon sun
- North-facing only if supplemented with grow lights (2000-3000 lux)
- South-facing requires 3-6 feet back from window or heavy sheer curtains
- Rotate plant 90° weekly for even growth
Prevention
Acclimate plants gradually when moving to new light conditions (increase 1 hour daily over 2 weeks), use light meters to verify adequacy, and understand that variegated varieties need more protection than solid green ones.
Why isn't my Anthurium flowering?
Anthurium flowering is triggered by optimal environmental conditions including adequate light, proper nutrition, and stable humidity
87%
Why isn't my Anthurium flowering?
Anthurium flowering is triggered by optimal environmental conditions including adequate light, proper nutrition, and stable humidity
Cause
Anthurium flowering is triggered by optimal environmental conditions including adequate light, proper nutrition, and stable humidity. Declining or failed blooming typically results from insufficient light, nutrient depletion in aging soil, low humidity causing bud abortion, or stress from root problems. Aerial root health is crucial for nutrient uptake supporting flower production.
Solutions
- Ensure bright indirect light (2000-4000 lux) - insufficient light is the #1 reason for no flowers
- Maintain consistent 60-80% humidity to prevent bud drop and support spathe development
- Fertilize with phosphorus-rich fertilizer (e.g., bloom booster 10-30-20) during flowering season
- Prune old/yellowing leaves to redirect energy to flower production
- Allow plant to become slightly root-bound which can trigger flowering
- Check for pests (thrips, spider mites) which damage developing buds and flowers
Prevention
Repot every 2-3 years in fresh aroid mix to prevent nutrient depletion, maintain consistent care year-round without seasonal neglect, ensure proper air circulation to prevent fungal issues on flowers, and monitor humidity levels especially during dry winter months.
Why isn't my Anthurium flowering?
Insufficient light intensity below 1500 lux triggers Anthurium andraeanum to enter vegetative dormancy rather than reproductive phase; flowering requires consistent bright indirect light (1500-35000 lux) to activate photoperiodic genes including AaMYB2 that regulate spathe anthocyanin accumulation (PMID 27424029)
92%
Why isn't my Anthurium flowering?
Insufficient light intensity below 1500 lux triggers Anthurium andraeanum to enter vegetative dormancy rather than reproductive phase; flowering requires consistent bright indirect light (1500-35000 lux) to activate photoperiodic genes including AaMYB2 that regulate spathe anthocyanin accumulation (PMID 27424029)
Cause
Insufficient light intensity below 1500 lux triggers Anthurium andraeanum to enter vegetative dormancy rather than reproductive phase; flowering requires consistent bright indirect light (1500-35000 lux) to activate photoperiodic genes including AaMYB2 that regulate spathe anthocyanin accumulation (PMID 27424029).
Solutions
- Position plant in east-facing window receiving 4-6 hours of bright indirect light (1500-8000 lux)
- Use supplemental LED grow light (full spectrum, 12-14 hours daily) if natural light is inadequate
- Maintain consistent 65-75°F temperature during flowering season
- Apply balanced liquid fertilizer (20-20-20 at half strength) every 4 weeks during spring-fall growing season
- Ensure humidity remains above 60% to prevent bud abortion from transpiration stress
Prevention
Provide bright indirect light year-round; avoid sudden light reduction after purchase; maintain stable temperatures above 60°F; fertilize monthly during active growth to support sustained blooming cycles.
Anthurium: Bud Abortion
Anthurium spathes (the showy 'flowers') are actually modified leaves that house the true flowers on the spadix
91%
Anthurium: Bud Abortion
Anthurium spathes (the showy 'flowers') are actually modified leaves that house the true flowers on the spadix
Cause
Anthurium spathes (the showy 'flowers') are actually modified leaves that house the true flowers on the spadix. Developing spathes require immense resources—water, nutrients, and metabolic energy. When humidity drops below 50% or the plant experiences root stress, it aborts reproduction to prioritize survival. The spathe dries while still furled inside the cataphyll, never opening, as the plant reabsorbs nutrients from the dying structure.
Solutions
- Confirm aborted spathe: Dried brown structure inside cataphyll that never unfurled
- Check humidity: Use hygrometer—levels below 50% during bud formation cause abortion
- Inspect roots: Gently unpot—healthy roots are white/firm; mushy roots indicate rot causing resource shortage
- Increase humidity immediately: Deploy humidifier targeting 65-70% RH
- Prune aborted spathe: Remove at base to redirect energy to next flowering attempt
- Optimize nutrition: Apply diluted fertilizer (20-20-20 at 1/4 strength) once plant stabilizes
- Monitor next flowering cycle: Proper conditions should enable successful spathe development
Prevention
Maintain 60-80% RH consistently during flowering season (spring-fall); ensure well-draining but moisture-retentive soil; fertilize monthly with diluted balanced formula (1/4 strength) during active growth; avoid repotting during bud formation; group plants to increase local humidity through transpiration.
Anthurium: Common Problems
Anthurium issues cluster into five primary categories: (1) Water-related—overwatering causes root rot and edema, underwatering causes crispy edges; (2) Environmental—low humidity (<60%) causes tip burn and marginal necrosis, temperature extremes stress the plant; (3) Pest-related—thrips and spider mites cause stippling and yellow spots; (4) Nutritional—soil-less orchid bark mixes lack nutrients causing chlorosis; (5) Pathogenic—bacterial blight (Xanthomonas phaseoli pv
90%
Anthurium: Common Problems
Anthurium issues cluster into five primary categories: (1) Water-related—overwatering causes root rot and edema, underwatering causes crispy edges; (2) Environmental—low humidity (<60%) causes tip burn and marginal necrosis, temperature extremes stress the plant; (3) Pest-related—thrips and spider mites cause stippling and yellow spots; (4) Nutritional—soil-less orchid bark mixes lack nutrients causing chlorosis; (5) Pathogenic—bacterial blight (Xanthomonas phaseoli pv
Cause
Anthurium issues cluster into five primary categories: (1) Water-related—overwatering causes root rot and edema, underwatering causes crispy edges; (2) Environmental—low humidity (<60%) causes tip burn and marginal necrosis, temperature extremes stress the plant; (3) Pest-related—thrips and spider mites cause stippling and yellow spots; (4) Nutritional—soil-less orchid bark mixes lack nutrients causing chlorosis; (5) Pathogenic—bacterial blight (Xanthomonas phaseoli pv. dieffenbachiae) causes water-soaked spots and rapid decline.
Solutions
- Yellow leaves: Check soil moisture; if soggy, withhold water and inspect roots for rot; trim affected roots and repot in fresh mix
- Brown spots: Inspect for yellow halos (fungal root rot) vs. translucent center (edema from overwatering) vs. water-soaked appearance (bacterial blight)
- Dry leaf edges: Increase humidity to 60-80% via humidifier or pebble tray; maintain stable temperature 65-80°F
- Pest damage: Magnify undersides of leaves for thrips; treat with neem oil or insecticidal soap weekly for 2-3 weeks
- Nutrient deficiency: Apply balanced fertilizer (20-20-20) at 1/4 strength monthly during growing season
Prevention
Quarantine new plants for 2 weeks. Inspect weekly for pests. Maintain consistent watering schedule with soil dryness checks. Ensure 60-80% humidity and bright indirect light. Use well-draining aroid mix and repot annually to refresh medium.
Why isn't my Anthurium flowering?
Anthurium andraeanum requires stable bright indirect light (2000-4000 foot-candles) to maintain continuous flowering cycles
90%
Why isn't my Anthurium flowering?
Anthurium andraeanum requires stable bright indirect light (2000-4000 foot-candles) to maintain continuous flowering cycles
Cause
Anthurium andraeanum requires stable bright indirect light (2000-4000 foot-candles) to maintain continuous flowering cycles. Inconsistent light exposure disrupts photoperiodic signaling through phytochrome pathways, causing the plant to enter vegetative rest phases. The spathe coloration mechanisms depend on flavonoid-anthocyanin pathways that require consistent light intensity for pigment synthesis.
Solutions
- Position plant 3-5 feet from east or north-facing window for consistent bright indirect light
- Supplement with full-spectrum LED grow lights (12-14 hours daily) during winter months
- Use light meter app to verify 2000-4000 lux at plant canopy level
- Rotate plant 90 degrees weekly to ensure even light exposure
- Avoid sudden light changes—acclimate gradually over 7-10 days
Prevention
Maintain light levels between 2000-4000 lux year-round using supplemental lighting when natural light drops below threshold. Use programmable grow lights on 12-hour timer to ensure photoperiod consistency.
Why are my Anthurium leaves curling?
Leaf curling in anthuriums indicates water stress - either too much or too little
77%
Why are my Anthurium leaves curling?
Leaf curling in anthuriums indicates water stress - either too much or too little
Cause
Leaf curling in anthuriums indicates water stress - either too much or too little. Underwatering causes leaves to curl inward to reduce surface area and conserve moisture. Overwatering/root rot prevents water uptake, causing similar curling despite wet soil. Other causes include low humidity, heat stress, or pest damage affecting water transport.
Solutions
- Check soil moisture immediately: insert finger 2-3 inches deep
- If soil is dry: water thoroughly until water drains from bottom
- If soil is wet and plant is curling: check for root rot (unpot and inspect)
- For root rot cases: trim rot, repot in fresh mix, water sparingly
- Increase humidity to 60%+ to reduce water loss from leaves
- Move away from heat sources (radiators, heating vents)
- Check for pests on stems and leaf undersides that might affect vascular system
Prevention
Maintain consistent watering schedule based on soil dryness, not calendar; use well-draining mix to prevent both drought and waterlogging; keep humidity 60-80%; avoid temperature extremes; monitor for pests regularly; use clear pots to visually assess moisture and root health
Why isn't my Anthurium flowering?
Anthurium allocates 30-40% of photosynthetic energy to maintaining senescing spathes
88%
Why isn't my Anthurium flowering?
Anthurium allocates 30-40% of photosynthetic energy to maintaining senescing spathes
Cause
Anthurium allocates 30-40% of photosynthetic energy to maintaining senescing spathes. The plant exhibits sympodial-like monopodial growth where reproductive maturity inhibits new leaf and flower initiation. Ethylene signaling from aging blooms triggers resource reallocation, but removal of spent flowers breaks this dormancy-like stagnation.
Solutions
- Snip spent spathe at base where stem meets main stalk using sterilized scissors
- Remove blooms when spathe fades from bright red/pink to brown or burgundy
- Redirected energy should produce new spathe within 4-8 weeks post-removal
- Prune lower/inner leaves simultaneously if yellowing to further conserve resources
- Expect 2-3 week recovery lag before visible new growth emerges
Prevention
Inspect monthly for fading spathes and remove promptly. Maintain 60-80% humidity post-pruning to support recovery and new spathe development.
Why does my Anthurium have edema (water spots)?
Edema in Anthurium occurs when root uptake of water exceeds leaf transpiration capacity, causing cells to burst and create blister-like brown spots
87%
Why does my Anthurium have edema (water spots)?
Edema in Anthurium occurs when root uptake of water exceeds leaf transpiration capacity, causing cells to burst and create blister-like brown spots
Cause
Edema in Anthurium occurs when root uptake of water exceeds leaf transpiration capacity, causing cells to burst and create blister-like brown spots. This happens when plants are watered heavily during low-light periods or when high humidity reduces transpiration. The thin, velutinous leaf cells of Anthurium andraeanum are particularly vulnerable to rupture from internal water pressure compared to thicker-leaved tropical plants.
Solutions
- Identify edema: Blister-like or water-soaked brown spots, often on leaf undersides or margins, distinct from circular lens burn
- Immediate action: Stop watering for 7-10 days to allow plant to process excess moisture
- Increase transpiration: Move to slightly brighter location or add gentle air circulation with fan
- Reduce humidity temporarily: If above 75%, lower to 60-65% for 1-2 weeks to encourage leaf drying
- Long-term fix: Adjust watering schedule to morning only; reduce volume in low-light conditions
Prevention
Water only in morning hours when transpiration is active; reduce watering frequency during winter low-light months; maintain 60-70% humidity (not excessive 80%+); ensure good air circulation to promote transpiration; allow soil to dry 2-3 inches between waterings.
Anthurium: Epiphytic Roots
Anthurium are obligate epiphytes with specialized aerial roots evolved for attachment to tree bark in tropical rainforest canopies
90%
Anthurium: Epiphytic Roots
Anthurium are obligate epiphytes with specialized aerial roots evolved for attachment to tree bark in tropical rainforest canopies
Cause
Anthurium are obligate epiphytes with specialized aerial roots evolved for attachment to tree bark in tropical rainforest canopies. These roots require constant gas exchange and cannot tolerate prolonged submersion in dense, compacted soil. Standard potting mixes create anaerobic zones that suffocate epiphytic roots, leading to energy deficit where the plant cannot support both root expansion and flowering. The root system requires structural support while maintaining aeration—conditions mimicking their natural tree-dwelling habitat.
Solutions
- Assess root type: Anthurium roots are aerial/epiphytic—different from terrestrial plant roots
- Convert to epiphytic mount: Attach to tree fern slab, cork bark, or wooden plaque with sphagnum moss wrapping
- Use basket culture: Wire or mesh orchid baskets allow maximum air circulation to roots
- Substrate selection: If potting, use 70% orchid bark + 30% charcoal only—no dense peat or soil
- Watering adjustment: Mist aerial roots daily or soak mounted plants 2-3x weekly; never let roots sit in standing water
Prevention
Mount on tree fern plaques or use open mesh baskets filled with coarse bark; provide bright indirect light to support photosynthesis in aerial roots; maintain 70-80% humidity to reduce root desiccation; ensure roots have air gaps and are not packed tightly in substrate.
Anthurium: Growing Medium
The sphagnum moss vs potting soil debate centers on Anthurium's epiphytic root requirements
88%
Anthurium: Growing Medium
The sphagnum moss vs potting soil debate centers on Anthurium's epiphytic root requirements
Cause
The sphagnum moss vs potting soil debate centers on Anthurium's epiphytic root requirements. Sphagnum moss provides superior aeration, moisture retention without compaction, and mimics natural tree bark conditions. However, it requires more frequent monitoring and is prone to overwatering in inexperienced hands. Standard potting soil offers convenience but creates anaerobic conditions that suffocate epiphytic roots. The optimal solution depends on grower experience, watering habits, and environmental conditions.
Solutions
- Sphagnum moss method: Use long-fiber sphagnum (not peat moss); wrap loosely around root ball; water when moss feels barely damp; provides excellent aeration and moisture balance
- Chunky aroid mix method: 50% orchid bark, 30% perlite, 20% peat/charcoal; more forgiving of watering mistakes; allows longer intervals between waterings
- Semi-hydroponics option: LECA (clay pebbles) in self-watering pot provides maximum aeration with consistent moisture; requires nutrient solution instead of plain water
- Conversion protocol: Transition gradually by mixing old and new substrate over 4-6 weeks to minimize shock
Prevention
Choose based on care style: Sphagnum for attentive growers who can monitor moisture; chunky bark mix for busy growers; soil only if heavily amended with 50%+ perlite/bark. Consider semi-hydroponics (LECA) as modern alternative providing both aeration and consistent moisture.
Why isn't my Anthurium flowering?
Anthurium andraeanum requires bright, indirect light (2500-4000 lux) and adequate phosphorus to produce the characteristic spathe and spadix blooms
87%
Why isn't my Anthurium flowering?
Anthurium andraeanum requires bright, indirect light (2500-4000 lux) and adequate phosphorus to produce the characteristic spathe and spadix blooms
Cause
Anthurium andraeanum requires bright, indirect light (2500-4000 lux) and adequate phosphorus to produce the characteristic spathe and spadix blooms. As understory plants in tropical forests, they have adapted to filtered but consistent light. When placed in low-light conditions (<1000 lux), the plant enters survival mode—preserving energy for leaf maintenance rather than reproduction. Additionally, phosphorus deficiency directly limits flower formation as it is required for ATP production during bloom development.
Solutions
- Relocate to bright, indirect light: East or west-facing window 3-5 feet back, or north window with sheer curtain
- Avoid direct sun which causes bract scorch; measure with light meter to confirm 2500-4000 lux range
- Apply high-phosphorus fertilizer (bloom booster formula 10-30-10 or similar) at half-strength every 2 weeks during spring-summer growing season
- Ensure 12-14 hours of light daily; supplement with grow lights if natural light insufficient
- Maintain 60-80% humidity and 70-85°F temperatures to support metabolic energy for blooming
Prevention
Position Anthuriums where they receive consistent bright, indirect light for 10+ hours daily. Rotate pot 90° weekly for even exposure. Fertilize year-round at quarter-strength with balanced formula, increasing to bloom formula during active growing season.
How much light does my Anthurium need?
Anthurium leaf scorch (sunburn) occurs when tropical understory plants adapted to dappled shade are exposed to direct sunlight exceeding 3,000 lux
89%
How much light does my Anthurium need?
Anthurium leaf scorch (sunburn) occurs when tropical understory plants adapted to dappled shade are exposed to direct sunlight exceeding 3,000 lux
Cause
Anthurium leaf scorch (sunburn) occurs when tropical understory plants adapted to dappled shade are exposed to direct sunlight exceeding 3,000 lux. UV radiation triggers phenolic oxidation and cellular damage in thin, waxy Anthurium foliage, causing bleached, crispy brown patches. Unlike root rot damage (mushy, spreading), sunburn presents as firm, dry, bleached patches typically on leaves facing the light source.
Solutions
- Move plant immediately to location with bright indirect light only
- Assess damage: sunburned areas are firm, dry, and bleached brown (not mushy like root rot)
- Trim severely damaged leaves with sterile shears to redirect energy—damaged tissue won't recover
- Mildly affected leaves can remain as they still photosynthesize
- Increase humidity to 60-80% to support recovery via pebble tray or humidifier
- Monitor for 2-4 weeks; new growth should emerge healthy if light corrected
Prevention
Position Anthurium in bright indirect light (10,000-20,000 lux). Use sheer curtains or position 2-4 feet from east/north windows. Never place in direct afternoon sun.
How much light does my Anthurium need?
Anthuriums moved suddenly from low light (dark corners, north windows) to bright indirect light (south windows, grow lights) experience photobleaching
89%
How much light does my Anthurium need?
Anthuriums moved suddenly from low light (dark corners, north windows) to bright indirect light (south windows, grow lights) experience photobleaching
Cause
Anthuriums moved suddenly from low light (dark corners, north windows) to bright indirect light (south windows, grow lights) experience photobleaching. The existing leaves developed under low PAR (photosynthetically active radiation) and built insufficient protective pigments. When light intensity increases 3-5x abruptly, chloroplasts cannot process the photon flux, causing oxidative stress that manifests as yellowing, bleaching, or translucency on older leaves—distinct from sunburn on new growth.
Solutions
- Assess light change: Calculate intensity difference—low light (<1000 lux) to bright (3000+ lux) requires acclimation
- Begin gradual transition: 2 hours at new location, then return to original spot
- Increase exposure: Add 2 hours every 3 days over 2-3 weeks
- Monitor leaf response: Yellowing or translucency = reduce light intensity immediately
- Provide humidity support: Maintain 70%+ RH during acclimation to reduce stress
- Expect leaf adaptation: Older leaves may not fully recover; new leaves will adapt to higher light
- Emergency reversal: If severe bleaching occurs, return to original light immediately and restart slower
Prevention
Acclimate gradually over 14-21 days: Start at new location for 2 hours daily, increasing 2 hours every 3 days; rotate plant 90 degrees weekly; maintain 65%+ humidity during transition; avoid moving during flowering; measure light with lux meter—target 1500-2500 lux for mature leaves.
How much light does my Anthurium need?
Anthuriums are adapted to tropical understory conditions receiving bright, filtered light (2000-5000 lux PPFD)
90%
How much light does my Anthurium need?
Anthuriums are adapted to tropical understory conditions receiving bright, filtered light (2000-5000 lux PPFD)
Cause
Anthuriums are adapted to tropical understory conditions receiving bright, filtered light (2000-5000 lux PPFD). Low light levels (<1500 lux) reduce photosynthetic capacity, limiting energy available for carotenoid and anthocyanin accumulation in spathes, resulting in pale coloration and reduced blooming. Excessive direct sunlight (>10000 lux) causes photooxidative stress, leaf scorch, and chlorophyll degradation. Research on bract coloration (PMID 40733391) confirms light intensity directly regulates pigment biosynthesis pathways.
Solutions
- Measure light with meter or smartphone app: target 2000-5000 lux bright indirect light
- Position 3-6 feet from south-facing windows with sheer curtain, or 1-3 feet from east-facing windows
- Rotate plant quarterly for even light distribution and prevent phototropism (leaning toward light)
- Monitor leaf color: dark green leaves indicate insufficient light; pale or scorched patches indicate excess light
Prevention
East-facing windows provide ideal morning light without harsh afternoon sun. Use sheer curtains for south/west windows. Maintain consistent daily light duration of 10-12 hours; supplement with grow lights (full spectrum, 4000-6500K) during winter or in low-light spaces.
Why isn't my Anthurium flowering?
Anthurium flowering requires bright indirect light intensity of 2000-5000 lux for 12-14 hours daily to trigger spathe development
93%
Why isn't my Anthurium flowering?
Anthurium flowering requires bright indirect light intensity of 2000-5000 lux for 12-14 hours daily to trigger spathe development
Cause
Anthurium flowering requires bright indirect light intensity of 2000-5000 lux for 12-14 hours daily to trigger spathe development. In low light conditions (below 1000 lux), the plant prioritizes vegetative leaf production over reproductive energy allocation. The photoperiod and intensity must be sufficient to generate the carbohydrates needed to support the metabolically expensive process of inflorescence development, which can consume 30-40% of the plant's energy reserves.
Solutions
- Light assessment: Measure current light levels; target minimum 2000 lux for 12+ hours
- Immediate relocation: Move to brighter location or add grow lights (full spectrum LED, 12-18 inches above plant)
- Clean leaves: Wipe dust from foliage monthly to maximize light absorption
- Fertilization adjustment: Switch to bloom-boosting fertilizer (higher phosphorus) when light improves
- Timeline expectations: Allow 8-12 weeks after light improvement for first new inflorescence to develop
Prevention
Position Anthurium 3-5 feet from east or south-facing windows with sheer curtains; measure light with lux meter ensuring 2000+ lux; supplement with full-spectrum grow lights (12-14 hours) during winter months or in north-facing rooms; maintain consistent 65-80°F temperatures year-round as temperature fluctuations inhibit flowering.
Anthurium: No New Growth
Stalled vegetative growth in Anthurium results from energy partitioning: mature plants prioritize flowering (spathe production) over leaf expansion when environmental conditions are stable but suboptimal
87%
Anthurium: No New Growth
Stalled vegetative growth in Anthurium results from energy partitioning: mature plants prioritize flowering (spathe production) over leaf expansion when environmental conditions are stable but suboptimal
Cause
Stalled vegetative growth in Anthurium results from energy partitioning: mature plants prioritize flowering (spathe production) over leaf expansion when environmental conditions are stable but suboptimal. Additionally, small/immature specimens lack established root systems and metabolic reserves to support rapid growth. Research shows aerial roots outperform soil roots in nutrient uptake—juvenile plants with underdeveloped aerial roots show dormancy-like stagnation.
Solutions
- Remove all current spathes/flowers at base with sterile shears to redirect energy to foliage
- Optimize environment: Provide bright indirect light (2000-4000 foot-candles), maintain 60-80% humidity, ensure temperatures 70-85°F
- Repot if rootbound in fresh well-draining aroid mix with added perlite/bark
- Apply nitrogen-rich fertilizer (30-10-10) at 1/4 strength biweekly to promote vegetative growth
- Monitor for 4-6 weeks; separate pups promptly when they appear to stimulate mother plant growth
Prevention
Purchase established medium-sized specimens with visible pups. Maintain optimal tropical conditions (60-80% humidity, 70-85°F, bright indirect light 2000-5000 lux). Fertilize consistently during growth season.
Why isn't my Anthurium flowering?
Insufficient light intensity prevents Anthurium spathe development by limiting photosynthetic capacity needed for reproductive energy allocation
2 protocols
85–88%
Why isn't my Anthurium flowering?
Insufficient light intensity prevents Anthurium spathe development by limiting photosynthetic capacity needed for reproductive energy allocation
Protocol 1: not blooming · 88% confidence
Cause
Insufficient light intensity prevents Anthurium spathe development by limiting photosynthetic capacity needed for reproductive energy allocation. Anthuriums require 10,000-20,000 lux of bright indirect light for 12-14 hours daily to trigger spathe color accumulation through carotenoid biosynthesis pathways (AaCMB1 transcription factor regulation of AaLCYB). Low light (<5,000 lux) causes dormancy-like state where the plant prioritizes vegetative survival over flowering.
Solutions
- Measure current light with phone lux meter app—target 10,000-20,000 lux at leaf level
- Relocate to brighter indirect location within 2-4 feet of window with sheer curtain filtration
- Supplement with full-spectrum LED grow light (200-400 PPFD) for 12-14 hours if natural light inadequate
- Maintain consistent 65-75°F temperature and 60-80% humidity to support flowering metabolism
- Fertilize with balanced liquid fertilizer at 1/4 strength biweekly during spring-summer growing season
Prevention
Position Anthurium within 2-4 feet of an east or north-facing window for consistent bright indirect light (10,000-20,000 lux). Rotate plant 90° weekly for even exposure.
Protocol 2: not blooming · 85% confidence
Cause
Anthurium spathe coloration and blooming require coordinated expression of carotenoid biosynthetic pathway genes (AaLCYB) and floral identity genes (SOC1, AGL6). Research shows inflorescence evolution correlates with loss of floral identity genes, indicating light-dependent photoperiodic signaling is critical for bloom initiation. Insufficient light (<2000 lux) reduces photosynthate allocation to reproductive structures, while temperatures below 65°F or above 85°F disrupt MADS-box transcription factor activity (AaCMB1) required for spathe development.
Solutions
- Measure light with meter: target 2000-5000 lux bright indirect light; relocate to east-facing window or 3-6 feet from south window with sheer curtain
- Maintain consistent temperature 70-85°F; avoid cold drafts from AC vents or winter window sills
- Apply balanced fertilizer (20-20-20 at 1/4 strength) every 4-6 weeks during spring-summer active growth to support reproductive energy demands
- Ensure 60-80% humidity via pebble tray or humidifier; low humidity stresses the plant and diverts resources from blooming
Prevention
Provide bright indirect light for 12-14 hours daily; maintain stable 70-85°F temperature range; fertilize lightly but consistently during growing season; avoid repotting during bloom cycle which causes transplant shock.
Anthurium: Root Stress
When Anthurium roots are compromised by rot, pests, or physical damage during repotting, the root system's capacity to uptake water and nutrients drops by 50-90%
85%
Anthurium: Root Stress
When Anthurium roots are compromised by rot, pests, or physical damage during repotting, the root system's capacity to uptake water and nutrients drops by 50-90%
Cause
When Anthurium roots are compromised by rot, pests, or physical damage during repotting, the root system's capacity to uptake water and nutrients drops by 50-90%. The plant enters resource conservation mode, aborting developing leaves to redirect limited energy to root repair. Leaves that were mid-development during root trauma emerge stunted, discolored, or fail to unfurl entirely—appearing as brown, crispy abortions at the crown.
Solutions
- Confirm root issue: Unpot and inspect—healthy roots = white/firm; damaged = brown/mushy/dry-shriveled
- Surgical intervention: Trim ALL compromised root tissue with sterile scissors until only firm white roots remain
- Sterilize: Treat cut surfaces with diluted hydrogen peroxide (3% at 1:1 with water) for 20 minutes
- Repot conservatively: Use fresh aroid mix; pot only 1 inch larger than root ball
- Withhold water: Wait 5-7 days before first watering to allow wound callusing
- Humidity support: Maintain 70%+ RH to compensate for reduced root uptake
- Fertilize later: Wait 4-6 weeks before applying diluted fertilizer
- Recovery timeline: Expect 4-8 weeks for root regeneration before normal leaf production resumes
Prevention
Inspect roots thoroughly before repotting; only repot when root ball fills 80%+ of pot; use well-draining aroid mix (50% bark/perlite); sterilize tools between plants; avoid overwatering post-repot; maintain high humidity to reduce transpiration stress during root recovery.
Is my Anthurium rootbound?
Nursery-grown Anthuriums often arrive with severely root-bound conditions from extended time in small propagation cells
85%
Is my Anthurium rootbound?
Nursery-grown Anthuriums often arrive with severely root-bound conditions from extended time in small propagation cells
Cause
Nursery-grown Anthuriums often arrive with severely root-bound conditions from extended time in small propagation cells. The epiphytic roots circle plastic containers, forming dense mats that restrict new root growth into surrounding soil after purchase. This constriction limits water and nutrient uptake, causing chronic stress that manifests as stunted growth, small new leaves, and failure to produce spathes. Unlike healthy plants that prioritize leaf development, root-bound specimens allocate 70%+ of energy to root expansion, leaving minimal resources for visible growth.
Solutions
- Confirm diagnosis: Gently unpot and inspect—root-bound = dense circling roots, minimal soil visible, roots form pot shape
- Tease roots apart: Gently loosen circling roots with fingers to encourage outward growth; trim any severely tangled sections
- Repot appropriately: Use pot only 1-2 inches larger than root ball; 50% bark, 30% perlite, 20% peat mix provides aeration for new root growth
- Remove stress leaves: Trim 1-2 oldest, smallest leaves to redirect energy from maintenance to root establishment
- Maintain high humidity: Keep 70-80% RH for 3-4 weeks post-repotting to reduce transpiration stress while roots establish
- Expect adjustment: Plant may appear stalled for 4-8 weeks as roots colonize new soil; resume fertilizer at 1/4 strength once new growth appears
Prevention
Inspect roots before purchasing: Choose plants with visible roots at drainage holes but not densely circling; repot immediately upon purchase if roots circle >50% of container; use clear orchid pots to monitor root fill without disturbance; upgrade pot size gradually (1-2 inches max); use chunky mix to encourage outward root exploration.
Anthurium: Shipping Stress
Anthurium shipping involves darkness, temperature fluctuations (50-80°F), and physical compression
87%
Anthurium: Shipping Stress
Anthurium shipping involves darkness, temperature fluctuations (50-80°F), and physical compression
Cause
Anthurium shipping involves darkness, temperature fluctuations (50-80°F), and physical compression. This triggers ethylene production and stress hormones that deform leaf primordia already initiated in the cataphyll. When the plant arrives and attempts to unfurl these pre-stressed leaves under home conditions (typically 30-50% humidity vs greenhouse 70%+), the cells cannot expand properly, resulting in puckered, asymmetrical, or discolored foliage that appears scarred.
Solutions
- Unpack immediately: Remove all packing materials within 24 hours of delivery
- Inspect and document: Photograph any visible damage for seller claims
- Create ICU chamber: Clear plastic bag or dome with 4-6 ventilation holes
- Humidity target: 80-90% RH for first 2 weeks, then reduce 10% every 3-4 days
- Temperature stability: Keep at 75-80°F—avoid cold drafts or heating vents
- Expect damaged leaves: First 1-2 unfurling leaves were formed during transit; assess recovery by 3rd leaf
Prevention
Request 'fully acclimated' plants from sellers; reject specimens with visible transit damage; unpack within 24 hours; immediately place in humidity dome at 80-90% RH; maintain 75-80°F for first week; never repot or fertilize for 30 days post-arrival; gradual hardening over 3-4 weeks.
Why isn't my Anthurium flowering?
Anthurium andraeanum inflorescence development requires stable temperatures between 70-85°F (21-29°C) daytime and 60-70°F (15-21°C) nighttime
90%
Why isn't my Anthurium flowering?
Anthurium andraeanum inflorescence development requires stable temperatures between 70-85°F (21-29°C) daytime and 60-70°F (15-21°C) nighttime
Cause
Anthurium andraeanum inflorescence development requires stable temperatures between 70-85°F (21-29°C) daytime and 60-70°F (15-21°C) nighttime. Temperature fluctuations below 65°F or above 90°F disrupt the SOC1 and AGL6 floral identity gene expression pathways, causing bloom cycle interruption. Cold drafts specifically trigger chilling injury that aborts developing spathes.
Solutions
- Maintain daytime temperature 75-80°F and nighttime 65-70°F for optimal flowering
- Position away from AC vents, drafty windows, and exterior doors
- Use heating mat set to 75°F during winter months to maintain root zone temperature
- Avoid temperature swings greater than 15°F between day and night
- Monitor with digital thermometer at plant level—ambient room temp often differs by 5-10°F
Prevention
Select stable microclimate location away from HVAC airflow. Use thermostat-controlled heating mat in winter. Maintain consistent year-round temperature to support continuous flowering rather than seasonal bloom cycles.
Anthurium: Temperature Sensitivity
Anthuriums are strictly tropical understory plants native to regions with stable year-round temperatures (68-85°F)
87%
Anthurium: Temperature Sensitivity
Anthuriums are strictly tropical understory plants native to regions with stable year-round temperatures (68-85°F)
Cause
Anthuriums are strictly tropical understory plants native to regions with stable year-round temperatures (68-85°F). Unlike hardy houseplants (snake plants, ZZ plants) that tolerate 50-90°F ranges, Anthuriums experience cellular damage at temperatures below 60°F and above 90°F. This narrow thermal window means seasonal HVAC fluctuations, winter window drafts, or summer heat waves can push plants outside their survival zone rapidly, causing leaf drop, growth stall, or death.
Solutions
- Monitor temperature: Install thermometer at plant level—target 65-80°F consistently
- Identify thermal stress: Leaf drop at temperature extremes = thermal shock
- Move to stable zone: Interior rooms maintain temperature better than perimeter areas
- Use heating mats: Place pot on thermostat-controlled mat set to 75°F in winter
- Create thermal mass: Group multiple plants together; use terracotta pots that moderate temperature swings
- Air circulation: Small fan prevents heat pockets and fungal issues in humid environments
- Emergency action: If frozen or overheated, move immediately to 70°F location and maintain high humidity
Prevention
Position away from exterior walls in winter; avoid placement near HVAC vents; use heating mats (set to 75°F) October-March; install thermometers near plants; insulate windows with film in winter; relocate to interior rooms during extreme weather; avoid mail-order during freezing or extreme heat periods.
Anthurium: Temperature Stress
Anthurium flowering is triggered by stable warm temperatures between 70-85°F (21-29°C)
88%
Anthurium: Temperature Stress
Anthurium flowering is triggered by stable warm temperatures between 70-85°F (21-29°C)
Cause
Anthurium flowering is triggered by stable warm temperatures between 70-85°F (21-29°C). Temperatures below 65°F or above 90°F inhibit the metabolic processes required for inflorescence initiation and development. Cold drafts from air conditioning, winter window placement, or proximity to exterior doors in winter cause temperature stress that suppresses flowering even when light and humidity are adequate. The plant prioritizes survival over reproduction when temperature stress occurs.
Solutions
- Temperature assessment: Verify plant is not near AC vents, drafty windows, or cold exterior walls
- Immediate relocation: Move to stable temperature zone away from drafts; target 70-85°F consistently
- Heating solution: Add seedling heat mat under pot set to 75°F during winter months
- Seasonal adjustment: Expect reduced flowering November-February even with supplemental heating
- Monitor with thermometer: Use digital thermometer to verify actual temperature at plant location (not room average)
Prevention
Maintain stable 70-85°F temperatures year-round; avoid positioning near air conditioning vents, drafty windows, or exterior doors; use heating mats under pots during winter if room temperature drops below 65°F; provide consistent temperatures with minimal fluctuation between day and night.
Anthurium: Toxic To Cats
High concentration of calcium oxalate crystals in leaves and stems causes severe mouth pain, drooling, and vomiting
90%
Anthurium: Toxic To Cats
High concentration of calcium oxalate crystals in leaves and stems causes severe mouth pain, drooling, and vomiting
Cause
High concentration of calcium oxalate crystals in leaves and stems causes severe mouth pain, drooling, and vomiting.
Solutions
- Wipe mouth gently.
- Provide a small amount of lactose-free milk or yogurt to bind crystals.
- Observe for swelling of the pharynx and seek emergency vet care if breathing is compromised.
Prevention
Keep these highly toxic plants completely out of reach of cats.
Anthurium: Transplant Shock
Transplant shock in Anthurium occurs when epiphytic roots are disturbed during repotting, division, or root pruning
88%
Anthurium: Transplant Shock
Transplant shock in Anthurium occurs when epiphytic roots are disturbed during repotting, division, or root pruning
Cause
Transplant shock in Anthurium occurs when epiphytic roots are disturbed during repotting, division, or root pruning. The fine, sensitive root hairs that absorb water and nutrients are easily damaged, causing temporary inability to uptake moisture even when roots are healthy. This vascular disruption triggers rapid leaf yellowing as the plant enters survival mode, redirecting energy from foliage to root system repair and reducing transpiration to prevent dehydration.
Solutions
- Verify shock vs rot: Check roots—firm white tissue indicates shock; mushy black tissue indicates rot
- Stabilize environment: Maintain 70-80% humidity and 70-85°F consistently
- Water sparingly: Allow soil to dry 50% between waterings during recovery
- Remove damaged foliage: Trim yellow/brown leaves at base to reduce transpiration load
- Patience protocol: Expect 4-8 week recovery period; do not repot again or move location during this time
- Monitor weekly: Look for new growth emergence as sign of recovery
Prevention
Water plant thoroughly 24 hours before repotting to hydrate tissues; minimize root disturbance by keeping root ball intact when possible; maintain 70-80% humidity post-transplant for 2-4 weeks; avoid fertilizing for 6-8 weeks; provide consistent 70-85°F temperatures; do not water immediately after repotting—wait 3-5 days to allow root callusing.
Common Questions
Frequently Asked Questions
Why does my anthurium have Low humidity?
Cause: Ambient humidity below 40% triggers stomatal closure and reduced transpiration in Anthurium andraeanum, stunting growth and causing leaf edge necrosis; research shows aerial roots outperform soil roots in nitrogen uptake when humidity exceeds 60% (PMID 36786325).
Solution: Maintain 60-80% relative humidity using humidifier, pebble trays, or plant grouping
Prevention: Install hygrometer for continuous monitoring; maintain consistent 60%+ humidity year-round; avoid drafty locations; increase humidity before visible stress appears, especially during heating season when indoor air becomes desiccated.
93% confidence · View full protocol →
Why does my anthurium have Root rot?
Cause: Anthurium losing its primary root system, requiring rehab but sensitive to pure water propagation.
Solution: Cut away rot with a sterilized blade. Anthuriums have thick roots; look for the stringy center vascular tissue to pull away dead velamen.
Prevention: Use extreme chunky mixes (orchid bark, charcoal, pumice) for Anthuriums; standard potting soil suffocates their epiphytic roots quickly.
96% confidence · View full protocol →
Why does my anthurium have Yellow leaves?
Cause: Natural senescence in Anthurium involves nutrient remobilization from older leaves to support emerging new growth. The plant sacrifices the oldest, smallest bottom leaf as a normal physiological process, redirecting nitrogen, chlorophyll, and mobile nutrients to developing inflorescences and new foliage. This occurs every 4-8 weeks in healthy, actively growing specimens and is distinct from stress-induced yellowing.
Solution: Verify pattern: Single oldest leaf yellowing over 2-4 weeks = natural; multiple leaves or rapid yellowing = problem
Prevention: Maintain stable growing conditions (65-80°F, 60-80% humidity, bright indirect light 2000-5000 lux) to minimize unnecessary senescence; provide balanced fertilization (20-20-20 at 1/4 strength monthly) to ensure adequate nutrient availability for both old and new growth.
94% confidence · View full protocol →
Why does my anthurium have Cold damage?
Cause: Anthuriums are strictly tropical (USDA zones 10-12) with optimal range of 65-80°F. When temperatures drop below 55°F, cellular metabolism slows dramatically. At 45-50°F, cell membranes lose fluidity causing chilling injury—water-soaked lesions on leaves that later turn brown. Cold damage often occurs during winter shipping, near drafty windows, or when placed near air conditioning vents. Unlike sunburn (crispy brown), cold damage is soft and wet initially.
Solution: Immediate warming: Move to stable 70°F+ location away from drafts
Prevention: Maintain 65-80°F year-round; never place near exterior doors or drafty windows in winter; avoid air conditioning vents in summer; use heat mats (set to 75°F) for winter growing; insulate pots with terracotta or place on foam board if near cold surfaces; delay winter shipping purchases to spring.
90% confidence · View full protocol →
Why does my anthurium have Spider mites?
Cause: Spider mites (Tetranychus urticae) infest Anthurium in low-humidity indoor environments (<40% RH). These tiny arachnids feed on leaf undersides, piercing cells and extracting sap, causing stippling, yellowing, and fine webbing. Anthurium's thin, velvety leaves show damage faster than thicker foliage. Mites reproduce rapidly in dry, warm conditions with bright indirect light.
Solution: Isolate infested plant immediately to prevent spread to collection
Prevention: Maintain 60-80% humidity via pebble trays or humidifiers. Quarantine new plants for 2 weeks. Inspect leaf undersides weekly with magnification. Avoid over-fertilizing which promotes soft susceptible growth.
90% confidence · View full protocol →
Common Questions
Frequently Asked About Anthurium
Can Anthurium grow in water?
Yes. We have 2 documented protocols for water-based Anthurium care, including propagation and long-term hydroponic transition.
What problems can Anthurium get?
Our database contains 64 documented Anthurium cases covering 52 distinct topics, including diseases, pest identification, environmental stress, propagation, and advanced care protocols — each with verified solutions.
Structured Learning
Ready to Go Deeper?
Explore our Mastery Packs for structured, video-based learning with step-by-step protocols from 20,000+ analyzed plant cases.
Browse All Courses →