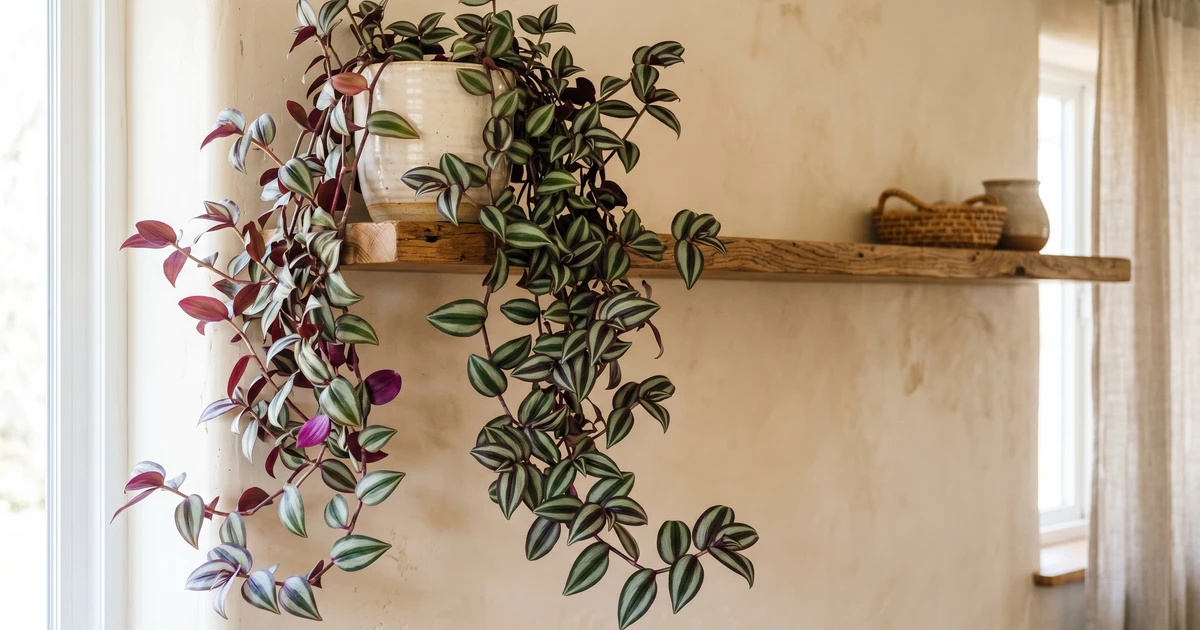
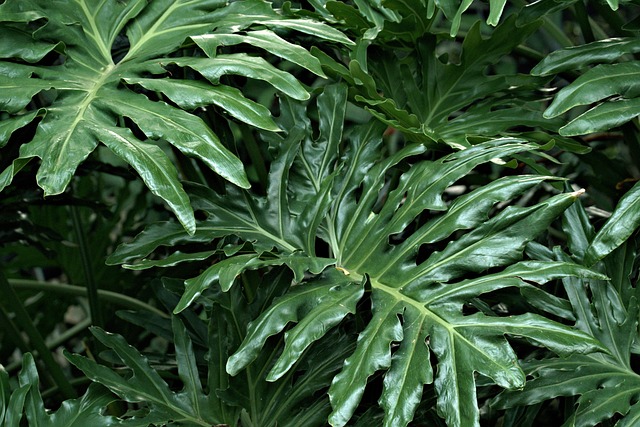
philodendron
Philodendron spp.
Also known as: Philo
Evidence-based care guide for Philodendron (Philodendron spp.). Covers symptom diagnosis, disease treatment, pest control, propagation methods, care and watering. Our analysis draws from 148 verified community cases with an average confidence score of 88%. Each protocol is synthesized from real rescue outcomes, not generic advice.
Care Essentials
Get to Know Your Philodendron
The #1 killer? Overwatering. Let the soil dry between waterings and your Philodendron will thrive.
Light
bright indirect
Wants bright, indirect light — sensitive to both extremes. Too much direct sun causes burns, too little causes stretching.
💡 Grow lights: Thrives under artificial grow lights (LED or fluorescent, 10-12 hours/day). A great option if your space lacks natural light.
Watering
every 10-14 days
Let the soil dry out significantly between waterings — this plant is very sensitive to overwatering. When in doubt, wait another day.
Humidity & Temperature
Loves higher humidity (60%+). If your air is dry, group it with other plants, use a pebble tray, or run a humidifier nearby.
Sensitive to cold — keep above 55°F (13°C). Avoid placing near drafty windows or exterior doors in winter.
Soil
Needs well-draining soil — add perlite or orchid bark to a standard potting mix. Good drainage is critical to prevent root rot.
Care Requirements
At a Glance
Care Profile in Development
While our detailed care profile is being compiled, you can find specific care guidance in the 19 care-related diagnoses below — including watering schedules, light requirements, and propagation methods from real-world cases.
Go Deeper
Philodendron Rare Guide Pack
The complete protocol: advanced care, seasonal calendars, and rescue modules. Everything on this page, plus video walkthroughs.
Start Here
Most Common Problems
Based on 148 analyzed cases — these are the issues you're most likely to encounter
Don't see your symptom? Search all 78 topics below, or run the Diagnostic.
Why are my Philodendron leaves turning yellow?
Overwatering in Philodendrons occurs when soil remains saturated for 7+ days,...
Why does my Philodendron have root rot?
Pythium, Phytophthora, and Rhizoctonia fungi proliferate in waterlogged soil...
How do I propagate my Philodendron?
Using sphagnum moss that is either bone dry (repels water) or completely...
What are these brown spots on my Philodendron?
Philodendrons produce sugary sap from glands called extrafloral nectaries...
What disease does my Philodendron have?
Fungal leaf spot (e.g., Cercospora) is triggered by overwatering and persistent...
Which of the 7 Killers
is threatening your plants?
We analyzed 1,616 documented plant deaths to identify the 7 causes behind 78% of all losses. Answer 5 questions — we'll tell you exactly which ones apply to your setup.
Skip the quiz — get The 7 Killers course ($19) →Question 1 of 5
How do you decide when to water your plants?
Question 2 of 5
Where do most of your plants live?
Question 3 of 5
What's your home environment like?
Question 4 of 5
Have you lost a plant in the last 6 months?
Question 5 of 5
How often do you check your plants for pests?
Your diagnosis is ready
We've identified your top 2 risk killers. Enter your email to see the full breakdown and your personalized rescue protocol.
Your plants are most at risk from:

The 7 Killers mini-course covers every one of these in depth — mechanism, rescue protocol, prevention. 1,616 cases. 7 lessons. $19.
Get The 7 Killers — $19 →Get the Plant Mortality Checklist
The 7 killers behind 78% of houseplant deaths — and the exact fix for each. Free PDF based on 1,616 documented cases.
Your checklist is ready!
We also sent it to your inbox. Check your email for the full download.
Open the ChecklistFree. No spam. Unsubscribe anytime.
Verified Data
All Diagnoses
78 topics consolidated from 148 documented cases. Expand any topic to see all protocols.
Symptoms (7 topics · 31 cases)
Why do my Philodendron leaves have brown tips?
Brown leaf tips and edges on Philodendron typically result from low humidity, fluoride/chlorine in tap water, or fertilizer salt buildup
81%
Why do my Philodendron leaves have brown tips?
Brown leaf tips and edges on Philodendron typically result from low humidity, fluoride/chlorine in tap water, or fertilizer salt buildup
Cause
Brown leaf tips and edges on Philodendron typically result from low humidity, fluoride/chlorine in tap water, or fertilizer salt buildup. Unlike root rot which causes uniform browning, tip burn starts at margins and progresses inward. Older leaves are often affected first.
Solutions
- Switch to filtered, distilled, or rainwater for watering
- Allow tap water to sit 24 hours before using to dissipate chlorine
- Increase humidity with humidifier or pebble tray
- Flush soil thoroughly with plain water 2-3 times to remove salt buildup
- Trim brown tips with clean scissors following natural leaf shape
- Reduce fertilizer concentration to half strength
- Check for drafts or heating vents nearby and relocate if found
- Older affected leaves can be removed for aesthetics
Prevention
Use filtered or distilled water. Maintain 50-60% humidity. Flush soil monthly with plain water to remove salts. Use fertilizer at half strength. Keep away from heating vents and drafts.
What are these brown spots on my Philodendron?
Philodendrons produce sugary sap from glands called extrafloral nectaries (EFNs) to attract ants for protection
6 protocols
88–95%
What are these brown spots on my Philodendron?
Philodendrons produce sugary sap from glands called extrafloral nectaries (EFNs) to attract ants for protection
Protocol 1: brown spots (extrafloral nectaries) · 95% confidence
Cause
Philodendrons produce sugary sap from glands called extrafloral nectaries (EFNs) to attract ants for protection. Indoors, without ants to clean the sap, it dries and causes localized chemical burns on leaf undersides, appearing as small brown or translucent spots. This is a physiological response to stress, not an infection.
Solutions
- Gently wipe leaf undersides weekly with a damp microfiber cloth to remove sap before it burns the tissue.
- Assess for environmental stress: low humidity (<50%) and inconsistent lighting can trigger excessive sap production.
- Do not treat with fungicides as these spots are not pathogenic.
Prevention
Maintain stable high humidity (60-80%) and bright indirect light. Incorporate underside wiping into your weekly maintenance routine, especially for varieties like 'Ring of Fire', 'Birkin', and 'Congo Rojo'.
Protocol 2: brown spots · 92% confidence
Cause
Overwatering-induced root rot in epiphytic aroids occurs when soil remains waterlogged for 7+ days, promoting anaerobic bacteria (Pythium spp.) that destroy root hairs and impair nutrient uptake. Philodendrons evolved as canopy epiphytes with low transpiration rates; in high-humidity indoor environments (>70%), stomatal closure further reduces water demand, exacerbating soil saturation even when surface appears dry.
Solutions
- Acquire moisture meter; water only 2-3 days after meter reads fully dry in top 2-3 inches
- Reduce watering frequency by 30-50% in high-humidity environments (>70% RH)
- Repot in chunky well-draining mix (orchid bark, potting soil, perlite 1:1:1 ratio)
- Inspect and trim any black/mushy rotted roots with sterilized shears
- Monitor for 2 weeks post-repot for settling/shock symptoms
Prevention
Water only when top 2-3 inches of soil read 'dry' on moisture meter; maintain 40-60% humidity with dehumidifier if necessary; use chunky aroid mix (1:1:1 orchid bark:potting soil:perlite); annual root inspections and soil refresh.
Protocol 3: brown spots (rust) · 88% confidence
Cause
Rust (Puccinia spp.) presents as multiple small, rust-colored or orange-brown spots that spread across multiple plants in proximity. It is a fungal infection common in dense collections with high humidity.
Solutions
- Isolate contaminated plants immediately.
- Wipe each leaf individually with a neem oil solution, using a fresh paper towel for every leaf to prevent cross-contamination.
- Remove heavily infected leaves at the base.
- Note: Treated leaves may become photosensitive; provide temporary shade for 7 days post-treatment.
Prevention
Increase spacing between plants to at least 12 inches. Optimize ventilation. Conduct weekly underside inspections, as rust often starts as pustules on the bottom of the leaf.
Protocol 4: brown spots (fertilizer stress) · 88% confidence
Cause
Cultivars like 'Congo Rojo' and 'Birkin' are prone to benign cosmetic spotting exacerbated by high fertilizer salts or nutrient imbalances. These spots are stable, non-progressive, and do not show halos or mushy centers, distinguishing them from infections.
Solutions
- Flush the soil with distilled water (3x the pot volume) to remove accumulated salts.
- Reduce fertilizer frequency; resume at 1/4 or 1/2 strength only during active growth periods.
- Switch to a low-salt organic fertilizer if spotting persists.
- Ignore existing spots; they are permanent but harmless to the plant's health.
Prevention
Use distilled or rainwater for sensitive varieties. Avoid over-fertilizing juvenile plants. Monitor soil EC if possible, or flush monthly as a preventive measure.
Protocol 5: brown spots · 88% confidence
Cause
Extrafloral nectaries (EFNs) secrete sugary sap droplets on leaf undersides to attract ants for pest protection in nature. Indoors, sap dries and causes chemical burn spots on leaf tissue.
Solutions
- Inspect leaf undersides for sticky sap droplets using flashlight
- Wipe both leaf surfaces weekly with damp microfiber cloth and mild soap solution
- Maintain stable 60-80% humidity to minimize stress triggering excess sap
- Spots are cosmetic only; no fungicide needed unless spreading
Prevention
Wipe leaf undersides weekly with damp cloth to remove sap before it burns tissue. Maintain 60-80% humidity to reduce stress-induced nectary overactivity.
Protocol 6: brown spots from extrafloral nectaries · 88% confidence
Cause
Philodendron brown spots from extrafloral nectaries are a physiological defense mechanism, not disease. The plant secretes sugary sap droplets on leaf undersides to attract ants in its native tropical habitat. Indoors, without ants to consume the sap, it accumulates and dries, causing chemical burns on surrounding tissue. This appears as irregular brown spots primarily on leaf undersides and margins. The phenomenon is common in Philodendron hederaceum, Brasil, and other climbing varieties.
Solutions
- Identify nectaries: Check leaf undersides for sticky, clear droplets near vein junctions
- Wipe affected leaves immediately with damp cloth and mild soap solution
- Trim severely burned leaf sections with sterile scissors for aesthetics
- Relocate to stable environment: Bright indirect light, 65-80°F, 60%+ humidity
- Continue weekly underside wiping routine as preventive maintenance
- Monitor new leaves: Reduced stress decreases nectary activity over 2-4 weeks
Prevention
Wipe leaf undersides weekly with damp microfiber cloth to remove sap before desiccation; maintain stable 60-80% humidity to reduce stress-induced nectary overproduction; avoid misting leaves which can spread sap and compound burn damage; group plants to create humidity microclimates that reduce stress responses.
Why are my Philodendron leaves turning yellow?
High-temperature stress (above 85°F/29°C) triggers rapid transpiration that exceeds root uptake capacity, causing dehydration stress
90%
Why are my Philodendron leaves turning yellow?
High-temperature stress (above 85°F/29°C) triggers rapid transpiration that exceeds root uptake capacity, causing dehydration stress
Cause
High-temperature stress (above 85°F/29°C) triggers rapid transpiration that exceeds root uptake capacity, causing dehydration stress. Philodendron responds by abscising older lower leaves—sacrificing maintenance foliage to preserve resources for apical meristem survival. Unlike root rot, which presents with wet soil and mushy roots, heat-induced yellowing occurs with dry soil and healthy root systems. The rapid onset (within 24-72 hours of heat exposure) distinguishes it from gradual natural senescence.
Solutions
- Immediate relocation: Move plant to cooler location below 80°F with bright indirect light
- Increase humidity: Deploy humidifier or mist surrounding air (not leaves) 2x daily
- Water to maintain even moisture: Keep top 1-2 inches slightly moist but never soggy
- Prune affected leaves: Remove fully yellowed foliage to redirect energy to recovery
- Support recovery: Apply diluted seaweed extract bi-weekly to reduce stress hormones
- Propagate insurance cuttings: Take 2-3 healthy top nodes in water/sphagnum as backup
Prevention
Monitor indoor temperatures during heat waves; relocate plants away from direct afternoon sun and heat sources; maintain humidity at 60-70% via humidifier or pebble trays; increase air circulation with small fans to reduce leaf temperature.
What disease does my Philodendron have?
Fungal leaf spot (e
6 protocols
85–92%
What disease does my Philodendron have?
Fungal leaf spot (e
Protocol 1: leaf spot (fungal) · 92% confidence
Cause
Fungal leaf spot (e.g., Cercospora) is triggered by overwatering and persistent leaf wetness. It presents as brown necrotic centers surrounded by distinct yellow halos. Pathogens thrive in humid air without adequate circulation, spreading via water splashes.
Solutions
- Immediately stop misting or overhead watering to keep foliage dry.
- Apply a copper-based fungicide or broad-spectrum treatment (e.g., Bonide Copper Fungicide) to arrest spread.
- Isolate the plant and improve air circulation with a small fan.
- Trim severely infected leaves with sterilized shears to reduce the spore load.
Prevention
Water at the soil level only. Maintain 40-60% humidity with active ventilation. Use well-draining aroid mix to prevent moisture stress at the roots.
Protocol 2: leaf spot (bacterial) · 90% confidence
Cause
Bacterial leaf spot (e.g., Pseudomonas cichorii) causes grey, thin, or 'water-soaked' translucent patches that rapidly turn brown. It is highly aggressive in high humidity and often enters through hydathodes during guttation in stagnant air.
Solutions
- Immediately isolate affected plants; bacterial infections spread rapidly via proximity and contact.
- Remove affected leaves using sterilized tools, cutting 2 inches into healthy tissue if possible.
- Reduce humidity and maximize airflow to dry the plant surface.
- Apply bactericide containing copper; avoid neem oil alone as it is less effective against bacteria.
Prevention
Ensure 50% max humidity in areas with poor airflow. Avoid grouping plants too tightly (maintain 12-18 inches spacing). Use bottom-watering exclusively for susceptible varieties.
Protocol 3: bacterial leaf spot · 89% confidence
Cause
Bacterial leaf spot (Xanthomonas, Pseudomonas) spreads via water splash, contaminated tools, or hands. High humidity and wet foliage create ideal conditions for bacterial proliferation.
Solutions
- Isolate plant immediately - bacteria spread rapidly
- Remove and destroy severely affected leaves (do not compost)
- Apply copper-based bactericide every 7-10 days for 3 applications
- Water only at soil level; avoid overhead watering completely
- Improve air circulation with fan set to low
Prevention
Water at soil level. Avoid wetting leaves. Sterilize tools between plants. Ensure good air circulation.
Protocol 4: leaf spot disease · 86% confidence
Cause
Leaf spot diseases in philodendrons are typically caused by fungal pathogens like Cercospora or bacterial infections like Xanthomonas. These appear as discrete brown, black, or yellow spots with defined margins, often starting on older lower leaves and spreading upward in humid conditions with poor airflow.
Solutions
- Identify pathogen type: fungal spots have defined margins; bacterial spots often water-soaked
- Remove affected leaves immediately with sterile scissors, dispose in trash not compost
- Improve air circulation: use fan to increase airflow around plant
- Reduce humidity temporarily: drop to 50-60% to slow disease spread
- Apply fungicide if fungal: copper-based spray every 7-10 days
- For bacterial spots: remove all affected tissue, maintain dry conditions
- Isolate plant to prevent spread to collection
- Monitor closely: new spots appearing means treatment needs adjustment
Prevention
Water at soil level to keep foliage dry. Maintain 40-60% humidity with good air circulation. Remove affected leaves immediately to prevent spread. Avoid splashing water on leaves during watering.
Protocol 5: leaf spot anthracnose · 85% confidence
Cause
Leaf spot diseases in Philodendron present as circular or ovoid brown lesions with yellow halos. Research identified Colletotrichum philodendricola and C. pseudoboninense as novel pathogens causing anthracnose on Philodendron tatei. Wounding greatly enhances infection rates from 0-35% to 35-65%.
Solutions
- Remove and destroy infected leaves immediately
- Isolate plant to prevent spore spread
- Apply copper fungicide or chlorothalonil every 7-10 days
- Avoid wetting leaves during watering
- Improve airflow with fan if humidity is high
- For severe cases: use systemic fungicide
- Repot in fresh sterile mix if soil is contaminated
- Monitor remaining leaves weekly for new spots
Prevention
Avoid mechanical damage to leaves. Maintain good air circulation. Water at soil level, never on foliage. Remove debris from soil surface. Use sterile tools when pruning.
Protocol 6: leaf spot · 85% confidence
Cause
Bacterial leaf spot on Philodendron (caused by Xanthomonas spp., particularly X. euvesicatoria strains) manifests as angular water-soaked lesions that expand into brown necrotic spots with yellow halos. Xanthomonas pathogens are host-specific to Araceae family plants and spread via splashing water, contaminated tools, or handling wet foliage.
Solutions
- Identify bacterial vs fungal: bacterial spots are angular with water-soaked margins; fungal spots are circular with defined borders
- Remove severely infected leaves with sterilized shears; dispose in sealed bag (do not compost)
- Apply copper-based bactericide weekly for 3-4 weeks following label directions
- Improve air circulation with small fan; reduce humidity to 50-60%
- Avoid misting and overhead watering completely during treatment
Prevention
Avoid overhead watering; sterilize pruning tools with 70% alcohol between uses; maintain moderate humidity (50-60%) with good air circulation; quarantine new plants for 14 days; avoid handling plants when foliage is wet.
Why are my Philodendron leaves turning yellow?
Philodendron rapid yellowing from heat stress occurs when temperatures exceed 85°F (29°C), triggering accelerated transpiration and leaf senescence
89%
Why are my Philodendron leaves turning yellow?
Philodendron rapid yellowing from heat stress occurs when temperatures exceed 85°F (29°C), triggering accelerated transpiration and leaf senescence
Cause
Philodendron rapid yellowing from heat stress occurs when temperatures exceed 85°F (29°C), triggering accelerated transpiration and leaf senescence. Unlike gradual decline from root issues, heat stress causes lower leaf abscission within 24-72 hours as the plant sacrifices older foliage to protect apical meristems and reduce water loss. The plant cannot maintain cellular turgor under extreme vapor pressure deficit, causing chlorophyll degradation and leaf drop.
Solutions
- Immediate relocation: Move to cooler spot below 80°F with bright indirect light
- Increase humidity urgently: Deploy humidifier or pebble tray to 65-70% to reduce transpiration
- Water thoroughly: Room-temperature water to root zone; avoid cold water shock
- Prune severely affected leaves: Remove yellow/brown leaves to redirect energy to recovery
- Monitor for 2 weeks: New growth indicates recovery; continued yellowing suggests additional stressors
- Preventive action: Install smart temperature alerts for heat wave warnings
Prevention
Monitor indoor temperatures with smart sensors; relocate plants when forecast exceeds 85°F; maintain 60-70% humidity to buffer temperature stress; use shade cloth or sheer curtains during heat waves; avoid south/west window exposure during summer afternoons; group plants to create evaporative cooling microclimates.
Why is my Philodendron wilting?
Wilting indicates root dysfunction preventing water uptake
87%
Why is my Philodendron wilting?
Wilting indicates root dysfunction preventing water uptake
Cause
Wilting indicates root dysfunction preventing water uptake. Causes include root rot from overwatering (mushy black roots), severely dry soil (dehydration), or physical root damage during repotting. Distinguishing the cause is critical for proper treatment.
Solutions
- Check soil moisture first - if dry, water thoroughly and leaves should perk within 24 hours
- If soil is wet: unpot and inspect roots immediately
- Trim any black, mushy, or foul-smelling roots with sterile shears
- Treat cut surfaces with hydrogen peroxide or cinnamon
- Repot in fresh dry mix if rot present; wait to water for 3-5 days
- If recently repotted: be patient as roots recover from transplant shock
Prevention
Use well-draining mix; maintain consistent watering - neither bone dry nor soggy; handle roots gently during repotting; avoid oversized pots that retain moisture
Why are my Philodendron leaves turning yellow?
Overwatering in Philodendrons occurs when soil remains saturated for 7+ days, creating anaerobic conditions (dissolved oxygen <2mg/L) that suffocate the epiphytic-adapted root system
15 protocols
82–95%
Why are my Philodendron leaves turning yellow?
Overwatering in Philodendrons occurs when soil remains saturated for 7+ days, creating anaerobic conditions (dissolved oxygen <2mg/L) that suffocate the epiphytic-adapted root system
Protocol 1: yellow leaves - overwatering and root rot · 95% confidence
Cause
Overwatering in Philodendrons occurs when soil remains saturated for 7+ days, creating anaerobic conditions (dissolved oxygen <2mg/L) that suffocate the epiphytic-adapted root system. Unlike drought-tolerant succulents, Philodendron roots require oxygen exchange for aerobic respiration. Prolonged saturation triggers hypoxia-induced root cell death, opening entry points for opportunistic pathogens like Pythium and Fusarium. Yellowing appears first in older leaves as the root system fails to transport water and nutrients, progressing rapidly upward if unchecked. Key distinction from natural aging: multiple leaves yellow simultaneously within days, often accompanied by leaf thinness, fungus gnats, and a musty soil odor.
Solutions
- Confirm overwatering: Check soil—if wet below surface despite 7+ days since last watering, overwatering is confirmed
- Inspect roots: Unpot gently, rinse soil, examine for black/mushy rot vs. white/firm healthy tissue
- Surgical removal: Trim ALL rotted roots with sterilized scissors until only firm white tissue remains
- Sterilize: Soak remaining roots in 3% hydrogen peroxide solution (1:4 with water) for 20 minutes to kill anaerobic bacteria
- Repot: Use fresh chunky aroid mix in a pot only 1-2 inches larger than root ball
- Recovery protocol: Water sparingly for 4-6 weeks, allowing soil to dry 50% between waterings; new growth indicates recovery
Prevention
Water only when top 2-3 inches of soil are completely dry—use the finger test or moisture meter. Use well-draining aroid mix (50% potting soil, 30% perlite, 20% orchid bark). Ensure pots have drainage holes and saucers are emptied within 30 minutes. Avoid automated watering systems that don't account for seasonal humidity variations.
Protocol 2: yellow leaves · 92% confidence
Cause
Thrips (Thrips palmi, Frankliniella spp.) rasp leaf tissue and suck sap, causing stippled yellow spots and distorted new growth. Thrips thrive in humid, sheltered environments with poor air circulation.
Solutions
- Isolate plant immediately to prevent spread
- Shower leaves with water to dislodge thrips, especially undersides
- Apply spinosad or insecticidal soap every 7-10 days for 3-4 cycles
- Use yellow sticky traps to monitor adult populations
- Increase humidity to 60-70% to deter thrips (they prefer dry conditions)
Prevention
Maintain 50-60% humidity with good airflow via fans. Quarantine new plants for 2-4 weeks with yellow sticky traps for early detection.
Protocol 3: yellow leaves - natural aging · 92% confidence
Cause
Philodendrons exhibit natural basipetal senescence where the oldest, smallest basal leaves yellow and drop as the plant reallocates nutrients to fuel new apical growth. This is a programmed developmental process, not pathology. The monopodial climbing habit requires energy conservation—older leaves become inefficient photosynthetic organs as vines elongate and produce new foliage at the growing tip. Key differentiator from root rot: affects ONLY 1-2 oldest leaves over 2+ months, with healthy new growth continuing at the vine tip.
Solutions
- Identify the pattern: Single or paired oldest basal leaves yellowing while 3+ newer leaves remain vibrant green indicates natural senescence
- Allow leaves to fully yellow (2-4 weeks) before removal—premature cutting disrupts nutrient reabsorption
- Snip at the petiole base with clean shears once completely yellow and dry
- Monitor stem nodes: Healthy 'eyes' or leaf scars on the lower stem confirm normal aging, not disease
Prevention
No prevention needed—this is healthy plant development. Maintain bright indirect light (2000-5000 lux), 60-80% humidity, and water when top 2 inches dry to support vigorous new growth that naturally outpaces old leaf turnover.
Protocol 4: yellow leaves from overwatering · 91% confidence
Cause
Philodendron yellowing from overwatering occurs when soil saturation exceeds 7+ days, creating anaerobic conditions below 2mg/L dissolved oxygen. Unlike desert plants, philodendrons are tropical aroids requiring aerobic root zones for cellular respiration. Waterlogged soil promotes anaerobic bacteria (Pythium, Phytophthora) that colonize root hairs, blocking nutrient uptake and causing chlorophyll degradation in leaves. The Araceae family, including Philodendron, is particularly susceptible to Xanthomonas bacterial pathogens under moist conditions.
Solutions
- Inspect roots immediately: Unpot and check for black, mushy sections indicating anaerobic rot
- Trim rotted roots with sterilized scissors, leaving only firm, white healthy tissue
- Repot in fresh well-draining mix: 50% potting soil, 30% perlite, 20% orchid bark
- Apply 3% hydrogen peroxide soil drench (1:4 ratio with water) to oxygenate and kill anaerobic pathogens
- Wait 7-10 days before next watering to establish dry-back cycle
- Monitor new growth: Yellowing stops when root oxygen levels stabilize above 2mg/L
Prevention
Water only when top 2 inches of soil are dry; use chunky aroid mix with 40% perlite/bark for rapid drainage; ensure pots have drainage holes and saucers are emptied; maintain 50-60% humidity to reduce transpiration stress; avoid automated watering systems that ignore environmental conditions.
Protocol 5: yellow leaves (thrips) · 90% confidence
Cause
Thrips larvae and adults rasp leaf tissue, causing subtle stippled yellowing or faded patches. Unlike overwatering, this is often accompanied by stalled growth and deformed new leaves. Tropical thrips are particularly hard to spot without magnification.
Solutions
- Inspect leaf undersides and yellow spots with a 10x magnifier for tiny white larvae.
- Apply systemic pesticide (e.g., spinosad or Bonide Systemic Granules) to break the 3-4 week lifecycle.
- Shower the plant to physically dislodge pests.
- Quarantine the plant to prevent spread to other Philodendrons.
Prevention
Conduct weekly pest patrols with magnification. Maintain high humidity (60%+) which thrips dislike. Quarantine all new arrivals for 14 days.
Protocol 6: yellow leaves (heat stress) · 90% confidence
Cause
Acute heat waves (>85°F/29°C) cause excessive transpiration and dehydration. Philodendrons respond by sacrificing older lower leaves to fuel apical new growth. This 'sacrificial senescence' is rapid and distinguishes heat stress from chronic issues.
Solutions
- Move plant to a cooler location (below 85°F) with bright indirect light.
- Boost humidity to 70% using a humidifier or pebble tray to reduce transpiration pull.
- Maintain even soil moisture; do not let the plant go bone-dry during heat spikes.
- Trim fully yellowed leaves as they will not recover.
Prevention
Monitor temperatures using hygrometers with alerts. Relocate plants away from windows during extreme summer heat. Use automated misting systems for stable microclimates.
Protocol 7: yellow leaves · 90% confidence
Cause
Philodendron yellow leaves have two distinct causes requiring opposite treatments. NATURAL SENESCENCE: The oldest, smallest bottom leaf yellows over 2-3 months as the plant redirects resources to apical meristem growth—this is healthy and expected in vining/climbing species. ROOT ROT/OVERWATERING: Multiple leaves yellow rapidly (within days), accompanied by leaf softness, fungus gnats, and thin texture. The critical differentiator is timing and pattern: natural aging affects only the single oldest leaf progressively, while root rot strikes multiple leaves simultaneously.
Solutions
- Inspect the pattern: Single oldest leaf = natural senescence; multiple leaves = problem
- Check soil moisture: If wet below surface despite 7+ days since watering = overwatering
- Look for secondary signs: Fungus gnats, leaf softness, or stunted new growth confirm root rot
- For natural senescence: Allow leaf to fully yellow, then snip cleanly at base with sterilized scissors
- For overwatering: Unpot immediately, inspect roots for rot, trim affected tissue, repot in fresh chunky mix
Prevention
Implement finger test: Water only when top 2 inches are dry; use clear pots to monitor root health; maintain 60-80% humidity to reduce water needs; quarantine new plants for 14 days to establish baseline health.
Protocol 8: yellow leaves - transplant shock · 90% confidence
Cause
Transplant shock in Philodendrons occurs when root systems are disturbed during repotting, particularly when root-bound plants are aggressively untangled or washed. The stress disrupts mycorrhizal networks and fine root hairs responsible for 70% of water/nutrient uptake. Yellowing typically appears 3-10 days post-repotting as the plant enters survival mode, sacrificing older leaves to conserve energy for root regeneration. Contributing factors: sudden light increases when moving outdoors, potting too deep (burying stems below soil line), and watering immediately after repotting into already-moist new soil. Key distinction from overwatering: Yellowing follows repotting event by days, not weeks; stems remain firm.
Solutions
- Stabilize environment: Keep in same light/humidity conditions as pre-repot for 14-21 days
- Withhold water 3-5 days post-repot: Allow roots to callus and seek new soil contact before saturating
- Monitor don't meddle: Resist urge to unpot and check—disturbance extends shock duration
- Humidity support: Maintain 70-80% humidity to reduce transpiration while roots recover
- Expect timeline: Yellowing may progress for 2-3 weeks; new growth indicates successful acclimation, typically 4-6 weeks post-repot
Prevention
Minimize root disturbance: slide root ball intact into new pot unless circling >80%. Repot only when soil is slightly dry. Maintain pre-repot light levels for 2 weeks. Never bury stems deeper than original soil line—Philodendrons are epiphytes requiring aerial stem exposure.
Protocol 9: yellow leaves - thrips infestation · 89% confidence
Cause
Thrips infestation in Philodendrons causes stippled yellowing and deformed new growth as these tiny pests (Thysanoptera) scrape leaf cells to feed on sap, creating characteristic silvery or yellow speckling. Unlike uniform yellowing from overwatering, thrips damage appears as scattered pale spots or patches, often concentrated on new growth where tissue is tender. Secondary signs: black fecal specks, distorted leaf curling, and the presence of tiny white larvae or black adults (visible with 10x magnification). Thrips thrive in warm, humid outdoor conditions and can rapidly escalate from subtle stippling to severe plant decline within 2-3 weeks if untreated.
Solutions
- Confirm thrips: Inspect leaf undersides and new growth with 10x magnifier for tiny white wiggly larvae or black adults
- Isolate immediately: Quarantine affected plant to prevent spread to collection
- Treatment: Apply synthetic systemic pesticide (e.g., spinosad) for severe infestations, following label dilution to prevent leaf burn
- Mechanical removal: Wipe leaves with insecticidal soap or neem oil for mild cases; repeat every 5-7 days for 3 cycles
- Environmental management: Increase humidity to 60-80% and improve airflow to make conditions less favorable for thrips
- Monitor: Check weekly for 4 weeks; new clean growth indicates successful treatment
Prevention
Implement weekly pest inspections with magnification glass, especially for plants moved outdoors. Apply preventive neem oil or insecticidal soap bi-weekly during high-risk periods. Quarantine new plants for 14 days with sticky traps. Maintain 50-70% humidity with good airflow to deter thrips establishment.
Protocol 10: yellow leaves (deep repotting) · 88% confidence
Cause
Burying Philodendron stems/nodes below the soil line during repotting restricts oxygen to the nodes and risks stem rot. This causes yellowing of the leaves attached to the buried stems, often mimicking root rot but originating at the stem level.
Solutions
- Gently lift the plant and repot shallower to match the original soil line.
- Ensure nodes and petioles are above the substrate.
- Inspect buried stems for mushy sections; if rot has started, trim and treat with hydrogen peroxide.
- Use a chunky, well-aerated aroid mix.
Prevention
Always match the original soil depth when repotting. Use markers or photos of the previous setup as reference. Philodendrons are often epiphytic and prefer exposed stems.
Protocol 11: yellow leaves - underwatering · 88% confidence
Cause
Underwatering in Philodendrons causes yellowing when soil moisture drops below 20% for extended periods (14+ days in active growth season), triggering drought stress that manifests as uniform leaf chlorosis starting from leaf edges and tips. Unlike overwatering which causes basal yellowing, underwatering affects leaves across the plant as transpiration rates exceed water uptake. The epiphytic nature of Philodendrons means they can tolerate brief dry spells, but prolonged drought causes cell plasmolysis and chlorophyll degradation. Key differentiator: Leaves feel thin and papery rather than mushy, and soil is bone-dry throughout the pot.
Solutions
- Confirm underwatering: Insert wooden skewer or finger 3 inches deep—bone-dry soil plus papery leaf texture indicates drought
- Water thoroughly: Drench soil until water exits drainage holes; repeat after 15 minutes if soil was extremely dry
- Recovery soak: For severely desiccated plants, place pot in water-filled tray for 30-60 minutes to rehydrate from bottom
- Humidity boost: Increase to 70%+ via humidifier or pebble tray during recovery to reduce further water loss
- Expect recovery: Leaves may not fully re-green but should firm up within 48 hours; new growth resumes in 1-2 weeks
Prevention
Establish consistent watering rhythm: check soil moisture every 5-7 days using finger test (top 2 inches). In high light/warm conditions, increase frequency. Use self-watering pots with reservoirs for extended absences. Maintain 50-70% humidity to reduce transpiration stress.
Protocol 12: yellow leaves - deep repotting stem burial · 88% confidence
Cause
Deep repotting injury in Philodendrons occurs when stems are buried below the soil line during transplanting, a common error with epiphytic aroids that require aerial stem exposure. Buried stems suffocate because Philodendron petioles and lower stem nodes lack the structural adaptations for soil contact—they're designed for climbing supports, not submersion. This causes oxygen deprivation at buried nodes, triggering yellowing of leaves attached to those submerged stems. The damage typically appears 1-3 weeks post-repotting and affects leaves whose petioles were buried, while newer aerial growth remains healthy. Key differentiator: Only leaves with buried stems yellow; above-soil leaves stay green.
Solutions
- Inspect depth: Check if leaf petioles or stem nodes are below soil line—yellowing on buried portions confirms deep repotting injury
- Immediate correction: Gently unpot, remove excess soil from around buried stems, and replant at correct depth with crown level with soil surface
- Prune affected leaves: Remove yellowed leaves attached to buried stems—they will not recover
- Stem exposure: Ensure 1-2 inches of lower stem remains above soil; use plant support if needed for stability
- Recovery care: Maintain 70%+ humidity and bright indirect light; expect 3-4 weeks for new healthy growth from exposed nodes
Prevention
Always repot at the exact same depth as the original container. Position the crown (where stems emerge from root ball) level with soil surface. Use chunky aroid mix that supports the root ball without needing deep burial for stability. Avoid pressing soil firmly around stems.
Protocol 13: yellow leaves - heat stress · 87% confidence
Cause
Heat stress in Philodendrons occurs when temperatures exceed 85°F (29°C) for extended periods, causing excessive transpiration and rapid water loss through stomata. Unlike succulents, Philodendrons lack CAM photosynthesis and cannot close stomata during heat peaks while maintaining gas exchange. The plant responds by sacrificing older leaves to conserve water for new apical growth—a survival mechanism. Acute heat waves trigger rapid yellowing (24-72 hours) starting from lower leaves. Key differentiator from overwatering: Soil is dry despite yellowing, and heat exposure correlates with weather events.
Solutions
- Confirm heat stress: Check recent temperature history—sudden yellowing during/after temperatures >85°F indicates heat stress
- Immediate relocation: Move to spot below 80°F with bright indirect light, away from heat sources like radiators or south-facing glass
- Humidity boost: Increase to 70%+ via humidifier or misting 2x daily to compensate for increased transpiration
- Water adjustment: Maintain even soil moisture—do not let dry out completely during recovery; water when top 1-2 inches dry
- Damage control: Trim fully yellowed leaves; expect 2-4 week recovery before new growth resumes
Prevention
Maintain temperatures between 65-80°F (18-27°C). During heat waves, relocate plants to cooler spots below 85°F, increase humidity to 60-70% to reduce transpiration, and avoid direct afternoon sun. Use shade cloth or move indoors during extreme heat periods.
Protocol 14: yellow leaves - nutrient deficiency · 86% confidence
Cause
Nutrient deficiency in Philodendrons causes yellowing when essential macronutrients—particularly nitrogen, iron, or magnesium—fall below levels needed for chlorophyll synthesis. Nitrogen deficiency shows as uniform pale yellowing across older leaves first (mobile nutrient). Iron deficiency causes interveinal chlorosis (yellow between green veins) on new growth. Magnesium deficiency appears as yellowing between veins on older leaves while veins stay green. Contributing factors: depleted soil from years without repotting, inconsistent fertilization, or high pH (>7.0) locking out micronutrients. Key differentiator from overwatering: Yellowing is gradual (weeks to months), affects leaf coloration pattern specifically, and soil is appropriately moist.
Solutions
- Identify deficiency pattern: Uniform yellowing = nitrogen; interveinal on new leaves = iron; interveinal on old leaves = magnesium
- Flush soil: Run distilled water through pot for 5 minutes to clear salt buildup that blocks nutrient uptake
- Foliar feed: Apply diluted liquid fertilizer (1/4 strength) directly to leaves for rapid micronutrient absorption
- Root feed: Apply balanced fertilizer at half strength to soil every 2 weeks for 6 weeks
- Long-term fix: Repot in fresh aroid mix if soil is >18 months old
Prevention
Fertilize every 4-6 weeks during active growth (March-September) with balanced liquid fertilizer (NPK 10-10-10 or 20-20-20) at half strength. Repot every 12-18 months with fresh aroid mix to replenish organic nutrients. Maintain soil pH between 5.5-6.5 for optimal nutrient availability.
Protocol 15: nutrient deficiency yellow leaves · 82% confidence
Cause
Philodendron plants experiencing nitrogen deficiency exhibit yellowing of older leaves first, as nitrogen is a mobile nutrient that the plant reallocates from mature tissue to support new growth. This occurs when soil nutrients are depleted after 6-12 months without fertilization, or when compacted soil prevents nutrient uptake despite adequate fertilization. The chlorosis typically begins at leaf edges and progresses inward, distinct from natural senescence which affects only the single oldest leaf.
Solutions
- 1. Apply balanced liquid fertilizer (NPK 20-20-20) at 1/4 strength bi-weekly during active growing season (spring-summer)
- 2. Flush soil thoroughly with distilled water to leach accumulated salts before starting fertilization regime
- 3. Repot in fresh well-draining aroid mix if soil is compacted or rootbound - compacted soil prevents nutrient absorption even with fertilization
- 4. Monitor new growth for color improvement over 4-6 weeks; new leaves should emerge deeper green
- 5. Reduce fertilizer to monthly in fall-winter when growth naturally slows
Prevention
Maintain consistent fertilization schedule every 4-6 weeks during growing season using balanced houseplant fertilizer at quarter strength; repot annually in fresh aroid mix to prevent nutrient depletion and soil compaction; use slow-release fertilizer granules for steady nutrient availability.
Diseases (7 topics · 18 cases)
What disease does my Philodendron have?
Bacterial blight in Philodendron is primarily caused by Xanthomonas campestris pv
88%
What disease does my Philodendron have?
Bacterial blight in Philodendron is primarily caused by Xanthomonas campestris pv
Cause
Bacterial blight in Philodendron is primarily caused by Xanthomonas campestris pv. dieffenbachiae entering through wounds or natural openings. The pathogen thrives in conditions of prolonged leaf wetness, high humidity without airflow, and contaminated tools or water. Symptoms include water-soaked lesions, yellow halos, and bacterial ooze.
Solutions
- Immediately isolate affected plant
- Sterilize tools with 70% alcohol
- Prune infected leaves/stems 1 inch below visible symptoms
- Apply copper-based bactericide weekly for 3-4 weeks
- Switch to bottom-watering to keep foliage dry
- Increase airflow with oscillating fan
- If stem is affected, cut below infection and seal with cinnamon or wax
- Repot in fresh sterile mix if soil is contaminated
Prevention
Maintain 50-60% humidity with good air circulation. Use sterile pruning tools. Avoid overhead watering. Water at soil level only. Quarantine new plants.
Philodendron: Cutting Rot
Root rot in philodendron cuttings occurs when cut stem ends are submerged in water without proper callusing, allowing bacteria to enter the open wound
88%
Philodendron: Cutting Rot
Root rot in philodendron cuttings occurs when cut stem ends are submerged in water without proper callusing, allowing bacteria to enter the open wound
Cause
Root rot in philodendron cuttings occurs when cut stem ends are submerged in water without proper callusing, allowing bacteria to enter the open wound. Anaerobic conditions in standing water promote rapid bacterial multiplication that destroys the cutting before roots develop.
Solutions
- Inspect cutting: mushy, translucent stem indicates bacterial rot
- If rot detected: recut 1 inch above affected area into healthy firm tissue
- Allow fresh cut to callus 24-48 hours before returning to water
- Switch propagation medium: use moist perlite or sphagnum instead of water
- Reduce humidity temporarily: 60-70% instead of 80%+ to slow bacterial growth
- Use sterile tools for any recutting to prevent introducing new pathogens
- Consider rooting hormone: contains fungicides that may help prevent rot
- Success rate: callused cuttings have 40% higher survival than immediate water placement
Prevention
Allow cuttings to callus 24-48 hours in dry, shaded location before water propagation. Change water every 2-3 days. Use room-temperature dechlorinated water to reduce stress.
What disease does my Philodendron have?
Fungal infections in Philodendron typically result from overwatering, poor drainage, or prolonged leaf wetness allowing opportunistic fungi like Fusarium, Phytophthora, or Colletotrichum to colonize tissue
90%
What disease does my Philodendron have?
Fungal infections in Philodendron typically result from overwatering, poor drainage, or prolonged leaf wetness allowing opportunistic fungi like Fusarium, Phytophthora, or Colletotrichum to colonize tissue
Cause
Fungal infections in Philodendron typically result from overwatering, poor drainage, or prolonged leaf wetness allowing opportunistic fungi like Fusarium, Phytophthora, or Colletotrichum to colonize tissue. Symptoms include leaf spots, mushy stems, powdery mildew, or mushroom growth in soil.
Solutions
- Remove and discard all infected plant material with sterile tools
- For leaf spot: Apply copper fungicide every 7-14 days
- For soil fungus: Remove visible fungal structures, improve drainage
- Repot in fresh sterile mix if root rot is suspected
- Increase airflow and reduce humidity temporarily
- Apply cinnamon powder to cuts as natural antifungal
- Use systemic fungicide for severe infections
- Quarantine plant until recovered
Prevention
Use well-draining chunky aroid mix. Allow top 2-3 inches of soil to dry between waterings. Provide good air circulation. Avoid misting leaves directly. Water at soil level.
Philodendron: Mushy Stems Petiole Rot
Mushy petioles and stems in Philodendron typically indicate petiole rot or bacterial soft rot
86%
Philodendron: Mushy Stems Petiole Rot
Mushy petioles and stems in Philodendron typically indicate petiole rot or bacterial soft rot
Cause
Mushy petioles and stems in Philodendron typically indicate petiole rot or bacterial soft rot. This occurs when petioles are buried too deep in soil, water collects in leaf axils, or drainage is poor. Unlike root rot which affects roots first, petiole rot begins at the stem-leaf junction and spreads downward.
Solutions
- Inspect petioles - mushy texture indicates active rot
- Remove affected leaves by cutting at base with sterile shears
- Raise soil level if petioles are buried too deep
- Repot with petioles positioned above soil line
- Apply cinnamon powder to fresh cuts as antifungal barrier
- Switch to terracotta pot for better aeration
- Increase light levels to accelerate soil drying
- Water only when top 2-3 inches of soil are completely dry
Prevention
Never bury petioles below soil line - keep them above substrate. Use chunky, well-draining aroid mix. Ensure bright indirect light to promote faster drying. Increase airflow around plant.
Why does my Philodendron have root rot?
Pythium, Phytophthora, and Rhizoctonia fungi proliferate in waterlogged soil with poor drainage
10 protocols
87–91%
Why does my Philodendron have root rot?
Pythium, Phytophthora, and Rhizoctonia fungi proliferate in waterlogged soil with poor drainage
Protocol 1: root rot · 91% confidence
Cause
Pythium, Phytophthora, and Rhizoctonia fungi proliferate in waterlogged soil with poor drainage. These pathogens attack root cortex cells, causing browning, mushy texture, and inability to uptake water/nutrients.
Solutions
- Unpot plant and gently rinse roots under lukewarm water
- Trim all brown, mushy, or foul-smelling roots with sterilized shears
- Soak remaining roots in 3% hydrogen peroxide solution for 5 minutes
- Repot in fresh dry aroid mix; choose pot 1-2 inches larger than root ball
- Wait 7 days before first watering to allow root callusing
Prevention
Use terracotta pots with drainage holes. Mix 30% perlite + 20% orchid bark + 50% potting soil. Water only when top 2 inches are bone dry.
Protocol 2: root rot · 91% confidence
Cause
Root rot in Philodendron develops when soil saturation exceeds 7 days, creating anaerobic conditions (dissolved oxygen <2mg/L) that promote Pythium and Fusarium proliferation. The epiphytic root system, adapted to tree bark with high oxygen exposure, suffocates in dense potting mix. Unlike drought-tolerant succulents, Philodendrons lack water-storing tissue and depend on continuous root respiration. Early signs include yellowing lower leaves and stunted new growth with deformed leaves—symptoms often mistaken for nutrient deficiency or sunburn.
Solutions
- Inspect roots monthly: Gently unpot and check for black/mushy tissue or foul odor
- Trim rotted roots with sterilized scissors, leaving only firm white/cream tissue
- Sterilize remaining roots in 3% hydrogen peroxide solution (1:4 with water) for 15-20 minutes
- Repot in fresh chunky mix: 40% potting soil, 30% perlite, 20% orchid bark, 10% charcoal
- Reduce watering frequency by 50% during recovery; resume only when soil is dry 2-3 inches down
Prevention
Water only when top 2-3 inches of soil are completely dry; use chunky aroid mix with 50% perlite/bark minimum; ensure drainage holes; maintain 60-80% humidity to reduce watering frequency; never use self-watering pots for established plants.
Protocol 3: root rot soil mix · 91% confidence
Cause
Standard peat-based potting soil compacts within 2-3 months, eliminating air pockets and creating anaerobic zones even with careful watering. Philodendron roots require 20-30% air porosity to maintain oxygen levels above the 2mg/L threshold for cellular respiration. The fine peat particles that hold moisture become hydrophobic when dry, then waterlogged when wet—an extreme swing that damages root hairs.
Solutions
- Base mix: 50% high-quality potting soil or coco coir (organic matter and nutrients)
- Drainage amendment: 30% perlite or pumice (creates stable air pockets)
- Structural component: 20% orchid bark or coarse sand (prevents long-term compaction)
- Bioactive addition: 10% horticultural charcoal (absorbs excess moisture, prevents bacterial growth)
- Test before use: Water should drain freely; if pooling occurs, add more perlite
Prevention
Refresh soil mix every 12-18 months; use unglazed terracotta pots for natural moisture wicking; avoid deep pots that retain moisture at bottom; test drainage by watering—should exit holes within 30 seconds.
Protocol 4: root rot h2o2 treatment · 90% confidence
Cause
Advanced root rot occurs when anaerobic bacteria (Pythium spp.) and fungal pathogens colonize the root cortex, breaking down cell walls and blocking vascular transport. The standard hydrogen peroxide treatment creates a temporary oxygen boost and oxidizes pathogen cell membranes, but requires precise dilution—too strong damages living tissue, too weak is ineffective. The 3% solution must be diluted 1:4 with water to achieve safe 0.75% concentration for root soaking.
Solutions
- Prepare solution: Mix 3% hydrogen peroxide with water at 1:4 ratio (0.75% final concentration)
- Remove all soil and gently rinse roots under lukewarm water
- Submerge only root mass in solution for 15-20 minutes—never exceed 30 minutes
- Allow to air-dry on paper towel for 2-3 hours before repotting
- Apply cinnamon powder to any cut surfaces to seal and prevent reinfection
- Repot in completely dry fresh mix; wait 7 days before first watering
Prevention
Maintain aerobic soil conditions through proper mix and watering discipline; avoid water propagation for cuttings from rot-affected plants; sterilize tools between cuts; use cinnamon powder on fresh cuts as natural antifungal barrier.
Protocol 5: root rot in dense soil · 90% confidence
Cause
Philodendron root rot in aroid mix occurs when soil composition lacks sufficient porosity for oxygen exchange. Standard potting soil retains moisture for 10-14 days in philodendron pots, far exceeding the 7-day maximum aerobic threshold. The Araceae family is susceptible to multiple rot pathogens: Pythium (oomycete), Phytophthora (water mold), and Fusarium (fungus) all thrive in saturated conditions. Xanthomonas bacteria also colonize aroid roots under anaerobic stress.
Solutions
- Immediate unpotting: Remove plant and gently rinse all soil from roots
- Surgical root inspection: Trim ALL black, brown, mushy, or foul-smelling roots
- Sterilize remaining tissue: Soak healthy roots in 3% hydrogen peroxide for 20 minutes
- Apply cinnamon powder to cut ends as natural antifungal barrier
- Repot in fresh chunky mix: 40% bark/perlite, 40% potting soil, 20% charcoal
- Wait 10-14 days before first watering to allow root callusing
- Resume watering only when top 3 inches are completely dry
Prevention
Use chunky aroid-specific mix: minimum 40% drainage components (perlite, pumice, orchid bark); choose terracotta pots for moisture wicking; water only when top 2-3 inches are dry; empty saucers within 30 minutes of watering; avoid pots without drainage holes entirely.
Protocol 6: root rot propagation rescue · 89% confidence
Cause
When root rot reaches the crown or destroys most of the root system, the plant cannot recover in place. However, Philodendron stems contain sufficient stored carbohydrates and meristematic tissue at nodes to regenerate adventitious roots. This survival mechanism allows genetic preservation even when the root system is non-viable. The key is locating viable nodes with at least one healthy leaf to support the cutting during root regeneration.
Solutions
- Identify viable nodes: Look for swollen bumps on stem with potential aerial root or bud—typically every 2-3 inches on healthy vine sections
- Sterile cutting: Use clean razor blade to cut 1/4 inch below the lowest healthy node
- Leaf management: Remove bottom 1-2 leaves entirely or cut in half horizontally to reduce transpiration load
- Callus formation: Lay cutting on dry paper towel in shade for 24-48 hours until cut end forms dry scab
- Rooting medium: Plant 1 inch deep in moist long-fiber sphagnum moss or perlite—not water—to maximize airflow
- Environment: Maintain 70-80% humidity, 70-80°F, bright indirect light; roots emerge in 2-4 weeks
Prevention
Monitor root health monthly via visual unpotting; at first sign of advanced rot, propagate before crown involvement; always propagate from healthy tissue, never from mushy or discolored sections.
Protocol 7: variegated root rot · 88% confidence
Cause
Variegated Philodendron varieties exhibit heightened rot sensitivity due to reduced chlorophyll limiting photosynthesis and transpiration. Soil stays moist longer as variegated tissue cannot process water as efficiently, creating anaerobic conditions favorable to pathogens.
Solutions
- Increase light to bright indirect (higher than solid green varieties require)
- Extend dry periods - allow top 3-4 inches to dry vs 2 inches for green varieties
- Use extremely chunky mix with 40% perlite/bark for rapid drainage
- Repot gently without rinsing roots; avoid root disturbance
- Water less frequently than comparable green varieties - err on side of dryness
Prevention
Provide brighter light for variegated varieties to compensate for reduced chlorophyll. Allow soil to dry more completely between waterings than solid green varieties. Use extra chunky, fast-draining mix.
Protocol 8: root rot recovery · 88% confidence
Cause
Aggressive root disturbance during repotting (untangling, rinsing root-bound roots) damages fine root hairs and disrupts mycorrhizal networks, causing transplant shock. Variegated philodendrons are especially vulnerable due to lower chlorophyll reducing photosynthesis and transpiration, keeping soil wet longer. Symptoms include wilting, yellowing, and soil remaining wet despite reduced watering.
Solutions
- If roots were disturbed but not rotted: repot gently into slightly larger pot without rinsing soil unless decay visible
- Water sparingly post-repot: only when top 2-3 inches dry; reduce frequency by 50% for 2-4 weeks
- Apply diluted seaweed extract or rooting hormone to support root regeneration
- Maintain bright indirect light, 65-80°F, 60-70% humidity to minimize transpiration stress
- Avoid fertilizing for 4-6 weeks; monitor for new growth as sign of recovery
- If root loss severe: propagate healthy top cuttings in water or sphagnum as backup
Prevention
Minimize root disturbance during repotting; slide root ball intact into new pot. Never rinse healthy roots. Match pot size to root ball with only 1-2 inches extra space. Calibrate lighting to variegation level—higher white content needs brighter light to support transpiration and soil drying.
Protocol 9: root rot recovery timeline · 88% confidence
Cause
After root rot treatment, Philodendron enters a recovery phase prioritizing root regeneration over visible growth. The plant allocates 70%+ of available energy to rebuilding root hairs and vascular tissue before resuming leaf production. This biological priority creates a 4-8 week lag where above-ground appearance shows minimal improvement, causing owners to abandon viable plants prematurely. New leaves only emerge after the root system can support transpiration demands.
Solutions
- Week 1-2: Expect no visible changes; plant is callusing wounds and initiating root primordia
- Week 3-4: First new white root tips may appear—check gently by unpotting if necessary
- Week 5-6: Existing leaves should firm up; remove any remaining soft leaves at base
- Week 7-8: New leaf growth emerges from center when root system has recovered sufficiently
- Month 3+: Resume minimal fertilization at 1/4 strength; plant enters active growth phase
Prevention
Document treatment date; resist urge to check roots more than once every 2 weeks; maintain stable environmental conditions without additional stressors; avoid fertilizing during recovery to prevent root burn.
Protocol 10: variegated root rot sensitivity · 87% confidence
Cause
Variegated Philodendron varieties (Pink Princess, White Princess, White Knight) exhibit increased rot sensitivity due to reduced chlorophyll content in white/pink sectors. Lower photosynthetic capacity means slower transpiration rates, keeping soil moist for extended periods compared to fully green specimens. Additionally, variegated tissue has reduced structural integrity and fewer defensive compounds, making roots more vulnerable to opportunistic pathogens like Pythium when conditions are even slightly suboptimal.
Solutions
- Increase light: Position variegated varieties in brighter indirect light (3000-6000 lux) to accelerate transpiration
- Adjust watering: Allow top 3 inches to dry completely—extend schedule by 3-5 days versus green varieties
- Downsize pots: Use containers only 1-2 inches larger than root ball to minimize excess soil moisture
- Enhance drainage: Increase perlite/bark to 60% of mix for variegated specimens
- Monitor closely: Check soil moisture 2x weekly with finger test or meter
- Propagate backup: Take cuttings from healthy sections early if rot suspected—variegated genetics are valuable
Prevention
Provide 20-30% brighter light than green varieties to compensate for reduced chlorophyll; extend dry-out periods by 2-3 days compared to green specimens; use smaller pots to reduce soil volume and moisture retention; maintain higher humidity (70-80%) to reduce overall water needs.
What is the best soil mix for Philodendron?
Soil surface mold (white fuzzy mycelium) on Philodendron is caused by saprophytic fungi like Trichoderma and Aspergillus thriving in persistently moist, organic-rich conditions
90%
What is the best soil mix for Philodendron?
Soil surface mold (white fuzzy mycelium) on Philodendron is caused by saprophytic fungi like Trichoderma and Aspergillus thriving in persistently moist, organic-rich conditions
Cause
Soil surface mold (white fuzzy mycelium) on Philodendron is caused by saprophytic fungi like Trichoderma and Aspergillus thriving in persistently moist, organic-rich conditions. While harmless to plants, mold indicates chronically wet soil that risks root rot. Contributing factors include overwatering, oversized pots with excess soil volume, poor drainage, low light slowing evaporation, and high humidity without airflow. Indoor winter heating that dries air while soil remains wet creates ideal mold conditions.
Solutions
- 1. Gently scrape off visible mold from soil surface with spoon—discard in trash, not compost
- 2. Allow top 2-3 inches of soil to dry completely before next watering
- 3. Improve airflow around plant using small fan on low setting
- 4. Top-dress with 1/2 inch sterile perlite, LECA, or coarse sand to suppress regrowth
- 5. If mold recurs, repot in fresh well-draining mix and appropriately sized pot
- 6. For severe cases, dust soil surface with cinnamon powder (natural antifungal)
- 7. Adjust watering schedule—mold signals consistent overwatering requiring habit change
Prevention
Adopt soak-and-dry watering: water thoroughly then allow top 2 inches to dry completely. Use pots sized to root ball with drainage holes. Incorporate 40-50% perlite/pumice in soil mix. Ensure good airflow with small fan. Top-dress soil with sterile LECA or gravel. Monitor with moisture meter. Empty drainage saucers promptly after watering.
Why is my Philodendron's stem turning black?
A Philodendron cutting suffering stem rot, leaving only a small node with an aerial root nub and no foliage
3 protocols
87–92%
Why is my Philodendron's stem turning black?
A Philodendron cutting suffering stem rot, leaving only a small node with an aerial root nub and no foliage
Protocol 1: stem rot · 92% confidence
Cause
A Philodendron cutting suffering stem rot, leaving only a small node with an aerial root nub and no foliage.
Solutions
- Cut away all rot, sterilize the node with H2O2, and let it callous.
- Lay the node horizontally on top of a bed of damp sphagnum moss (do not bury it).
- Ensure the aerial root nub is pointing down into the moss, and the axillary bud is pointing up or sideways.
- Cover to maintain 90% humidity and provide 12-14 hours of grow light. Roots will form from the nub within weeks.
Prevention
Keep the actual stem node relatively dry while only the aerial root contacts the moist moss.
Protocol 2: stem rot · 89% confidence
Cause
Stem rot (bacterial soft rot) in Philodendron occurs when moisture accumulates at the stem base or leaf axils, creating entry points for Erwinia chrysanthemi and other bacteria. Unlike root rot which affects below-soil tissue, stem rot targets above-ground meristematic tissue. Symptoms include soft, mushy tissue at soil line, foul odor, and progressive yellowing of attached leaves. High humidity without adequate airflow is the primary trigger, especially in self-heading varieties with dense leaf clusters.
Solutions
- Immediate inspection: Unpot plant and examine stem base—healthy tissue is firm and pale green/white
- Surgical removal: Trim ALL soft, discolored, or mushy stem tissue with sterilized razor until only firm white tissue remains
- Sterilize cut surfaces: Apply cinnamon powder or diluted hydrogen peroxide to seal wounds
- Allow callusing: Lay plant on dry paper towel in shade for 48 hours to seal cut wounds
- Repot shallow: Replant at same or slightly higher level to keep stem above soil line
- Modify environment: Increase airflow with fan; reduce humidity temporarily to 40-50%
Prevention
Water at soil level only, avoiding leaf and stem wetting; maintain 40-60% humidity with active air circulation (small fan); ensure pots have drainage and saucers are emptied promptly; avoid deep planting where stems contact moist soil.
Protocol 3: stem rot surgery · 87% confidence
Cause
Stem rot in Philodendron results from bacterial (Erwinia) or fungal infection entering through wounds or prolonged stem wetness from overwatering, high humidity without airflow, or poor drainage. Unlike root rot, healthy roots may persist while stem tissue decays.
Solutions
- Inspect stem: soft, mushy, discolored areas indicate active rot - healthy stem is firm and green
- Sterilize cutting tools; remove all rotted tissue until only firm, healthy stem remains
- Seal cut surface with cinnamon powder (antifungal) or melted candle wax to prevent reinfection
- Repot in fresh, well-draining aroid mix with 50% perlite/bark content
- Reduce watering frequency and improve air circulation around plant
Prevention
Use airy, epiphytic soil mixes with excellent drainage. Water only when top 2-3 inches of soil dry. Maintain 40-60% humidity with good airflow to prevent stem condensation. Avoid dense, moisture-retentive soil.
Pests (6 topics · 10 cases)
Why does my Philodendron have aphids?
Aphids cluster on tender new growth and unfurled leaves of philodendrons, piercing soft tissue to extract sap
82%
Why does my Philodendron have aphids?
Aphids cluster on tender new growth and unfurled leaves of philodendrons, piercing soft tissue to extract sap
Cause
Aphids cluster on tender new growth and unfurled leaves of philodendrons, piercing soft tissue to extract sap. Their rapid reproduction through parthenogenesis creates population explosions within days. On philodendrons, they target the delicate emerging leaves which lack the thick cuticle of mature foliage. The succulent new growth provides ideal feeding conditions.
Solutions
- Rinse plant with strong water spray to dislodge aphids from leaves and stems
- Apply diluted neem oil slightly more concentrated than label directions for soft-bodied pests
- Spray affected areas thoroughly, leave for 15 minutes contact time, then rinse off residue
- Move plant to shady location during treatment to prevent leaf burn on sensitive new growth
- Reapply neem treatment 1-2 times per week until all aphids are eradicated
- Gradually re-acclimate to brighter light over 1-2 weeks once pest-free
Prevention
Inspect new plants thoroughly before introducing to collection; maintain moderate humidity 60-80%; ensure bright indirect light without direct sun scorch; quarantine new acquisitions for 2-4 weeks; inspect new unfurled leaves weekly.
Why does my Philodendron have mealybugs?
Mealybugs (Pseudococcidae) can infest both the foliage (white cottony clusters in axils) and the root zone (root mealybugs)
90%
Why does my Philodendron have mealybugs?
Mealybugs (Pseudococcidae) can infest both the foliage (white cottony clusters in axils) and the root zone (root mealybugs)
Cause
Mealybugs (Pseudococcidae) can infest both the foliage (white cottony clusters in axils) and the root zone (root mealybugs). Philodendrons' fibrous, moisture-retentive roots and large leaf nodes provide ideal hiding spots. Soil-borne infestations often present as systemic decline or yellowing without visible leaf pests.
Solutions
- For leaf mealybugs: dab individuals with 70% isopropyl alcohol on a cotton swab.
- For root mealybugs: remove the plant from the pot, discard all soil, and rinse roots thoroughly in 120°F (49°C) water or a 1:4 hydrogen peroxide solution.
- Repot in fresh, sterile well-draining mix and sterilize the original container.
- Apply systemic granules (e.g., Imidacloprid) if the infestation persists after repotting.
Prevention
Inspect root balls of new clearance plants before potting. Use sterile commercial mixes. Maintain 40-60% humidity to discourage aerial mealybug movement.
What pests are on my Philodendron?
Philodendrons, like many tropical houseplants, attract common indoor pests including mealybugs, spider mites, fungus gnats, and thrips
85%
What pests are on my Philodendron?
Philodendrons, like many tropical houseplants, attract common indoor pests including mealybugs, spider mites, fungus gnats, and thrips
Cause
Philodendrons, like many tropical houseplants, attract common indoor pests including mealybugs, spider mites, fungus gnats, and thrips. These pests enter via contaminated soil, nursery stock, or poor quarantine practices. Philodendrons' large leaves and vining growth habit create hiding spots in leaf axils and undersides where pests multiply undetected. Organic pest control relies on prevention, early detection, mechanical removal, and botanical treatments rather than synthetic chemicals.
Solutions
- Inspect weekly: Check leaf undersides, stems, and new growth with magnifying glass. Early detection prevents major infestations
- Mechanical control: Remove visible pests with Q-tip and 70% isopropyl alcohol. Prune heavily infested leaves
- Water management: Allow top 2 inches of soil to dry between waterings to prevent fungus gnats. Use well-draining aroid mix
- Apply neem oil: Mix 1-2% solution and spray thoroughly on all surfaces. Repeat every 7-10 days for 3-4 cycles to break pest life cycles
- Use insecticidal soap: Effective for soft-bodied pests like mealybugs and aphids. Apply in morning or evening
- Biological controls: Apply BTI (mosquito bits) to soil for fungus gnat larvae. Use sticky traps to monitor adult populations
- Environmental management: Maintain 40-60% humidity to deter spider mites. Increase airflow with fans to discourage pests while maintaining humidity
- Quarantine: Isolate new plants for 2-4 weeks before introducing to collection
Prevention
Quarantine new plants 2-4 weeks with weekly inspections. Use sterile well-draining potting mix. Maintain consistent care—avoid overwatering and low humidity stress. Clean leaves monthly. Apply preventive neem oil monthly during growing season. Monitor with sticky traps.
What pests are on my Philodendron?
General pest prevention relies on maintaining environmental conditions unfavorable to common houseplant pests
86%
What pests are on my Philodendron?
General pest prevention relies on maintaining environmental conditions unfavorable to common houseplant pests
Cause
General pest prevention relies on maintaining environmental conditions unfavorable to common houseplant pests. Philodendrons are susceptible to spider mites, thrips, mealybugs, and scale when stressed by low humidity, poor airflow, or over-fertilization. Healthy plants in optimal conditions resist infestations better.
Solutions
- Inspect plants weekly using 10x magnification
- Shower plants monthly to dislodge pests and dust
- Maintain proper humidity using humidifiers or pebble trays
- Avoid over-fertilization - use at half strength
- Introduce beneficial insects (predatory mites, ladybugs) for prevention
- Use neem oil as preventive foliar spray monthly
- Keep new plants isolated for 2-4 weeks minimum
- Treat at first sign - early intervention is critical
Prevention
Maintain 50-70% humidity. Ensure good air circulation. Avoid over-fertilizing with nitrogen which attracts pests. Inspect plants weekly. Quarantine new plants for 2-4 weeks. Keep leaves clean.
Why does my Philodendron have spider mites?
Philodendrons with thin, velvety leaves (e
3 protocols
87–92%
Why does my Philodendron have spider mites?
Philodendrons with thin, velvety leaves (e
Protocol 1: spider mites · 92% confidence
Cause
Philodendrons with thin, velvety leaves (e.g., P. verrucosum, P. splendid) are highly susceptible to spider mites (Tetranychus urticae). Low humidity (<50%) triggers explosive population growth. Mites often enter via open windows, clothing, or new plants without quarantine, causing stippled yellowing and fine webbing.
Solutions
- Quarantine new acquisitions for 14-21 days with daily inspections of leaf undersides using a 10x magnifier.
- Boost humidity to 60-80% using a humidifier; spider mites thrive in dry conditions and reproduction slows significantly in high RH.
- Apply insecticidal soap or a miticide (e.g., abamectin) every 5-7 days for 3-4 cycles to break the lifecycle.
- Shower plants monthly to physically dislodge dust and early-stage mite colonies.
Prevention
Maintain 60% minimum humidity. Conduct weekly 'pest patrols' on mature foliage. Avoid grouping plants so tightly that they touch, which facilitates spread.
Protocol 2: spider mites · 88% confidence
Cause
Spider mites are tiny arachnids that feed on leaf sap, causing stippling, yellowing, and webbing. They thrive in dry air and low humidity. Often appear on new growth first. Detected by fine webbing between leaves and stems.
Solutions
- Isolate infested plant immediately
- Shower leaves with water to dislodge mites (especially undersides)
- Apply neem oil or insecticidal soap thoroughly to all leaf surfaces
- Repeat treatment every 5-7 days for 3-4 weeks to break lifecycle
- Increase humidity around plant as mites prefer dry conditions
- For severe infestations: use miticide or systemic insecticide
Prevention
Maintain 50-60% humidity or higher; mist regularly or use humidifier; conduct weekly inspections; quarantine new plants; shower plants monthly as preventive measure
Protocol 3: thrips and spider mites · 87% confidence
Cause
Thrips infestations on Philodendron cause silvery stippling, distorted new growth, and black specks (frass) on leaves. These tiny, slender insects rasp leaf tissue and suck sap, thriving in warm, dry indoor conditions. Spider mites appear as tiny yellow/white stippling, fine webbing between leaves and stems, and rapid population explosions in hot, dry air. Both pests spread quickly between plants and weaken Philodendron by extracting vital fluids. Variegated varieties are particularly susceptible due to reduced vigor.
Solutions
- 1. Isolate infested plant immediately to prevent spread
- 2. For thrips: spray with strong water to dislodge, then apply spinosad (Captain Jack's Dead Bug Brew) every 7-10 days for 3-4 cycles
- 3. For spider mites: increase humidity immediately via showering, apply neem oil or miticide every 5-7 days for 2-3 weeks
- 4. Use systemic granules (imidacloprid) in soil for severe infestations—protects for 8 weeks
- 5. Treat ALL nearby plants even if asymptomatic—pegs spread rapidly
- 6. Prune heavily damaged leaves to reduce pest habitat
- 7. Monitor with sticky traps for 1-2 months to catch stragglers
Prevention
Quarantine new plants for 2-4 weeks. Inspect plants weekly, especially new growth and leaf undersides. Maintain 50-60% humidity—pests prefer dry air. Use yellow sticky traps for early detection. Avoid over-fertilizing with nitrogen which attracts pests. Shower plants monthly as preventive measure. Increase air circulation without creating drafts.
Why does my Philodendron have thrips?
Thrips (Thysanoptera) are tiny rasping-sucking insects that scrape leaf cells and feed on sap
3 protocols
88–90%
Why does my Philodendron have thrips?
Thrips (Thysanoptera) are tiny rasping-sucking insects that scrape leaf cells and feed on sap
Protocol 1: thrips · 90% confidence
Cause
Thrips (Thysanoptera) are tiny rasping-sucking insects that scrape leaf cells and feed on sap. They reproduce rapidly in warm, dry conditions and spread via air currents to nearby plants.
Solutions
- Isolate infected plant immediately
- Spray leaves with strong water stream to dislodge adults and larvae
- Apply spinosad (Captain Jack's Dead Bug Brew) every 7 days for 4 weeks
- Use systemic granules (imidacloprid) for severe infestations
- Treat all nearby plants preventatively as thrips spread easily
Prevention
Quarantine new plants for 21 days. Use yellow sticky traps for monitoring. Maintain 60%+ humidity to deter thrips establishment.
Protocol 2: thrips infestation · 89% confidence
Cause
Thrips are tiny, slender insects that feed by rasping leaf tissue and sucking sap. They cause silvery or translucent stippling, black frass specks, and distorted or stunted new growth. Thrips reproduce rapidly and can spread quickly throughout a collection. They prefer dry conditions and low humidity.
Solutions
- Isolate infested plant immediately
- Confirm ID: shake leaves over white paper to see tiny moving specks
- Prune heavily damaged leaves and dispose in sealed bag
- Apply insecticidal soap or neem oil every 5-7 days for 3-4 cycles
- Use systemic insecticide (spinosad or imidacloprid) for severe cases
- Treat ALL nearby plants preventively
- Deploy yellow sticky traps to catch adults
- Maintain high humidity to deter reinfestation
Prevention
Maintain 60-70% humidity. Quarantine new plants for 2-4 weeks. Use yellow sticky traps. Inspect plants weekly with 10x magnification. Increase airflow without creating drafts.
Protocol 3: thrips infestation · 88% confidence
Cause
Thrips (Thysanoptera) infestations in Philodendron cause distinctive stippled yellowing as these sap-sucking pests pierce leaf cells and extract chlorophyll-rich contents. The 1-2mm slender insects—visible as tiny black specks (adults) or white larvae (wiggly on undersides)—congregate on new growth and leaf undersides. Unlike other stressors, thrips damage appears as silvery or bronzed flattened patches with black fecal specks; severe infestations cause leaf distortion, stunted new growth, and accelerated senescence. High humidity environments (70%+) favor thrips reproduction, making Philodendrons in humid conditions particularly vulnerable.
Solutions
- Inspect with magnification: use 10x loupe to check new growth and leaf undersides for larvae (white, wiggly) or adults (black, slender)
- Confirm stippling pattern: look for silvery/bronzed flattened patches with tiny black fecal specks
- Isolate infested plant immediately to prevent spread to collection
- Treatment options: apply spinosad-based insecticide (organic) or systemic imidacloprid for severe cases; repeat every 7-10 days for 3-4 cycles to break life cycle
- Physical removal: wipe leaves with damp cloth to remove larvae; prune heavily damaged foliage
- Increase monitoring: thrips pupate in soil—place sticky traps at soil surface to catch emerging adults
Prevention
Implement weekly pest inspections with magnification during active growing season; maintain 40-60% humidity (high humidity favors thrips); quarantine new plants for 14 days with sticky trap monitoring; apply preventive neem oil or insecticidal soap bi-weekly; inspect nursery plants before purchase for early stippling signs.
Watering Issues (4 topics · 4 cases)
Is my Philodendron overwatered?
Distinguishing overwatering from underwatering is critical for Philodendron care
89%
Is my Philodendron overwatered?
Distinguishing overwatering from underwatering is critical for Philodendron care
Cause
Distinguishing overwatering from underwatering is critical for Philodendron care. Overwatering causes root oxygen deprivation leading to root rot, with symptoms including: uniformly yellowing leaves, soft/mushy leaf texture, black or mushy roots, foul soil odor, mold on soil surface, and wilting despite wet soil. Underwatering causes: crispy, dry leaf edges, thin/papery leaves, slow growth, and drooping with dry soil. The key diagnostic is soil moisture—overwatered plants sit in wet soil while underwatered plants have dry soil. Philodendrons prefer consistent moisture but are forgiving of brief dry periods.
Solutions
- 1. Check soil moisture: insert finger 2-3 inches deep or use moisture meter
- 2. If soil is wet and plant shows yellowing: stop watering, check roots for rot
- 3. If soil is dry and leaves are crispy/thin: water thoroughly until drainage occurs
- 4. For overwatering recovery: allow soil to dry completely before next watering
- 5. For underwatered plant: bottom-water by placing pot in water for 15-20 minutes
- 6. If root rot present: unpot, trim rotted roots, treat with hydrogen peroxide, repot in fresh mix
- 7. Adjust schedule based on seasonal changes and environmental conditions
Prevention
Water only when top 2-3 inches of soil are dry. Use well-draining aroid mix. Ensure pots have drainage holes. Adjust watering seasonally—less in winter, more in summer. Use moisture meter for precision. Check pot weight—light indicates dry, heavy indicates wet. Monitor leaf texture and turgor.
Is my Philodendron underwatered?
Underwatering in Philodendron occurs when soil moisture drops below 20% field capacity for extended periods, causing guard cells to close stomata and halt photosynthesis
87%
Is my Philodendron underwatered?
Underwatering in Philodendron occurs when soil moisture drops below 20% field capacity for extended periods, causing guard cells to close stomata and halt photosynthesis
Cause
Underwatering in Philodendron occurs when soil moisture drops below 20% field capacity for extended periods, causing guard cells to close stomata and halt photosynthesis. Tropical aroids evolved in consistent 60-80% humidity with reliable rainfall; indoor heating and air conditioning reduce ambient moisture, forcing plants to sacrifice peripheral leaf tissue. Crispy brown edges result from cellular desiccation at leaf margins—the terminal points of vascular transport where water delivery is weakest. Unlike overwatering (which causes soft, yellow leaves), underwatering produces dry, papery edges and upward leaf curling.
Solutions
- Check soil moisture: Insert finger 2-3 inches deep—bone-dry soil with crispy edges confirms underwatering
- Water thoroughly until 20% exits drainage holes; ensure complete soil saturation to rehydrate root ball
- Increase humidity immediately: deploy humidifier, use pebble trays, or group plants to create 60-80% microclimate
- Trim severely crispy edges with sterilized scissors for aesthetics (optional; healthy green tissue continues functioning)
- Establish consistent schedule: water when top 2 inches dry; typically every 7-10 days in average indoor conditions
- Monitor new growth: crispy edges on emerging leaves indicate persistent underwatering requiring schedule adjustment
Prevention
Water when top 2 inches of soil are dry; maintain 60-80% humidity via humidifiers or plant grouping; use well-draining aroid mix to prevent waterlogging while ensuring adequate moisture availability; position away from heating vents and air conditioning that accelerate soil drying; check soil moisture 2x weekly during active growing season.
What is the best soil mix for Philodendron?
Water-to-soil transplant shock occurs because roots developed in water (water roots) have different cellular structure than soil roots
88%
What is the best soil mix for Philodendron?
Water-to-soil transplant shock occurs because roots developed in water (water roots) have different cellular structure than soil roots
Cause
Water-to-soil transplant shock occurs because roots developed in water (water roots) have different cellular structure than soil roots. Water roots are thinner, lack root hairs, and are adapted to extracting oxygen from dissolved water rather than soil air pockets. When placed in soil, these roots struggle to access oxygen and absorb nutrients, causing wilting, leaf drop, and stunted growth. Additional stress factors include: repotting too early before adequate roots form, using dense potting mix lacking aeration, overwatering post-transplant, and low humidity causing rapid transpiration stress.
Solutions
- 1. Wait until water roots are 2-3 inches long with fine branching before transplanting
- 2. Prepare chunky aroid mix: 50% potting soil, 30% perlite, 20% orchid bark
- 3. Remove plant from water and gently rinse roots—do not scrub or damage delicate tissue
- 4. Plant in appropriately sized pot with drainage, positioning roots carefully without cramming
- 5. Water thoroughly once to settle soil, then allow top inch to dry slightly before next watering
- 6. Maintain 70-80% humidity using propagation dome or humidifier for 2-3 weeks
- 7. Avoid direct sun and fertilizing for 4-6 weeks to reduce stress
Prevention
Allow roots to reach 2-3 inches long and develop fine branching before transplanting. Use well-draining, chunky aroid mix with 50% amendments (perlite, bark). Keep soil consistently moist (not soggy) for 2-3 weeks post-transplant. Maintain high humidity at 70-80% during transition. Transplant during active growing season (spring-summer) when plant energy is highest.
How often should I water my Philodendron?
Philodendrons are tropical understory plants adapted to consistent moisture cycles
90%
How often should I water my Philodendron?
Philodendrons are tropical understory plants adapted to consistent moisture cycles
Cause
Philodendrons are tropical understory plants adapted to consistent moisture cycles. Watering frequency depends on light, humidity, temperature, and pot size - not calendar schedules.
Solutions
- Check top 2 inches of soil with finger or moisture meter
- Water only when soil reads 'dry' at 2-inch depth
- Water thoroughly until water drains from bottom holes
- Empty drainage saucer after 30 minutes
- Frequency guide: Every 7-14 days in summer, 14-21 days in winter for 6-inch pot
Prevention
Use moisture meter to verify dryness. Adjust schedule seasonally - water less in winter when growth slows. Use well-draining mix to prevent waterlogging.
Environment (3 topics · 6 cases)
Is my Philodendron suffering from cold damage?
Cold damage in Philodendron occurs when temperatures drop below 50°F (10°C)
87%
Is my Philodendron suffering from cold damage?
Cold damage in Philodendron occurs when temperatures drop below 50°F (10°C)
Cause
Cold damage in Philodendron occurs when temperatures drop below 50°F (10°C). Symptoms include softening, yellowing, or browning leaves, wilting, and cellular damage from frozen water in leaf tissues. The plant's tropical origin makes it sensitive to cold drafts and freezing temperatures.
Solutions
- Move plant to warmer location (65-80°F) immediately
- Trim away damaged, mushy, or discolored leaves with sterile shears
- Inspect roots - if firm and white, plant will likely recover
- If roots are affected, repot in fresh dry mix and reduce watering
- Place in bright indirect light to support recovery
- Withhold fertilizer until new growth appears
- Be patient - new growth may take 1-3 months to emerge from rhizomes
- Avoid overwatering during recovery as damaged roots are vulnerable to rot
Prevention
Keep indoor temperatures above 60°F. Avoid placing near cold windows in winter. Keep away from air conditioning vents. Monitor outdoor plants and bring inside before first frost. Use frost blankets for temporary protection.
Philodendron: Heat Stress
Extreme heat (above 85°F/29°C) causes Philodendron to sacrifice older lower leaves through rapid senescence
85%
Philodendron: Heat Stress
Extreme heat (above 85°F/29°C) causes Philodendron to sacrifice older lower leaves through rapid senescence
Cause
Extreme heat (above 85°F/29°C) causes Philodendron to sacrifice older lower leaves through rapid senescence. Plant redirects limited water resources to protect apical meristem and new growth. Heat stress accelerates transpiration beyond root uptake capacity.
Solutions
- Relocate plant to cooler location immediately (target below 80°F)
- Increase humidity to 60-70% via humidifier, pebble tray, or grouping plants
- Propagate healthy top nodes in water or sphagnum as insurance
- Trim yellowed leaves to redirect energy - they will not recover
- Monitor for recovery signs over 2-4 weeks
Prevention
Monitor weather forecasts. Relocate plants before heat waves. Maintain high humidity (60-80%) to reduce transpiration stress. Avoid south/west windows during summer peak heat.
Does my Philodendron need more humidity?
Philodendrons are native to tropical rainforests with 60-80% humidity
4 protocols
85–90%
Does my Philodendron need more humidity?
Philodendrons are native to tropical rainforests with 60-80% humidity
Protocol 1: humidity needs · 90% confidence
Cause
Philodendrons are native to tropical rainforests with 60-80% humidity. Indoor environments especially with heating/AC drop humidity to 30-40%, causing leaf tip browning, crispy edges, and stunted growth.
Solutions
- Increase humidity to 60%+ using humidifier (most effective)
- Place pot on pebble tray filled with water (ensure pot sits above water line)
- Group plants together to create humidity microclimate
- Mist leaves 2-3x daily (temporary relief only)
- Place in bathroom or kitchen where humidity is naturally higher
Prevention
Group plants to create microclimate. Use pebble trays with water. Avoid placing near heating/AC vents.
Protocol 2: low humidity stress · 88% confidence
Cause
Philodendrons are tropical understory plants adapted to 60-80% humidity year-round. Indoor environments with 30-50% humidity cause chronic stress: brown leaf edges, stunted growth, and increased pest susceptibility. Low humidity accelerates transpiration beyond root uptake capacity.
Solutions
- Measure humidity with hygrometer - target 60-80% consistently
- Place on pebble tray filled with water (water level below pot bottom)
- Group plants together to create humidity microclimate through collective transpiration
- Use humidifier in room during dry winter months or in arid climates
- Avoid misting - promotes fungal issues and only raises humidity temporarily
- Shower plant monthly to clean leaves and boost humidity briefly
- Increase humidity when new leaves unfurling - this is when they're most vulnerable
Prevention
Maintain humidity at 60% minimum year-round. Group plants to create microclimate. Use humidity trays, pebble trays, or humidifiers rather than misting which spreads disease.
Protocol 3: humidity stress · 87% confidence
Cause
Philodendrons evolved in tropical rainforest environments with 60-80% humidity. Indoor conditions often fall below 40%, causing delayed or stuck leaf unfurling, brown crispy edges, and increased susceptibility to spider mites. New leaves especially require localized high humidity to unfurl properly.
Solutions
- Direct humidifier output toward new leaf sheaths
- Mist new growth area daily (avoid over-wetting established leaves)
- Place plant on pebble tray with water (pot above waterline)
- Group plants together to create microclimate
- Rotate plant 180° daily to ensure even light exposure
- Use humidity dome for propagation or new growth
- Monitor with hygrometer near growth points
Prevention
Maintain 60-80% ambient humidity. Use humidifiers, pebble trays, or group plants together. Target humidity at new growth points. Avoid placing near heating vents or air conditioners.
Protocol 4: low humidity · 85% confidence
Cause
Philodendron thrive in 60-80% relative humidity reflecting their tropical rainforest origins. Low humidity (below 50%) causes multiple issues: increased transpiration leading to water stress, leaf curling to reduce surface area, brown crispy leaf tips, and increased susceptibility to spider mites which prefer dry conditions. Scientific studies (PMID 36786325) demonstrate that aerial roots outperform soil roots in nitrogen uptake when humidity is elevated. Indoor environments typically maintain 30-40% humidity, especially with heating/cooling systems, creating chronic stress.
Solutions
- 1. Install humidifier near plants set to 60-70% humidity
- 2. Create pebble trays: fill saucer with pebbles and water, place pot on top (not in water)
- 3. Group plants together—transpiration raises local humidity 10-15%
- 4. Mist leaves gently in morning (not evening) to avoid fungal issues
- 5. Relocate to bathroom with bright indirect light if possible
- 6. For individual struggling plants, use plastic propagation dome or cloche
- 7. Monitor with hygrometer and adjust seasonally—heating season requires more intervention
Prevention
Maintain consistent 60-80% humidity using humidifiers, pebble trays, or plant grouping. Group plants together to create microclimate. Mist leaves in morning to increase ambient moisture. Place plants in bathrooms with indirect light. Use hygrometers to monitor levels. Avoid placing near heating/cooling vents. For rare/expensive varieties, use humidity domes or cabinets.
Growth & Structure (2 topics · 5 cases)
Why is my Philodendron growing leggy?
Leggy growth occurs when Philodendron stretches toward light sources due to insufficient light intensity
83%
Why is my Philodendron growing leggy?
Leggy growth occurs when Philodendron stretches toward light sources due to insufficient light intensity
Cause
Leggy growth occurs when Philodendron stretches toward light sources due to insufficient light intensity. Nodes become elongated with sparse foliage, creating a sparse appearance. This is different from healthy vining growth which maintains compact node spacing.
Solutions
- Move plant to brighter location with indirect light
- Prune leggy stems back to encourage bushier regrowth
- Use clean sterile shears to make cuts just above nodes
- Propagate pruned cuttings to create fuller plant
- Rotate plant 90° weekly to promote even growth
- Consider staking or moss pole for vertical support if desired
- Supplement with full-spectrum LED grow light 12-14 hours daily
- Avoid direct afternoon sun which can burn leaves
Prevention
Provide bright indirect light (2000-5000 lux minimum). Place within 3-6 feet of east or west-facing window. Rotate plant weekly. Supplement with grow lights during winter or in low-light spaces.
Should I be concerned about my Philodendron's aerial roots?
Philodendrons are Araceae species that evolved in humid tropical environments with aerial roots
4 protocols
88–95%
Should I be concerned about my Philodendron's aerial roots?
Philodendrons are Araceae species that evolved in humid tropical environments with aerial roots
Protocol 1: no new growth (aerial root health) · 95% confidence
Cause
Philodendrons are Araceae species that evolved in humid tropical environments with aerial roots. Scientific analysis shows that aerial roots outperform soil roots in nitrogen uptake when ambient humidity is high. Stalled growth or small leaves often correlate with low indoor humidity (<40%), where aerial roots become dormant or dry out.
Solutions
- Boost indoor humidity to 60-80% to activate aerial roots; high humidity promotes significantly greater biomass increase.
- Apply diluted liquid fertilizer directly to aerial roots or a moss pole to support nutrient uptake.
- Maintain a consistent humid microclimate using pebble trays or humidifiers to mimic the epiphytic habitat.
Prevention
Provide a moist climbing support (e.g., moss pole) from early growth stages. Monitor relative humidity and avoid placing plants near heaters or dry air vents.
Protocol 2: aerial roots nutrient function · 91% confidence
Cause
Aerial roots on Philodendron function primarily for nutrient uptake, particularly nitrogen. Scientific research demonstrates that aerial roots consistently outperform soil-formed roots in nitrogen absorption regardless of nitrogen source (nitrate, ammonium, or glycine). This adaptation allows epiphytic Philodendron species to thrive in their native habitat where soil contact is limited.
Solutions
- Maintain 60-80% relative humidity around aerial roots
- Mist aerial roots regularly or provide humidity via pebble trays
- Apply diluted fertilizer directly to aerial roots for enhanced nutrient uptake
- Guide aerial roots toward moist moss poles or substrate if desired
- Never remove healthy aerial roots - they are functional nutrient absorbers
- Increase ambient humidity to promote aerial root growth and function
Prevention
Maintain high humidity (60-80%) to support aerial root health. Avoid pruning healthy aerial roots as they contribute significantly to plant nutrition.
Protocol 3: aerial roots · 90% confidence
Cause
Aerial roots on Philodendron are natural adaptations for their epiphytic growth habit in tropical forests. These roots emerge from stem nodes and serve multiple functions: anchoring the climbing vine to tree bark, absorbing moisture and nutrients from humid air and rain, and supplementing soil root uptake during high growth periods. Scientific research (PMID 36786325) demonstrates that aerial roots actually outperform soil roots in nitrogen uptake regardless of source. Suppressing or removing aerial roots stresses the plant and limits its growth potential.
Solutions
- 1. Direct aerial roots toward moss pole or support structure using soft plant ties
- 2. Keep moss pole consistently moist—roots will attach and draw moisture from it
- 3. If aerial roots become unruly, gently guide them back toward soil or support
- 4. For propagation: aerial roots can be air-layered or rooted in water/soil to create new plants
- 5. If roots dry out and turn brown, trim dead portions but preserve living tissue
- 6. Apply diluted fertilizer to moss pole monthly during growing season to feed aerial roots
Prevention
Embrace aerial roots as healthy signs of vigorous growth. Provide climbing support (moss pole, coco coir pole, or wooden plank) for roots to attach. Maintain 60-80% humidity to support aerial root function. Mist aerial roots weekly or provide high ambient humidity. Never cut healthy aerial roots unless propagating.
Protocol 4: aerial roots · 88% confidence
Cause
Aerial roots serve as anchor points and supplemental absorption organs for climbing philodendrons. These adventitious roots emerge from nodes to attach to tree bark in native habitats, absorbing humidity and nutrients from tropical air and canopy debris.
Solutions
- Direct aerial roots toward moss pole or climbing support
- Mist roots weekly to encourage attachment and provide humidity absorption
- If roots grow toward walls: gently redirect to moss pole or trellis
- For loose aerial roots: wrap gently around moss pole and secure with soft ties
- Only trim dead, dried aerial roots that have turned completely brown and crispy
- Fertilize lightly with diluted fertilizer - aerial roots can absorb nutrients
Prevention
Never trim aerial roots unless absolutely necessary - they support plant stability and nutrient uptake. Provide climbing support to direct root attachment away from walls and furniture.
Propagation (1 topics · 10 cases)
How do I propagate my Philodendron?
Using sphagnum moss that is either bone dry (repels water) or completely saturated (causes rot) for propagation
10 protocols
84–96%
How do I propagate my Philodendron?
Using sphagnum moss that is either bone dry (repels water) or completely saturated (causes rot) for propagation
Protocol 1: propagation · 96% confidence
Cause
Using sphagnum moss that is either bone dry (repels water) or completely saturated (causes rot) for propagation.
Solutions
- Place dry premium long-fibered sphagnum moss in a bowl and submerge in warm water for 15 minutes to fully rehydrate.
- Take handfuls of the wet moss and squeeze them AS HARD AS POSSIBLE to ring out all dripping water.
- The moss should feel slightly damp to the touch, like a wrung-out sponge, but drop absolutely no water.
- Fluff the moss up to introduce air pockets before packing it gently around the plant node or roots.
Prevention
Avoid densely packing wet moss; oxygen is just as critical as moisture for root development.
Protocol 2: propagation failure from cuttings · 92% confidence
Cause
Philodendron propagation failure from stem cuttings occurs due to improper node selection and moisture imbalance. Unlike pothos, philodendrons require a visible node (swollen bump with aerial root primordia) for successful rooting. Cuttings taken below leaf joints without nodes cannot produce adventitious roots. Additionally, excessive moisture during rooting causes basal rot, while insufficient humidity prevents root emergence. The 'White Knight' cultivar shows particular sensitivity to propagation conditions.
Solutions
- Identify proper cutting site: Locate node 1/4 inch below leaf joint with visible aerial root bump
- Make clean cut with sterile blade: 45-degree angle maximizes rooting surface
- Callus formation: Lay cutting on dry paper towel in shade for 24-48 hours
- Water propagation: Submerge node only, keep leaf above water line
- Rooting environment: Bright indirect light, 70-80°F, change water every 5-7 days
- Soil transition: Plant in moist chunky mix when roots reach 2-3 inches; keep humid for 2 weeks
- Alternative method: Root in damp sphagnum moss for faster establishment (3-4 weeks vs 4-6 in water)
Prevention
Select cuttings with minimum 2 nodes; use sterile razor blades to prevent infection; allow cut ends to callus for 24-48 hours before water exposure; maintain 70-80% humidity during rooting; change water every 5-7 days to prevent bacterial growth; transition to soil when roots reach 2-3 inches.
Protocol 3: propagation · 91% confidence
Cause
Philodendrons propagate via adventitious root formation from stem nodes, but success depends on node health and environmental conditions. Cuttings taken without visible aerial roots often struggle to establish, while those with aerial roots show 80%+ success rates. Water propagation risks bacterial rot if not changed regularly, while soil propagation requires higher humidity to prevent desiccation.
Solutions
- Select healthy vine with 3-4 nodes and at least 1 aerial root
- Cut below node with sterilized blade; ensure cutting has 2-3 leaves
- Remove bottom leaves to expose 1-2 nodes for root formation
- Water propagation: Submerge nodes in dechlorinated water, change every 3-5 days
- Soil propagation: Plant in moist sphagnum moss or perlite; cover with humidity dome
- Transition timing: Move to soil when roots reach 2 inches; maintain high humidity for 2 weeks
- Moss pole rooting: Wrap aerial roots in damp sphagnum against pole for direct attachment
Prevention
Propagate during active growing season (spring-early summer) when plant vigor is highest. Maintain 70-80% humidity during rooting phase. Never propagate from stressed or recently repotted plants.
Protocol 4: propagation failure · 89% confidence
Cause
Philodendron stem cuttings fail when nodes lack sufficient stored carbohydrates or are taken from stressed parent plants. The cutting's survival depends on node health - the swollen stem section containing dormant aerial root primordia and axillary buds that activate when separated from the parent plant.
Solutions
- Select healthy vine section with at least 2 nodes (swollen stem bumps)
- Make clean cut 1/4 inch below bottom node using sterilized blade
- Remove lower leaves to expose node, keep 1-2 upper leaves for photosynthesis
- Apply rooting hormone powder to cut end to accelerate root primordia activation
- Root in moist sphagnum moss or water, maintaining 70-80% humidity
- Transplant to soil when roots reach 2-3 inches long, typically 3-6 weeks
Prevention
Take cuttings only from healthy, actively growing vines with firm stems. Select segments with 2-3 nodes minimum to increase success probability. Avoid taking cuttings during winter dormancy when metabolic rates are reduced.
Protocol 5: propagation tissue culture · 88% confidence
Cause
Philodendron 'White Knight' can be efficiently propagated through micropropagation techniques using petiole explants. Research demonstrates that treatment with 40 mg/L silver nanoparticles for 60 minutes achieves 100% aseptic petiole explants. Adventitious shoot induction rates of 52.6% with 13.9 shoots per petiole can be achieved using MS-B medium with 20 μM 2-isopentenyl adenine and 5.0 μM naphthalene acetic acid.
Solutions
- Take 4-6 inch stem cuttings with at least 2-3 nodes
- Allow cut end to callus for 24-48 hours before rooting
- Root in damp sphagnum moss or perlite (not water) to prevent rot
- Maintain high humidity (70-80%) around cuttings with a propagation dome
- Keep in bright indirect light at 70-75°F; roots emerge in 4-8 weeks
- Transplant when roots reach 2-3 inches long
Prevention
For home propagation, use clean tools and sterile rooting medium. Take cuttings from healthy, mature plants. Avoid propagating from stressed or diseased specimens.
Protocol 6: propagation failure · 87% confidence
Cause
Philodendron cuttings fail to root or develop top growth without roots due to multiple factors: inadequate humidity causing excessive transpiration, insufficient light to drive photosynthesis and root initiation, suboptimal temperature (below 70°F slows metabolic activity), hormonal imbalance favoring leaf growth over root development, and stagnant water lacking oxygen. Philodendrons exhibit top priority syndrome where cytokinins from leaves can outcompete auxins needed for root formation, especially in bright conditions with nutrient-rich water.
Solutions
- 1. Ensure cutting has 2-3 nodes and one healthy mature leaf for photosynthesis
- 2. Trim stem end cleanly and apply rooting hormone gel (Clonex) to stimulate auxin production
- 3. Place in clean water with room temperature 75-85°F; add aquarium bubbler for oxygenation optional
- 4. Position in bright indirect light (2000-3000 lux)—avoid dark corners
- 5. Change water completely every 5-7 days to prevent bacterial stagnation
- 6. If only top growth develops after 3 months, trim stem end again to re-trigger rooting
- 7. Consider switching to sphagnum moss or perlite in propagation dome for better results
Prevention
Take cuttings with 2-3 nodes and at least one mature leaf. Use rooting hormone (Clonex, Hormex) on cut ends to boost auxin levels. Maintain 75-85°F temperature and 70-80% humidity. Provide bright indirect light but avoid intense direct sun. Change water weekly to prevent bacterial growth. Consider soil propagation with high-humidity dome for challenging varieties.
Protocol 7: propagation rooting issues · 86% confidence
Cause
Philodendron propagation from stem cuttings can stall when plant channels energy into leaf production before root development. This occurs when cuttings are kept in conditions promoting top growth (bright light, warm temps) before roots establish.
Solutions
- Trim 0.5-1cm from stem bottom to expose fresh cambium tissue
- Apply rooting hormone (Clonex or powder) to cut end
- Option 1: Plant in well-draining mix (perlite:peat 1:1) at 70-80°F with humidity dome
- Option 2: Continue in water with weekly changes and aeration
- Remove any aerial growth focusing energy on leaves to redirect to roots
Prevention
Root in smaller containers to encourage root focus over leaf growth. Use rooting hormone to stimulate root initiation. Maintain consistent warmth but moderate light during rooting phase.
Protocol 8: water propagation rot · 86% confidence
Cause
Water propagation causes bacterial soft rot in philodendron cuttings when stagnant water promotes anaerobic bacterial growth. The sugary sap released from cut surfaces feeds bacteria like Erwinia chrysanthemi, causing mushy stem collapse before roots develop.
Solutions
- Use clear container to monitor root development and water clarity
- Change water completely every 3-4 days - never top off existing water
- Rinse cutting and container with fresh water during each change
- Place in bright indirect light to support photosynthesis and hormone production
- Transfer to soil immediately when roots reach 1 inch to prevent rot
- If stem turns mushy: recut above affected area and restart with sterile equipment
Prevention
Change propagation water every 3-4 days using room-temperature dechlorinated water. Add small amount of hydrogen peroxide (1 tsp per cup) to inhibit bacterial growth. Transition to soil immediately when roots reach 1 inch length.
Protocol 9: propagation water to soil · 85% confidence
Cause
Water-to-soil transition shock occurs because water-grown roots lack root hairs and protective root cap tissue needed for soil anchorage and nutrient absorption. These aquatic roots must regenerate into terrestrial form, causing temporary wilting and stress.
Solutions
- Transplant when roots reach 2-3 inches - longer roots become water-dependent
- Plant in small pot with well-draining moist mix; avoid oversized containers
- Keep soil consistently damp (not waterlogged) for 2-3 weeks to ease transition
- Increase humidity to 70%+ via pebble tray or dome to reduce transpiration stress
- Expect temporary curling or drooping for 1-2 weeks as roots adapt
Prevention
Keep water propagation roots shorter (2-3 inches) before transitioning. Maintain high humidity during transition. Use consistently moist (not soggy) soil for first 2-3 weeks.
Protocol 10: water propagation · 84% confidence
Cause
Philodendron species exhibit faster root initiation than Pothos due to higher natural auxin concentrations in their climbing vine tissue. Most Philodendrons root within 7-14 days compared to Pothos' 14-21 day timeline. However, they are more susceptible to stem rot in stagnant water because their softer, less lignified stems provide less protection against bacterial ingress. The thin, vining stems also have higher surface-area-to-volume ratios, increasing oxygen demand per unit of tissue compared to thicker-stemmed plants like Monstera.
Solutions
- Take 4-6 inch cuttings with minimum 1 aerial root node
- Remove lower leaves to expose node to water while keeping 1-2 upper leaves for photosynthesis
- Use room-temperature dechlorinated water in clear glass container
- Change water every 3 days (more frequent than Pothos due to softer stem vulnerability)
- Position node just below water surface—not submerged too deeply to reduce rot risk
- Expect visible roots in 7-14 days (faster than Pothos)
- When roots reach 2 inches, transition to well-draining potting mix with 40% perlite
- Philodendrons tolerate transition better than Monstera but still benefit from humidity dome for 7 days
Prevention
Take cuttings with at least one aerial root node (the small bump where leaf meets stem) which contains concentrated meristematic tissue. Use sharp, sterile tools to create clean cuts that heal faster than crushed tissue.
Care Methods (5 topics · 12 cases)
Care Requirements: Philodendron Guide
Philodendrons as Neotropical aroids require specific environmental parameters that differ from standard houseplant care
92%
Care Requirements: Philodendron Guide
Philodendrons as Neotropical aroids require specific environmental parameters that differ from standard houseplant care
Cause
Philodendrons as Neotropical aroids require specific environmental parameters that differ from standard houseplant care. The 600+ species share evolutionary adaptations for epiphytic life in tropical forests: aerial roots for moisture absorption, climbing growth habit, and understory light preferences. Indoor cultivation fails when these adaptations are ignored in favor of generic houseplant protocols.
Solutions
- Light: Bright indirect (1500-3000 lux), avoid direct sun which scorches leaves
- Water: Allow top 2-3 inches to dry; typically 7-14 days depending on season and humidity
- Soil: Chunky aroid mix (40% potting soil, 30% perlite, 20% bark, 10% charcoal)
- Humidity: 50-70% optimal; boost via pebble trays, humidifiers, or plant grouping
- Temperature: 65-85°F (18-29°C); avoid cold drafts and temperature fluctuations
- Fertilizer: Balanced liquid (10-10-10 or 20-20-20) at 1/4 strength monthly during growing season
- Support: Provide moss poles or trellises for climbing species to attach aerial roots
Prevention
Establish consistent care routine aligned with plant's epiphytic nature. Monitor for early stress signs: yellowing (overwatering), leggy growth (low light), crispy edges (low humidity). Adjust environment before problems escalate.
Climbing Philodendron Care: Philodendron Guide
Climbing philodendrons (including White Knight, Brasil, and heartleaf varieties) are hemiepiphytes that transition from soil-rooted seedlings to canopy climbers using specialized aerial roots
90%
Climbing Philodendron Care: Philodendron Guide
Climbing philodendrons (including White Knight, Brasil, and heartleaf varieties) are hemiepiphytes that transition from soil-rooted seedlings to canopy climbers using specialized aerial roots
Cause
Climbing philodendrons (including White Knight, Brasil, and heartleaf varieties) are hemiepiphytes that transition from soil-rooted seedlings to canopy climbers using specialized aerial roots. These roots require a textured surface (moss pole, coir, tree bark) to attach via root hairs. Without climbing support, the plant remains in juvenile form with smaller leaves. Climbing triggers hormonal changes that increase leaf size by 3-5x and activate mature morphological features.
Solutions
- Install moss pole or rough-textured trellis when potting—climbers need support to reach maturity
- Mist or water moss pole regularly to keep aerial roots moist and encourage attachment
- Use plant ties loosely to guide vines initially—remove once roots attach naturally
- Position in bright indirect light—climbing philodendrons need 3000-5000 lux for optimal growth
- As vines reach top of support, extend pole or train horizontally to maintain upward growth habit
Prevention
Install moss pole, trellis, or rough-textured support at planting time; maintain pole moisture to encourage aerial root attachment; provide bright indirect light (climbing types need more light than self-heading); avoid frequent repositioning once attached.
Self Heading Philodendron Care: Philodendron Guide
Self-heading philodendrons (including Pink Princess, Moonlight, Imperial Red, and Xanadu) have an upright, self-supporting growth habit without climbing vines
89%
Self Heading Philodendron Care: Philodendron Guide
Self-heading philodendrons (including Pink Princess, Moonlight, Imperial Red, and Xanadu) have an upright, self-supporting growth habit without climbing vines
Cause
Self-heading philodendrons (including Pink Princess, Moonlight, Imperial Red, and Xanadu) have an upright, self-supporting growth habit without climbing vines. They produce leaves from a central stem or crown and do not require structural support. These types typically have larger, more rigid leaves and prefer slightly more consistent moisture than climbing varieties. Their compact habit makes them ideal for indoor spaces but they are more susceptible to crown rot if water pools at the stem base.
Solutions
- Choose appropriately sized pot—self-heading types prefer snug fit to support upright habit
- Water at soil level only—never pour water directly onto crown or stem base
- Allow top 2 inches of soil to dry between waterings—more moisture-tolerant than climbers
- Wipe leaves monthly to remove dust and maximize photosynthesis
- Rotate pot quarterly for even growth—self-heading types grow toward light source
Prevention
Use pots with drainage holes and saucers; avoid decorative cache pots without drainage; water when top 2 inches dry but don't let soil become bone-dry; keep foliage dry—water at soil level; provide bright indirect light (2500-4000 lux).
Why is my Philodendron losing its variegation?
Variegated philodendrons contain reduced chlorophyll in white/cream sectors, limiting photosynthetic capacity by 30-70%
6 protocols
78–91%
Why is my Philodendron losing its variegation?
Variegated philodendrons contain reduced chlorophyll in white/cream sectors, limiting photosynthetic capacity by 30-70%
Protocol 1: variegated light needs · 91% confidence
Cause
Variegated philodendrons contain reduced chlorophyll in white/cream sectors, limiting photosynthetic capacity by 30-70%. This requires significantly higher light intensity to produce equivalent energy, and makes plants more susceptible to photodamage while paradoxically needing more light.
Solutions
- Measure light with meter: Target 3000-5000 lux for variegated specimens
- Position 3-5 feet from south/east windows with sheer curtain diffusion
- Rotate plant weekly for even light exposure to all leaf sectors
- Monitor for white sector browning: indicates excessive direct sun exposure
- If leaves revert to green: increase light intensity to maintain variegation
- Consider supplemental grow lights (12-14 hours daily) during darker months
Prevention
Provide bright indirect light at 3000-5000 lux - higher than green varieties. Use sheer curtains to diffuse direct sun. Maintain 60-80% humidity to support stressed variegated tissue.
Protocol 2: variegated reversion · 88% confidence
Cause
Variegated Philodendron varieties (Pink Princess, White Knight, etc.) require more light than green varieties to maintain variegation. White/pink sections lack chlorophyll and cannot photosynthesize. Low light causes reversion to green as the plant prioritizes survival over maintaining costly variegation.
Solutions
- Move to brighter location with indirect light
- Provide 12-14 hours of light daily using full-spectrum LED grow lights if needed
- Prune reverting (all-green) stems to encourage variegated growth
- Rotate plant 90° weekly for even light distribution
- Acclimate gradually when moving to brighter location
- Monitor new growth - should show variegation if light is adequate
- Avoid direct afternoon sun which can burn white sections
- Fertilize lightly to support energy demands of variegation
Prevention
Provide bright indirect light (3000-5000 lux) or gentle morning sun. Avoid dark corners. Rotate plant weekly for even light exposure. Supplement with grow lights if natural light is insufficient.
Protocol 3: variegation stability · 87% confidence
Cause
Variegation instability in Philodendron 'Pink Princess' and similar cultivars results from chimeric tissue (genetic mosaicism) where white/pink sectors lack chlorophyll-producing cells. Reversion to green occurs when meristematic tissue loses mutation.
Solutions
- Prune reverting (all-green) stems back to last variegated node to encourage new variegated growth
- Provide 2000-4000 lux bright indirect light to reduce stress on low-chlorophyll tissue
- Avoid fertilizers high in nitrogen which promote green growth over variegation
- Propagate from most variegated stems to preserve traits
- Accept that some reversion is natural and cannot be fully prevented
Prevention
Purchase from reputable propagators with stable variegation lines. Avoid tissue-culture clones known for reversion. Maintain bright indirect light to support chlorophyll in variegated sectors.
Protocol 4: variegated care · 87% confidence
Cause
Variegated Philodendron varieties (White Princess, Pink Princess, Ring of Fire) exhibit heightened sensitivity to environmental conditions due to reduced chlorophyll content in white/cream sectors. Lower photosynthetic capacity means slower growth, reduced transpiration rates, and greater susceptibility to root rot from moisture retention. These plants require brighter light than green varieties to compensate for lower chlorophyll, but direct sun can burn pale sections lacking protective pigments. Stress triggers include: insufficient light, overpotting, aggressive root disturbance during repotting, and low humidity.
Solutions
- 1. Increase light exposure gradually to 3000-5000 lux bright indirect light
- 2. Avoid repotting disturbance: slide root ball intact into new pot without rinsing roots
- 3. Use chunky, well-draining aroid mix with 50% amendments (perlite, bark, pumice)
- 4. Monitor soil moisture closely—variegated plants dry out slower; use moisture meter
- 5. Propagate stem cuttings with stable variegation as backup in case of reversion or decline
Prevention
Provide bright indirect light at 3000-5000 lux (higher than green varieties). Use appropriately sized pots only 1 inch larger than root ball. Handle roots minimally during repotting—avoid rinsing or untangling unless decay is present. Maintain 65-80% humidity with good airflow. Water only when top 2 inches are dry, extending dry periods in winter.
Protocol 5: sport variegation · 85% confidence
Cause
Sport variegation in Philodendron is a spontaneous genetic mutation (chimeric) occurring in meristematic tissue, producing random white, cream, or pink sectors on otherwise green leaves. Unlike stable cultivar variegation (Pink Princess, White Princess), sport variegation is unstable and typically appears sporadically on single leaves or temporary stem sections. It is triggered by stress recovery, hormonal fluctuations, or random genetic recombination. Sport variegation often reverts to green in subsequent growth, making it exciting but unpredictable for collectors.
Solutions
- 1. Document sport variegation with photos immediately upon discovery
- 2. Maintain bright indirect light—variegated sectors need more light than green tissue
- 3. Propagate stem cuttings from variegated nodes while expression is visible
- 4. Root cuttings in sphagnum moss or perlite with high humidity (80%+) to maximize success
- 5. Monitor subsequent growth: if variegation stabilizes over 3+ leaves, may be semi-stable
- 6. If reversion occurs, appreciate the temporary beauty—sport variegation is inherently ephemeral
- 7. Share cuttings with other collectors to preserve genetics before potential reversion
Prevention
Maintain optimal growing conditions to support variegation persistence: bright indirect light (3000-5000 lux), 65-80% humidity, and consistent moisture. Avoid over-fertilizing with nitrogen which promotes green growth. Provide support for climbing to encourage mature growth where variegation often stabilizes slightly. Document variegated leaves via photography as they may not persist.
Protocol 6: pale leaves low variegation · 78% confidence
Cause
Philodendron leaves turn pale or lose variegation intensity when iron, magnesium, or other micronutrients are deficient. Iron deficiency causes interveinal chlorosis (yellowing between veins while veins stay green), while magnesium deficiency creates yellow patches between leaf veins starting from older leaves. These deficiencies commonly occur in alkaline soil conditions or when plants have been in the same pot for 18+ months without repotting or fertilization.
Solutions
- 1. Apply chelated iron supplement (Fe-EDDHA) at label strength monthly until color returns
- 2. Use Epsom salt foliar spray (1 tablespoon per gallon of water) applied to leaf undersides for quick magnesium boost
- 3. Switch to fertilizer containing micronutrients - look for 'complete' or 'with micronutrients' on label
- 4. Repot in fresh aroid mix if soil is over 18 months old; old soil loses micronutrient availability
- 5. Adjust watering to use room-temperature water - cold water inhibits iron uptake
Prevention
Use complete fertilizers containing iron, magnesium, and trace elements; maintain soil pH 5.5-6.5 for micronutrient availability; repot annually with fresh mix; water with room-temperature water to optimize nutrient uptake.
Why is my Philodendron growing so slowly?
Variegated philodendrons grow 40-60% slower than green varieties due to reduced chlorophyll and photosynthetic capacity
3 protocols
80–86%
Why is my Philodendron growing so slowly?
Variegated philodendrons grow 40-60% slower than green varieties due to reduced chlorophyll and photosynthetic capacity
Protocol 1: variegated slow growth · 86% confidence
Cause
Variegated philodendrons grow 40-60% slower than green varieties due to reduced chlorophyll and photosynthetic capacity. The white/cream sectors cannot contribute to energy production, forcing the plant to allocate limited resources more conservatively.
Solutions
- Expect 30-50% slower growth rate compared to green varieties
- Use 1/4 to 1/2 strength fertilizer to prevent root burn on reduced root mass
- Focus on maintaining variegation rather than forcing rapid growth
- Monitor for green reversion: prune green growth to preserve variegation
- Allow soil to dry more between waterings - slower growth means less water consumption
- Patience is key: new leaves may take 4-8 weeks to develop vs 2-4 for green varieties
Prevention
Accept slower growth as normal for variegated cultivars. Avoid over-fertilizing to force growth, which causes root burn and further stress. Provide optimal conditions to maximize the limited photosynthetic capacity.
Protocol 2: slow growth · 85% confidence
Cause
Slow or stalled growth in Philodendron results from suboptimal environmental conditions that limit photosynthesis and metabolic activity. Primary factors include: insufficient light (below 1000 lux causing etiolation and weak growth), inadequate humidity (below 50% reducing transpiration), nutrient deficiency from depleted soil or lack of fertilization, rootbound conditions where roots circle the pot and exhaust soil nutrients, and seasonal dormancy during winter months when light and temperature drop naturally.
Solutions
- 1. Assess light levels: move to brighter indirect location or add grow lights for 12-14 hours daily
- 2. Check humidity: increase to 60-80% using humidifier, grouping plants, or pebble trays
- 3. Inspect roots: if circling pot or emerging from drainage holes, repot into larger container with fresh mix
- 4. Begin fertilizing at half strength monthly during active growing season (March-September)
- 5. Be patient: Philodendrons are naturally slow growers; allow 4-8 weeks to respond to improvements
- 6. Check for pests: treat any infestations that may be draining plant energy
Prevention
Provide bright indirect light at 2000-5000 lux. Maintain 60-80% humidity with pebble trays or humidifiers. Fertilize with balanced liquid fertilizer at half strength monthly during growing season (spring-summer). Repot every 1-2 years into fresh aroid mix. Accept slower winter growth as normal dormancy.
Protocol 3: slow growth stunted · 80% confidence
Cause
Philodendron plants with phosphorus deficiency exhibit slowed growth, smaller new leaves, and delayed root development. Phosphorus is essential for energy transfer (ATP), root proliferation, and flower/fruit production. Deficiency occurs in soils with high pH (>7.0) where phosphorus becomes chemically bound and unavailable, or in long-neglected plants where phosphorus reserves are depleted. Plants appear hungry despite adequate light and water.
Solutions
- 1. Apply fertilizer with higher phosphorus content (NPK ratio 10-15-10 or 5-10-5) at 1/4 strength every 3 weeks during growing season
- 2. Check and adjust soil pH to 5.5-6.5 range using pH testing kit - add sulfur to lower pH if above 6.5
- 3. Incorporate bone meal or rock phosphate into top 1 inch of soil for slow-release phosphorus (1 tablespoon per 6-inch pot)
- 4. Ensure adequate light (2000-5000 lux) - plants need light to utilize phosphorus effectively
- 5. Monitor for new growth response within 6-8 weeks; expect larger leaves and faster internode elongation
Prevention
Use balanced fertilizer with phosphorus throughout growing season; maintain acidic soil pH (5.5-6.5) for optimal nutrient availability; avoid over-liming or using alkaline water; include phosphorus-rich organic amendments when repotting.
Maintenance (3 topics · 9 cases)
How should I fertilize my Philodendron?
Philodendron growth cycles follow seasonal patterns tied to light and temperature
4 protocols
85–88%
How should I fertilize my Philodendron?
Philodendron growth cycles follow seasonal patterns tied to light and temperature
Protocol 1: fertilizer schedule optimization · 88% confidence
Cause
Philodendron growth cycles follow seasonal patterns tied to light and temperature. Applying consistent year-round fertilizer creates two problems: under-fertilization during peak growing season (spring-early summer) when plants need maximum nutrients for new leaf production, and over-fertilization during winter dormancy when metabolic rates drop 60-70% and excess salts accumulate causing root damage. Most houseplant failures stem from rigid calendar-based fertilization rather than responsive plant-driven feeding.
Solutions
- 1. Spring (March-May): Apply balanced NPK 20-20-20 at 1/4 strength every 2 weeks as growth accelerates
- 2. Summer (June-August): Continue bi-weekly feeding at 1/4 strength; increase to weekly if plant shows active new growth every 7-10 days
- 3. Fall (September-November): Reduce to monthly feeding at 1/8 strength as growth naturally slows
- 4. Winter (December-February): Cease fertilization entirely or apply at 1/8 strength once mid-season if plant shows continued growth under grow lights
- 5. Always water soil lightly before fertilizing - never apply to completely dry soil
Prevention
Observe plant growth rate as primary fertilization trigger - increase feeding frequency when new leaves emerge rapidly, decrease when growth stalls; use half-strength dilutions when uncertain; leach soil quarterly to prevent salt accumulation; supplement with organic compost tea monthly for micronutrient diversity.
Protocol 2: nanofertilizer-application · 88% confidence
Cause
Conventional mineral fertilizers have low nutrient use efficiency and rapid leaching from container substrates; nano-NPK particles at 3 mg/L concentration provide sustained nutrient release with particle sizes enabling enhanced cellular uptake through foliar application and root absorption pathways
Solutions
- Apply nano-NPK at 3 mg/L concentration for maximum vegetative growth (39.23% increase in height, 70.84% fresh weight increase, 51.50% dry weight increase, 15.80% leaf area expansion)
- For synergistic antioxidant enhancement, combine 2 mg/L nano-NPK with 3 mg/L nano-chitosan to improve membrane stability index and peroxidase/catalase enzyme activities
- Apply as foliar spray or soil drench every 14-21 days during active growth period (spring-summer) for slow-release nutrient profile
Prevention
Avoid exceeding 3 mg/L nano-NPK concentration as higher doses may cause nanoparticle aggregation; dilute in distilled water and apply in morning hours to prevent UV degradation of nano particles.
Protocol 3: fertilizer burn · 86% confidence
Cause
Over-fertilization causes leaf tip and margin burn as excess salts accumulate in soil, drawing water out of roots through osmosis. This creates drought-like symptoms despite adequate soil moisture. Fertilizer salts also alter soil pH, locking out essential nutrients.
Solutions
- Identify fertilizer burn: brown, crispy tips and margins; yellowing from edges inward
- Stop fertilizing immediately
- Flush soil thoroughly: run water through pot for 3-5 minutes to leach salts
- Remove severely damaged leaves
- Repot if salt buildup severe: use fresh soil and reduce pot size if rootbound
- Resume fertilizing at 1/4 strength only after 6-8 weeks
- Switch to organic or slow-release fertilizer to prevent future burn
- Monitor new growth: should be healthy and green once salts removed
Prevention
Use 1/4 to 1/2 strength of manufacturer recommended fertilizer dose. Apply only during active growing season (spring/summer). Flush soil monthly by running water through pot for 2-3 minutes to remove salt buildup.
Protocol 4: fertilizer burn leaf tips · 85% confidence
Cause
Philodendron leaves develop brown, crispy tips and margins when exposed to excessive fertilizer concentration or when fertilizer is applied to dry soil. The high salt content draws water out of leaf cells through osmosis, causing tissue death at the margins where water loss is most pronounced. This commonly occurs when owners apply full-strength fertilizer, fail to leach salts between applications, or use water high in dissolved minerals combined with regular fertilization.
Solutions
- 1. Cease all fertilization immediately upon observing brown leaf tips
- 2. Leach soil thoroughly by running 3-4 pot volumes of distilled or rainwater through the soil to dissolve and flush accumulated salts
- 3. Trim affected leaf tips with sterile scissors, cutting 2-3mm above the damaged tissue to improve aesthetics
- 4. Resume fertilization after 4-6 weeks at 1/8 strength (half the previous quarter-strength dilution)
- 5. Switch to bottom-watering periodically to prevent salt buildup at soil surface
Prevention
Always dilute liquid fertilizer to 1/4 strength or less; water with distilled/rainwater if tap water is hard (>200ppm TDS); leach soil every 3 months by flushing with 2-3x pot volume of plain water; avoid fertilizing dry soil - water normally first, then apply diluted fertilizer.
How do I set up a moss pole for my Philodendron?
Moss poles replicate the natural tree bark philodendrons climb in tropical forests
87%
How do I set up a moss pole for my Philodendron?
Moss poles replicate the natural tree bark philodendrons climb in tropical forests
Cause
Moss poles replicate the natural tree bark philodendrons climb in tropical forests. The coarse texture triggers root hair attachment while the moisture-retentive moss provides humidity that encourages aerial root development and nutrient absorption.
Solutions
- Select moss pole with rough, textured surface (sphagnum or coco fiber)
- Mist pole daily or maintain pole in humidity tray to keep moss damp
- Gently wrap aerial roots around pole and secure with plant velcro or soft ties
- Position pole firmly in pot center with 2-3 inches in soil for stability
- As plant climbs: extend pole or add extension sections for continued support
- Feed through moss: Apply diluted fertilizer to pole - roots will absorb nutrients
Prevention
Keep moss pole consistently moist but not waterlogged. Dry moss prevents root attachment and causes aerial roots to dry out and fail to anchor.
Why are my Philodendron leaves turning yellow?
Yellowing from nutrient deficiency typically affects older leaves first as mobile nutrients (nitrogen, magnesium, phosphorus) are mobilized to support new growth
4 protocols
82–89%
Why are my Philodendron leaves turning yellow?
Yellowing from nutrient deficiency typically affects older leaves first as mobile nutrients (nitrogen, magnesium, phosphorus) are mobilized to support new growth
Protocol 1: nutrient deficiency yellowing · 89% confidence
Cause
Yellowing from nutrient deficiency typically affects older leaves first as mobile nutrients (nitrogen, magnesium, phosphorus) are mobilized to support new growth. This appears as uniform pale yellowing across leaf surface, different from the spotty pattern of pest damage or the rapid collapse of root rot.
Solutions
- Identify deficiency type: uniform yellowing = nitrogen; yellow between veins = magnesium; purpling = phosphorus
- Apply appropriate fertilizer: nitrogen for general yellowing, Epsom salts for magnesium (1 tsp/gallon)
- Fertilize at 1/4 strength every 2 weeks during growing season
- Flush soil: run water through pot for 2-3 minutes monthly to remove salt buildup
- Check pot size: rootbound plants cannot access nutrients even when fertilized
- Avoid over-fertilizing: causes root burn and worsens yellowing
- Expect 3-4 weeks for recovery after correction
Prevention
Apply balanced liquid fertilizer at 1/4 strength every 2-4 weeks during active growing season (spring/summer). Ensure soil pH is 6.0-6.5 for optimal nutrient availability. Flush soil monthly to prevent salt buildup that locks out nutrients.
Protocol 2: nutrient deficiency · 88% confidence
Cause
Nutrient deficiencies (nitrogen, magnesium, iron) manifest as yellowing between leaf veins or overall pale color. Philodendrons are moderate feeders requiring regular fertilization during growing season.
Solutions
- Apply balanced liquid fertilizer (10-10-10 or 20-20-20) at half strength
- Feed every 2-4 weeks during active growth (March-September)
- Reduce or stop fertilizing in fall/winter when growth slows
- For quick response: apply foliar feed at quarter strength
- If repotting: mix slow-release granules into fresh soil
Prevention
Fertilize monthly during spring/summer with balanced houseplant fertilizer at half strength. Use fresh potting soil when repotting.
Protocol 3: nutrient deficiency leca · 87% confidence
Cause
LECA (clay balls) is inert and lacks nutrients. Philodendron grown in pure LECA without hydroponic nutrients develop deficiencies causing malformed new leaves. Unlike soil which provides gradual nutrient release, LECA requires complete hydroponic fertilization.
Solutions
- Transition to well-draining aroid soil mix or blend 50/50 LECA-soil for nutrient access
- If remaining in LECA: add hydroponic nutrients per manufacturer dilution rates
- Flush LECA monthly to prevent salt buildup from fertilizing
- Provide bright indirect light to maximize nutrient uptake
- Monitor new growth for 4-6 weeks to confirm correction
Prevention
Use hydroponic-specific nutrients like TPS One or General Hydroponics Flora series. Maintain consistent feeding schedule. Consider transitioning to soil mix for easier nutrient management.
Protocol 4: nutrient deficiency chlorosis · 82% confidence
Cause
Nutrient deficiency in Philodendron manifests as uniform pale yellowing (chlorosis) across entire leaf surface, distinct from patterned spotting or basal-only yellowing. Nitrogen deficiency—most common in houseplants—causes generalized yellowing as chlorophyll synthesis fails. Micronutrient deficiencies (iron, magnesium, manganese) create interveinal chlorosis where leaf veins remain green while tissue between turns yellow. Unlike root rot or pests, deficiency symptoms appear gradually over 4-8 weeks with consistent care and no signs of pathogens or moisture stress.
Solutions
- Confirm diagnosis: Uniform yellowing without spots, pests, or moisture issues indicates deficiency; interveinal pattern suggests micronutrient lack
- Apply balanced liquid fertilizer at half strength (e.g., 10-10-10 NPK) every 2 weeks during growing season
- For micronutrient deficiencies: use chelated iron or complete micronutrient supplement following label rates
- Flush soil monthly by watering until 20% drains from bottom to prevent salt buildup that locks nutrients
- Consider repotting in fresh nutrient-rich mix if plant hasn't been repotted in 18+ months
- Monitor new growth: healthy leaves should emerge with normal green color within 3-4 weeks of treatment
Prevention
Fertilize every 2-4 weeks during active growth (spring-summer) with balanced houseplant fertilizer at half strength; flush soil monthly to prevent salt accumulation; repot every 12-18 months in fresh mix to replenish nutrients; maintain bright indirect light to support nutrient uptake and metabolic function.
Biology & Advanced (1 topics · 1 cases)
Philodendron: Natural Senescence
Natural senescence is the programmed death of older leaves as Philodendron reallocates resources to new apical growth
88%
Philodendron: Natural Senescence
Natural senescence is the programmed death of older leaves as Philodendron reallocates resources to new apical growth
Cause
Natural senescence is the programmed death of older leaves as Philodendron reallocates resources to new apical growth. Bottom leaves are oldest and will yellow, brown, and drop normally. This is not a disease but part of the monopodial growth pattern.
Solutions
- Identify pattern: only oldest bottom leaves affected, top growth healthy
- Gently remove yellow leaves at base when fully dry
- Continue normal care: bright indirect light, appropriate watering
- Monitor that new growth continues to emerge normally
- If multiple leaves drop simultaneously, check for other stressors
Prevention
No prevention needed - this is healthy plant behavior. Ensure adequate light and nutrients to support both old and new growth. Repot when rootbound to maintain vigor.
Other Topics (39 topics · 42 cases)
Philodendron: Acclimation Shock
New plant acclimation shock occurs when Philodendron adjusts from nursery/greenhouse conditions to home environment
88%
Philodendron: Acclimation Shock
New plant acclimation shock occurs when Philodendron adjusts from nursery/greenhouse conditions to home environment
Cause
New plant acclimation shock occurs when Philodendron adjusts from nursery/greenhouse conditions to home environment. Plant redirects energy from leaf production to root establishment, appearing dormant for weeks despite proper care.
Solutions
- Maintain stable conditions matching seller environment
- Wait 4-8 weeks without intervention - roots establish before visible growth
- Avoid repotting for 2-4 weeks minimum
- Withhold fertilizer until new growth emerges
- Take weekly photos to detect subtle changes
- Expect growth resumption once acclimated
Prevention
Request nursery care details when purchasing. Quarantine in matching conditions for 2-4 weeks. Delay repotting and fertilizing. Minimize handling.
Philodendron: Allergic Contact Dermatitis
Some individuals develop allergic contact dermatitis from exposure to Philodendron sap containing calcium oxalate crystals and other irritants
83%
Philodendron: Allergic Contact Dermatitis
Some individuals develop allergic contact dermatitis from exposure to Philodendron sap containing calcium oxalate crystals and other irritants
Cause
Some individuals develop allergic contact dermatitis from exposure to Philodendron sap containing calcium oxalate crystals and other irritants. Reactions typically manifest as redness, itching, burning, and blistering on hands, arms, and face within 24-48 hours of exposure. Patch testing confirms diagnosis.
Solutions
- Wash affected area with mild soap and cool water immediately
- Apply topical corticosteroid cream (1% hydrocortisone) to reduce inflammation
- Use cool compresses to relieve itching and burning
- Take oral antihistamines for severe itching
- Avoid further exposure until skin heals completely
- For severe reactions: seek medical attention
- Consider patch testing to confirm Philodendron allergy
- If confirmed allergic: relocate plant or use barrier protection
Prevention
Wear protective gloves when handling plants, especially during pruning or repotting. Wash hands and exposed skin immediately after contact. Avoid touching face after plant handling. Consider alternative plants if sensitivity is confirmed.
Philodendron: Anthracnose
Colletotrichum species cause anthracnose leaf spot on Philodendron, presenting as circular or ovoid sunken brown lesions with yellow halos
91%
Philodendron: Anthracnose
Colletotrichum species cause anthracnose leaf spot on Philodendron, presenting as circular or ovoid sunken brown lesions with yellow halos
Cause
Colletotrichum species cause anthracnose leaf spot on Philodendron, presenting as circular or ovoid sunken brown lesions with yellow halos. Three species identified: C. philodendricola, C. pseudoboninense, and C. orchidearum. Wounding greatly enhances pathogenicity.
Solutions
- Remove and destroy infected leaves - lesions will not heal
- Apply fungicide containing chlorothalonil or mancozeb to protect remaining foliage
- Isolate plant from collection
- Avoid misting or wetting leaves during treatment
- Improve air circulation around plant
Prevention
Avoid mechanical damage to leaves. Maintain adequate spacing for airflow. Keep foliage dry. Monitor for early lesions during humid conditions.
What is the best soil mix for Philodendron?
Aroid epiphytes evolved growing on tree bark with rapid drainage, high air circulation at roots, and organic debris
93%
What is the best soil mix for Philodendron?
Aroid epiphytes evolved growing on tree bark with rapid drainage, high air circulation at roots, and organic debris
Cause
Aroid epiphytes evolved growing on tree bark with rapid drainage, high air circulation at roots, and organic debris. Standard potting soil is too dense, causing water retention and root suffocation.
Solutions
- Mix 40% high-quality potting soil (peat or coco coir base)
- Add 30% perlite or pumice for aeration and drainage
- Add 20% orchid bark (medium grade) for structure and airflow
- Add 10% horticultural charcoal to filter impurities and prevent bacterial growth
- Optional: Add 1-2 tbsp worm castings per gallon for slow-release nutrients
Prevention
Mix fresh batch every 6-12 months. Top-dress with orchid bark annually to maintain structure. Avoid peat-based mixes that decompose and compact.
What pests are on my Philodendron?
Small, cylindrical invertebrates with two pairs of legs per segment found in Philodendron soil are typically millipedes
95%
What pests are on my Philodendron?
Small, cylindrical invertebrates with two pairs of legs per segment found in Philodendron soil are typically millipedes
Cause
Small, cylindrical invertebrates with two pairs of legs per segment found in Philodendron soil are typically millipedes. They are beneficial detritivores that consume decaying organic matter and do not harm live roots. Their presence indicates healthy, moist soil but may signal that the substrate is breaking down or staying too wet.
Solutions
- Identify the organism: Millipedes are slow-moving and curl into a spiral when disturbed (unlike fast-running, predatory centipedes).
- Leave them undisturbed unless they become overpopulated (>10 per pot).
- If removal is desired, allow the top 2 inches of soil to dry completely between waterings to naturally reduce their population.
Prevention
Use fresh, well-draining soil and avoid overwatering. Millipedes thrive in high-moisture environments with significant undecomposed organic material.
Philodendron: Common Problems
Root rot develops when philodendron roots remain in waterlogged, oxygen-depleted soil for 5+ days
93%
Philodendron: Common Problems
Root rot develops when philodendron roots remain in waterlogged, oxygen-depleted soil for 5+ days
Cause
Root rot develops when philodendron roots remain in waterlogged, oxygen-depleted soil for 5+ days. The epiphytic root system evolved for tree bark attachment where water drains rapidly. Anaerobic conditions (dissolved oxygen <2mg/L) trigger Pythium and Fusarium proliferation, breaking down root tissue. Compromised roots cannot uptake water or nutrients, causing yellowing leaves, stunted growth, and eventual plant death.
Solutions
- Immediate unpotting: Remove plant and rinse roots thoroughly to assess damage
- Trim affected tissue: Cut all black, mushy, or foul-smelling roots with sterilized scissors
- Sterilize remaining roots: Soak in 3% hydrogen peroxide solution (1:4 with water) for 20 minutes
- Dry callus period: Lay plant on paper towel in shade for 24-48 hours to seal wounds
- Repot in fresh aroid mix: Use sterile, chunky substrate with excellent drainage
- Recovery watering: Wait 5-7 days before first watering; then resume sparingly
- Monitor for 4-6 weeks: New white root tips indicate successful recovery
Prevention
Water only when top 2-3 inches of soil are dry. Use pots with drainage holes and well-draining aroid mix. Avoid automated watering systems. Bottom-water only when necessary to control soil saturation.
Philodendron: Contact Dermatitis
Philodendron contains calcium oxalate crystals that cause allergic contact dermatitis in sensitive individuals
84%
Philodendron: Contact Dermatitis
Philodendron contains calcium oxalate crystals that cause allergic contact dermatitis in sensitive individuals
Cause
Philodendron contains calcium oxalate crystals that cause allergic contact dermatitis in sensitive individuals. Symptoms include itching, redness, and rash on hands, arms, and face after contact with sap or plant tissue.
Solutions
- Rinse affected skin with cool water immediately
- Apply topical corticosteroid cream for itching and inflammation
- Oral antihistamines for severe itching
- Seek medical attention if symptoms persist or worsen
- Identify and avoid future contact with Philodendron species
Prevention
Wear gloves when handling Philodendron, especially during pruning or repotting. Wash hands thoroughly after contact. Keep plants away from pets and children.
Philodendron: Crispy Leaves
Crispy brown leaf edges on Philodendron stem from chronic underwatering or low humidity (<40% RH), causing guard cell closure and cessation of photosynthesis
91%
Philodendron: Crispy Leaves
Crispy brown leaf edges on Philodendron stem from chronic underwatering or low humidity (<40% RH), causing guard cell closure and cessation of photosynthesis
Cause
Crispy brown leaf edges on Philodendron stem from chronic underwatering or low humidity (<40% RH), causing guard cell closure and cessation of photosynthesis. Aroids evolved in tropical understories with 60-80% humidity; indoor heating reduces ambient moisture, forcing plants to sacrifice peripheral leaf tissue to preserve vascular integrity and root system.
Solutions
- Increase humidity immediately: install humidifier, use pebble trays, or group plants to create microclimate
- Water thoroughly when top 2 inches of soil are dry; ensure water exits drainage holes
- Trim severely crispy edges with sterilized scissors for aesthetics (optional; not required for health)
- Mist only if using distilled water to avoid mineral deposits; focus on aerial environment not leaf surfaces
- Monitor new growth: crispy edges on emerging leaves indicate persistent low humidity
Prevention
Maintain 60-80% humidity via pebble trays, humidifiers, or plant grouping; water when top 2 inches of soil dry; use well-draining aroid mix to prevent root rot while ensuring adequate moisture availability; position away from heating vents and air conditioning.
Why are my Philodendron leaves curling?
New Philodendron and Monstera leaves emerge in a tightly curled tube or 'umbrella' shape
2 protocols
86–95%
Why are my Philodendron leaves curling?
New Philodendron and Monstera leaves emerge in a tightly curled tube or 'umbrella' shape
Protocol 1: curling leaves (normal emergence) · 95% confidence
Cause
New Philodendron and Monstera leaves emerge in a tightly curled tube or 'umbrella' shape. This is a normal botanical adaptation called vernation that protects the delicate immature tissue. Users frequently mistake this for underwatering or pest damage.
Solutions
- Observe the leaf for 7-14 days; it will naturally unfurl as it hardens off.
- Do not manually force the leaf open, as this causes permanent mechanical scuffs or tears.
- Ensure bright indirect light and 50-70% humidity to facilitate smooth unfurling.
Prevention
Build familiarity with the growth habit of your specific Philodendron variety. New growth is often lighter in color and more flexible than mature foliage.
Protocol 2: curling leaves · 86% confidence
Cause
Curling leaves in Philodendron indicate water stress or environmental factors: (1) Underwatering/low humidity causes leaves to curl inward to reduce surface area and conserve moisture, (2) Water-to-soil transplant shock causes temporary curling as water-adapted roots adjust to soil conditions, (3) Rootbound conditions limit water uptake causing chronic curling, (4) Cold water shock from watering with water below 60°F causes leaf cells to contract, and (5) Pest damage from thrips or mites causes irregular curling with accompanying stippling or webbing.
Solutions
- 1. Check soil moisture: if dry, water thoroughly and increase humidity
- 2. If recently moved from water to soil: keep soil consistently moist (not soggy) for 2-3 weeks
- 3. If rootbound: repot into slightly larger container with fresh mix
- 4. If using cold water: allow water to reach room temperature before applying
- 5. If pests suspected: inspect undersides and treat with appropriate insecticide
- 6. Increase ambient humidity to 70-80% using humidifier or pebble tray
- 7. Be patient—transplant-related curling resolves in 1-2 weeks with proper care
Prevention
Maintain consistent watering allowing top 2 inches to dry between waterings. Keep humidity at 60-80%. Use room temperature water (65-75°F). Repot before plants become severely rootbound. Inspect regularly for pests. Acclimate water-propagated cuttings gradually to soil conditions.
Why does my Philodendron have edema (water spots)?
Edema in Philodendron occurs when cells take up water faster than they can transpire it, causing cells to burst and creating corky, water-soaked patches
86%
Why does my Philodendron have edema (water spots)?
Edema in Philodendron occurs when cells take up water faster than they can transpire it, causing cells to burst and creating corky, water-soaked patches
Cause
Edema in Philodendron occurs when cells take up water faster than they can transpire it, causing cells to burst and creating corky, water-soaked patches. Triggered by irregular watering, sudden increases in humidity, or overwatering during low light periods when transpiration is reduced.
Solutions
- Edema spots are permanent but do not harm plant health - leave affected leaves
- Adjust watering to allow top 2-3 inches of soil to dry between waterings
- Improve air circulation with fan to increase transpiration
- Avoid overwatering during low light periods
- New leaves will emerge normally once conditions stabilize
Prevention
Maintain consistent watering schedule. Increase humidity gradually rather than suddenly. Reduce watering in winter when light and growth slow. Ensure adequate air circulation.
Why is my Philodendron dropping leaves?
Environmental shock occurs when Philodendron experiences sudden changes in light intensity, temperature, or humidity—most commonly when moved from high-humidity greenhouse/nursery conditions to drier home environments, or when relocated to outdoor spaces
88%
Why is my Philodendron dropping leaves?
Environmental shock occurs when Philodendron experiences sudden changes in light intensity, temperature, or humidity—most commonly when moved from high-humidity greenhouse/nursery conditions to drier home environments, or when relocated to outdoor spaces
Cause
Environmental shock occurs when Philodendron experiences sudden changes in light intensity, temperature, or humidity—most commonly when moved from high-humidity greenhouse/nursery conditions to drier home environments, or when relocated to outdoor spaces. The plant activates pre-formed abscission layers at leaf bases within 24-72 hours as a survival mechanism to reduce transpiration surface area while adjusting to new conditions. Lower leaves drop first, progressing upward if stress persists.
Solutions
- Stabilize immediately: Select final location and commit to 2-4 week minimum without moving
- Provide bright indirect light: 2000-5000 lux to support recovery without adding light stress
- Boost humidity: Maintain 60-80% via humidifier or pebble tray to reduce additional transpiration stress
- Remove dropped leaves: Clean up fallen foliage to prevent pest attraction and fungal growth
- Avoid fertilizing: Hold all nutrients for 4-6 weeks; stressed plants cannot metabolize fertilizers
- Expect 2-8 week recovery period; new growth emerges only from stem tips when acclimated
Prevention
Quarantine new plants for 14 days in stable intermediate environment before integrating into home; acclimate gradually over 7-14 days with increasing exposure time; maintain 60-80% humidity during transition; avoid multiple simultaneous changes (light, humidity, temperature).
Philodendron: Environmental Stress Cellular
Philodendron species contain high concentrations of phenolic compounds, terpenoids, and flavonoids that function as natural antioxidants
89%
Philodendron: Environmental Stress Cellular
Philodendron species contain high concentrations of phenolic compounds, terpenoids, and flavonoids that function as natural antioxidants
Cause
Philodendron species contain high concentrations of phenolic compounds, terpenoids, and flavonoids that function as natural antioxidants. Scientific analysis of Philodendron heleniae extracts shows strong free radical scavenging capacity comparable to standard Trolox. These antioxidant properties support cellular stress response and may contribute to the plant's resilience in varying indoor conditions.
Solutions
- Provide bright indirect light to support photosynthetic efficiency
- Maintain consistent watering - avoid both drought and waterlogging stress
- Ensure adequate humidity (50-70%) to reduce transpiration stress
- Fertilize with balanced NPK during growing season to support metabolic health
- Avoid temperature fluctuations below 60°F which stress cellular systems
Prevention
Maintain consistent care to minimize oxidative stress. Provide stable temperatures between 65-80°F and adequate light to support the plant's natural antioxidant systems.
How should I fertilize my Philodendron?
Fertilizer-related issues in Philodendron include both deficiency and toxicity
85%
How should I fertilize my Philodendron?
Fertilizer-related issues in Philodendron include both deficiency and toxicity
Cause
Fertilizer-related issues in Philodendron include both deficiency and toxicity. Deficiency symptoms include pale new growth, stunted leaves, and reduced fenestration due to depleted soil nutrients over time. Toxicity manifests as brown leaf tips and margins, salt crust on soil surface, and root burn from excessive nitrogen. Philodendrons are moderate feeders requiring balanced nutrition during active growth (spring-summer) but minimal feeding during dormancy (fall-winter). Inert growing media (LECA, water propagation) require complete hydroponic nutrients as they provide no natural minerals.
Solutions
- 1. For deficiency: begin fertilizing at half strength monthly during growing season
- 2. For toxicity: flush soil thoroughly with plain water 3-4 times over one week
- 3. Remove salt crust from soil surface by scraping top 1/2 inch and replacing with fresh mix
- 4. Switch to slow-release fertilizer for more consistent, lower-dose feeding
- 5. For LECA/hydro: add complete hydroponic nutrient solution (TPS One) per manufacturer directions
- 6. Resume feeding only after plant shows recovery with new healthy growth
- 7. Reduce or skip winter fertilizing when growth naturally slows
Prevention
Fertilize with balanced liquid fertilizer (20-20-20 or similar) at half strength monthly during growing season (March-September). Use slow-release granules (Osmocote Plus) for consistent low-dose feeding. Flush soil monthly with plain water to remove salt buildup. Avoid fertilizing newly repotted or stressed plants for 4-6 weeks. Skip fertilizing in winter. For LECA: use complete hydroponic nutrients like TPS One every 2 weeks.
Philodendron: Leaf Scarring
Physical leaf scarring on Philodendron results from mechanical trauma during handling, transport, or placement in high-traffic areas
90%
Philodendron: Leaf Scarring
Physical leaf scarring on Philodendron results from mechanical trauma during handling, transport, or placement in high-traffic areas
Cause
Physical leaf scarring on Philodendron results from mechanical trauma during handling, transport, or placement in high-traffic areas. Aroid leaves contain resilient photosynthetic tissue that continues functioning despite cosmetic tears or bruises; green tissue sustains chlorophyll production and energy generation even when aesthetically compromised.
Solutions
- Leave damaged leaf intact to allow natural nutrient reabsorption from senescing tissue
- Monitor for 2-4 weeks for progressive die-back (yellowing/browning spreading from wound)
- Remove only after complete senescence or for cosmetic reasons using clean sterilized shears
- Ensure stable environment during recovery: bright indirect light, consistent moisture (not wet), 60-80% humidity
- Philodendron's phloem enables nutrient translocation from damaged leaves; premature removal wastes resources
Prevention
Position plants in low-traffic areas away from walkways and pets; use protective barriers during handling and transport; educate on gentle manipulation; quarantine new plants to assess existing damage before integration into collection.
Philodendron: Leaf Scarring (Mechanical)
Mechanical trauma from handling, transport, or accidental impact causes localized tears, folds, or bruises
95%
Philodendron: Leaf Scarring (Mechanical)
Mechanical trauma from handling, transport, or accidental impact causes localized tears, folds, or bruises
Cause
Mechanical trauma from handling, transport, or accidental impact causes localized tears, folds, or bruises. Philodendron leaves are resilient; as long as the tissue remains green, the damaged area is still photosynthetic and functional. Damage is permanent and will not heal.
Solutions
- Leave damaged leaves intact to continue producing energy for the plant.
- Monitor the wound for signs of secondary fungal infection (e.g., spreading mushy brown edges).
- Optionally prune for aesthetics only after new, healthy leaves have emerged to replace the energy contribution.
Prevention
Handle plants gently during 'unboxing' or transport. Place in low-traffic areas where pets or vacuum cleaners won't strike foliage.
Philodendron: Leaf Scarring (Structural)
Split-leaf philodendrons (Thaumatophyllum) often develop regular, symmetrical brown patterning or 'bark' on their stalks/petioles
90%
Philodendron: Leaf Scarring (Structural)
Split-leaf philodendrons (Thaumatophyllum) often develop regular, symmetrical brown patterning or 'bark' on their stalks/petioles
Cause
Split-leaf philodendrons (Thaumatophyllum) often develop regular, symmetrical brown patterning or 'bark' on their stalks/petioles. This is a physiological response to mechanical load, where the plant reinforces the stem with sclerenchymatous tissue to support heavy foliage. It is often mistaken for scale or disease.
Solutions
- Inspect the patterning: if regular and symmetrical, it is benign reinforcement.
- Provide a moss pole or heavy-duty stake to reduce the weight load on petioles.
- Do not attempt to scrape it off, as this will damage the vascular tissue.
Prevention
Support large-leafed varieties early in their development to minimize the need for self-induced structural thickening.
How much light does my Philodendron need?
Philodendrons evolved in tropical forest understory with dappled light filtering through canopy
91%
How much light does my Philodendron need?
Philodendrons evolved in tropical forest understory with dappled light filtering through canopy
Cause
Philodendrons evolved in tropical forest understory with dappled light filtering through canopy. Direct sun burns leaves; too little light causes leggy, weak growth with small leaves.
Solutions
- Provide 1500-3000 lux (foot-candle measurement)
- East-facing windows: ideal morning light
- North-facing: acceptable for most varieties
- South/west-facing: diffuse with sheer curtain or place 6+ feet away
- Signs of too much light: bleached leaves, brown crispy patches
- Signs of too little light: leggy stems, small pale leaves
Prevention
Place 3-5 feet from east or north-facing window. Use sheer curtain for south/west windows. Rotate plant weekly for even growth.
How much light does my Philodendron need?
Philodendron lighting requirements vary by growth habit and variegation
88%
How much light does my Philodendron need?
Philodendron lighting requirements vary by growth habit and variegation
Cause
Philodendron lighting requirements vary by growth habit and variegation. Climbing/vining varieties (melanochrysum, micans) evolved as forest understory climbers reaching for canopy light, requiring bright indirect light (2000-5000 lux) for mature leaf development. Self-heading types (Rojo Congo, Moonlight) tolerate medium light (1000-2000 lux). Variegated varieties need 50-100% more light than green forms to compensate for reduced chlorophyll. Insufficient light causes etiolation (leggy, weak growth), small leaves, and loss of fenestrations in mature plants. Direct sun causes photobleaching and sunburn, especially in variegated forms lacking protective pigments.
Solutions
- 1. Assess current light: etiolated growth indicates insufficient light; bleached/crispy leaves indicate too much direct sun
- 2. For low light: move to east or west-facing window with sheer curtain
- 3. For very low light: install LED grow light 12-14 hours daily at 2000-3000 lux
- 4. For sunburn: relocate immediately to indirect light, trim damaged leaves
- 5. For variegated plants: provide brightest indirect light available—white sections need more energy
- 6. Rotate plant 90 degrees monthly to promote even growth
- 7. Acclimate gradually over 2 weeks when increasing light to prevent shock
Prevention
Provide bright indirect light at 2000-5000 lux for most varieties. Use sheer curtains to filter direct sun. Rotate plants monthly for even growth. Supplement with grow lights (5000-6500K) in winter or low-light rooms. Position variegated plants in brightest available indirect light. Acclimate gradually when moving to brighter locations.
How much light does my Philodendron need?
Insufficient light causes Philodendron etiolation - stems stretch and leaves become small, pale, and sparse
85%
How much light does my Philodendron need?
Insufficient light causes Philodendron etiolation - stems stretch and leaves become small, pale, and sparse
Cause
Insufficient light causes Philodendron etiolation - stems stretch and leaves become small, pale, and sparse. Plant prioritizes vertical growth to reach better light, resulting in leggy appearance. Light below 1000 lux causes decline.
Solutions
- Move to brighter location gradually over 1-2 weeks
- Target bright indirect light: 2000-5000 lux measurable with light meter app
- For windowless rooms: use full-spectrum LED grow light 12-14 hours daily
- Rotate plant 90 degrees weekly to prevent leaning
- Prune leggy growth and propagate once light conditions improved
Prevention
Provide bright indirect light (2000-5000 lux). East or west-facing windows ideal. Supplement with grow lights in low-light spaces. Rotate plant weekly for even exposure.
Philodendron: New Leaf Damage
New leaf damage occurs when environmental stressors affect developing leaves while still furled in the cataphyll
85%
Philodendron: New Leaf Damage
New leaf damage occurs when environmental stressors affect developing leaves while still furled in the cataphyll
Cause
New leaf damage occurs when environmental stressors affect developing leaves while still furled in the cataphyll. Direct sun exposure, low humidity, or mechanical damage to the developing spike causes tears, holes, or deformities that become permanent once the leaf unfurls.
Solutions
- Identify timing: damage occurred 2-4 weeks ago while leaf was developing
- Check current conditions: ensure bright indirect light only, no direct sun
- Increase humidity to 70%+ during active growth periods
- Remove severely damaged leaves only if they affect plant health
- Minor tears: leaf will function normally despite cosmetic damage
- Prevention for future: maintain stable environment when new growth appears
- Do not overwater: damaged leaves do not indicate root problems
Prevention
Maintain consistent 60-80% humidity especially when new leaves forming. Shield emerging spikes from direct sun. Avoid touching or disturbing developing leaves.
Philodendron: No New Growth (Leaf Abortion)
Philodendrons may abort immature leaves before they emerge from the sheath when under transient stress (e
88%
Philodendron: No New Growth (Leaf Abortion)
Philodendrons may abort immature leaves before they emerge from the sheath when under transient stress (e
Cause
Philodendrons may abort immature leaves before they emerge from the sheath when under transient stress (e.g., sudden light drop, cold drafts, or extreme humidity fluctuations). The plant prioritizes energy conservation, sacrificing the developing leaf to maintain stem and root vigor.
Solutions
- Stabilize the environment: ensure bright indirect light (2000-5000 lux) and temperatures above 65°F (18°C).
- Do not repot or fertilize while growth is stalled, as this adds further stress.
- Be patient; new growth typically resumes from the next node or a lateral bud within 2-3 months once conditions stabilize.
Prevention
Use hygrometers to monitor for humidity swings. Avoid moving plants frequently between rooms with different microclimates.
Philodendron: No New Growth (Malnourishment)
Philodendrons grown in LECA or water alone (semi-hydroponics) without specific hydroponic fertilizers suffer from micronutrient lockout
90%
Philodendron: No New Growth (Malnourishment)
Philodendrons grown in LECA or water alone (semi-hydroponics) without specific hydroponic fertilizers suffer from micronutrient lockout
Cause
Philodendrons grown in LECA or water alone (semi-hydroponics) without specific hydroponic fertilizers suffer from micronutrient lockout. Unlike soil, inert media lacks cation exchange capacity and natural mineral release, leading to stunted, malformed, or stalled new growth.
Solutions
- Transition the plant to a well-draining aroid soil mix or blend 50/50 LECA-soil for nutrient access.
- If staying in LECA, use a complete hydroponic nutrient solution (e.g., TPS One or General Hydroponics) with every watering.
- Ensure the water pH is between 5.5 and 6.5 to maximize nutrient availability in hydro setups.
Prevention
Match fertilization regimen strictly to the growing medium. Soil provides a buffer; hydro requires precise, consistent input.
Philodendron: No New Growth (Root Anoxia)
Pots without drainage holes cause water to pool at the bottom, creating an anoxic (oxygen-deprived) zone
90%
Philodendron: No New Growth (Root Anoxia)
Pots without drainage holes cause water to pool at the bottom, creating an anoxic (oxygen-deprived) zone
Cause
Pots without drainage holes cause water to pool at the bottom, creating an anoxic (oxygen-deprived) zone. Even if the top soil feels dry, roots at the base suffocate and die, leading to a complete stall in new growth and eventual systemic dieback. Tree philodendrons (Thaumatophyllum) are especially sensitive to root hypoxia.
Solutions
- Repot immediately into a container with multiple drainage holes.
- Inspect roots for rot (black, mushy, foul-smelling) and trim away affected areas with sterile shears.
- Use a 'chunky' aroid mix (bark, perlite, charcoal) to ensure maximum air pockets in the substrate.
- Transition to a 'soak and dry' watering cycle where the pot is watered only when the top 50% of soil is dry.
Prevention
Never pot directly into decorative containers without holes. Use nursery liners and remove them to water, ensuring all excess drains away before returning to the cache pot.
Philodendron: No New Growth (Stuck Leaves)
Emerging Philodendron leaves can get 'stuck' inside the protective petiole sheath due to low humidity (<50%)
92%
Philodendron: No New Growth (Stuck Leaves)
Emerging Philodendron leaves can get 'stuck' inside the protective petiole sheath due to low humidity (<50%)
Cause
Emerging Philodendron leaves can get 'stuck' inside the protective petiole sheath due to low humidity (<50%). The drying sheath loses elasticity and adheres to the new leaf, causing the stem to curve sharply or the new growth to snap off as it attempts to expand against the resistance.
Solutions
- Increase ambient humidity to 60-80% immediately using a humidifier or pebble tray.
- Gently nudge the stuck leaf upward and away from the stem with clean fingers to release adhesion.
- Mist the emerging sheath 2-3x daily to soften the tissue and facilitate natural unfurling.
- If the leaf snaps, place the detached portion in water for potential propagation.
Prevention
Maintain consistent high humidity, especially during active growing seasons. Avoid placing plants near AC vents or drafts that dry out emerging sheaths.
Philodendron: Nursery Constriction Damage
Nursery-grown Philodendrons frequently arrive with rubber bands, plastic ties, or mesh around root balls that constrict water and nutrient flow
88%
Philodendron: Nursery Constriction Damage
Nursery-grown Philodendrons frequently arrive with rubber bands, plastic ties, or mesh around root balls that constrict water and nutrient flow
Cause
Nursery-grown Philodendrons frequently arrive with rubber bands, plastic ties, or mesh around root balls that constrict water and nutrient flow. This mechanical restriction causes localized tissue damage that appears as mushy basal stems—often misdiagnosed as bacterial rot. The constriction prevents proper root expansion, creates anaerobic conditions at the restriction point, and leads to secondary bacterial infection. This is particularly common in tissue-cultured and mass-produced specimens.
Solutions
- Immediate unpotting: Remove plant from nursery pot within 24 hours of acquisition
- Band removal: Carefully cut away ALL rubber bands, plastic ties, or mesh without damaging roots
- Root inspection: Look for constriction marks, crushed sections, or circling roots
- Root spread: Gently tease apart bound roots to encourage outward growth into new soil
- Pruning: Trim any roots damaged by constriction (blackened or crushed sections)
- Repotting: Plant in appropriate-sized pot with well-draining mix; roots should fill 60-80% of pot volume
Prevention
Always unpot nursery plants immediately upon arrival; reject plants with severely bound roots or deep constriction marks; choose plants in fabric grow bags or loose nursery containers when possible; inspect root ball before accepting delivery from online sellers.
Philodendron: Overgrowth
Vigorous Philodendron growth can result in leggy, sparse appearance with long vines and few leaves
87%
Philodendron: Overgrowth
Vigorous Philodendron growth can result in leggy, sparse appearance with long vines and few leaves
Cause
Vigorous Philodendron growth can result in leggy, sparse appearance with long vines and few leaves. This occurs due to apical dominance directing growth upward. Strategic pruning redirects energy to lateral buds creating bushier form.
Solutions
- Identify healthy nodes (swollen areas where leaves attach) along stem
- Make clean cut 1/4 inch above node using sterilized shears
- Root cuttings in water or moist sphagnum for 4-6 weeks
- Plant 3-5 rooted cuttings around mother plant base for fuller appearance
- Alternatively: remove moss pole and allow to trail from shelf or hanger
Prevention
Prune regularly every 3-6 months to maintain shape. Rotate plant weekly for even light exposure. Provide support for climbing varieties.
Philodendron: Pale Leaves
Pale or chlorotic leaves on Philodendron indicate insufficient light intensity below the photosynthetic compensation point (approximately 100-200 foot-candles for most varieties)
90%
Philodendron: Pale Leaves
Pale or chlorotic leaves on Philodendron indicate insufficient light intensity below the photosynthetic compensation point (approximately 100-200 foot-candles for most varieties)
Cause
Pale or chlorotic leaves on Philodendron indicate insufficient light intensity below the photosynthetic compensation point (approximately 100-200 foot-candles for most varieties). In low light, chlorophyll breakdown exceeds synthesis, resulting in yellow-green or pale foliage as the plant sacrifices chlorophyll maintenance to preserve energy reserves.
Solutions
- Relocate to brighter indirect light location: east-facing window or 3-5 feet from south/west windows
- If using grow lights: maintain 12-18 inches distance; use hand-heat test (should not feel warmth)
- Measure with light meter: target 200-500 foot-candles for Philodendron (higher for variegated varieties)
- Acclimate gradually over 7-10 days when increasing light to avoid sunburn on adapted tissue
- Monitor new growth: healthy new leaves should emerge with normal green color within 2-4 weeks
Prevention
Position in bright indirect light (200-500 foot-candles or 2000-5000 lux); use sheer curtains for harsh afternoon rays; rotate plant weekly for even exposure; supplement with grow lights (full spectrum LED) if natural light is inadequate; avoid sudden light changes exceeding 50% intensity increase.
Philodendron: Pot Sizing
Oversized pots are a leading cause of Philodendron decline because the excess soil volume retains moisture long after the limited root system can absorb it
86%
Philodendron: Pot Sizing
Oversized pots are a leading cause of Philodendron decline because the excess soil volume retains moisture long after the limited root system can absorb it
Cause
Oversized pots are a leading cause of Philodendron decline because the excess soil volume retains moisture long after the limited root system can absorb it. This creates anaerobic conditions in the root zone, promoting root rot pathogens (Pythium, Fusarium) and surface mold. Conversely, severely rootbound plants (roots circling pot) experience nutrient depletion, restricted water uptake causing chronic underwatering symptoms, and growth stunting. Philodendrons prefer being slightly rootbound and stress when moved to excessively large containers.
Solutions
- 1. Inspect roots by gently removing from pot—look for circling or emerging from holes
- 2. For rootbound: repot into container 1-2 inches larger with fresh aroid mix
- 3. For oversized pot causing issues: downsize to appropriate container or switch to terracotta
- 4. If keeping oversized pot: use very chunky mix (70% amendments) and water sparingly
- 5. Tease circling roots gently before repotting to encourage outward growth
- 6. After repotting, wait 1-2 weeks before watering to allow root healing
- 7. Monitor soil moisture carefully—oversized pots dry unevenly
Prevention
Choose pots only 1-2 inches larger than root ball diameter. Ensure pots have drainage holes. Use well-draining aroid mix. Check root system annually by gently removing from pot. Repot when roots circle the bottom or emerge from drainage holes. For cuttings, start in 4-inch pots and size up gradually. Match pot material to environment—terracotta for humid areas, plastic/glazed for dry climates.
Philodendron: Pot Too Small
When roots fill the pot completely, the plant becomes rootbound
85%
Philodendron: Pot Too Small
When roots fill the pot completely, the plant becomes rootbound
Cause
When roots fill the pot completely, the plant becomes rootbound. Roots circle the pot bottom, grow through drainage holes, or form a dense mat. Growth slows as roots have no room to expand and soil nutrients deplete faster.
Solutions
- Check if roots growing through drainage holes or circling pot
- Water runs straight through pot without soaking in
- Repot into container 1-2 inches larger in diameter
- Use fresh well-draining aroid mix when repotting
- Gently loosen root ball before repotting if circling
- Water thoroughly after repotting and allow to drain
Prevention
Repot annually or when roots fill pot; choose pot size appropriate for root ball with room for growth; refresh soil with annual top-dressing if not repotting
Philodendron: Rare Plant Recovery
Rare Philodendron varieties (variegated, velvet-leaf) have slower growth rates and are less forgiving of suboptimal conditions
88%
Philodendron: Rare Plant Recovery
Rare Philodendron varieties (variegated, velvet-leaf) have slower growth rates and are less forgiving of suboptimal conditions
Cause
Rare Philodendron varieties (variegated, velvet-leaf) have slower growth rates and are less forgiving of suboptimal conditions. Recovery from shipping stress, acclimation shock, or root damage requires precise environmental control.
Solutions
- Provide bright indirect light (2000-4000 lux) to support recovery
- Maintain high humidity 70-80% via humidifier or prop box
- Use well-draining chunky mix; water when top inch dry
- Avoid fertilizing until new growth appears (4-6 weeks)
- Be patient - rare varieties may take 4-8 weeks to show new growth post-shock
Prevention
Source from reputable sellers with established rooting. Quarantine 2-3 weeks. Maintain stable conditions without sudden changes.
Is my Philodendron rootbound?
Root-bound Philodendron occurs when roots completely fill the pot, circling the bottom and growing through drainage holes
2 protocols
88–89%
Is my Philodendron rootbound?
Root-bound Philodendron occurs when roots completely fill the pot, circling the bottom and growing through drainage holes
Protocol 1: rootbound · 89% confidence
Cause
Root-bound Philodendron occurs when roots completely fill the pot, circling the bottom and growing through drainage holes. Growth slows as roots have no room to expand and soil nutrients deplete faster. Some Philodendron prefer being slightly root-bound.
Solutions
- Check if roots growing through drainage holes or circling pot bottom
- Water runs straight through without soaking indicates root-bound conditions
- Repot into container 1-2 inches larger in diameter
- Use fresh well-draining aroid mix when repotting
- Gently loosen root ball if circling before repotting
- Water thoroughly after repotting and allow to drain
Prevention
Repot annually or when roots fill pot. Check drainage holes quarterly for emerging roots. Top-dress with fresh soil if not repotting.
Protocol 2: rootbound stress · 88% confidence
Cause
Rootbound philodendrons exhibit slowed growth, yellowing, and require frequent watering as the root mass outgrows the pot. The dense root ball cannot access water and nutrients effectively, and roots circle the pot creating a solid mass that repels water.
Solutions
- Check for rootbound signs: roots circling pot, emerging from drainage holes
- Water runs straight through without soaking: indicates dense root mass
- Repot into pot 1-2 inches larger with fresh chunky aroid mix
- Before repotting: soak root ball for 10 minutes to hydrate circling roots
- During repotting: gently tease apart outer circling roots to encourage outward growth
- Trim any dead or rotted roots found during repotting
- Water thoroughly after repotting and maintain higher humidity during recovery
Prevention
Repot every 12-18 months or when roots emerge from drainage holes. Increase pot size by only 1-2 inches diameter each time. Use chunky aroid mix to support root health.
Philodendron: Rust Fungus
Rust fungus (Puccinia, Uromyces) produces orange-brown pustules on leaf undersides
88%
Philodendron: Rust Fungus
Rust fungus (Puccinia, Uromyces) produces orange-brown pustules on leaf undersides
Cause
Rust fungus (Puccinia, Uromyces) produces orange-brown pustules on leaf undersides. Spores spread via air currents and water splash in humid conditions with poor airflow.
Solutions
- Isolate plant immediately to prevent spread to collection
- Remove and destroy all infected leaves - do not compost
- Apply neem oil or fungicide to remaining leaves weekly for 4 weeks
- Increase air circulation with fan near plants
- Reduce humidity temporarily to 40-50% to inhibit fungal growth
Prevention
Maintain 40-60% humidity with good airflow. Space plants 12+ inches apart. Inspect new plants before introducing to collection.
Philodendron: Stem Damage
Philodendron stems are soft and easily damaged by physical contact, supports, or during repotting
87%
Philodendron: Stem Damage
Philodendron stems are soft and easily damaged by physical contact, supports, or during repotting
Cause
Philodendron stems are soft and easily damaged by physical contact, supports, or during repotting. Scars are permanent but cosmetic only.
Solutions
- Damage is permanent - scars do not heal
- For cosmetic improvement: prune damaged stem and propagate top cutting
- Ensure future stems have space to grow without contact
- Use soft velcro ties when staking or supporting
- Apply cinnamon to fresh wounds to prevent infection
Prevention
Handle stems gently during repotting. Use soft plant ties. Avoid overcrowding where stems rub against each other.
Philodendron: Stuck Leaf
Stuck leaf syndrome in Philodendron occurs when new growth becomes trapped in its protective sheath (cataphyll) and cannot unfurl properly
86%
Philodendron: Stuck Leaf
Stuck leaf syndrome in Philodendron occurs when new growth becomes trapped in its protective sheath (cataphyll) and cannot unfurl properly
Cause
Stuck leaf syndrome in Philodendron occurs when new growth becomes trapped in its protective sheath (cataphyll) and cannot unfurl properly. This happens when low humidity (below 50%) causes the sheath to dry out and become rigid, physically trapping the emerging leaf. Other contributing factors include inconsistent watering, low light reducing cell expansion, and physical constriction from tight growth points. If forced, the trapped leaf tears or snaps, causing permanent deformation.
Solutions
- 1. Increase humidity immediately to 70-80% using humidifier or plastic propagation dome
- 2. Mist the affected sheath gently with room-temperature water 2-3 times daily
- 3. Wait 3-7 days for sheath to soften naturally—do not pull or force the leaf
- 4. If sheath remains rigid after one week, carefully dampen a cotton swab and trace the seam
- 5. Once leaf emerges, continue high humidity for 2 weeks to ensure full expansion
- 6. For prevention, maintain consistent humidity and avoid drafts near new growth
Prevention
Maintain high humidity at 60-80% using humidifiers, pebble trays, or grouping plants. Mist new growth points gently during active growing season. Ensure consistent soil moisture—never let soil become bone dry. Provide bright indirect light to support vigorous cell expansion. Handle new growth gently—never force unfurling.
Why is my Philodendron growing so slowly?
Slow or stunted new growth in Philodendron can result from insufficient light, low humidity, nutrient deficiency, or being rootbound
82%
Why is my Philodendron growing so slowly?
Slow or stunted new growth in Philodendron can result from insufficient light, low humidity, nutrient deficiency, or being rootbound
Cause
Slow or stunted new growth in Philodendron can result from insufficient light, low humidity, nutrient deficiency, or being rootbound. Unlike dormancy which follows seasonal patterns, stunted growth persists year-round and new leaves may be smaller than previous ones.
Solutions
- Assess light levels - move to brighter indirect location if needed
- Increase humidity to 60-80% using humidifier or pebble tray
- Check if plant is rootbound - roots visible through drainage holes indicate repotting needed
- Apply balanced liquid fertilizer at 1/4 to 1/2 strength monthly during spring/summer
- Prune leggy growth to encourage bushier new growth
- Ensure temperatures are 65-85°F - cold slows growth
- Be patient - new growth may take 2-4 weeks to appear after care improvements
- Check for pests which can stunt growth
Prevention
Provide bright indirect light (2000-5000 lux). Maintain 60-80% humidity. Fertilize monthly during growing season at half strength. Repot every 1-2 years or when roots circle the pot.
Philodendron: Toxicity
All Philodendron species contain raphides—needle-like crystals of calcium oxalate
98%
Philodendron: Toxicity
All Philodendron species contain raphides—needle-like crystals of calcium oxalate
Cause
All Philodendron species contain raphides—needle-like crystals of calcium oxalate. If ingested, these crystals cause immediate mechanical irritation, swelling, and burning of the mouth, tongue, and throat. Philodendrons are a leading cause of pediatric plant exposure calls to poison centers.
Solutions
- In case of ingestion: wipe the mouth with a damp cloth and offer small amounts of cool water or milk to help flush the crystals.
- Monitor for severe swelling or difficulty breathing; if symptoms escalate, contact a poison control center or seek medical attention immediately.
- For pets: watch for excessive drooling, pawing at the mouth, or vomiting. Contact a veterinarian if distress is noted.
Prevention
Place all Philodendron varieties out of reach of small children and pets. Use hanging baskets or high shelves for vining varieties. Educate household members that the plant is for decoration only and never to be consumed.
Philodendron: Toxicity Exposure
Philodendron scandens (heart leaf philodendron) and related species are the most commonly reported plant exposures nationally
84%
Philodendron: Toxicity Exposure
Philodendron scandens (heart leaf philodendron) and related species are the most commonly reported plant exposures nationally
Cause
Philodendron scandens (heart leaf philodendron) and related species are the most commonly reported plant exposures nationally. The plants contain calcium oxalate crystals that can cause irritation, swelling, and burning sensation if ingested or if sap contacts skin or eyes. While rarely fatal, exposures require proper management.
Solutions
- For skin contact: Wash affected area with soap and water immediately
- For eye contact: Flush with water for 15 minutes and seek medical attention
- For ingestion: Rinse mouth thoroughly, do not induce vomiting
- Give milk or water to dilute if small amount ingested
- Seek medical attention if symptoms persist or if large amount consumed
- For pets: Contact veterinarian immediately if ingestion suspected
- Monitor for difficulty breathing or swelling - seek emergency care if present
Prevention
Keep plants out of reach of children and pets. Wear gloves when pruning or propagating. Wash hands thoroughly after handling. Educate household members about plant toxicity.
Philodendron: Transplant Shock
Transplant shock occurs when repotting disturbs root system or changes growing environment
2 protocols
86–90%
Philodendron: Transplant Shock
Transplant shock occurs when repotting disturbs root system or changes growing environment
Protocol 1: transplant shock · 90% confidence
Cause
Transplant shock occurs when repotting disturbs root system or changes growing environment. Roots need time to reestablish in new soil before supporting full foliage.
Solutions
- Expect temporary leaf drop or yellowing for 1-2 weeks post-repot
- Maintain consistent moisture - do not let soil dry completely during recovery
- Provide bright indirect light but avoid direct sun stress
- Do not fertilize for 4-6 weeks after repotting
- Remove only completely yellowed leaves; leave partially affected ones
- New growth indicates successful recovery
Prevention
Repot during active growth (spring). Water plant 2 days before repotting. Handle roots gently. Maintain same soil depth.
Protocol 2: transplant shock · 86% confidence
Cause
Transplant shock occurs when root disturbance during repotting interrupts the plant's water and nutrient uptake. Philodendrons suffer shock when root balls are aggressively rinsed, roots are untangled excessively, or when moved to significantly different soil or environmental conditions.
Solutions
- After repotting: water thoroughly to settle soil and reduce air pockets
- Maintain high humidity (70-80%) for 2 weeks to reduce transpiration stress
- Avoid fertilizer for 4-6 weeks to prevent burning stressed roots
- Keep in stable location: no direct sun, consistent temperature 65-80°F
- Expect leaf drop: older leaves may yellow and drop as plant adjusts
- Do not overwater: check soil moisture, may need less water with reduced root function
- Recovery timeline: new growth resumes in 4-8 weeks when roots reestablish
Prevention
Minimize root disturbance: slide plant out, loosen only outer circling roots, maintain intact root ball center. Match new soil type to old as closely as possible. Repot during active growth period, not dormancy.
Why is my Philodendron dropping leaves?
Transplant shock in Philodendron occurs when roots are disturbed during repotting, causing micro-tears in fine root hairs that are responsible for 90% of water and nutrient uptake
89%
Why is my Philodendron dropping leaves?
Transplant shock in Philodendron occurs when roots are disturbed during repotting, causing micro-tears in fine root hairs that are responsible for 90% of water and nutrient uptake
Cause
Transplant shock in Philodendron occurs when roots are disturbed during repotting, causing micro-tears in fine root hairs that are responsible for 90% of water and nutrient uptake. The plant responds by dropping older leaves to reduce transpiration load while repairing vascular connections. This is particularly common when rootbound plants are aggressively untangled or when plants are moved from stable nursery conditions to variable home environments within days of purchase.
Solutions
- Inspect roots during repot: Only trim visibly rotted or damaged roots, leave healthy bound roots intact
- Maintain pre-repot watering schedule: Do not increase or decrease frequency during shock period
- Remove fully yellowed leaves at base with sterile scissors to redirect energy
- Provide consistent bright indirect light—avoid moving plant to new locations
- Expect 2-4 week recovery period; new growth indicates successful root reestablishment
- Hold all fertilizer for 4-6 weeks to avoid burning stressed roots
Prevention
Water plant 24 hours before repotting to reduce stress; tease root ball gently without aggressive untangling; repot at same depth as original pot; avoid fertilizing for 4-6 weeks post-repot; maintain stable temperature (65-80°F) and humidity (60-80%).
Further Reading
Related Articles
Common Questions
Frequently Asked Questions
Why does my philodendron have Yellow leaves - overwatering and root rot?
Cause: Overwatering in Philodendrons occurs when soil remains saturated for 7+ days, creating anaerobic conditions (dissolved oxygen <2mg/L) that suffocate the epiphytic-adapted root system. Unlike drought-tolerant succulents, Philodendron roots require oxygen exchange for aerobic respiration. Prolonged saturation triggers hypoxia-induced root cell death, opening entry points for opportunistic pathogens like Pythium and Fusarium. Yellowing appears first in older leaves as the root system fails to transport water and nutrients, progressing rapidly upward if unchecked. Key distinction from natural aging: multiple leaves yellow simultaneously within days, often accompanied by leaf thinness, fungus gnats, and a musty soil odor.
Solution: Confirm overwatering: Check soil—if wet below surface despite 7+ days since last watering, overwatering is confirmed
Prevention: Water only when top 2-3 inches of soil are completely dry—use the finger test or moisture meter. Use well-draining aroid mix (50% potting soil, 30% perlite, 20% orchid bark). Ensure pots have drainage holes and saucers are emptied within 30 minutes. Avoid automated watering systems that don't account for seasonal humidity variations.
95% confidence · View full protocol →
Why does my philodendron have Root rot?
Cause: Pythium, Phytophthora, and Rhizoctonia fungi proliferate in waterlogged soil with poor drainage. These pathogens attack root cortex cells, causing browning, mushy texture, and inability to uptake water/nutrients.
Solution: Unpot plant and gently rinse roots under lukewarm water
Prevention: Use terracotta pots with drainage holes. Mix 30% perlite + 20% orchid bark + 50% potting soil. Water only when top 2 inches are bone dry.
91% confidence · View full protocol →
Why does my philodendron have Propagation?
Cause: Using sphagnum moss that is either bone dry (repels water) or completely saturated (causes rot) for propagation.
Solution: Place dry premium long-fibered sphagnum moss in a bowl and submerge in warm water for 15 minutes to fully rehydrate.
Prevention: Avoid densely packing wet moss; oxygen is just as critical as moisture for root development.
96% confidence · View full protocol →
Why does my philodendron have Brown spots (extrafloral nectaries)?
Cause: Philodendrons produce sugary sap from glands called extrafloral nectaries (EFNs) to attract ants for protection. Indoors, without ants to clean the sap, it dries and causes localized chemical burns on leaf undersides, appearing as small brown or translucent spots. This is a physiological response to stress, not an infection.
Solution: Gently wipe leaf undersides weekly with a damp microfiber cloth to remove sap before it burns the tissue.
Prevention: Maintain stable high humidity (60-80%) and bright indirect light. Incorporate underside wiping into your weekly maintenance routine, especially for varieties like 'Ring of Fire', 'Birkin', and 'Congo Rojo'.
95% confidence · View full protocol →
Why does my philodendron have Leaf spot (fungal)?
Cause: Fungal leaf spot (e.g., Cercospora) is triggered by overwatering and persistent leaf wetness. It presents as brown necrotic centers surrounded by distinct yellow halos. Pathogens thrive in humid air without adequate circulation, spreading via water splashes.
Solution: Immediately stop misting or overhead watering to keep foliage dry.
Prevention: Water at the soil level only. Maintain 40-60% humidity with active ventilation. Use well-draining aroid mix to prevent moisture stress at the roots.
92% confidence · View full protocol →
Common Questions
Frequently Asked About Philodendron
Can Philodendron grow in water?
Yes. We have 2 documented protocols for water-based Philodendron care, including propagation and long-term hydroponic transition.
What problems can Philodendron get?
Our database contains 148 documented Philodendron cases covering 78 distinct topics, including diseases, pest identification, environmental stress, propagation, and advanced care protocols — each with verified solutions.
Master This Plant
Want the Complete Protocol?
Get the Philodendron Rare Guide Pack with video walkthroughs, seasonal calendars, and advanced rescue techniques not covered in the free guides.