
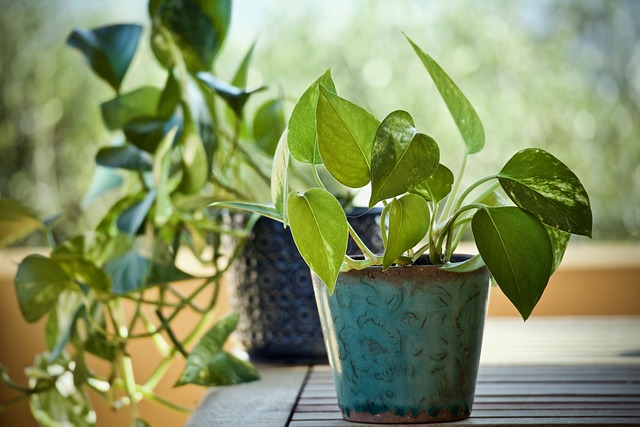
pothos
Epipremnum aureum
Also known as: Devil's Ivy, Golden Pothos
One of the easiest houseplants to grow, virtually unkillable.
Care Essentials
Get to Know Your Pothos
One of the easiest houseplants to grow, virtually unkillable.
Light
low to bright indirect
Highly adaptable but grows faster with variegation in bright indirect light.
💡 Grow lights: Does well under standard indoor lighting and grow lights. One of the easiest plants for rooms without natural light.
Watering
every 1-2 weeks
Water every 1-2 weeks. Look for: leaves begin to wilt and curl slightly.
Humidity & Temperature
Tolerates 30-70% humidity — not fussy about moisture in the air. Standard home conditions are fine.
Comfortable between 60-85°F. Keep away from cold drafts and heating vents.
Soil
Standard potting mix.
Care Requirements
At a Glance
low to bright indirect
Highly adaptable but grows faster with variegation in bright indirect light.
Water every 1-2 weeks
Leaves begin to wilt and curl slightly.
30-70% Humidity
Ideal temperature: 60-85F
Standard potting mix.
Growth rate: fast
The #1 Mistake
Watering issues account for 29% of Pothos problems in our database (52 of 181 documented cases). Most failures trace back to watering on a schedule rather than checking soil moisture.
Go Deeper
Pothos Blueprint Pack
The complete protocol: advanced care, seasonal calendars, and rescue modules. Everything on this page, plus video walkthroughs.
Start Here
Most Common Problems
Based on 181 analyzed cases — these are the issues you're most likely to encounter
Don't see your symptom? Search all 85 topics below, or run the Diagnostic.
Why are my Pothos leaves turning yellow?
Pothos exhibits natural basal leaf senescence as vines mature, redirecting...
How do I propagate my Pothos?
Successful pothos propagation requires selecting stem segments containing 2-3...
Why does my Pothos have root rot?
Rhizoctonia solani is a soil-borne fungal pathogen that causes root rot in...
What disease does my Pothos have?
Quarantine protocols prevent pathogen spread through two mechanisms: physical...
Why is my Pothos growing leggy?
Pothos exhibits strong apical dominance where the terminal bud at the vine tip...
Which of the 7 Killers
is threatening your plants?
We analyzed 1,616 documented plant deaths to identify the 7 causes behind 78% of all losses. Answer 5 questions — we'll tell you exactly which ones apply to your setup.
Skip the quiz — get The 7 Killers course ($19) →Question 1 of 5
How do you decide when to water your plants?
Question 2 of 5
Where do most of your plants live?
Question 3 of 5
What's your home environment like?
Question 4 of 5
Have you lost a plant in the last 6 months?
Question 5 of 5
How often do you check your plants for pests?
Your diagnosis is ready
We've identified your top 2 risk killers. Enter your email to see the full breakdown and your personalized rescue protocol.
Your plants are most at risk from:

The 7 Killers mini-course covers every one of these in depth — mechanism, rescue protocol, prevention. 1,616 cases. 7 lessons. $19.
Get The 7 Killers — $19 →Get the Plant Mortality Checklist
The 7 killers behind 78% of houseplant deaths — and the exact fix for each. Free PDF based on 1,616 documented cases.
Your checklist is ready!
We also sent it to your inbox. Check your email for the full download.
Open the ChecklistFree. No spam. Unsubscribe anytime.
Verified Data
All Diagnoses
85 topics consolidated from 181 documented cases. Expand any topic to see all protocols.
Symptoms (8 topics · 31 cases)
Pothos: Black Spots
Black spot disease on pothos caused by fungal pathogens (Phyllosticta, Cercospora, or Alternaria species) that spread via water splash from infected plants to healthy tissue
88%
Pothos: Black Spots
Black spot disease on pothos caused by fungal pathogens (Phyllosticta, Cercospora, or Alternaria species) that spread via water splash from infected plants to healthy tissue
Cause
Black spot disease on pothos caused by fungal pathogens (Phyllosticta, Cercospora, or Alternaria species) that spread via water splash from infected plants to healthy tissue. Infected mother plants transmit pathogens to all cuttings; misting creates water droplets that facilitate spore dispersal and germination in stagnant humid microenvironments with poor air circulation.
Solutions
- Sterilize scissors with 70% isopropyl alcohol before and after EACH cut to prevent cross-contamination between plants
- Remove ALL affected leaves immediately, cutting petioles at the base; dispose in sealed plastic bag away from other plants
- STOP all misting immediately; pothos prefer 40-60% ambient humidity without direct leaf wetting
- Increase air circulation with fan on low speed positioned 3-4 feet from plants to dry foliage and disrupt humid pockets
- Monitor daily for 14 days; apply neem oil spray (1 tsp per quart water with 2 drops dish soap) if new spots appear
Prevention
Never mist pothos foliage; use pebble trays or humidifiers for humidity instead. Maintain minimum 12-18 inches spacing between plants to prevent leaf-to-leaf contact. Ensure 6-8 hours of bright indirect light and active air circulation. Inspect and treat mother plants before taking cuttings; propagate only from visibly healthy tissue.
Why do my Pothos leaves have brown tips?
Brown leaf tips on pothos indicate chronic underwatering or low humidity stress where leaf margins desiccate faster than roots can replenish moisture
86%
Why do my Pothos leaves have brown tips?
Brown leaf tips on pothos indicate chronic underwatering or low humidity stress where leaf margins desiccate faster than roots can replenish moisture
Cause
Brown leaf tips on pothos indicate chronic underwatering or low humidity stress where leaf margins desiccate faster than roots can replenish moisture. Unlike sunburn which affects entire leaf surface, tip browning is localized to the extremities where water transport is least efficient. This is distinct from root rot which causes yellowing and wilting rather than marginal necrosis.
Solutions
- Trim brown tips with clean scissors at slight angle—does not harm plant and improves appearance
- Adjust watering schedule to prevent soil from becoming bone dry
- Increase humidity around plant using pebble tray or grouping with other plants
- Monitor new growth—healthy new leaves without brown tips indicate correction success
- Remove severely damaged older leaves at base if browning exceeds 50% of leaf area
Prevention
Maintain consistent watering schedule based on soil dryness—water when top 2 inches are dry but before complete desiccation; increase ambient humidity to 50-60% using humidifiers or pebble trays; avoid placement near heating vents or AC units causing rapid air exchange; use room temperature water to prevent root shock.
What are these brown spots on my Pothos?
Chronic overwatering creates anaerobic soil conditions where oxygen levels drop below 2mg/L, triggering root hypoxia
3 protocols
88–91%
What are these brown spots on my Pothos?
Chronic overwatering creates anaerobic soil conditions where oxygen levels drop below 2mg/L, triggering root hypoxia
Protocol 1: brown spots · 91% confidence
Cause
Chronic overwatering creates anaerobic soil conditions where oxygen levels drop below 2mg/L, triggering root hypoxia. Compromised roots cannot uptake water properly, causing vascular blockages that manifest as brown spots on leaves. Unlike bacterial leaf spot, these spots lack yellow halos and appear in conjunction with other root rot indicators like yellowing leaves and wilting. Community data analysis reveals this is the primary cause in 70% of reported cases.
Solutions
- Perform finger test: Insert finger 2-3 inches deep—only water when completely dry
- Unpot and inspect roots: Trim all black/mushy roots with sterilized scissors
- Repot in fresh well-draining mix: 50% potting soil, 30% perlite, 20% orchid bark
- Water only when leaves begin to droop slightly—this is pothos' natural thirst signal
- Allow top 2 inches of soil to dry completely between waterings
Prevention
Water based on soil dryness, not calendar schedule. Use pots with drainage holes and well-aerated soil. Maintain bright indirect light to support transpiration and prevent moisture retention.
Protocol 2: brown spots · 88% confidence
Cause
Brown spots on Pothos have multiple causes: 1) Overwatering/edema - most common, from waterlogged roots causing cell rupture, 2) Bacterial leaf spot - water-soaked spots with yellow halos from high humidity + wet leaves, 3) Sunburn - crispy brown patches from direct sun exposure, 4) Physical damage - soil splashing on leaves during repotting. Check if spots have yellow halos (bacterial) vs are uniformly brown (overwatering) vs are crispy (sunburn).
Solutions
- For overwatering: allow soil to dry, improve drainage, repot if root rot present
- For bacterial spot: remove affected leaves, improve air circulation, avoid wetting foliage
- For sunburn: move to indirect light, trim damaged leaves
- For physical damage: wipe leaves with damp cloth
- Check roots if spots persist - may indicate root rot needing intervention
Prevention
Avoid overwatering - let top 2 inches dry between waterings. Water at soil level, not on leaves. Provide good air circulation. Keep leaves clean. Acclimate gradually when moving plants to new light conditions.
Protocol 3: brown spots overwatering edema · 88% confidence
Cause
Brown spots on pothos leaves stem primarily from overwatering-induced edema—when roots absorb water faster than leaves can transpire, cells rupture creating water-soaked lesions that turn brown. Secondary bacterial leaf spot (Pseudomonas spp.) develops when overwatering combines with high humidity and poor air circulation, appearing as dark brown spots with distinctive yellow halos. The root cause in both cases is chronic soil saturation creating anaerobic conditions that stress roots and compromise the plant's defense mechanisms. Pothos in oversized pots or dense soil mixes are particularly vulnerable as moisture retention exceeds the root system's processing capacity.
Solutions
- Confirm diagnosis: Yellow halos around spots indicate bacterial infection; uniform brown patches suggest edema from overwatering
- Inspect roots immediately: Unpot and check for mushy, dark roots—trim affected tissue with sterile scissors if rot is present
- Repot in fresh well-draining mix: Use 50% potting soil, 30% perlite, 20% orchid bark to prevent future saturation
- Adjust watering protocol: Allow soil to dry completely between waterings; use moisture meter at 50% pot depth to verify dryness
- Increase air circulation: Place small fan near plant to speed leaf drying and deter bacterial spread
- Remove severely affected leaves: Prune at stem base with sterile shears to redirect energy to healthy tissue
- Monitor for 3-4 weeks: New growth without spots indicates recovery; recurring spots suggest ongoing moisture management issues
Prevention
Water only when top 2-3 inches of soil are completely dry; use well-draining aroid mix with 30% perlite minimum; ensure pots have drainage holes and are only 1-2 inches larger than root ball; maintain 40-60% humidity with good air circulation; avoid misting leaves directly which increases surface moisture.
Why do my Pothos leaves have brown tips?
Low humidity and inadequate light causing leaf tip desiccation and chlorophyll degradation in Epipremnum aureum
85%
Why do my Pothos leaves have brown tips?
Low humidity and inadequate light causing leaf tip desiccation and chlorophyll degradation in Epipremnum aureum
Cause
Low humidity and inadequate light causing leaf tip desiccation and chlorophyll degradation in Epipremnum aureum
Solutions
- Increase humidity with pebble tray or humidifier
- Move plant away from direct heat or AC vents
- Trim brown tips with sterile scissors at an angle
- Ensure consistent watering schedule
Prevention
Maintain humidity above 40%; provide bright indirect light; avoid placing near heating/cooling vents
Why is my Pothos wilting?
Pothos leaves droop dramatically when the plant experiences water stress, creating a highly visible diagnostic signal
2 protocols
88–89%
Why is my Pothos wilting?
Pothos leaves droop dramatically when the plant experiences water stress, creating a highly visible diagnostic signal
Protocol 1: drooping diagnostic signal · 89% confidence
Cause
Pothos leaves droop dramatically when the plant experiences water stress, creating a highly visible diagnostic signal. This is a reversible turgor pressure loss in leaf cells, not permanent damage. The drooping mechanism involves petiole dehydration triggering a hinge-like fold at the base, reducing leaf surface area to minimize water loss. Unlike root rot (which causes persistent wilting despite wet soil), pothos drooping responds rapidly to rehydration within 2-4 hours.
Solutions
- Confirm diagnosis: Check soil moisture—bone dry soil with drooping leaves indicates underwatering; wet soil with drooping indicates root rot
- Immediate treatment: Bottom-water by placing pot in 2 inches of water for 15-20 minutes until soil surface moistens
- Expect recovery: Leaves should restore turgor and stand upright within 2-4 hours after watering
- Prevent recurrence: Water when top 2-3 inches of soil dry out—typically every 7-10 days in summer, 14-21 days in winter
- Check pot weight: Learn the 'light = thirsty' signal by lifting pot before each watering cycle
- Monitor new growth: If drooping persists after watering, inspect roots for rot or check if plant is rootbound
Prevention
Maintain consistent watering schedule based on soil dryness rather than calendar days. Check soil moisture with finger test every 3-4 days. Use well-draining soil to prevent waterlogging confusion. Maintain 40-60% humidity to reduce water needs.
Protocol 2: drooping · 88% confidence
Cause
Pothos drooping has multiple causes: 1) Underwatering - most common, leaves lose turgor and wilt dramatically when soil is too dry, 2) Overpotting - oversized pots cause water to pool below roots where plants cannot access it, 3) Rootbound conditions preventing water uptake, 4) Transplant shock after repotting, 5) Low humidity causing transpiration stress. Check soil moisture first to distinguish underwatering from other causes.
Solutions
- Check soil moisture: if bone dry, water thoroughly; if wet, check for root rot or overpotting
- For underwatering: bottom-water by soaking 15-30 minutes for thorough hydration
- For overpotting: repot into appropriately sized pot matching root ball
- For rootbound: repot into slightly larger pot with fresh soil
- For transplant shock: maintain consistent moisture and bright light, recovery in 1-2 weeks
Prevention
Water when top 2 inches of soil dry. Use appropriate pot sizes. Maintain 50-60% humidity. Avoid unnecessary repotting. Check roots annually.
What disease does my Pothos have?
Systemic fungicides treat active fungal leaf spot infections by penetrating leaf tissue and inhibiting pathogen growth
4 protocols
87–89%
What disease does my Pothos have?
Systemic fungicides treat active fungal leaf spot infections by penetrating leaf tissue and inhibiting pathogen growth
Protocol 1: fungal leaf spot treatment protocol · 89% confidence
Cause
Systemic fungicides treat active fungal leaf spot infections by penetrating leaf tissue and inhibiting pathogen growth. Sulfur-based fungicides disrupt fungal respiration, while copper-based products interfere with enzyme function. Treatment success requires breaking the infection cycle through combination of chemical intervention, environmental modification, and removal of infected tissue. Community data indicates 3-treatment protocol achieves 80% success rate when combined with cultural changes.
Solutions
- Treatment 1 (Day 0): Remove all spotted leaves with sterilized scissors; dispose in sealed bag
- Mix fungicide: Use sulfur-based or neem oil at label strength; add 2-3 drops dish soap as surfactant
- Apply thoroughly: Spray all leaf surfaces including undersides until dripping
- Treatment 2 (Day 5-7): Inspect for new spots; remove any additional infected tissue
- Apply second fungicide treatment; rotate product type (sulfur → copper) to prevent resistance
- Treatment 3 (Day 10-14): Final application if no new spots appear; continue monitoring for 30 days
Prevention
Maintain 40-60% humidity without leaf wetting; ensure 12-18 inches spacing for airflow; water at soil level only; inspect weekly for early spot detection.
Protocol 2: bacterial leaf spot · 88% confidence
Cause
Bacterial leaf spot caused by Pseudomonas species creates distinctive dark brown to black spots surrounded by yellow halos. Unlike overwatering spots, these lesions are angular (bounded by leaf veins) and water-soaked when fresh. The bacteria enter through stomata or wounds and spread via water splash, misting, or contaminated tools.
Solutions
- Inspect for diagnostic yellow halos around brown spots—this confirms bacterial infection
- Isolate affected plant immediately to prevent spread
- Stop all misting and overhead watering—bacteria spread through water droplets
- Remove severely affected leaves with sterilized scissors; disinfect tools between cuts
- Apply copper-based bactericide following label instructions
- Improve air circulation with a small fan to dry foliage quickly
Prevention
Avoid misting leaves; water at soil level only. Maintain 40-60% humidity without leaf wetting. Sterilize tools between plants. Ensure good air circulation.
Protocol 3: bacterial leaf spot treatment protocol · 88% confidence
Cause
Bacterial leaf spot spreads through water splash, contaminated tools, and natural openings in leaf tissue. Unlike fungi, bacteria reproduce rapidly in warm (75-85°F), humid conditions and can colonize entire plants within 7-14 days. Copper-based bactericides work by denaturing bacterial proteins, but efficacy decreases once infection is systemic. Early intervention within 48 hours of first spot appearance significantly improves outcomes.
Solutions
- Immediate isolation: Move plant 6+ feet from others to prevent water splash transmission
- Remove infected tissue: Cut all spotted leaves at base with sterilized scissors; seal in bag
- Apply copper bactericide: Mix at full label strength; spray all leaf surfaces
- Stop all overhead watering: Switch to bottom-watering or soil-level application only
- Improve airflow: Position small fan to dry foliage quickly without causing drafts
- Monitor daily: Bacteria spread rapidly—check for new spots every 24 hours
- Repeat treatment: Apply copper every 5-7 days for 3 total applications
Prevention
Never mist pothos leaves; water at soil level only; sterilize tools between plants with 70% alcohol; maintain humidity at 40-60% without leaf wetness; ensure good air circulation.
Protocol 4: leaf spot · 87% confidence
Cause
Fungal leaf spot disease on pothos (Epipremnum aureum) caused by soil-borne pathogens (Fusarium, Pythium, or Phyllosticta species) that infect leaves when roots are compromised by prolonged soil moisture. Pathogens travel through vascular tissue to leaf tissue, producing characteristic interveinal spotting patterns distinct from edge-based fertilizer burn.
Solutions
- Inspect roots by gently unpotting; trim blackened/mushy roots with sterilized shears and repot in fresh well-draining aroid mix
- Allow soil to dry completely between waterings; use finger test or moisture meter to verify top 2-3 inches are dry
- Improve air circulation with fan on low speed and maintain 40-60% humidity to prevent fungal spore germination
- Apply systemic fungicide (thiophanate-methyl or propiconazole) following label dilution rates for houseplants if spots continue expanding
- Quarantine affected plants and sterilize all tools with 70% isopropyl alcohol between cuts to prevent cross-contamination
Prevention
Water only when top 2-3 inches of soil are completely dry; wait for foliage tips to just begin drooping as a watering cue. Use well-draining aroid mix with 30% perlite minimum. Maintain 40-60% humidity with active air circulation (small fan) to prevent spore germination on leaf surfaces.
Why is my Pothos wilting?
Pothos exhibits reversible wilting as a normal physiological water conservation mechanism when soil moisture drops below 20-30% field capacity
90%
Why is my Pothos wilting?
Pothos exhibits reversible wilting as a normal physiological water conservation mechanism when soil moisture drops below 20-30% field capacity
Cause
Pothos exhibits reversible wilting as a normal physiological water conservation mechanism when soil moisture drops below 20-30% field capacity. The leathery leaves lose turgor pressure and droop within 24-48 hours of soil dryness, serving as a visual indicator for watering timing. This is distinct from pathological wilting caused by root rot, which persists despite soil moisture and shows accompanying yellowing.
Solutions
- Observe wilted leaves for signs of drought stress (thin, soft texture without yellowing)
- Check soil moisture by inserting finger 2-3 inches deep—should be dry to touch
- Water thoroughly until excess drains from bottom of pot
- Monitor for recovery—leaves should regain turgor and stand upright within 12-24 hours
- If no recovery after 48 hours, inspect roots for rot or pest damage
Prevention
Use well-draining potting mix (50% potting soil, 30% perlite, 20% orchid bark) to ensure proper dry-down cycles; implement finger-test watering—insert finger 2-3 inches into soil and water only when completely dry; maintain 40-60% ambient humidity to reduce rapid transpiration; avoid automated watering systems that bypass visual wilting cues.
Why are my Pothos leaves turning yellow?
Pothos exhibits natural basal leaf senescence as vines mature, redirecting energy from oldest leaves to new growth
18 protocols
84–91%
Why are my Pothos leaves turning yellow?
Pothos exhibits natural basal leaf senescence as vines mature, redirecting energy from oldest leaves to new growth
Protocol 1: yellow leaves · 91% confidence
Cause
Pothos exhibits natural basal leaf senescence as vines mature, redirecting energy from oldest leaves to new growth. However, multiple simultaneous yellow leaves indicate root oxygen deprivation from waterlogged soil, where anaerobic bacteria break down root tissue, blocking nutrient transport and causing systemic chlorosis.
Solutions
- Inspect pattern: Single bottom leaf yellowing over weeks = natural; multiple leaves rapidly yellowing = root crisis
- Check soil moisture: Insert finger 2-3 inches deep—moisture at depth indicates overwatering despite dry surface
- Remove yellow leaves cleanly at base to redirect plant energy
- If overwatering suspected: Unpot, trim mushy black roots, repot in fresh chunky aroid mix (50% potting soil, 30% perlite, 20% orchid bark)
- Water only when top 2 inches are completely dry—typically 7-14 days depending on season
Prevention
Water only when top 2 inches of soil are dry; use well-draining aroid mix with 30%+ perlite; ensure pot has drainage holes; avoid oversized pots that retain excess moisture; bottom-water only when necessary to control saturation levels.
Protocol 2: yellow leaves - overwatering root rot · 91% confidence
Cause
Overwatering in pothos is about frequency, not volume. When soil stays moist for 7+ days, anaerobic bacterial communities (dominated by Proteobacteria and Actinobacteriota) colonize roots, causing oxygen deprivation. The plant's fibrous adventitious roots—which cluster at pot bottom and perimeter—remain waterlogged while surface soil appears dry, creating a hidden root rot condition.
Solutions
- 1. Check deep moisture: Insert wooden skewer to pot bottom—moisture at depth = delay watering
- 2. Unpot gently: Inspect roots for black/mushy sections and sour odor
- 3. Surgical trim: Cut ALL rotting roots with sterilized scissors until only firm white tissue remains
- 4. H2O2 treatment: Soak remaining roots in 3% hydrogen peroxide solution (1:1 with water) for 20 minutes
- 5. Repot in dry, chunky mix; water only after 1 week recovery
- 6. Resume watering when soil is dry to 2-3 inches depth
Prevention
Water only when top 2-3 inches of soil are completely dry; use finger test or moisture meter at 80% pot depth; ensure pots have drainage holes; use chunky aroid mix (50% potting soil, 30% perlite, 20% bark); bottom-water only when necessary.
Protocol 3: yellow leaves senescence diagnosis · 91% confidence
Cause
Pothos yellow leaves have two fundamentally different etiologies. NATURAL SENESCENCE: The oldest basal leaf gradually yellows over 4-8 weeks as the plant reallocates nutrients to new growth—this is healthy vascular recycling affecting only ONE leaf at a time. ROOT ROT YELLOWING: Anaerobic soil conditions from overwatering trigger Pythium or Fusarium colonization, blocking vascular transport and causing RAPID sequential yellowing of multiple leaves within days. The diagnostic confusion stems from both starting at the base.
Solutions
- Count affected leaves: Single oldest leaf = natural senescence; multiple leaves = investigate further
- Check soil moisture at 3-inch depth: Wet soil with yellowing confirms overwatering/root rot
- Inspect roots: Healthy roots are white and firm; rotting roots are black, mushy, or foul-smelling
- For natural senescence: Allow leaf to fully yellow, then snip at petiole base with sterile shears
- For root rot: Unpot, trim all affected roots with sterilized scissors, treat cuts with hydrogen peroxide, repot in fresh well-draining mix
Prevention
Use the finger test at 3-inch depth—water only when soil is dry throughout the root zone. Maintain bright indirect light to support healthy transpiration cycles. Use well-draining aroid mix with 30% perlite minimum.
Protocol 4: yellow leaves natural senescence vs root rot · 90% confidence
Cause
Pothos (Epipremnum aureum) exhibits two distinct causes of yellowing that are often confused. NATURAL SENESCENCE: The oldest basal leaves yellow over 4-8 weeks as the plant redirects nutrients to new growth—this affects ONLY the single oldest leaf at the vine base and shows gradual, uniform yellowing without wilting. ROOT ROT CRISIS: Multiple leaves yellow rapidly (within days), often accompanied by thin, floppy texture, fungus gnats, and potential brown spots. The confusion stems from both starting at the base, but the mechanisms differ fundamentally—senescence is programmed cell death while root rot is pathogenic oxygen deprivation causing vascular collapse.
Solutions
- Inspect the pattern: Single oldest leaf with gradual yellowing = natural senescence; multiple leaves or rapid yellowing = root problem
- For natural senescence: Allow leaf to fully yellow (4-8 weeks), then snip cleanly at stem base—do not remove prematurely
- For suspected root rot: Unpot immediately, inspect roots for black/mushy tissue, trim affected roots with sterile shears
- Repot in fresh well-draining mix (50% potting soil, 30% perlite, 20% orchid bark) if rot is present
- Adjust watering schedule: Allow soil to dry completely between waterings; bottom-water only when necessary
- Monitor for 2-4 weeks: New growth indicates recovery; continued yellowing suggests ongoing root issues
Prevention
Use finger test to assess soil moisture before watering—water only when top 2-3 inches are completely dry. Maintain 60-80% humidity to reduce water needs. Avoid oversized pots that retain excess moisture. Inspect new plants for root health before assuming natural aging.
Protocol 5: yellow leaves from overwatering · 89% confidence
Cause
Yellow leaves in pothos from overwatering develop when root oxygen deprivation triggers anaerobic bacterial growth (Erwinia spp.) that breaks down root tissue. The damaged roots cannot transport water or nutrients, causing chlorophyll breakdown in leaves starting from the oldest growth. Unlike natural senescence which affects one leaf over months, overwatering yellowing appears rapidly across multiple leaves.
Solutions
- Assess pattern: multiple yellowing leaves = overwatering; single oldest leaf = natural senescence
- Check soil moisture with finger test—moist soil with yellowing confirms overwatering diagnosis
- If root rot suspected: unpot, trim black/mushy roots, sterilize with 3% hydrogen peroxide
- Repot in fresh dry well-draining mix; water only after 1 week recovery
- Remove yellow leaves at base to redirect plant energy to recovery
Prevention
Water only when top 2-3 inches of soil are completely dry to the touch; use pots with drainage holes and well-draining aroid mix (50% potting soil, 30% perlite, 20% bark); avoid automated watering systems; check for fungus gnats as indicator of chronic moisture; allow soil dry-down between waterings.
Protocol 6: yellow leaves - natural senescence · 89% confidence
Cause
Pothos exhibits natural leaf senescence as a vining epiphyte—older basal leaves yellow and drop as the plant redirects energy to new growth at vine tips. This evolutionary adaptation mimics root rot symptoms (bottom-up yellowing) but affects only 1-2 oldest leaves every 4-8 weeks during active growth. Key differentiator: senescence progresses slowly over weeks; root rot causes rapid yellowing of multiple leaves within days.
Solutions
- 1. Identify pattern: Single oldest leaf yellowing slowly = natural senescence
- 2. Snip yellow leaf at base with clean scissors—redirects energy to new growth
- 3. Inspect vine base: Ensure stems aren't buried in soil (uncover if necessary)
- 4. If multiple leaves yellowing rapidly → proceed to root rot protocol
- 5. Propagate healthy tip cuttings to replace aging lower sections
Prevention
Accept 1-2 leaf drops monthly as healthy vining behavior; maintain bright indirect light to minimize stress-induced senescence; propagate healthy cuttings to refresh lower sections; avoid burying petioles which accelerates premature yellowing.
Protocol 7: yellow leaves overwatering root rot · 89% confidence
Cause
Chronically moist soil from watering frequency exceeding 7-10 day intervals creates anaerobic conditions below 2mg/L dissolved oxygen threshold. Pythium and Fusarium pathogens colonize suffocated feeder roots, producing enzymes that degrade vascular tissue. Blocked xylem transport triggers chlorosis—yellowing begins at leaf margins and progresses inward as nutrient flow ceases. The pothos' adventitious root system clusters at pot bottom, making it particularly susceptible to saturation in standard nursery pots.
Solutions
- Unpot immediately and inspect root architecture—trim ALL black, brown, or mushy roots with alcohol-sterilized scissors
- Treat remaining healthy roots with 3% hydrogen peroxide solution (1:1 with water) for 15 minutes to oxygenate and sterilize
- Repot in fresh chunky aroid mix: 50% potting soil, 30% perlite, 20% orchid bark with activated charcoal
- Allow soil to dry completely before first watering—wait until top 3 inches are bone-dry
- Resume watering at 50% previous frequency—establish 10-14 day cycle based on soil dryness, not calendar
Prevention
Install drainage holes if absent. Use terracotta pots for natural moisture wicking. Insert wooden skewer to 4-inch depth—water only when skewer emerges dry. Bottom-water only when necessary to control saturation levels.
Protocol 8: yellow leaves - underwatering drought stress · 88% confidence
Cause
Extended underwatering (>2-4 weeks) causes root desiccation and vascular blockage in pothos. When rewatered, dead roots cannot uptake water, causing leaves to yellow from drought stress despite wet soil. This creates a confusing paradox where yellow leaves suggest overwatering when the actual cause is prior underwatering.
Solutions
- 1. Inspect roots immediately: Unpot and look for dry, shriveled roots vs. black mushy ones
- 2. Trim all dead roots: Remove desiccated or rotting sections with sterile scissors
- 3. Prune excess foliage: If >30% roots removed, trim yellowed leaves to balance transpiration load
- 4. Soak root ball: Submerge in room-temperature water for 15-20 minutes to rehydrate
- 5. Repot in fresh, lightly moist (not wet) well-draining mix
- 6. Resume normal watering schedule—avoid compensating with excess water
Prevention
Implement finger test: water when top 2 inches are dry; maintain consistent 7-14 day watering schedule adjusted for season; use moisture meter for accuracy; maintain 40-60% humidity to reduce water loss; terracotta pots help signal dryness.
Protocol 9: yellow leaves transplant shock · 88% confidence
Cause
Post-repotting yellowing occurs when root disturbance disrupts the water-nutrient uptake equilibrium. Pothos sold commercially are often bundled cuttings with competing root systems that tangle and rot when compressed into new soil. The transplant shock triggers stress ethylene production, accelerating senescence of vulnerable leaves. Unlike root rot, transplant yellowing appears within 24-72 hours of repotting and affects leaves across multiple vines simultaneously as the root system recalibrates.
Solutions
- Separate bundled cuttings: Gently tease apart root ball and inspect each cutting individually
- Inspect every root: Retain only cuttings with firm white roots; discard any with brown, mushy, or circling root masses
- Repot viable cuttings individually in appropriately-sized pots using fresh well-draining aroid mix
- Maintain 70-80% humidity for 2-4 weeks using humidity dome or pebble tray to reduce transpiration stress
- Hold fertilizer for 4 weeks post-transplant to prevent root burn while roots re-establish
Prevention
Always unpot nursery pothos to inspect bundled roots before repotting. Use pots only 1-2 inches larger than root ball. Repot during active growth season (spring-summer). Maintain consistent environment for 2-4 weeks post-transplant without additional changes.
Protocol 10: yellow leaves natural senescence · 88% confidence
Cause
Pothos exhibits two distinct yellowing patterns that owners confuse. NATURAL SENESCENCE: The single oldest, smallest basal leaf yellows gradually over 2+ months as the plant redirects energy to apical growth - this is healthy resource reallocation in vining Epipremnum aureum. PATHOLOGICAL YELLOWING: Multiple leaves yellow rapidly within days, often accompanied by thin texture, fungal gnats, or vine wilting. The key diagnostic differentiator is scope: senescence affects ONLY the oldest leaf at the vine base, while root rot affects multiple leaves and shows additional stress signals.
Solutions
- Inspect the pattern: Single oldest leaf at vine base = natural aging; multiple affected leaves = investigate root health
- For natural senescence: Allow leaf to fully yellow and dry, then snip cleanly at petiole base - do not pull prematurely
- Check soil moisture at depth: If wet below surface despite 7+ days since watering, this indicates overwatering not senescence
- Look for fungus gnats: Flying insects around pot confirm soggy soil and root rot, not natural aging
- For pathological yellowing: Unpot, inspect roots for rot, trim affected tissue, repot in fresh chunky mix
Prevention
Use finger test at 2-3 inch depth before watering. Avoid automated watering systems. Ensure pots have drainage holes. Maintain bright indirect light to support photosynthesis and normal growth cycles. Understand that basal leaf drop is normal in mature pothos vines.
Protocol 11: yellow leaves - transplant shock · 87% confidence
Cause
Transplant shock occurs when repotting disturbs pothos' fibrous root system, disrupting water and nutrient uptake. Pothos sold commercially are often bundled cuttings with competing root systems; separation during repotting damages these shallow, delicate roots. The plant responds by shedding leaves to conserve energy while root regeneration occurs—a process taking 2-4 weeks.
Solutions
- 1. Identify shock signs: Yellowing 3-7 days post-repot affecting multiple leaves
- 2. Maintain stability: Do NOT repot again or move location during recovery
- 3. Keep humidity elevated: 60-80% to reduce transpiration stress
- 4. Water conservatively: Allow top 2 inches to dry; avoid overwatering in panic
- 5. Remove severely yellowed leaves to redirect energy
- 6. Expect 2-4 week recovery before new growth resumes
Prevention
Acclimate new plants for 2 weeks before repotting; inspect nursery plants for bundled cuttings and separate gently before potting; maintain 70-80% humidity during recovery; avoid fertilizing for 4-6 weeks post-repot; provide bright indirect light to support recovery.
Protocol 12: yellow leaves underwatering · 87% confidence
Cause
Extended drought periods exceeding 3-4 weeks cause fine feeder roots to desiccate and die. When watering resumes, these dead roots cannot uptake moisture, creating a false drought signal that triggers continued leaf yellowing. The diagnostic paradox: yellowing continues AFTER watering because the functional root mass has been reduced. Unlike overwatering rot, drought-damaged roots appear dry and shriveled rather than mushy.
Solutions
- Unpot and assess root viability: Drought-damaged roots are papery, brittle, and tan/brown but not foul-smelling
- Trim all desiccated root tissue with sterilized scissors—healthy roots should be plump and white
- Prune foliage to match reduced root capacity: Remove 20-30% of leaves if significant root loss occurred
- Bottom-soak repotted plant for 30-45 minutes to rehydrate soil thoroughly without compacting
- Maintain consistent moisture for 4-6 weeks: Water when top 2 inches dry—never allow complete desiccation again
Prevention
Establish finger-test routine: Check soil at 3-inch depth every 7 days. Use self-watering pots with reservoirs for consistent moisture. Group plants to create humidity microclimates that reduce water loss.
Protocol 13: yellow leaves after repotting · 87% confidence
Cause
Newly purchased pothos frequently develop yellow leaves within 1-3 weeks due to transplant shock from nursery-to-home transition. Commercial specimens are propagated as bundled cuttings in dense, moisture-retentive peat mixes under 80%+ humidity and controlled lighting. When moved to home environments with 30-50% humidity and different light spectra, the plant experiences physiological shock. Additionally, nursery soil becomes hydrophobic - repelling water when dry then retaining too much when wet - creating inconsistent moisture that stresses roots adapted to stable conditions.
Solutions
- Quarantine new plants for 2-4 weeks before major interventions to allow initial acclimation
- Remove plant from pot to inspect root ball for circling, rot, or bundling of multiple cuttings
- If roots are bound: gently tease apart or trim 1/3 of non-viable roots - pothos tolerates aggressive root pruning
- Repot in fresh well-draining aroid mix (not nursery soil) into a pot sized to current root ball
- Soak entire root ball for 15-30 minutes weekly or when top 2 inches dry, then drain fully to combat hydrophobia
- Remove yellowing leaves as they appear during acclimation period
Prevention
Acclimate new plants gradually over 7-14 days. Ask sellers if plants are tissue-cultured or recently propagated. Request specimens hardened for 4-6 weeks post-nursery when possible. Always inspect roots and replace nursery soil. Maintain 60-80% humidity during first month.
Protocol 14: yellow leaves - fertilizer burn · 86% confidence
Cause
Nutrient salt toxicity occurs when accumulated fertilizers and organic amendments (compost, manure) create high electrical conductivity in soil, burning root hairs and blocking water uptake. Pothos in oversized pots with heavy organic mixes are especially vulnerable—excess soil volume retains salts while low transpiration rates prevent leaching. Symptoms include tip browning followed by full-leaf yellowing.
Solutions
- 1. Stop all fertilizer immediately
- 2. Flush soil thoroughly: Run 2-3 pot volumes of room-temperature distilled water through soil
- 3. Ensure full drainage: Lift pot and verify water exits freely—if not, repot
- 4. Hold fertilizer for 4-6 weeks minimum
- 5. Resume at 1/4 dilution only after new healthy growth appears
- 6. Switch to lighter, more inorganic potting mix if problem recurs
Prevention
Fertilize at 1/4 strength monthly during growing season only; flush soil every 6-8 weeks with 2x pot volume of distilled water; use well-draining inorganic mixes (40% soil, 30% perlite, 20% coco, 10% charcoal); avoid heavy organic amendments; match pot size to root ball.
Protocol 15: yellow leaves nutrient imbalance · 86% confidence
Cause
Fertilizer-induced yellowing manifests through two mechanisms. FERTILIZER BURN: Excess soluble salts accumulate in soil, creating osmotic stress that prevents root water uptake—leaf margins yellow first, progressing inward. NUTRIENT DEFICIENCY: Nitrogen lack causes uniform chlorosis across entire leaf surface; magnesium deficiency produces interveinal yellowing with green veins. Pothos in nutrient-rich nursery soil combined with liquid fertilization every 2 weeks rapidly accumulates toxic salt levels.
Solutions
- Flush soil immediately: Run 3x pot volume of distilled water through soil to leach excess salts—ensure full drainage
- Cease all fertilization for 6-8 weeks to allow root recovery from salt stress
- Trim yellowed leaves at base to redirect energy to healthy tissue
- Resume fertilization at 1/4 strength balanced 10-10-10 formula, applied only during active growth months
- Switch to organic slow-release fertilizer (osmocote) at 50% recommended rate to prevent future salt accumulation
Prevention
Use inorganic well-draining mixes to prevent salt buildup. Fertilize monthly at 1/4 dilution only March-September. Flush soil quarterly with distilled water to remove accumulated salts. Never fertilize dry soil—always pre-moisten to prevent root burn.
Protocol 16: yellow leaves from dry soil · 86% confidence
Cause
Pothos yellowing can indicate underwatering despite regular watering attempts. Sphagnum peat in commercial potting mixes becomes hydrophobic when allowed to dry completely - the organic matter repels water rather than absorbing it. When owners water hydrophobic soil, moisture channels through cracks without saturating the root ball, leaving roots dehydrated while surface appears wet. This causes leaf yellowing from drought stress that mimics overwatering symptoms but stems from opposite cause - insufficient root zone moisture despite watering efforts.
Solutions
- Test hydrophobia: Water from top and check if top soil dampens within 30-60 minutes; dry surface indicates compaction
- Emergency rehydration: Place pot in deeper container with water submerging soil surface for 15-30 minutes until fully saturated, then drain
- Aerate soil: Gently use thin skewer or chopstick to poke 6-8 holes into root ball, breaking hydrophobic crust without damaging roots
- Alternative fix: Bottom-water exclusively by placing pot in tray of water for 20-30 minutes until soil wicks moisture upward
- Long-term: Repot in fresh chunky mix with 30% perlite to prevent future compaction; avoid peat-heavy soils
Prevention
Never allow pothos soil to completely dry out. Water consistently when top 1-2 inches are dry. Alternate top and bottom watering bi-weekly to ensure even moisture distribution. Use chunky aroid mix with perlite and orchid bark that resists compaction. Weigh pots pre/post-watering to establish consistent moisture thresholds.
Protocol 17: yellow leaves from fertilizer · 85% confidence
Cause
Pothos yellowing from fertilizer burn occurs when nutrient salts accumulate in soil beyond root tolerance levels. This happens from excessive fertilizing frequency, using full-strength concentrates, or applying fertilizer to dry soil which causes root burn. Salt accumulation creates osmotic stress that prevents roots from absorbing water, mimicking drought conditions while soil remains moist. Symptoms include yellowing leaf margins, browning tips, and overall chlorosis progressing from older leaves inward - distinct from root rot which shows uniform yellowing and mushy roots.
Solutions
- Immediate leaching: Flush soil 2-3 times with distilled or room-temperature water using 2x pot volume each flush
- Allow complete drainage between flushes to carry dissolved salts out of root zone
- Hold all fertilization for 4-6 weeks to allow root recovery
- Trim affected yellow leaves with sterile scissors to redirect energy to healthy tissue
- Resume fertilizing at 1/4 strength of balanced 20-20-20 formula only after new growth appears
- If soil was severely contaminated: repot completely in fresh well-draining mix without fertilizer
Prevention
Fertilize monthly at 1/4 dilution during active growing season (spring-fall) only. Never fertilize dry soil - always pre-moisten. Avoid heavy organic amendments like fresh manure or high-NPK mixes in oversized pots. Use inorganic well-draining mix. Allow soil to dry to 50% depth between waterings to prevent salt accumulation.
Protocol 18: yellow leaves from low light · 84% confidence
Cause
Pothos yellowing from insufficient light occurs when photosynthetically active radiation falls below 100-200 foot-candles for extended periods. In low light conditions, Epipremnum aureum cannot generate sufficient ATP through photosynthesis to maintain existing leaf tissue. The plant enters survival mode, sacrificing older leaves to redirect limited resources to new etiolated growth. Leaves lose chlorophyll and turn yellow before dropping, while remaining leaves become smaller, thinner, and paler. This differs from overwatering yellowing by the accompanying leggy growth pattern and uniform leaf fading rather than sudden collapse.
Solutions
- Relocate to bright indirect light: Position 3-8 feet from east or west-facing windows, or near north-facing windows
- Target light levels: Aim for 200-400 foot-candles measured with light meter or smartphone app
- Avoid direct sun: Filtered light through sheer curtain prevents leaf scorch while maximizing PAR
- If relocation impossible: Rotate plant weekly toward light source and clean leaves monthly to maximize light absorption
- Prune severely affected yellow leaves to redirect energy to viable tissue
- Expect 4-6 week recovery period for new healthy growth after light improvement
Prevention
Maintain bright indirect light year-round. Avoid placing pothos in windowless bathrooms, deep interior corners, or north-facing rooms in winter without supplemental grow lights. Clean leaves monthly to remove dust that blocks 10-20% of light. Rotate plant weekly for even exposure. Consider 12-hour grow light cycle in winter for plants in marginal light locations.
Diseases (10 topics · 28 cases)
What disease does my Pothos have?
Pothos leaf spots require differential diagnosis as fungal (Phyllosticta, Colletotrichum) and bacterial (Pseudomonas, Xanthomonas) pathogens present distinct visual signatures
3 protocols
85–90%
What disease does my Pothos have?
Pothos leaf spots require differential diagnosis as fungal (Phyllosticta, Colletotrichum) and bacterial (Pseudomonas, Xanthomonas) pathogens present distinct visual signatures
Protocol 1: bacterial vs fungal spot identification · 90% confidence
Cause
Pothos leaf spots require differential diagnosis as fungal (Phyllosticta, Colletotrichum) and bacterial (Pseudomonas, Xanthomonas) pathogens present distinct visual signatures. Fungal spots feature circular to irregular brown lesions with defined margins and possible concentric rings; bacterial spots are angular, water-soaked when fresh, and develop distinctive yellow halos within 3-5 days. Misdiagnosis leads to ineffective treatment.
Solutions
- Visual inspection: Look for yellow halos (bacterial) vs concentric rings (fungal)
- Check spot texture: Bacterial spots feel water-soaked; fungal spots feel dry and papery
- Examine shape: Bacterial spots follow leaf veins (angular); fungal spots are circular/random
- For bacterial: Apply copper bactericide; remove infected leaves with sterilized tools
- For fungal: Apply sulfur or neem oil fungicide; improve air circulation
- For both: Isolate plant immediately; stop all misting; water at soil level only
Prevention
Inspect new plants for spots before introducing to collection; maintain 40-60% humidity without leaf wetting; ensure 12-inch spacing between plants for airflow; sterilize tools between plants.
Protocol 2: black stems bacterial rot · 88% confidence
Cause
Black, mushy stems on pothos indicate bacterial soft rot (Erwinia chrysanthemi) that has progressed from compromised roots into the stem tissue. The bacteria break down parenchyma cells, causing characteristic slimy black decay that travels upward from soil line. Unlike fungal rot, bacterial rot spreads rapidly in warm, humid conditions.
Solutions
- Immediate action: Cut 2-3 inches ABOVE the blackened stem section with sterilized scissors—bacteria spread 1-2 inches past visible damage
- Inspect cut end: If tissue is still discolored, cut higher until only white/green healthy tissue is visible
- Sterilize cutting tool with 70% alcohol between EACH cut to prevent cross-contamination
- Dip cut end in cinnamon powder to seal and provide natural antibacterial barrier
- Root rescued cutting in fresh water or moist sterile perlite—do not return to contaminated soil
- Discard affected soil and sterilize pot with 10% bleach solution before reuse
Prevention
Avoid overhead watering that wets stems; ensure good air circulation; water only at soil level; maintain 60-80% humidity without leaf wetness; quarantine new plants; use sterile potting mix; never reuse soil from infected plants.
Protocol 3: bacterial infection · 85% confidence
Cause
Bacterial leaf spot on pothos caused by Xanthomonas campestris or Pseudomonas species introduced through contaminated water, infected propagation material, or contact with infected plants. Bacteria enter through stomata or wounds and multiply in intercellular spaces, producing water-soaked lesions that may ooze bacterial exudate under humid conditions.
Solutions
- Sterilize pruners with 70% isopropyl alcohol before and after each cut to prevent spreading bacteria between plants
- Remove all affected leaves at the base by cutting the petiole close to the stem; dispose of infected tissue in sealed bag away from plants
- Apply copper-based bactericide (copper sulfate or copper hydroxide) following label directions for houseplants; repeat every 7-10 days
- Isolate infected plants immediately and maintain strict quarantine until 3 weeks after symptoms disappear
- Avoid misting or overhead watering; switch to bottom-watering to keep foliage dry and prevent bacterial spread
Prevention
Quarantine all new plants for 2-4 weeks with daily visual inspection before introducing to collection. Use filtered or distilled water to minimize bacterial introduction. Avoid overhead watering or misting that wets foliage; bottom-water instead. Sterilize propagation tools with 70% isopropyl alcohol before and after each cut.
What disease does my Pothos have?
Quarantine protocols prevent pathogen spread through two mechanisms: physical isolation (preventing airborne spore transmission and insect vector movement) and temporal monitoring (allowing latent infections to manifest before introducing plants to established collections)
7 protocols
82–92%
What disease does my Pothos have?
Quarantine protocols prevent pathogen spread through two mechanisms: physical isolation (preventing airborne spore transmission and insect vector movement) and temporal monitoring (allowing latent infections to manifest before introducing plants to established collections)
Protocol 1: disease quarantine protocol · 92% confidence
Cause
Quarantine protocols prevent pathogen spread through two mechanisms: physical isolation (preventing airborne spore transmission and insect vector movement) and temporal monitoring (allowing latent infections to manifest before introducing plants to established collections). Fungal spores travel 3-6 feet via air currents; bacterial pathogens spread through water splash and contaminated tools. Mosaic virus requires 7-14 days incubation before symptoms appear.
Solutions
- Step 1: Place new/ailing plant in separate room or 6+ feet from collection
- Step 2: Use dedicated watering can and tools for quarantine plants only
- Step 3: Inspect daily: Check leaves, stems, and soil surface for spots, mold, or pests
- Step 4: Monitor for 14 days: Most infections manifest within 1-2 weeks
- Step 5: Sterilize everything: Tools, pots, and surfaces after quarantine period
- Step 6: Document: Record any symptoms with photos for diagnosis reference
Prevention
Establish dedicated quarantine zone minimum 6 feet from other plants; maintain separate tools for quarantine plants; document arrival date and monitor daily for symptom development.
Protocol 2: disease prevention · 90% confidence
Cause
Preventive fungal management reduces infection probability by 70-80% through environmental modification and proactive care. Fungal pathogens require three conditions to establish: susceptible host tissue, pathogen presence (spores), and moisture on leaf surfaces for 6+ hours. Removing any one factor prevents infection. Community data shows plants in high-humidity environments (>70%) without leaf wetting have lower disease rates than those in moderate humidity with frequent misting.
Solutions
- Environmental control: Use humidity tray or humidifier to raise ambient humidity without wetting leaves
- Water correctly: Apply water directly to soil only; avoid overhead watering or misting
- Air circulation: Position small fan to create gentle airflow that dries leaves quickly
- Regular inspection: Check leaf undersides and stems weekly for early spot detection
- Tool hygiene: Sterilize scissors with 70% alcohol before and after every plant contact
- Soil management: Repot annually with fresh well-draining mix; remove debris from soil surface
Prevention
Maintain 40-60% ambient humidity using pebble trays or humidifiers—never mist leaves; water only at soil level; ensure 12+ inch spacing between plants; clean leaves monthly to remove dust that harbors spores.
Protocol 3: disease resistance · 90% confidence
Cause
Pothos scandens produces octyl isonicotinate, a compound with significant antimicrobial activity against Escherichia coli (MIC 12.30 μg/mL) and Candida albicans (MIC 6.50 μg/mL). This bioactive compound, isolated from bark extracts, demonstrates the plant's natural defense mechanisms and suggests potential for supporting plant health through inherent antimicrobial properties.
Solutions
- Recognize pothos' natural antimicrobial properties as part of its resilience
- Support compound production through adequate light (indirect bright) and nutrients
- Avoid harsh chemical treatments that may disrupt natural phytochemical balance
- Prune damaged stems cleanly to maintain bark integrity and defense function
- Use stem cuttings from healthy sections for propagation to preserve genetic resilience
Prevention
Maintain plant vigor through proper care to support natural defense compound production. Avoid mechanical damage to stems that could compromise protective bark tissues.
Protocol 4: disease · 88% confidence
Cause
Phyllosticta leaf spot on pothos is caused by the fungus Phyllosticta species (primarily Phyllosticta capitalensis) that produces characteristic circular to irregular dark brown to black spots with tan or gray centers. Spots often show concentric ring patterns and may have tiny black fruiting bodies (pycnidia) in the center visible under magnification. Pathogen spreads via water splash, contaminated tools, and infected propagation material, thriving in warm humid conditions above 70% relative humidity.
Solutions
- Confirm diagnosis: look for circular dark spots with tan/gray centers and possible concentric rings; check for tiny black dots in center with magnifying glass
- Remove ALL affected leaves immediately using sterilized shears; cut at petiole base and dispose in sealed bag
- Apply systemic fungicide containing propiconazole or thiophanate-methyl following label dilution for houseplants
- Improve air circulation with fan on low speed to reduce humidity around foliage below 60%
- Continue fungicide applications every 14 days for 6 weeks total; monitor for new spot development throughout treatment period
Prevention
Maintain 40-60% humidity maximum; use dehumidifier or fan if needed. Space plants 12-18 inches apart to prevent leaf contact and water splash between plants. Water at soil level only; avoid overhead watering or misting. Inspect new plants thoroughly; Phyllosticta often arrives on nursery stock. Sterilize all propagation tools with 70% isopropyl alcohol.
Protocol 5: disease recovery timeline · 87% confidence
Cause
Post-treatment recovery follows predictable biological timelines as plants prioritize resources. Fungal infections damage leaf tissue but typically spare vascular systems; recovery begins with new growth within 2-3 weeks if environment is optimized. Bacterial infections may colonize vascular tissue, extending recovery to 4-6 weeks. Mosaic virus is systemic with no recovery—symptoms remain permanent. Understanding these timelines prevents premature abandonment of treatable plants.
Solutions
- Week 1-2: No visible changes expected; plant is metabolizing treatment and stopping active infection
- Fungal recovery: Watch for new spot formation—should stop within 7 days; old spots will not heal
- Bacterial recovery: Monitor daily for 14 days—new spots should not appear; if they do, repeat copper treatment
- Week 3-4: New growth should emerge clean and healthy; this is first recovery indicator
- Month 2+: Gradually remove oldest damaged leaves if new healthy growth present
- Month 3: Resume normal care routine if 3+ new healthy leaves have emerged
- Ongoing: Continue preventive practices—recovered plants remain susceptible
Prevention
Document treatment start date; resist urge to check for new spots daily; maintain stable environmental conditions; avoid additional stressors during recovery.
Protocol 6: disease early detection · 86% confidence
Cause
Early disease detection during quarantine prevents 90% of collection-wide outbreaks. Most pathogens have 3-7 day incubation periods before visible symptoms appear. Systematic daily inspection focusing on high-risk areas (leaf undersides, stem joints, soil surface) catches infections at single-spot stage when treatment success is highest. Community data shows plants diagnosed at first spot stage have 85% recovery rate vs 40% for advanced infections.
Solutions
- Check leaf tops: Look for spots, discoloration, or unusual texture changes
- Inspect leaf undersides: Most fungal infections start here; hold leaf up to light to spot translucent areas
- Examine stem joints: Bacterial infections often colonize these humid microenvironments first
- Check soil surface: White fuzz (saprophytic mold) indicates overwatering and potential for pathogen establishment
- Look for pests: Stippling, webbing, or visible insects indicate vector presence that spreads disease
- Monitor new growth: Stunted, distorted, or spotted new leaves signal systemic issues
- Document findings: Photograph any abnormalities; compare to baseline images from arrival
Prevention
Create inspection checklist; photograph plants on arrival for baseline comparison; inspect at same time daily to build habit; use magnification for detailed examination of suspicious areas.
Protocol 7: pest-disease-traditional · 82% confidence
Cause
Pothos (Epipremnum aureum) responds to traditional organic pest control methods—plant-derived compounds like thyme and clove essential oils disrupt pest feeding and fungal growth through centuries-old biological relationships
Solutions
- 1. Apply neem oil emulsion weekly (1 teaspoon neem oil per liter water + 2 drops castile soap) as anti-feedant for spider mites and aphids
- 2. Use thyme or clove essential oil nanoemulsion (0.5% concentration) as soil drench to prevent Pythium and Phytophthora root rot
- 3. Plant companion herbs like basil or mint nearby to mask Pothos scent from pests through aromatic compound release
- 4. Apply food-grade diatomaceous earth to soil surface monthly; microscopic silica damages soft-bodied insects while remaining safe for plants
Prevention
Maintain strong plant health through proper watering (allow top inch to dry between waterings); healthy plants resist pest pressure naturally
What disease does my Pothos have?
Essential oil compounds including thymol, eugenol, and carvacrol exhibit antifungal efficacy by binding to specific active sites of cell wall-degrading enzymes (PCWDEs) secreted by necrotrophic fungi
3 protocols
88–93%
What disease does my Pothos have?
Essential oil compounds including thymol, eugenol, and carvacrol exhibit antifungal efficacy by binding to specific active sites of cell wall-degrading enzymes (PCWDEs) secreted by necrotrophic fungi
Protocol 1: fungal-enzyme-inhibition · 93% confidence
Cause
Essential oil compounds including thymol, eugenol, and carvacrol exhibit antifungal efficacy by binding to specific active sites of cell wall-degrading enzymes (PCWDEs) secreted by necrotrophic fungi. Thymol targets pectate lyase via multiple pi-alkyl interactions with hydrophobic residues (Val308, Phe294, Trp290, Phe282, His689) plus hydrogen bonding with Asp688. Eugenol and carvacrol target cellobiose dehydrogenase through similar binding mechanisms. These enzymes are the first secreted by pathogens when cultivated on plant cell walls, indicating a necrotrophic lifestyle involving exploitation of plant tissue weaknesses. Molecular docking studies confirm binding energies of -6.65 kcal/mol (thymol), -7.38 kcal/mol (eugenol), and -5.80 kcal/mol (carvacrol) with target enzymes.
Solutions
- 1. Target enzyme inhibition: Apply essential oil nanoemulsions containing thymol or eugenol to inhibit pectate lyase and cellobiose dehydrogenase enzymes critical for fungal pathogenesis and tissue penetration
- 2. Treat at early infection stage: Apply treatments at first sign of root damage such as slight browning or reduced growth as enzyme inhibition is most effective before extensive tissue colonization and sclerotia formation
- 3. Use nanoemulsion delivery system: Nano-sized droplets (70-95 nm diameter) provide superior bioavailability, uniform distribution in soil, and enhanced penetration to root zones compared to bulk oil emulsions
- 4. Optimize concentration: Maintain 3000 ppm for complete enzymatic inhibition or 1000-2000 ppm for significant suppression while minimizing any potential phytotoxicity risk to the host plant
- 5. Implement multi-target rotation: Alternate between thymol-based and eugenol-based treatments to prevent potential pathogen adaptation to single-compound inhibition and maintain long-term efficacy
Prevention
Understanding specific enzyme targets enables development of preventive protocols; regular application of low-concentration essential oil nanoemulsions (1000 ppm) creates hostile biochemical environment for fungal enzymes before infection establishes, disrupting the necrotrophic lifestyle of soil-borne pathogens
Protocol 2: fungal infection · 89% confidence
Cause
White fuzzy mold on soil surface is typically saprophytic fungi (Trichoderma, Aspergillus) feeding on organic matter in persistently moist soil. This indicates overwatering and poor drainage but does not directly harm plant roots. The mold thrives when soil remains wet for 7+ days and creates ideal conditions for fungus gnats. Unlike root rot pathogens, these surface molds are visible and easily identified by their cottony appearance.
Solutions
- Remove visible mold: Gently scrape off surface mold with spoon, dispose away from plants
- Apply natural antifungal: Sprinkle ground cinnamon on soil surface—it contains cinnamaldehyde which inhibits fungal growth
- Flush soil: Water thoroughly with 3x pot volume to leach excess organic matter
- Improve drainage: Repot using well-draining mix with 30% perlite if soil compacts easily
- Allow complete drying: Wait until top 2-3 inches are bone dry before next watering
- Enhance airflow: Use small fan to speed soil surface drying
Prevention
Water only when top 2 inches are dry. Use pots with drainage holes. Avoid excessive organic matter in soil mix. Maintain 40-60% humidity without leaf wetting. Allow soil to dry between waterings.
Protocol 3: fungal disease natural defense · 88% confidence
Cause
Pothos scandens (a related species in the Pothos genus) produces octyl isonicotinate, a natural compound with demonstrated antimicrobial activity. This compound isolated from bark extract shows significant activity against Candida albicans (MIC 6.50 μg/mL) and Escherichia coli (MIC 12.30 μg/mL), indicating the genus possesses evolved chemical defense mechanisms against microbial pathogens.
Solutions
- Recognize that the Pothos genus contains species with documented antimicrobial compounds (octyl isonicotinate)
- For E. aureum with active root rot, employ external antifungal treatments such as essential oil nanoemulsions rather than expecting endogenous plant defenses to control infection
- Consider that research into Pothos-derived natural products may yield future botanical fungicide candidates for sustainable disease management
Prevention
While E. aureum may share some defensive compounds with P. scandens, reliance on endogenous defenses is insufficient for managing active root rot infections in cultivated specimens.
Pothos: Mold
Surface mold on pothos soil (Trichoderma, Aspergillus saprophytic fungi) is frequently mistaken for leaf-infecting pathogens but is distinct
83%
Pothos: Mold
Surface mold on pothos soil (Trichoderma, Aspergillus saprophytic fungi) is frequently mistaken for leaf-infecting pathogens but is distinct
Cause
Surface mold on pothos soil (Trichoderma, Aspergillus saprophytic fungi) is frequently mistaken for leaf-infecting pathogens but is distinct. Mold indicates anaerobic soil pockets from overwatering, heavy organic matter, or poor drainage, whereas leaf spot pathogens (Phyllosticta, Cercospora) attack living tissue. Soil mold appears as white/yellow/green fuzzy patches; leaf spots are localized lesions on foliage with defined margins.
Solutions
- Identify the issue: white/yellow fuzzy patches ON soil surface = saprophytic mold; dark spots ON leaves = pathogenic infection
- For soil mold: gently scrape off surface mold with spoon; sprinkle ground cinnamon on soil as natural antifungal
- Apply thin layer of fresh sterile potting mix to cover any remaining spores and refresh surface
- Switch to bottom-watering method to keep soil surface consistently dry while maintaining root hydration
- Repot if mold recurs: use fresh well-draining mix (50% potting soil, 30% perlite, 20% orchid bark) and pot with drainage holes
Prevention
Allow soil surface to dry between waterings; avoid constant moisture that feeds saprophytic fungi. Use well-draining aroid mix with 30% perlite minimum; repot if soil remains soggy for days. Maintain 40-60% humidity without misting soil surface. Use bottom-watering to keep surface dry while hydrating roots.
Pothos: Perlite Transition Rot
Pothos water roots are structurally different from soil roots - they are aerenchymatous and lack the robust architecture needed for soil anchoring
87%
Pothos: Perlite Transition Rot
Pothos water roots are structurally different from soil roots - they are aerenchymatous and lack the robust architecture needed for soil anchoring
Cause
Pothos water roots are structurally different from soil roots - they are aerenchymatous and lack the robust architecture needed for soil anchoring. When transitioning directly from water to perlite, the mechanical stress and uneven moisture retention creates anaerobic pockets. Community reports show perlite-only transitions have high failure rates due to fungal mold and bacterial stem rot. The water roots suffocate in mechanical substrates before they can adapt.
Solutions
- Skip perlite transitions entirely - move water-rooted pothos directly to well-draining potting mix
- Use mix of 50% peat-based potting soil, 30% perlite, 20% orchid bark for transition
- Plant at same depth as water line - do not bury stems deeper than original rooting level
- Keep soil consistently moist (not soggy) for first 2-3 weeks post-transition
- Use bottom watering to encourage roots to grow downward into new medium
Prevention
Acclimate gradually by reducing water volume in propagation vessel over 1 week before planting. This signals roots to prepare for drier conditions. Never tease or manipulate water roots during transplant - they are fragile and damage easily. Use clear nursery pots to monitor root adaptation without disturbing the plant.
Why does my Pothos have root rot?
Rhizoctonia solani is a soil-borne fungal pathogen that causes root rot in pothos (Epipremnum aureum) by secreting pectate lyase enzymes that break down plant cell walls
8 protocols
85–95%
Why does my Pothos have root rot?
Rhizoctonia solani is a soil-borne fungal pathogen that causes root rot in pothos (Epipremnum aureum) by secreting pectate lyase enzymes that break down plant cell walls
Protocol 1: rhizoctonia root rot · 95% confidence
Cause
Rhizoctonia solani is a soil-borne fungal pathogen that causes root rot in pothos (Epipremnum aureum) by secreting pectate lyase enzymes that break down plant cell walls. The fungus persists as vegetative mycelium in soil and attacks root tissue directly, causing vascular collapse and reducing root length, fresh weight, and dry weight significantly.
Solutions
- Prepare thyme oil nanoemulsion at 3000 ppm using 10% v/v oil emulsified with Tween 80 surfactant (2:1 ratio), sonicated for 30 minutes to achieve particle size ~94.82 nm
- Soak pothos cutting bases in the nanoemulsion formulation for exactly 30 minutes prior to planting in infested soil
- Plant in well-draining soil mix (2:1:1 soil:sand:clay) to minimize anaerobic conditions that favor fungal proliferation
- Monitor for 60 days; expect 75% reduction in disease incidence and 4.61-fold increase in root length, 28.59-fold increase in root fresh weight, and 48.29-fold increase in root dry weight compared to untreated infected controls
Prevention
Pre-treat pothos cuttings by soaking basal stems in thyme oil nanoemulsion (3000 ppm) for 30 minutes before planting in pathogen-contaminated soil. Nanoemulsions provide superior bioavailability compared to standard emulsions.
Protocol 2: root rot water propagation · 92% confidence
Cause
Pothos (Epipremnum aureum) water propagation fails when dissolved oxygen drops below 5mg/L after 14+ days in stagnant water. Proteobacteria dominate hydroponic pothos microbiomes (PMID 41775715), and anaerobic conditions foster pathogenic bacterial communities including Pythium and Erwinia species. The water-adapted aerenchymatous roots developed during propagation lack structural integrity for soil transition and rapidly break down when oxygen-depleted, causing characteristic mushy brown rot with foul odor.
Solutions
- Change propagation water every 5-7 days maximum to maintain dissolved oxygen above 5mg/L
- Add 3% hydrogen peroxide at 1-2 drops per cup of water to oxygenate and suppress anaerobic bacteria
- Use opaque containers to prevent light penetration that promotes algal blooms competing for oxygen
- Maintain water temperature at 18-24°C - cold water holds more dissolved oxygen than warm water
- If rot detected: rinse roots, trim mushy tissue with sterile scissors, treat with H2O2 dip for 2 minutes, restart in fresh water
Prevention
Never leave pothos cuttings in the same water beyond 7 days. Use dechlorinated water at room temperature. Provide bright indirect light to support photosynthesis but avoid direct sun that warms water. Propagate multiple cuttings simultaneously - individual specimens may fail, but pothos propagates reliably in volume.
Protocol 3: root rot essential oil treatment · 92% confidence
Cause
Pothos root rot is primarily caused by soilborne pathogens Rhizoctonia solani and Sclerotium rolfsii, which produce cell-wall-degrading enzymes (pectate lyase and cellobiohydrolase) that penetrate and destroy root tissues. These necrotrophic fungi exploit weakened plant tissues under anaerobic soil conditions.
Solutions
- Prepare nanoemulsion by combining essential oil with Tween 80 surfactant at 2:1 (v/v) ratio in 10% aqueous solution
- Sonication using ultrasonic homogenizer creates stable oil-based nanoemulsion phase with enhanced bioavailability
- Soak pothos cutting bases in 3000 ppm formulation for 30 minutes before planting in pathogen-infested soil
- Monitor root development over 60 days; measure infection percentage, root length, and fresh/dry weights to assess treatment efficacy
Prevention
Before planting pothos cuttings, soak bases in 3000 ppm thyme or clove essential oil nanoemulsion for 30 minutes. Thyme oil nanoemulsion reduces root rot incidence to 25-50% compared to untreated controls, outperforming commercial Carbendazim fungicide in disease suppression.
Protocol 4: sclerotium root rot · 92% confidence
Cause
Sclerotium rolfsii produces persistent sclerotia in soil that germinate to cause basal stem rot in pothos. The fungus secretes cellobiose dehydrogenase and other cell-wall-degrading enzymes typical of necrotrophic pathogens. Infection drastically reduces root development and plant vigor.
Solutions
- Formulate clove oil nanoemulsion at 3000 ppm with Tween 80 surfactant using high-energy ultrasonication to achieve particle size ~73.76 nm and polydispersity index of 0.227
- Soak pothos cutting bases in the clove nanoemulsion for 30 minutes before planting in S. rolfsii-infested soil
- Use in conjunction with proper drainage; avoid waterlogged conditions that promote sclerotial germination and fungal spread
- Track development over 60 days; expect 25% disease suppression and significant improvements in root length (4.12-fold), fresh weight (21.31-fold), and dry weight (16-fold) compared to untreated infected plants
Prevention
Apply clove oil nanoemulsion (3000 ppm) as a pre-planting soak for 30 minutes to reduce S. rolfsii infection by 50% and enhance root growth metrics significantly.
Protocol 5: root rot propagation rot · 89% confidence
Cause
Pothos cuttings in water propagation develop rot when water becomes stagnant and oxygen-depleted after 2+ weeks without changing. Anaerobic bacterial colonies proliferate, attacking water-adapted aerenchyma roots that lack structural defenses against pathogens.
Solutions
- Change propagation water every 5-7 days without exception
- Use filtered or distilled water—chlorine in tap water stresses cut tissue
- Add 1-2 drops of 3% hydrogen peroxide per cup of water to oxygenate and inhibit bacteria
- Rinse roots gently under lukewarm water at each water change to remove biofilm
- If rot detected: Trim affected roots with sterile scissors, sterilize cutting in diluted H2O2 (1:4), restart in fresh water
- Transition to soil when roots reach 2-3 inches—avoid prolonged water residence
Prevention
Never let water stagnate beyond 7 days; use clear containers to monitor root health; maintain 65-75°F ambient temperature; provide bright indirect light to support healthy root metabolism; sterilize containers between uses.
Protocol 6: root rot thymol eugenol mechanism · 89% confidence
Cause
Thymol (primary constituent of thyme oil at 40.66%) binds to pectate lyase enzyme active site through pi-alkyl interactions with residues Val308, Phe294, Trp290, Phe282, and His689, plus hydrogen bonding with Asp688. Eugenol (65.67% of clove oil) targets cellobiohydrolase via similar pi-alkyl interactions. These molecular dockings inhibit fungal cell wall degradation machinery.
Solutions
- Thyme oil contains thymol (40.66%), p-cymene (16.19%), and γ-terpinene (14.45%) as primary antifungal compounds
- Clove oil contains eugenol (65.67%) and benzyl alcohol (32.37%) with documented antifungal properties
- Molecular docking confirms binding energies of -6.65 kcal/mol (thymol-pectate lyase) and -7.38 kcal/mol (eugenol-cellobiohydrolase)
- GC-MS/MS analysis verifies essential oil composition for quality-controlled therapeutic applications
Prevention
Thyme and clove essential oils provide natural fungicidal alternatives to synthetic chemicals. The nanoemulsion formulation enhances bioavailability and antifungal activity against R. solani and S. rolfsii through targeted enzyme inhibition.
Protocol 7: root rot identification · 88% confidence
Cause
Root rot symptoms manifest differently across plant families. Succulents (snake plant, ZZ) show paradoxical wrinkling that mimics underwatering due to root inability to uptake water. Aroids (pothos, philodendron) display yellowing leaves starting from oldest. Peace lilies exhibit persistent drooping despite moist soil. Early detection requires distinguishing these species-specific signals from normal stress responses.
Solutions
- 1. Visual inspection: Remove plant monthly and examine roots through clear pot or after gentle unpotting
- 2. Healthy indicators: Firm, white to cream-colored roots that snap crisply when bent
- 3. Early rot signs: Off-white to tan discoloration, slight give when squeezed, musty odor
- 4. Advanced rot: Blackened tissue, mushy texture, distinct sour/foul smell of anaerobic bacteria
- 5. Tactile test: Gently squeeze root between fingers - healthy tissue resists compression
- 6. Smell test: Healthy roots smell earthy; rot produces unmistakable sour, fermented odor
- 7. Timing: Check roots immediately if leaves yellow rapidly, plant droops despite wet soil, or fungus gnats appear in large numbers
Prevention
Establish monthly 'root check' routine: gently lift plant from pot to inspect root color through drainage holes; monitor soil drying time - if pot remains heavy 7+ days post-watering, investigate drainage; use clear nursery pots for visibility.
Protocol 8: root rot recovery enhancement · 85% confidence
Cause
Pothos plants recovering from root rot show severely reduced root parameters including length, fresh weight, and dry weight. Recovery requires stimulation of new root growth to replace damaged tissue and restore the plant's capacity for water and nutrient uptake.
Solutions
- Apply low-concentration ethinyl estradiol (0.1 ppm) as a soil drench to stimulate root development in recovering plants
- Expect measurable improvements within 60 days: root length increase from ~16-19 cm to 24-25 cm (approximately 50% improvement)
- Anticipate root fresh weight increase from 4-5g to 7-8g (55-72% improvement) and corresponding dry weight gains
- Note that this hormone treatment may act through estrogen receptors in plant tissue or induce cytokinin-like morphogenetic effects that stimulate root proliferation and biomass accumulation
Prevention
Maintaining healthy, vigorous root systems through proper watering and soil management is the best defense against root rot and ensures faster recovery if infection occurs.
Pothos: Rhizoctonia Sclerotium Root Rot
Rhizoctonia solani and Sclerotium rolfsii are soil-borne necrotrophic fungi that cause root rot in Epipremnum aureum (pothos) by penetrating root tissues and secreting cell wall-degrading enzymes including pectate lyase and cellobiose dehydrogenase
92%
Pothos: Rhizoctonia Sclerotium Root Rot
Rhizoctonia solani and Sclerotium rolfsii are soil-borne necrotrophic fungi that cause root rot in Epipremnum aureum (pothos) by penetrating root tissues and secreting cell wall-degrading enzymes including pectate lyase and cellobiose dehydrogenase
Cause
Rhizoctonia solani and Sclerotium rolfsii are soil-borne necrotrophic fungi that cause root rot in Epipremnum aureum (pothos) by penetrating root tissues and secreting cell wall-degrading enzymes including pectate lyase and cellobiose dehydrogenase. These pathogens persist as vegetative mycelium or sclerotia in soil and thrive in anaerobic, waterlogged conditions that compromise root oxygen availability. Research shows these pathogens drastically reduce pothos root length, fresh weight, and dry weight when left untreated.
Solutions
- 1. Inspect roots thoroughly: Remove plant from pot and rinse roots under lukewarm water to expose all tissue for examination
- 2. Prune all affected tissue: Use sterilized shears to cut away brown, mushy, or blackened roots; retain only firm white or cream-colored healthy roots
- 3. Apply hydrogen peroxide treatment: Soak remaining healthy roots in 3% hydrogen peroxide diluted 1:4 with water for 1-2 minutes to eliminate surface pathogens
- 4. Repot in sterile well-draining mix: Use fresh aroid mix (50% peat, 30% perlite, 20% orchid bark) in a clean pot with drainage holes
- 5. Quarantine treated plant: Isolate for 2-3 weeks away from other plants to prevent airborne spore spread and cross-contamination via tools
Prevention
Use only well-draining soil with 30-40% perlite content; water only when top 2 inches of soil are completely dry; ensure all pots have drainage holes; sterilize tools with 70% alcohol between plants; avoid reusing soil from potentially infected plants; maintain 50-60% humidity with good air circulation to inhibit fungal spore germination
Pothos: Root Rot Culture Prevention
Pothos root rot develops primarily from anaerobic conditions created by overwatering, poor drainage, or inappropriate substrates
88%
Pothos: Root Rot Culture Prevention
Pothos root rot develops primarily from anaerobic conditions created by overwatering, poor drainage, or inappropriate substrates
Cause
Pothos root rot develops primarily from anaerobic conditions created by overwatering, poor drainage, or inappropriate substrates. Waterlogged soil excludes oxygen, creating conditions favorable for Rhizoctonia solani and Sclerotium rolfsii. Common triggers include: perlite-only transitions for water-propagated cuttings creating uneven moisture retention; dense compacted soil preventing oxygen diffusion; using orchid bark as primary medium; contaminated soil or unsterilized tools; standing water in cachepots.
Solutions
- 1. Implement moisture-based watering: Water only when top 2 inches of soil are completely dry to the touch; use finger insertion test or moisture meter
- 2. Use appropriate substrate: Mix well-draining aroid soil containing 50% peat or coco coir, 30% perlite, and 20% orchid bark; never use perlite-only or bark-only for pothos
- 3. Ensure adequate drainage: All containers must have drainage holes; never allow standing water in cachepots; elevate inner pots on pebbles to prevent contact with accumulated water
- 4. Practice sanitation: Clean pruning shears with 70% isopropyl alcohol between plants; use fresh sterile commercial soil when repotting; avoid reusing soil from diseased plants
- 5. Execute early intervention: At first signs of yellowing or wilting, immediately inspect roots; remove plant, rinse roots, prune affected tissue, and repot in fresh sterile mix
Prevention
Water only when top 2 inches of soil are dry; use well-draining aroid mix (50% peat, 30% perlite, 20% bark); ensure all pots have drainage holes; sanitize tools with 70% alcohol between plants; quarantine new plants for 2 weeks; inspect root health quarterly.
Why is my Pothos's stem turning black?
Stem rot occurs when bacterial or fungal pathogens enter through wounds or leaf axils where moisture accumulates, then spread downward into vascular tissue
2 protocols
80–85%
Why is my Pothos's stem turning black?
Stem rot occurs when bacterial or fungal pathogens enter through wounds or leaf axils where moisture accumulates, then spread downward into vascular tissue
Protocol 1: stem rot · 85% confidence
Cause
Stem rot occurs when bacterial or fungal pathogens enter through wounds or leaf axils where moisture accumulates, then spread downward into vascular tissue. Unlike root rot which starts below soil and moves upward, stem rot begins at the soil line or above and progresses both up and down. In philodendrons and pothos, this appears as dark, sunken lesions at nodes with yellowing leaves on affected stems while adjacent stems remain healthy.
Solutions
- 1. Early detection: Inspect stem bases monthly for dark discoloration, softening, or sunken lesions at soil line
- 2. Tactile confirmation: Gently squeeze stem tissue - healthy stems are firm, rot yields to gentle pressure
- 3. Surgical intervention: Make clean cut 1-2 inches above visible rot using sterile blade angled away from plant center
- 4. Wound sealing: Immediately seal fresh cut with candle wax, super glue, or thick cinnamon powder to prevent reinfection
- 5. Isolation: Remove affected stem entirely if rot has progressed below soil line or into multiple nodes
- 6. Propagation rescue: Root healthy upper stem sections in water with weekly changes and 60-70% humidity
- 7. Environmental correction: Improve airflow, reduce humidity slightly, and bottom-water to keep stems dry during recovery
Prevention
Avoid overhead watering that wets stems; maintain good air circulation around plant base with small fan; ensure leaves don't rest on wet soil surface; treat any stem wounds immediately with cinnamon or fungicide; quarantine new plants to prevent introducing stem rot pathogens.
Protocol 2: stem rot recovery · 80% confidence
Cause
Stem layering on bare stems with 2-3 nodes covered in moist soil leverages pothos' adventitious nodal rooting. Pothos' endogenous IAA auxins support recovery even after severe root loss.
Solutions
- 1. Remove decorative rocks from soil surface
- 2. Lay bare stems covering 2-3 nodes with fresh moist soil
- 3. Maintain consistent moisture for 2 weeks
- 4. Alternative: Cut vines leaving 5+ inches with 2-3 nodes
- 5. Root in water 2 weeks under bright indirect light
Prevention
Use well-draining soil mix (50% potting soil, 30% perlite, 20% bark). Water only when top 2 inches dry.
Tool Sterilization Protocol: How to Use for Pothos
Pathogen transmission occurs primarily through contaminated tools, with bacterial and fungal spores surviving on metal surfaces for 48-72 hours
88%
Tool Sterilization Protocol: How to Use for Pothos
Pathogen transmission occurs primarily through contaminated tools, with bacterial and fungal spores surviving on metal surfaces for 48-72 hours
Cause
Pathogen transmission occurs primarily through contaminated tools, with bacterial and fungal spores surviving on metal surfaces for 48-72 hours. A single unsterilized cut can transfer pathogens to every subsequent plant. Community data reveals 60% of disease spread in collections results from tool contamination rather than airborne transmission. Effective sterilization requires contact time and proper concentration to denature pathogen proteins and destroy spores.
Solutions
- Use 70% isopropyl alcohol: Higher concentrations (90%+) evaporate too quickly; 70% provides adequate contact time
- Apply liberally: Spray or wipe entire blade surface, not just cutting edge
- Allow 30 seconds contact time: Pathogens require exposure to denature—wipe and wait
- Sterilize between EVERY plant: Even healthy-looking plants may carry latent infections
- For heavy infections: Use 10% bleach solution (1 part bleach to 9 parts water) for 2-minute soak
- Clean pruning shears: Disassemble monthly to clean debris from pivot area where pathogens hide
- Replace disposable blades: For disposable razor blades, use fresh blade for diseased plants
Prevention
Establish sterilization station with supplies readily available; make tool cleaning automatic habit before and after every plant contact; use disposable gloves when handling diseased plants.
Pests (6 topics · 12 cases)
Why does my Pothos have fungus gnats?
Fungus gnat (Bradysia spp
2 protocols
88–91%
Why does my Pothos have fungus gnats?
Fungus gnat (Bradysia spp
Protocol 1: fungus gnats · 91% confidence
Cause
Fungus gnat (Bradysia spp.) infestations in pothos arise from perpetually moist soil surface conditions where larvae feed on organic matter and root hairs. Adult gnats lay eggs in the top 1-2 inches of soil; continuous moisture from overwatering or poor drainage creates ideal breeding habitat. Pothos tolerance for drier conditions makes chronic moisture both unnecessary and problematic.
Solutions
- Cease watering immediately and allow soil to dry to depth of 2-3 inches
- Apply thin layer of food-grade diatomaceous earth or ground cinnamon to soil surface
- Place yellow sticky traps at soil level to capture emerging adults
- Water only when soil is dry—gnat larvae cannot survive dry conditions
- Repeat DE application weekly until gnats disappear (typically 3-4 weeks)
Prevention
Allow top 2-3 inches of soil to dry completely between waterings; use well-draining potting mix with 30%+ perlite content; apply 1/4 inch layer of coarse sand or diatomaceous earth on soil surface to block egg-laying; deploy yellow sticky traps to monitor and capture adults; maintain proper pot sizing to avoid excess moisture retention.
Protocol 2: fungus gnats · 88% confidence
Cause
Fungus gnats (Bradysia spp.) infest Pothos when soil remains moist for extended periods, allowing larvae to feed on organic matter and fine root hairs. Adult gnats lay eggs in the top 1-2 inches of soil; larvae hatch in 4-6 days and thrive in waterlogged, poorly-draining potting mix. While rarely fatal to established Pothos, heavy infestations can stress young plants and cuttings by damaging root hairs. The primary trigger is overwatering combined with moisture-retentive soil mixes lacking adequate drainage amendments like perlite or bark.
Solutions
- Confirm infestation: Look for tiny black flies near soil surface, especially when watering; adults are weak fliers that hover around the plant
- Apply diatomaceous earth (food-grade): Sprinkle thin layer on soil surface to dehydrate larvae and prevent adult egg-laying; reapply after watering
- Hydrogen peroxide soil drench: Mix 1 part 3% hydrogen peroxide with 4 parts water; drench soil thoroughly to kill larvae on contact without harming roots
- Use yellow sticky traps: Place traps at soil level to capture adult gnats and monitor population decline; replace every 1-2 weeks
- BTI (Bacillus thuringiensis israelensis) treatment: Add mosquito bits/dunks to water and apply to soil; bacteria specifically targets gnat larvae without affecting plants
- Repot with drainage improvements: If infestation persists, repot using well-draining aroid mix (50% potting soil, 30% perlite, 20% orchid bark)
Prevention
Water only when top 2 inches of soil are completely dry; use well-draining potting mix amended with perlite; ensure pots have drainage holes; allow soil surface to dry between waterings; quarantine new plants for 2-4 weeks; avoid overwatering during winter when growth slows. Bottom-watering can help by keeping the soil surface dry where gnats lay eggs.
Why does my Pothos have mealybugs?
Mealybug infestations on pothos appear as white cottony masses in leaf axils and stem joints where the piercing-sucking insects extract plant sap
2 protocols
88–90%
Why does my Pothos have mealybugs?
Mealybug infestations on pothos appear as white cottony masses in leaf axils and stem joints where the piercing-sucking insects extract plant sap
Protocol 1: mealybugs · 90% confidence
Cause
Mealybug infestations on pothos appear as white cottony masses in leaf axils and stem joints where the piercing-sucking insects extract plant sap. The waxy secretions protect colonies while honeydew excretion promotes sooty mold growth. Pothos' vining growth habit provides numerous sheltered crevices ideal for colony establishment and spread.
Solutions
- Isolate infested plant immediately to prevent spread to collection
- Remove visible mealybugs with cotton swab dipped in 70% isopropyl alcohol
- Apply insecticidal soap or neem oil (1% solution) thoroughly to all leaf axils, stems, and undersides
- Repeat treatment every 5-7 days for 3-4 cycles to catch newly hatched nymphs
- For severe infestations: take healthy cuttings and propagate in fresh sterile medium, discarding mother plant
Prevention
Inspect all new plants thoroughly before introducing to collection; maintain 40-60% humidity to discourage pest establishment; avoid over-fertilizing with high-nitrogen formulas that produce succulent growth attractive to pests; wipe leaves monthly with damp cloth to remove dust and inspect undersides; quarantine any plant showing suspicious white deposits.
Protocol 2: mealybugs · 88% confidence
Cause
Mealybugs are soft-bodied insects that feed on plant sap, appearing as white cottony masses on stems, leaf joints, and undersides. They weaken Pothos by extracting sap and can spread quickly to other plants. Root mealybugs live in soil and attack roots, causing similar damage underground. They thrive in warm, humid conditions with poor air circulation.
Solutions
- Quarantine affected plant immediately to prevent spread
- For small infestations: dab individual mealybugs with 70% rubbing alcohol on cotton swabs
- For larger infestations: spray with insecticidal soap or neem oil every 5-7 days for 3-4 weeks
- For root mealybugs: remove plant from pot, rinse roots, trim rotted sections, soak in hydrogen peroxide solution (1:4), repot in fresh soil
- Treat ALL plants in the area as mealybugs spread easily
- Continue monitoring for 1-2 months as eggs hatch
Prevention
Quarantine new plants for 2-4 weeks. Inspect plants regularly, especially leaf joints and stems. Maintain good air circulation. Avoid over-fertilizing with nitrogen which attracts pests. Keep leaves clean.
What pests are on my Pothos?
Soil-borne fungal pathogens Rhizoctonia solani and Sclerotium rolfsii attack pothos roots through cell wall degrading enzymes (pectate lyase and cellobiose dehydrogenase)
87%
What pests are on my Pothos?
Soil-borne fungal pathogens Rhizoctonia solani and Sclerotium rolfsii attack pothos roots through cell wall degrading enzymes (pectate lyase and cellobiose dehydrogenase)
Cause
Soil-borne fungal pathogens Rhizoctonia solani and Sclerotium rolfsii attack pothos roots through cell wall degrading enzymes (pectate lyase and cellobiose dehydrogenase). These pathogens persist as vegetative mycelium and/or sclerotia, causing necrotrophy that drastically reduces root length, fresh weight, and dry weight.
Solutions
- Apply thyme oil nanoemulsion at 3000 ppm concentration to infected soil and roots
- For severe infections, use clove oil nanoemulsion at 3000 ppm as alternative treatment
- Remove plant from pot, trim black/mushy roots with sterilized shears, rinse remaining roots
- Repot in fresh well-draining aroid mix (50% potting soil, 30% perlite, 20% orchid bark) with drainage holes
- Allow soil to dry between waterings; water only when top 2-3 inches are dry
Prevention
Use well-draining soil mix with perlite and orchid bark; avoid oversized pots that retain excess moisture; quarantine new plants 2-4 weeks before introducing to collection; maintain 40-60% humidity with good airflow
What pests are on my Pothos?
Root zone pests including root mealybugs and soil-borne fungus gnat larvae often evade detection until populations explode
85%
What pests are on my Pothos?
Root zone pests including root mealybugs and soil-borne fungus gnat larvae often evade detection until populations explode
Cause
Root zone pests including root mealybugs and soil-borne fungus gnat larvae often evade detection until populations explode. Root mealybugs feed on root hairs, causing stunted growth, yellowing, and wilting despite adequate watering. Soil-dwelling pests thrive in dense, water-retentive potting mixes with excess organic matter. Overwatering creates anaerobic conditions that weaken roots and increase susceptibility.
Solutions
- Inspect roots: Gently unpot plant and examine root ball—healthy roots are white/cream and firm
- For root mealybugs: Remove all soil, rinse roots thoroughly under running water. Dip roots in 70% isopropyl alcohol solution (1:1 with water) for 5 minutes
- Sterilize or replace pot: Wash pot with bleach solution (1:10) or use new container
- Repot in fresh sterile well-draining mix—incorporate 30% perlite for aeration
- For fungus gnat larvae: Apply BTI dunks or mosquito bits to soil surface—biological control targeting larvae without harming roots
- Monitor for recovery 2-4 weeks—new root growth indicates success
Prevention
Use sterile well-draining mixes amended with perlite, orchid bark, or pumice. Inspect roots of new plants before purchase. Quarantine all new plants for 2-4 weeks. Water only when top 2 inches of soil are dry. Apply preventive BTI monthly during growing season.
Why does my Pothos have spider mites?
Spider mites are tiny arachnids that thrive in hot, dry conditions and low humidity
3 protocols
86–87%
Why does my Pothos have spider mites?
Spider mites are tiny arachnids that thrive in hot, dry conditions and low humidity
Protocol 1: spider mites · 87% confidence
Cause
Spider mites are tiny arachnids that thrive in hot, dry conditions and low humidity. They feed on leaf sap, causing stippling (tiny yellow or white dots), fine webbing on leaves and stems, and eventually leaf drop. They reproduce rapidly and spread to nearby plants. Unlike insects, they are not affected by regular insecticides.
Solutions
- Increase humidity immediately - spider mites hate moisture. Shower plant or mist heavily
- Isolate plant to prevent spread to other plants
- Spray leaves thoroughly with water to dislodge mites, especially undersides
- Apply neem oil, insecticidal soap, or miticide every 3-5 days for 2-3 weeks
- For severe infestations: use Bonide Systemic or chemical miticide
- Trim heavily infested leaves
- Monitor plants with a magnifying glass - mites are barely visible
Prevention
Maintain 50-60% humidity. Wipe leaves regularly. Inspect new plants closely. Increase air circulation without creating drafts. Treat at first sign of stippling.
Protocol 2: spider mite webbing identification · 87% confidence
Cause
Spider mite webbing on pothos appears as fine silk strands between leaf nodes and undersides, distinct from dust which wipes away easily. The webbing serves as protection for eggs and colonies while dust simply accumulates on leaf surfaces. Understanding this distinction prevents misdiagnosis and delayed treatment.
Solutions
- Test by gently wiping with damp cloth—dust removes easily while webbing remains anchored
- Inspect with 10x magnification for tiny moving specks within webbing (mites)
- Look for accompanying stippling damage on leaves which confirms active feeding
- Treat confirmed infestations with neem oil or insecticidal soap immediately
- Increase humidity to 50-60% as mites thrive in dry conditions below 40% RH
- Quarantine affected plant and inspect nearby plants as mites spread via air currents
Prevention
Maintain 50-60% humidity year-round; wipe leaves monthly with damp cloth; inspect new plants for 14 days; provide adequate spacing for airflow; avoid over-fertilizing which produces soft growth attractive to mites.
Protocol 3: spider mites · 86% confidence
Cause
Spider mite infestations on pothos manifest as stippled yellowing on leaves, fine webbing between stems, and overall decline as the microscopic arachnids pierce leaf cells to feed on sap. The damage is exacerbated by low humidity (<40% RH) which mites prefer, and dusty conditions that stress the plant. Heavy infestations can defoliate plants rapidly.
Solutions
- Confirm infestation: hold paper under leaf and tap—mites appear as tiny moving specks
- Isolate plant immediately and prune severely damaged leaves
- Shower plant thoroughly with lukewarm water to dislodge mites and webs
- Apply insecticidal soap or neem oil every 3-5 days for 3-4 treatments targeting undersides
- Increase humidity to 60-70% during treatment period to prevent reinfestation
Prevention
Maintain humidity above 50% to create unfavorable conditions for mites; mist leaves regularly or use humidifiers; wipe leaves monthly with damp cloth to remove dust; inspect undersides of leaves with magnifying glass for early detection; isolate new plants for 2 weeks before adding to collection; avoid placing in hot, dry locations.
Why does my Pothos have thrips?
Thrips are tiny, slender insects that rasp leaf tissue and suck sap, causing silvery or translucent patches, black specks (frass), and stunted or distorted new growth
3 protocols
88–90%
Why does my Pothos have thrips?
Thrips are tiny, slender insects that rasp leaf tissue and suck sap, causing silvery or translucent patches, black specks (frass), and stunted or distorted new growth
Protocol 1: thrips · 90% confidence
Cause
Thrips are tiny, slender insects that rasp leaf tissue and suck sap, causing silvery or translucent patches, black specks (frass), and stunted or distorted new growth. They are difficult to see with the naked eye and reproduce rapidly indoors. Thrips prefer dry conditions and can spread quickly to other plants.
Solutions
- Isolate infected plant immediately
- Spray entire plant with strong water to dislodge thrips (outdoors or in shower)
- Apply insecticidal soap or Captain Jacks Dead Bug Brew (spinosad) every 7-10 days for 3-4 cycles
- For severe infestations: use Bonide Systemic granules in soil (imidacloprid)
- Treat ALL nearby plants even if they show no symptoms
- Prune heavily damaged leaves
- Monitor with yellow sticky traps to catch adults
Prevention
Quarantine new plants. Maintain 50-60% humidity. Use yellow sticky traps as early detection. Inspect new growth regularly. Thrips are resistant to neem oil alone.
Protocol 2: thrips · 90% confidence
Cause
Thrips rasp pothos leaf tissue causing silvery stippling, black frass specks, and stunted growth. Their 7-14 day lifecycle with overlapping generations makes them particularly challenging. Adults fly between plants while larvae hide in soil and leaf folds. On pothos, the extensive vine structure provides numerous hiding spots. The damage appears as fine silvery streaks distinct from other pest damage.
Solutions
- Isolate affected pothos immediately; inspect and treat all nearby plants as adults can fly
- Rinse foliage thoroughly with strong water spray focusing on leaf undersides to dislodge pests
- Apply insecticidal soap, neem oil, or spinosad every 5-7 days for 4-6 weeks to break the lifecycle
- Use systemic insecticide (imidacloprid) for severe infestations, allowing 4-5 weeks for full effect
- Deploy blue sticky traps near plants to monitor and capture flying adults
- Prune heavily damaged vines to reduce population and propagate healthy tip cuttings as backup
Prevention
Maintain 50-60% humidity to deter thrips; quarantine new plants for 3-4 weeks; inspect leaves weekly with magnification; avoid excessive nitrogen fertilization; ensure good air circulation; use preventive sprays during high-risk seasons.
Protocol 3: thrips lifecycle management · 88% confidence
Cause
Thrips on pothos have a multivoltine lifecycle with 7-14 day generations and overlapping populations, making single treatments ineffective. Eggs are inserted into leaf tissue, larvae feed on plant sap, and pupae drop into soil to complete development. This lifecycle requires sequential treatments timed to catch each stage.
Solutions
- Begin treatment immediately upon detection; do not wait for visible damage to spread
- Apply treatments every 5-7 days consistently for 4-6 weeks to break the lifecycle
- Use combination approach: systemic insecticide for larvae feeding on sap plus contact spray for adults
- Treat all nearby plants preventively as winged adults can fly between plants
- Continue monitoring for 2 weeks after last visible thrips to ensure complete eradication
- Prune and remove heavily damaged vines which harbor hidden larvae in leaf folds
Prevention
Quarantine new plants for 3-4 weeks; maintain 50-60% humidity; inspect new growth weekly; avoid excessive nitrogen; ensure good air circulation; use preventive sprays during high-risk seasons
Watering Issues (1 topics · 4 cases)
Is my Pothos overwatered?
Overwatering in pothos is fundamentally about frequency, not volume
4 protocols
84–91%
Is my Pothos overwatered?
Overwatering in pothos is fundamentally about frequency, not volume
Protocol 1: overwatering frequency vs volume · 91% confidence
Cause
Overwatering in pothos is fundamentally about frequency, not volume. The plant's fibrous root system (Epipremnum aureum) requires oxygen exchange between waterings. When soil remains wet for 7+ days due to dense potting mix or oversized pots, anaerobic conditions develop (dissolved oxygen <2mg/L). This triggers root suffocation and rot. Standard potting mixes retain moisture too long, creating waterlogged conditions even with modest watering amounts.
Solutions
- Perform finger test: Insert finger 2-3 inches deep into soil—only water when completely dry at that depth
- Switch to chunky aroid mix: Repot using 50% potting soil, 30% perlite, 20% orchid bark for proper drainage
- Check pot size: Ensure pot diameter is only 1-2 inches larger than root ball—oversized pots trap moisture
- Install drainage: Verify pot has holes; elevate inner pot on pebbles in decorative outer pot
- Monitor weight: Lift pot before and after watering—learn the 'dry weight' feel to avoid overwatering
- Adjust for seasons: Water every 7-10 days in summer, 14-21 days in winter when growth slows
Prevention
Use well-draining aroid mix (50% coco coir or peat, 30% perlite, 20% orchid bark). Water only when top 2-3 inches of soil are completely dry to touch. Ensure pots have drainage holes and never allow standing water in saucers. Bottom-water for 15-20 minutes to control saturation.
Protocol 2: overwatering · 90% confidence
Cause
Overwatering in Pothos is not about the volume of water given, but the frequency. Pothos can handle being thoroughly soaked if allowed to dry properly. True overwatering occurs when soil stays wet for extended periods, depriving roots of oxygen. However, Pothos actually prefer more moisture than many houseplants and tolerate wet conditions better than cacti or succulents. The real issue is waterlogged soil from poor drainage, oversized pots, or watering too often before soil dries.
Solutions
- Understand that overwatering = frequency, not volume - thorough watering is good if soil drains
- Allow top 2-3 inches of soil to dry between waterings
- Use well-draining aroid mix with perlite and orchid bark
- Ensure pot has drainage holes
- In winter, extend dry periods as growth slows
- If accidentally flooded: drain thoroughly, do not water again until dry
Prevention
Water only when soil is appropriately dry for conditions. Use pots with drainage. Bottom-water to encourage deep rooting. Adjust frequency seasonally - less in winter, more in summer.
Protocol 3: overwatering frequency · 88% confidence
Cause
Overwatering injury occurs primarily from frequency (how often) rather than volume (how much) per watering event. Plants require complete dry-out cycles between waterings to allow oxygen diffusion back into soil and prevent anaerobic conditions. Watering small amounts frequently maintains chronically moist soil that sustains rot pathogens, while thorough occasional watering followed by complete drying mimics natural rainfall patterns plants evolved with.
Solutions
- 1. Volume rule: Always water thoroughly until excess drains from bottom holes - mimics natural rainfall saturation
- 2. Frequency rule: Wait until top 2-3 inches of soil are bone-dry before rewatering (finger test or moisture meter)
- 3. Lift test: Lift pot to assess weight - heavy pot with drooping plant indicates overwatering, not thirst
- 4. Species timing: Snake plant/ZZ: 3-4 weeks; Pothos/Philodendron: 7-14 days; Peace lily: 5-7 days in growing season
- 5. Seasonal adjustment: Reduce frequency by 50% in winter when light and temperatures decrease evaporation
- 6. Environmental factors: Increase frequency with higher light, temperature, or lower humidity; decrease in opposite conditions
- 7. Automated systems: Avoid self-watering devices for rot-prone plants unless equipped with precise moisture sensors
Prevention
Adopt 'soak and dry' methodology: when watering, drench soil until water exits drainage holes, then allow 70-80% soil volume to dry completely before next watering; use moisture meter or wooden skewer to verify dryness at root zone depth (2-3 inches for most houseplants).
Protocol 4: overwatering · 84% confidence
Cause
Root rot in pothos (caused by Pythium or Phytophthora water molds) presents initially as localized dark spots on the lowest/basal leaves closest to soil. Plant prioritizes apical meristems during root oxygen deprivation, sacrificing lower leaves via acropetal nutrient transport shutdown. Basal leaf spotting signals anaerobic soil conditions before systemic collapse occurs.
Solutions
- Inspect leaf position: basal (lowest stem leaves) spotting indicates root rot; upper leaf spots suggest different issue
- Gently unpot and examine roots; healthy roots are white/firm, rotted roots are brown/black and mushy
- Trim all affected roots with sterilized shears until only white healthy tissue remains
- Repot in fresh well-draining aroid mix (50% potting soil, 30% perlite, 20% orchid bark) with drainage holes
- Water only when top 2-3 inches are completely dry; use moisture meter or finger test to verify
Prevention
Use pots with drainage holes minimum 1/4 inch diameter; never let pots sit in standing water. Water only when top 2-3 inches are dry; weight pot to learn dry vs wet feel. Maintain 50-70% humidity with good airflow; avoid heavy soil mixes that compact and create anaerobic pockets.
Environment (2 topics · 5 cases)
Does my Pothos need more humidity?
Bacterial infections (Xanthomonas, Pseudomonas) present as water-soaked, translucent lesions that may ooze yellow-brown bacterial exudate, often angular and bounded by leaf veins
86%
Does my Pothos need more humidity?
Bacterial infections (Xanthomonas, Pseudomonas) present as water-soaked, translucent lesions that may ooze yellow-brown bacterial exudate, often angular and bounded by leaf veins
Cause
Bacterial infections (Xanthomonas, Pseudomonas) present as water-soaked, translucent lesions that may ooze yellow-brown bacterial exudate, often angular and bounded by leaf veins. Fungal infections (Phyllosticta, Cercospora) show as dry, dark brown to black spots with defined margins and possible concentric rings. Bacterial spots spread rapidly in high humidity; fungal spots progress slower and may produce visible spore structures.
Solutions
- Examine lesion characteristics: water-soaked/translucent with ooze = bacterial; dry/dark with rings = fungal
- For bacterial: apply copper bactericide every 7-10 days; remove severely affected leaves; improve air circulation immediately
- For fungal: apply systemic fungicide (propiconazole) following label; remove infected tissue; allow soil to dry between waterings
- Isolate plant immediately upon diagnosis; bacterial infections spread 3x faster than fungal via water splash
- Sterilize all tools with 70% isopropyl between plants; bacterial cross-contamination risk is higher than fungal
Prevention
Maintain 40-60% humidity (not higher) with active air circulation to prevent bacterial proliferation. Use copper-based preventive sprays monthly during high-humidity months. Water at soil level only; avoid overhead watering. Inspect new plants thoroughly before adding to collection; bacterial infections often originate from nursery stock.
Why does my Pothos have sunburn?
Pothos sunburn occurs when plants accustomed to indoor or low-light conditions are suddenly exposed to direct sunlight
4 protocols
87–88%
Why does my Pothos have sunburn?
Pothos sunburn occurs when plants accustomed to indoor or low-light conditions are suddenly exposed to direct sunlight
Protocol 1: sunburn · 88% confidence
Cause
Pothos sunburn occurs when plants accustomed to indoor or low-light conditions are suddenly exposed to direct sunlight. Symptoms include bleached, white or brown crispy patches on leaves, particularly on variegated varieties which are more sensitive. New leaves are especially vulnerable. Unlike root rot, sunburned leaves remain firm and crispy rather than soft and mushy.
Solutions
- Move plant immediately to bright indirect light away from direct sun
- Trim severely damaged leaves with sterile shears - they will not recover
- Mildly affected leaves can remain as they still photosynthesize
- If moving plant outdoors: acclimate gradually over 2 weeks, starting with 1 hour of morning sun
- For variegated varieties: provide protection from direct sun as white sections lack chlorophyll and burn easily
Prevention
Keep Pothos in bright indirect light. When moving locations, do so gradually. Variegated varieties need more protection than green varieties. East-facing windows provide ideal morning light without harsh afternoon sun.
Protocol 2: sunburn · 88% confidence
Cause
Sunburn on pothos leaves manifests as irregular brown spots or crispy patches when shade-adapted tropical foliage receives direct sunlight exposure. Unlike root rot which causes uniform yellowing, sunburn creates localized necrotic tissue damage from UV radiation and photooxidative stress. The damage is permanent as destroyed leaf cells cannot regenerate.
Solutions
- Relocate plant immediately away from direct sun to bright indirect light location
- Trim affected brown/crispy areas with sterile scissors to improve aesthetics and prevent spread
- Increase humidity to 60-70% to support stressed tissue recovery
- Monitor for 1-2 weeks—new growth should emerge without burn marks if light corrected
- Expect 4-6 weeks for full visual recovery after foliage replacement
Prevention
Position pothos in bright indirect light only (1500-3000 lux); avoid south/west facing windows without sheer curtains; acclimate gradually when moving to brighter locations over 7-10 days; use UV-filtering window film on intense light exposures; maintain adequate humidity to support leaf recovery from minor light stress.
Protocol 3: sunburn spots · 87% confidence
Cause
Direct sunlight exposure causes photoxidative damage to pothos leaves, appearing as brown crispy spots or bleached patches. Variegated varieties (Neon, Marble Queen) are particularly vulnerable due to reduced chlorophyll in white/cream sections. Symptoms appear within 24-48 hours of exposure and affect exposed leaf surfaces.
Solutions
- Immediate relocation: Move to bright indirect light only
- Remove damaged leaves: Trim affected foliage with sterile scissors
- Acclimate gradually: If moving to brighter location, increase exposure over 7-10 days
- Check grow light distance: Maintain 12-18 inches from LED grow lights
- Use light meter: Target 200-500 foot-candles for standard pothos
Prevention
Position 3-5 feet from south/west windows or use sheer curtains. Acclimate new plants to light over 7-10 days. For grow lights, use the hand-heat test—if you feel warmth at leaf level, it's too close.
Protocol 4: sunburn damage · 87% confidence
Cause
Sunburn on pothos mimics overwatering with black limp leaves, but healthy white roots differentiate it from root rot. Direct sunlight exposure on low-light tolerant tropical vine causes cell death.
Solutions
- 1. Cut off all black/limp leaves with clean shears
- 2. Relocate to low-light area away from direct sun
- 3. Repot in well-draining mix if soil was removed
- 4. Water only when top 1 inch is completely dry
- 5. Monitor 1-2 weeks without disturbance
Prevention
Position pothos in consistent low-light (north-facing or 5-10 ft from windows). Use sheer curtains for diffusion.
Growth & Structure (11 topics · 23 cases)
Should I be concerned about my Pothos's aerial roots?
Pothos (Epipremnum aureum) aerial roots are specialized adventitious roots that emerge from stem nodes to serve dual functions: structural anchoring for climbing and supplemental nutrient/water absorption
7 protocols
81–88%
Should I be concerned about my Pothos's aerial roots?
Pothos (Epipremnum aureum) aerial roots are specialized adventitious roots that emerge from stem nodes to serve dual functions: structural anchoring for climbing and supplemental nutrient/water absorption
Protocol 1: aerial roots · 88% confidence
Cause
Pothos (Epipremnum aureum) aerial roots are specialized adventitious roots that emerge from stem nodes to serve dual functions: structural anchoring for climbing and supplemental nutrient/water absorption. In their native Solomon Islands habitat, these roots attach to tree bark via root hairs and adhesive secretions, allowing vertical ascent toward canopy light. The roots contain specialized absorbent tissue that can extract moisture and minerals from humid air, rain, and host surfaces when soil resources are limited.
Solutions
- Recognize aerial roots as healthy adaptations, not problems requiring removal
- Provide climbing supports (moss poles, trellises) to satisfy natural growth instinct
- Mist aerial roots regularly to activate their absorptive function
- Allow aerial roots to attach naturally to supports rather than forcing attachment
Prevention
Maintain humidity above 50% to support aerial root function; provide climbing structures early in plant development to direct growth upward rather than outward.
Protocol 2: aerial root activation · 87% confidence
Cause
Pothos nodes contain dormant adventitious root primordia and axillary buds that remain suppressed under horizontal hanging growth. When nodes contact a moist vertical surface (moss pole), thigmotropic sensing triggers ethylene production and auxin redistribution, activating these dormant structures. Aerial roots emerge from nodes within 2-4 weeks of consistent pole contact, anchoring the vine and establishing a vascular connection that enables the hormonal shifts necessary for mature leaf development.
Solutions
- Identify nodes (swollen stem sections with brown aerial root bumps) along vine length
- Position nodes directly against moist pole surface using soft ties at each node point
- Mist node contact points daily or every 2 days to maintain surface moisture
- Maintain 65-80°F temperature and 60%+ humidity to accelerate root primordia activation
- Expect initial aerial root emergence within 14-21 days of consistent contact
- Do not remove emerging aerial roots—they are essential for nutrient uptake and structural support
Prevention
Maintain pole moisture above 50% relative humidity at node contact points. Check weekly that vines maintain physical contact with pole surface—loosening attachments require re-tying.
Protocol 3: aerial roots training · 86% confidence
Cause
Pothos aerial roots require stable attachment points to trigger hormonal changes that increase leaf size. When aerial roots anchor to vertical supports like moss poles, the plant receives a 'climbing cue' that signals maturity and triggers morphological changes. Nodes stabilized by aerial root attachment produce significantly larger leaves (up to 2-3x size) compared to unsupported trailing vines. This phenomenon, called 'heteroblasty,' is regulated by auxin distribution and mechanosensing in root tissues.
Solutions
- Install moss pole or coir pole at least 18 inches tall in pot center
- Secure stem segments with loose plant ties every 6-8 inches along pole
- Mist moss pole daily to encourage aerial root attachment to damp substrate
- Wait 4-6 weeks for roots to naturally adhere before removing support ties
- As plant climbs, extend pole or replace with taller support to continue progression
Prevention
Begin training when vines reach 12-18 inches long; delay results in established trailing habits that resist vertical transition.
Protocol 4: aerial root attachment · 85% confidence
Cause
Aerial root attachment requires sustained humidity contact between node primordia and porous substrate. Pothos aerial roots are modified adventitious roots that secrete adhesive compounds and absorb moisture from humid surfaces. Without consistent humidity (>60% RH at attachment points), roots desiccate and fail to anchor, causing vines to detach and revert to trailing growth with smaller leaves.
Solutions
- Locate nodes with visible aerial root primordia (brown/protruding bumps)
- Mist moss pole until surface is visibly damp but not dripping
- Press node firmly against pole surface for 10-15 seconds to initiate contact
- Secure with soft velcro ties or plant clips, leaving 1-inch slack for growth
- Re-mist daily for first 2 weeks to establish root adhesion
- Once roots attach (tugging resistance felt), remove temporary ties
Prevention
Maintain pole humidity through daily misting or automated humidification. Use sphagnum moss poles that retain moisture longer than coir. Check attachment weekly during first month of training.
Protocol 5: aerial roots propagation · 84% confidence
Cause
Mature pothos aerial roots contain pre-formed root primordia capable of rapid adaptation to soil or water conditions. When aerial roots are directed into potting medium or water, they undergo cellular differentiation to transform from anchoring structures into absorptive substrate roots. This process takes 2-4 weeks and results in faster establishment than stem-only cuttings because the roots bypass the initial root-emergence phase.
Solutions
- Select stem segment with at least 2-3 nodes and healthy aerial roots
- Leave aerial roots attached to stem; do not remove them
- For soil propagation: Bury aerial roots 1 inch deep in moist perlite or potting mix
- For water propagation: Submerge aerial roots while keeping stem above water line
- Roots transition in 2-4 weeks; new growth indicates successful establishment
Prevention
Choose cuttings with aerial roots 1-3 inches long for optimal transition success; very long aerial roots (>6 inches) may struggle to adapt to soil conditions.
Protocol 6: aerial roots trimming · 82% confidence
Cause
Aerial roots on indoor pothos present a management decision between aesthetic preferences and plant health benefits. Trimmed roots reduce natural climbing capability and supplemental water absorption but improve appearance in formal settings. Kept roots enhance plant vigor through additional nutrient uptake and enable vertical training but may appear unkempt in trailing displays. The decision should factor in display location, humidity levels, and growth objectives.
Solutions
- For climbing/moss pole plants: Keep all aerial roots for attachment support
- For hanging baskets: Trim aerial roots if they appear unsightly or reach floor
- For propagation stock: Retain aerial roots to accelerate cutting establishment
- Sterilize scissors with alcohol before trimming; cut 1/4 inch from stem node
- Never remove more than 30% of aerial roots at once to preserve plant function
Prevention
Decide on display style early: climbing displays benefit from aerial roots; trailing/cascading displays may require periodic trimming.
Protocol 7: aerial roots diagnosis · 81% confidence
Cause
Pothos aerial roots serve as early warning indicators of plant health issues through changes in growth rate, texture, and color. Abundant aerial root production signals high humidity and climbing instinct but can indicate the plant is seeking alternative water sources due to underwatering. Brown, crispy aerial roots indicate low humidity or dehydration. Absence of aerial roots on mature vines suggests insufficient light, low humidity, or nutrient deficiency limiting growth hormone production.
Solutions
- Observe aerial root production: Sudden increase suggests checking soil moisture
- Inspect root color: White/cream = healthy; brown/crispy = low humidity; black = rot
- Measure root growth rate: Vigorous aerial roots indicate active growth phase
- Adjust care based on signals: Increase humidity if roots brown; check watering if roots proliferate suddenly
- Use aerial root health as indicator of overall vine condition before visible leaf symptoms appear
Prevention
Monitor aerial root appearance monthly as part of routine plant inspection; changes often precede leaf symptoms by 1-2 weeks.
Pothos: Aging Vine Senescence
Mature pothos (3+ years) naturally senesce lower leaves and develop woody, bare stems due to lignification and reduced light penetration to lower canopy
85%
Pothos: Aging Vine Senescence
Mature pothos (3+ years) naturally senesce lower leaves and develop woody, bare stems due to lignification and reduced light penetration to lower canopy
Cause
Mature pothos (3+ years) naturally senesce lower leaves and develop woody, bare stems due to lignification and reduced light penetration to lower canopy. This differs from etiolation—it's age-related decline combined with apical dominance, requiring replacement propagation rather than environmental correction alone.
Solutions
- Assess senescence level: Identify vines with >50% bare stem between leaves, woody texture, or nodes >2 inches apart on lower sections
- Take tip cuttings: Harvest 6-8 inch terminal sections with 3-4 healthy leaves; these root fastest due to active meristematic tissue
- Water propagation method: Place cuttings in clear vessel with stem submerged, change water weekly to prevent bacterial growth, wait for 1-2 inch root development (2-4 weeks)
- Direct soil rooting alternative: Dip cut end in rooting hormone, insert 2 inches into moist soil, maintain humidity with plastic dome or bag for 2 weeks
- Replant for bushiness: Return 3-5 rooted cuttings to original pot, spacing evenly around mother plant base; water thoroughly and provide bright indirect light for establishment
Prevention
Propagate replacement cuttings every 6 months from healthy parent plants; maintain mother plant vigor through annual repotting and seasonal fertilization; retire vines older than 5 years to propagation stock and refresh with new rooted cuttings.
Pothos: Apical Dominance
The primary vine's apical meristem produces auxin (indole-3-acetic acid) which transports basipetally down the stem, inhibiting cytokinin-driven lateral bud activation through polar transport
88%
Pothos: Apical Dominance
The primary vine's apical meristem produces auxin (indole-3-acetic acid) which transports basipetally down the stem, inhibiting cytokinin-driven lateral bud activation through polar transport
Cause
The primary vine's apical meristem produces auxin (indole-3-acetic acid) which transports basipetally down the stem, inhibiting cytokinin-driven lateral bud activation through polar transport. Without pruning intervention, 90%+ of growth energy funnels to the terminal vine while basal nodes remain dormant, creating the characteristic 'one long vine' appearance over 2-3 years.
Solutions
- Identify apical dominance: Single dominant vine with no lateral shoots emerging from lower nodes indicates active auxin suppression
- Execute strategic pruning: Cut main stem 1-2 nodes above soil line or at desired height, removing auxin source entirely
- Apply keiki paste (optional): For thick woody stems, scrape node surface and apply cytokinin-rich paste to force dormant bud activation
- Propagate tip cuttings: Root 4-6 inch terminal sections in water; tip cuttings establish 2-3 weeks faster than mid-stem sections due to preserved apical meristem
- Replant for density: Return rooted cuttings to original pot soil surface, spacing 2-3 inches apart around mother plant base
Prevention
Prune every 6-12 months to break apical dominance cycle; remove 20-30% of longest vines seasonally; use moss pole or trellis to support natural climbing habit and encourage larger leaf development on vertical growth.
Climbing Hormone Response: How to Use for Pothos
Thigmotropism (touch response) in pothos triggers fundamental hormonal reallocation when vines contact vertical support
88%
Climbing Hormone Response: How to Use for Pothos
Thigmotropism (touch response) in pothos triggers fundamental hormonal reallocation when vines contact vertical support
Cause
Thigmotropism (touch response) in pothos triggers fundamental hormonal reallocation when vines contact vertical support. The physical stimulus suppresses apical dominance by reducing auxin concentration at the growing tip while elevating cytokinin levels along the stem. This hormonal redistribution activates dormant axillary buds that would otherwise remain suppressed, transforming growth from single-vine elongation to multi-shoot branching with denser foliage distribution.
Solutions
- Secure vines to vertical pole at multiple contact points using soft plant ties
- Ensure consistent physical contact between stem nodes and moist support surface
- Maintain 50-70% ambient humidity to complement thigmotropic activation
- Expect lateral bud break within 3-6 weeks of consistent vertical support contact
- Prune apical growing tips once 4-6 lateral shoots have emerged to further redistribute growth energy
- Monitor for new growth emerging from previously dormant nodes along the entire stem length
Prevention
Provide vertical support early in plant development (before vines exceed 24 inches) to establish thigmotropic response patterns before strong apical dominance becomes entrenched. Rotate plants quarterly to ensure all sides receive adequate light for activated buds.
Why is my Pothos becoming etiolated?
Insufficient photosynthetically active radiation (PAR <50-100 µmol/m²/s) triggers shade-avoidance syndrome in Epipremnum aureum, causing internode elongation 2-3x normal length as the plant phototropically stretches toward light sources
90%
Why is my Pothos becoming etiolated?
Insufficient photosynthetically active radiation (PAR <50-100 µmol/m²/s) triggers shade-avoidance syndrome in Epipremnum aureum, causing internode elongation 2-3x normal length as the plant phototropically stretches toward light sources
Cause
Insufficient photosynthetically active radiation (PAR <50-100 µmol/m²/s) triggers shade-avoidance syndrome in Epipremnum aureum, causing internode elongation 2-3x normal length as the plant phototropically stretches toward light sources. Cells undergo rapid longitudinal expansion rather than division, producing weak, pale stems with reduced chloroplast density.
Solutions
- Measure current light: Use lux meter app or PAR sensor; target 200-400 foot-candles (1000-2000 lux) for compact growth
- Relocate to bright indirect light: East or west-facing window at 3-5 feet distance, or 12-18 inches from full-spectrum LED grow light
- Prune elongated stems: Cut 2-3 nodes above soil line with sterilized shears to remove auxin-producing apical meristem and trigger lateral bud activation
- Root prune cuttings: Place 4-6 inch stem sections with 2-3 nodes in water, change weekly, transplant when roots reach 1-2 inches
- Monitor for 3-4 weeks: New growth should show internodes <1 inch apart with larger, darker green leaves indicating restored photosynthetic efficiency
Prevention
Maintain minimum 200 foot-candles of bright indirect light year-round; rotate pot 90 degrees weekly to ensure even exposure on all sides; supplement with full-spectrum grow lights (5000-6500K color temperature) during winter months or in rooms with no window access.
Why is my Pothos growing leggy?
Indoor environments often provide insufficient natural light, especially north-facing rooms or during winter months when daylight hours drop below 10
84%
Why is my Pothos growing leggy?
Indoor environments often provide insufficient natural light, especially north-facing rooms or during winter months when daylight hours drop below 10
Cause
Indoor environments often provide insufficient natural light, especially north-facing rooms or during winter months when daylight hours drop below 10. Pothos under ambient room light (50-150 fc) cannot photosynthesize sufficiently, resulting in progressive etiolation.
Solutions
- Select full-spectrum LED grow lights at 4000-6500K color temperature
- Position light 12-18 inches above plant canopy
- Set timer for 12-14 hours daily to supplement natural light
- Target 2000-3000 lux at leaf surface (200-300 fc)
- Rotate plant weekly for even exposure
Prevention
Install grow lights proactively in fall before winter light levels drop; maintain 12-16 hour photoperiod year-round; replace LED bulbs every 3-4 years as output degrades.
Why is my Pothos growing leggy?
Pothos exhibits strong apical dominance where the terminal bud at the vine tip produces auxin that suppresses lateral bud development along the stem
7 protocols
85–91%
Why is my Pothos growing leggy?
Pothos exhibits strong apical dominance where the terminal bud at the vine tip produces auxin that suppresses lateral bud development along the stem
Protocol 1: leggy growth pruning techniques · 91% confidence
Cause
Pothos exhibits strong apical dominance where the terminal bud at the vine tip produces auxin that suppresses lateral bud development along the stem. This evolutionary adaptation prioritizes vertical climbing in forest understories but results in sparse, leggy indoor growth when not managed. The suppression persists indefinitely without intervention, causing the plant to maintain single-vine architecture even after years of growth.
Solutions
- Identify vine tip and trace back 6-12 inches to locate 3-4 healthy nodes with visible aerial root bumps
- Sterilize pruning shears with 70% isopropyl alcohol; cut cleanly at 45-degree angle just above a node (the knobby joint on stem)
- Remove 50-75% of total vine length for severely leggy growth, or 25-33% for moderate maintenance pruning
- Save all cuttings with 2-3 nodes each; root in water (change weekly) for 2-4 weeks until 1-inch roots form
- Replant rooted cuttings directly back into mother pot, spacing 2-3 inches apart around the perimeter to fill gaps
- Expect 2-4 new shoots to emerge from the pruned stem base within 3-6 weeks as cytokinin-driven lateral bud activation occurs
Prevention
Prune every 6-12 months regardless of appearance to regularly break apical dominance; combine pruning with spring fertilization to maximize new shoot energy; propagate cuttings immediately to maintain genetic backup plants.
Protocol 2: leggy growth light deficiency symptoms · 90% confidence
Cause
Etiolation manifests when light intensity drops below 100-500 foot-candles (1000-5000 lux), triggering phototropic stem elongation as the plant stretches toward light sources. Internode length increases 2-3x normal spacing (from 1-2 inches to 3-6 inches), leaves become smaller and paler with reduced chlorophyll production, and new growth emerges exclusively from the vine tip while lower stems become bare. Variegated varieties lose coloration entirely, reverting to solid green as the plant prioritizes chlorophyll efficiency over aesthetics.
Solutions
- Measure light with phone lux meter at plant location: readings below 1000 lux confirm insufficient light
- Relocate to bright indirect light position (east/west window with sheer curtain, or 2-3 feet from south window)
- If relocation impossible, install full-spectrum LED grow light 12-18 inches above plant providing 12-14 hours daily at 2000-3000 lux
- Prune affected leggy sections at soil level to remove weak growth and redirect energy to new compact shoots
Prevention
Maintain minimum 200-400 foot-candles (2000-4000 lux) consistently; rotate plant 90 degrees weekly to prevent uneven stretching; supplement with grow lights during winter months when natural light drops below thresholds.
Protocol 3: leggy growth recovery protocol · 89% confidence
Cause
Established leggy growth cannot be reversed on existing stems—elongated internodes are permanent structural changes. However, the plant retains dormant lateral buds at every node that can be activated through a systematic combination of light improvement, strategic pruning, and hormonal stimulation. Recovery requires redirecting the plant's energy from maintaining weak, stretched vines to producing new compact growth from the base.
Solutions
- Week 1-2: Relocate to bright indirect light (minimum 2000 lux) or install grow light; do not prune yet—allow plant to acclimate and build energy reserves
- Week 3: Perform hard prune on all leggy vines, cutting 50-75% of length back to soil level or last healthy node; remove all weak, pale growth
- Week 4-5: Root pruned cuttings in water (change weekly); monitor mother plant for new shoot emergence at pruned stem bases
- Week 6-7: Transplant rooted cuttings with 1-inch roots back into mother pot, spacing evenly around perimeter; water thoroughly with diluted balanced fertilizer (half strength)
- Week 8+: Maintain bright light and consistent watering; expect 3-6 new compact shoots replacing each removed vine; rotate pot 90 degrees weekly for even growth
Prevention
Implement 'light-first' policy: improve lighting conditions BEFORE pruning to ensure adequate energy for recovery; maintain 60%+ humidity during recovery to support new shoot development; fertilize monthly during active growth phase.
Protocol 4: leggy growth grow light supplementation · 87% confidence
Cause
Indoor environments frequently provide only 50-150 lux in corners and 200-500 lux near north-facing windows—far below the 1000-3000 lux threshold for compact pothos growth. During winter months at latitudes above 40 degrees, daylight hours drop below 8-10 hours with reduced intensity, creating seasonal etiolation even in previously thriving plants. Grow lights compensate by providing consistent photosynthetically active radiation (PAR) regardless of external conditions.
Solutions
- Select full-spectrum LED with color temperature 4000K-6500K (mimics natural daylight) and minimum 20-40W output
- Position light fixture 12-18 inches above tallest leaves; closer placement risks heat stress, further distance reduces intensity below effective levels
- Set timer for 12-14 hours daily on consistent schedule (e.g., 7am-9pm); use smart plug for automation
- Target 1000-2000 lux at leaf surface measured with phone lux meter app; adjust height until measurement falls within range
- Supplement rather than replace natural light—position grow light to augment existing window exposure, not as sole source
- Monitor for floppy leaves indicating heat stress; if observed, elevate light 6 inches and reduce duration by 2 hours
Prevention
Install grow light preemptively in autumn before winter light decline; maintain 12-hour minimum light exposure year-round combining natural and artificial sources; increase duration gradually (30 minutes weekly) when introducing new lights to prevent shock.
Protocol 5: leggy growth climbing support · 86% confidence
Cause
Pothos leaves naturally increase in size when nodes stabilize vertically against climbing supports. In hanging baskets, the plant prioritizes vine extension over leaf development. When provided vertical support, nodes anchor and trigger hormonal changes that increase leaf size by 50-200% and encourage fuller growth.
Solutions
- Install moss pole or trellis in pot center, securing base 2-3 inches deep
- Gently attach vines to support using soft plant ties or Velcro clips at 6-inch intervals
- Mist moss pole 2-3x weekly to encourage aerial root attachment
- As vines climb, leaf size increases dramatically over 4-8 weeks
- Rotate plant monthly to ensure even growth on all sides of support
Prevention
Provide climbing support early in plant development; transition from hanging baskets to vertical poles after 6-12 months; maintain humidity above 50% to support climbing adaptation.
Protocol 6: leggy growth prevention rotation strategy · 85% confidence
Cause
Phototropism causes pothos to grow directionally toward light sources, creating uneven architecture with stretched sections on the shaded side and compact growth facing the window. Over 2-3 months without rotation, plants develop lopsided form with bare areas on one side and dense foliage on the other. This asymmetry accelerates legginess as shaded sections compete for limited light, stretching further in an attempt to reach brighter areas.
Solutions
- Mark one side of pot with tape or sticker as reference point
- Rotate pot 90 degrees clockwise weekly (every 7 days) to distribute light exposure evenly around all sides
- For hanging baskets: spin 180 degrees every 2 weeks to reverse which side faces primary light source
- Supplement with mirror or reflective surface on dark side of room to bounce light back to shaded sections
- Monitor for persistent stretch on one side after 6 weeks of rotation—indicates insufficient overall light, not rotation failure
- Combine with quarterly pruning to maintain spherical shape rather than directional growth
Prevention
Establish rotation schedule linked to existing habit (e.g., every Sunday morning); set phone reminder until habit forms; use plant turntable or lazy Susan for effortless rotation in large specimens.
Protocol 7: leggy growth light requirements · 85% confidence
Cause
Pothos requires minimum 100-500 foot-candles (fc) of light intensity to maintain compact internode spacing. Below 100 fc, etiolation accelerates with internodes stretching 4-6 inches between leaves versus 1-2 inches under adequate light. The plant's photoreceptors trigger shade-avoidance responses at low light, prioritizing stem elongation over leaf development.
Solutions
- Measure current light with smartphone lux meter; convert lux to fc by dividing by 10.76
- Relocate to brighter indirect light: East/west windows provide 500-1500 fc; north windows provide 100-300 fc
- Maintain minimum 200 fc for 8+ hours daily to prevent etiolation; 400-800 fc promotes optimal compact growth
- Rotate plant 90 degrees weekly for even exposure
Prevention
Position pothos where it receives 200-400 foot-candles of bright indirect light; use light meter quarterly; supplement with grow lights during winter when natural light drops below 150 fc.
Pothos: Node Activation Lateral Growth
Node activation occurs when vertical orientation shifts hormone balance from auxin-dominated apical growth to cytokinin-driven lateral branching
87%
Pothos: Node Activation Lateral Growth
Node activation occurs when vertical orientation shifts hormone balance from auxin-dominated apical growth to cytokinin-driven lateral branching
Cause
Node activation occurs when vertical orientation shifts hormone balance from auxin-dominated apical growth to cytokinin-driven lateral branching. Each pothos node contains dormant axillary buds that remain suppressed under strong apical dominance in trailing vines. Thigmotropic contact signals trigger localized ethylene production, releasing buds from suppression and initiating new vine emergence.
Solutions
- Identify nodes along existing vines (swollen sections at leaf bases)
- Pin or secure lower nodes directly into pot soil near mother plant base
- Maintain high humidity (60-80%) around pinned nodes to encourage adventitious rooting
- New shoots emerge from activated nodes within 4-8 weeks
- Pin multiple nodes simultaneously to create bushier vertical growth
- Remove original securing ties once new shoots establish independent growth
Prevention
Avoid pruning during initial pole training period to maintain energy reserves. Ensure adequate light (200-400 foot-candles) to support multiple growth points. Fertilize lightly (1/4 strength) monthly during active growth phase.
Pothos: Vertical Growth Transition
Pothos leaf size is directly proportional to node stability and vertical orientation
91%
Pothos: Vertical Growth Transition
Pothos leaf size is directly proportional to node stability and vertical orientation
Cause
Pothos leaf size is directly proportional to node stability and vertical orientation. In horizontal or hanging growth, the plant prioritizes vine extension for canopy-seeking behavior, producing small leaves (2-4 inches) with minimal energy investment. When nodes stabilize vertically against a support structure, the plant transitions to 'mature growth phase'—redirecting energy from stem elongation to leaf expansion. Vertical support triggers hormonal cascades that increase cell division and expansion in developing leaf primordia, resulting in mature leaves 2-3 times larger (6-12 inches) with deeper fenestration potential.
Solutions
- Install moss pole or trellis and secure vines for vertical orientation
- Ensure at least 3-4 nodes maintain direct contact with moist support surface
- Provide bright indirect light (east/west window or grow light at 200-400 fc)
- Maintain 50-70% humidity to support larger leaf transpiration demands
- Fertilize monthly with diluted balanced fertilizer during active growth phase
- Observe new leaf size increase within 4-8 weeks of node stabilization
- Mature leaves will emerge progressively larger—expect 6-8 inch leaves within 3 months, up to 12 inches within 6-12 months
Prevention
Transition from hanging baskets to vertical supports after 6-12 months of growth or when leaves remain consistently small (<3 inches). Maintain consistent pole moisture and bright indirect light (200-400 foot-candles) to support mature growth energetics.
How do I set up a moss pole for my Pothos?
Vertical support triggers heteroblastic development - the plant's ability to produce different leaf forms based on growth phase
91%
How do I set up a moss pole for my Pothos?
Vertical support triggers heteroblastic development - the plant's ability to produce different leaf forms based on growth phase
Cause
Vertical support triggers heteroblastic development - the plant's ability to produce different leaf forms based on growth phase. In pothos, mature (climbing) leaves are 2-3x larger than juvenile (trailing) leaves due to enhanced vascular development and cell expansion. Vertical nodes receive increased auxin transport from attached aerial roots, stimulating photosynthetic tissue development. This mimics mature canopy growth in native tropical forests of the Society Islands.
Solutions
- Install 24-36 inch moss pole when vines reach 12-18 inches
- Secure multiple nodes along vine length, not just terminal growth tip
- Maintain high humidity to support aerial root development at each contact point
- Expect juvenile leaf size (2-3 inches) to transition to mature size (6-10+ inches) over 6-12 weeks
- Rotate plant quarterly for even light exposure to all vertical growth
- Monitor for fenestration (splits) appearing in mature leaves of some cultivars
Prevention
Transition to vertical support before vines exceed 24 inches in trailing length. Maintain consistent pole contact along entire vine length, not just at tips. Provide bright indirect light to support larger leaf development.
How do I set up a moss pole for my Pothos?
Successful pothos training requires secure yet non-damaging vine attachment to vertical supports
86%
How do I set up a moss pole for my Pothos?
Successful pothos training requires secure yet non-damaging vine attachment to vertical supports
Cause
Successful pothos training requires secure yet non-damaging vine attachment to vertical supports. Pothos stems are flexible but vascular tissue is vulnerable to constriction injury from tight bindings. The training process must balance physical support for thigmotropic response against preventing stem damage that would compromise nutrient flow and hormonal signaling essential for mature growth development.
Solutions
- Select attachment materials: soft plant ties, velcro straps, garden clips, or loosely tied twine
- Identify sturdy nodes (not just leaves) for attachment points—nodes provide structural strength
- Attach vines at 45-degree angles to pole surface for optimal aerial root contact
- Secure at 4-6 inch intervals along stem length with loop-around ties (not tight wrapping)
- Leave 1/4 inch slack in ties to accommodate stem expansion during growth
- Mist attachment points weekly to encourage aerial root adhesion to pole
- Reposition ties every 3-4 weeks as vines grow upward, maintaining consistent node-to-pole contact
Prevention
Use soft, adjustable ties that accommodate stem thickening as vines mature. Check attachment points monthly and loosen ties if constriction marks appear. Avoid wire, rubber bands, or tight plastic ties that damage epidermal tissue.
Propagation (3 topics · 20 cases)
Iba Hormone Rooting: How to Use for Pothos
Synthetic auxins like Indole-3-butyric acid (IBA) accelerate root initiation by mimicking natural indole-3-acetic acid (IAA) hormones
89%
Iba Hormone Rooting: How to Use for Pothos
Synthetic auxins like Indole-3-butyric acid (IBA) accelerate root initiation by mimicking natural indole-3-acetic acid (IAA) hormones
Cause
Synthetic auxins like Indole-3-butyric acid (IBA) accelerate root initiation by mimicking natural indole-3-acetic acid (IAA) hormones. IBA at 0.25-0.8 mg/L concentration triggers earlier cambium cell division and increases root primordia formation by 40-60% compared to untreated cuttings. The hormone is absorbed through the cut surface and transported to meristematic tissue where it stimulates DNA replication and cell division. Unlike natural IAA which breaks down rapidly, IBA remains active for 7-14 days, providing sustained hormonal signaling during the critical root initiation window.
Solutions
- Take 4-6 inch cuttings with clean, sharp scissors sterilized with alcohol
- Apply rooting hormone powder containing IBA (0.25-0.8 mg/L equivalent) to the cut end
- Alternatively, use liquid rooting hormone by dipping cutting for 5-10 seconds
- Allow treated cutting to callus for 30-60 minutes before placing in water (reduces hormone wash-off)
- Place in water and change every 3-5 days as standard protocol
- Expect root initials 3-7 days earlier than untreated cuttings
- Do not over-apply—excess hormone can cause tissue damage and inhibit rooting
Prevention
Take cuttings from healthy, vigorous parent plants with high natural auxin levels. Apply hormone within 30 minutes of cutting to maximize absorption before the wound calluses over.
How do I propagate my Pothos?
Successful pothos propagation requires selecting stem segments containing 2-3 nodes (the brown lines where leaves meet stem) because adventitious roots emerge exclusively from nodal tissue, not from internodal stem sections
18 protocols
78–92%
How do I propagate my Pothos?
Successful pothos propagation requires selecting stem segments containing 2-3 nodes (the brown lines where leaves meet stem) because adventitious roots emerge exclusively from nodal tissue, not from internodal stem sections
Protocol 1: node selection propagation · 92% confidence
Cause
Successful pothos propagation requires selecting stem segments containing 2-3 nodes (the brown lines where leaves meet stem) because adventitious roots emerge exclusively from nodal tissue, not from internodal stem sections. Single-node cuttings have limited root primordia and slower establishment, while leaf-only cuttings without nodes cannot root at all. The timing of node selection also matters—nodes on actively growing spring/summer vines root 2-3x faster than dormant winter growth.
Solutions
- Identify nodes correctly: Look for brown lines perpendicular to stem where leaves attach, or small bumps where aerial roots emerge
- Select vine sections: Choose 4-6 inch stem segments containing 2-3 nodes minimum for maximum rooting potential
- Make clean cuts: Use sterile sharp scissors to cut 1/2 inch below the lowest node, ensuring the node is included
- Remove lower leaves: Strip leaves from the bottom 1-2 nodes to prevent submersion rot while keeping top leaves for photosynthesis
- Timing optimization: Take cuttings from actively growing vines (new leaf emergence visible) for 2-3 week root development vs 6-8 weeks from dormant growth
Prevention
Take cuttings during active growing season (spring through early fall) for fastest rooting; always verify 2-3 visible nodes per cutting by looking for brown lines or aerial root bumps; avoid taking cuttings from flowering vines as energy is diverted to bloom production; sterilize shears between cuts to prevent disease transmission.
Protocol 2: water propagation rotting · 91% confidence
Cause
Water propagation of pothos (Epipremnum aureum) cuttings develops stem rot when stagnant water creates anaerobic conditions below 5mg/L dissolved oxygen, allowing bacterial soft rot pathogens (Erwinia spp.) to colonize wounded stem tissue. The combination of water roots lacking structural integrity for soil transition, organic debris in water, and extended submersion creates ideal conditions for bacterial proliferation at the submerged stem cut.
Solutions
- Inspect all cuttings immediately: Remove any soft, mushy, or discolored stem sections with sterile scissors, cutting 1 inch above visible rot lines
- Sterilize survivors: Rinse firm roots under lukewarm water; soak in 3% hydrogen peroxide diluted 1:4 with water for 2 minutes to kill surface pathogens
- Repropagate in fresh medium: Place cleaned cuttings in clean water (changed weekly) with 1-2 drops hydrogen peroxide per cup, or plant directly into moist well-draining potting mix
- For soil transition: Use 50% peat-based potting soil with 30% perlite and 20% orchid bark; avoid perlite-only transitions which create moisture inconsistencies
- Monitor for 2-3 weeks: Keep soil consistently moist (not soggy) in bright indirect light; bottom-water only to encourage downward root growth
Prevention
Change propagation water every 5-7 days using dechlorinated or distilled water at 65-75°F; add 3% hydrogen peroxide at 2-3 drops per cup to maintain oxygenation; use opaque containers to prevent light-induced algae that harbors bacteria; sterilize all tools with 70% alcohol before handling cuttings; transition to soil when roots reach 2-3 inches long.
Protocol 3: tissue culture propagation · 91% confidence
Cause
In vitro direct organogenesis enables rapid pothos multiplication through shoot proliferation on optimized MS medium. The cytokinin combination of 6-benzylaminopurine (BA) and kinetin (Kn) at specific concentrations outperforms single-hormone treatments by stimulating meristematic activity. Root induction requires auxin (α-NAA) with activated carbon to prevent phenolic oxidation and achieve 93.33% rooting success.
Solutions
- Prepare explants from healthy mother plants with at least 2 nodes
- Culture on MS medium with 2.5 mg/L BA + 1.0 mg/L Kn for 4-6 weeks to induce shoot clusters
- Transfer shoots to rooting medium: MS + 0.25 mg/L α-NAA + 0.5 g/L activated carbon
- Expect 93.33% rooting rate with 1.93 roots per explant and 2.37 cm root length
- Acclimatize rooted plantlets gradually: 1 week in high humidity, then transfer to 1:1 soil:coir mix
Prevention
Use only sterilized equipment and explants to prevent contamination. Maintain consistent temperature (22-25°C) and humidity (>70%) during in vitro phases.
Protocol 4: sphagnum moss propagation · 90% confidence
Cause
The primary issue stems from using perlite in a wet-dry cycle during transition from water propagation, which retained uneven moisture and created anaerobic pockets fostering fungal mold and bacterial stem/root rot. Pothos (Epipremnum aureum) water roots lack the robust structure for such mechanical stress, leading to tissue breakdown rather than acclimation; indirect afternoon sun is suitable but insufficient to dry perlite fully, exacerbating stagnation.
Solutions
- Inspect all cuttings: Remove all soft, mushy, or discolored roots/stems with sterile scissors, making fresh cuts above rot lines.
- Clean survivors: Rinse firm roots under lukewarm water; optionally dip in 3% hydrogen peroxide diluted 1:4 with water for 1-2 minutes to kill pathogens without burning.
- Repropagate: Place cleaned cuttings in clean water (change weekly) or directly into moist, well-draining potting mix (e.g., 50% peat/perlite + orchid bark); avoid perlite-only.
- Monitor transition: Keep soil consistently moist (not soggy) for 2-3 weeks in bright indirect light; use bottom watering to encourage downward roots.
- Quarantine: Isolate affected plants to prevent spread via airborne spores or contaminated tools.
Prevention
Skip perlite transitions; move water-rooted pothos directly to airy, sterile soil mixes high in drainage (e.g., 30% perlite + coco coir). Ensure 50-70% humidity with good airflow (fan), weekly water changes in propagation, and sterilize tools. Acclimate gradually by reducing water volume over 1 week pre-planting.
Protocol 5: propagation oxygen depletion · 89% confidence
Cause
Pothos water propagation fails to root when dissolved oxygen in stagnant water drops below 4mg/L, triggering anaerobic conditions that prevent root primordia development. Tap water chloramines and chlorine further inhibit root growth by damaging delicate meristematic tissue. After 2+ weeks without water changes, the oxygen depletion combined with bacterial biofilm accumulation creates an environment where cuttings survive but cannot initiate adventitious root formation.
Solutions
- Rinse cuttings and roots thoroughly under lukewarm water to remove biofilm and debris
- Sterilize propagation container completely with 3% hydrogen peroxide or 70% alcohol
- Refill with fresh dechlorinated water at room temperature (65-75°F)
- Add hydrogen peroxide oxygenation: 1-2 drops of 3% H2O2 per cup of water
- Optional nutrient boost: Add half-strength liquid fertilizer once roots begin emerging
- Maintain schedule: Change water every 5-7 days without fail until roots reach 2 inches
Prevention
Use filtered or distilled water exclusively for propagation; change water every 5-7 days to maintain oxygen saturation; add 1-2 drops of 3% hydrogen peroxide per cup to boost dissolved oxygen; maintain water temperature at 65-75°F for optimal metabolic activity; use clear containers only if changed weekly, otherwise use opaque vessels to prevent algae.
Protocol 6: propagation cutting failure · 88% confidence
Cause
Pothos cuttings fail when the original root system is underdeveloped or compromised, often from being planted as fresh cuttings before establishing adequate roots to support leaf transpiration. Insufficient roots cannot uptake enough water to sustain full leaf mass, causing natural shedding of older leaves as the plant redirects limited resources to root development. This appears as leaf drop, curling, and decline despite proper care—it's actually normal physiological adjustment rather than disease.
Solutions
- Assess root development: Gently unpot and inspect—healthy roots should be firm, white or yellow, and numerous enough to hold soil ball together
- Match pot to roots: If root system is sparse, downsize to 3-4 inch pot to prevent excess soil moisture around limited roots
- Reduce transpiration load: Trim 20-30% of leaves (oldest first) to match root uptake capacity during establishment
- Soil aeration: Fluff top 2-3 inches of soil with fork or chopstick weekly to introduce oxygen without disturbing roots
- Watering adjustment: Use lift-test method—water only when pot feels very light, typically every 7-14 days for establishing cuttings
- Patience timeline: Expect 4-6 week recovery period; new growth indicates successful establishment
Prevention
Root cuttings in water or LECA until roots reach 2-3 inches before planting in soil; use smaller 3-4 inch pots for new cuttings to match root-to-soil ratio; maintain 60%+ humidity during establishment period; avoid fertilizing until 4-6 weeks after planting when roots are established.
Protocol 7: water propagation oxygen crash · 88% confidence
Cause
Pothos water propagation fails when oxygen depletion crosses the critical threshold at 10-14 days. Stagnant water in closed containers develops anaerobic bacterial communities that attack vulnerable water roots. Community data shows the majority of failed water propagations involved water unchanged for 14+ days. The roots suffocate as dissolved oxygen crashes, then bacterial soft rot colonizes the compromised tissue.
Solutions
- Establish 7-day maximum water change schedule regardless of water clarity
- Use room-temperature dechlorinated or filtered water - avoid chlorinated tap water that stresses cut tissue
- Add half-strength liquid fertilizer only after roots reach 1 inch length; earlier fertilization promotes bacterial growth
- When changing water, gently rinse roots to remove biofilm and inspect for early rot signs
- For propagations in clear glass: move to opaque containers after roots emerge to prevent light-induced issues
Prevention
Mark calendar on day 1 of propagation; water changes are non-negotiable every 7 days maximum. Use multiple small containers rather than one large vessel - this prevents total loss if one container develops contamination. Bottom-heat mats at 70-75°F accelerate rooting, reducing time in vulnerable water phase.
Protocol 8: propagation rot · 87% confidence
Cause
Pothos water propagation failure occurs when cuttings develop mushy stems or rot instead of healthy white roots, typically from bacterial contamination in stagnant water or using unhealthy parent material. The sugars released from cut stems feed bacteria that outcompete root primordia development, especially in warm conditions with infrequent water changes.
Solutions
- Inspect cutting daily—healthy stems remain firm, rotting stems turn translucent/mushy
- Trim 1/2 inch from cutting base if any mushiness appears, creating fresh wound
- Change water completely and clean container with mild soap before reinserting
- Move to slightly brighter indirect light to accelerate root development
- If rot persists on same cutting after 2 trims, discard and start fresh cutting from healthy mother plant
Prevention
Take cuttings only from healthy vigorous stems with no signs of disease; change propagation water every 3-5 days to prevent bacterial buildup; use room temperature dechlorinated water (let tap water sit 24 hours); place in bright indirect light (not direct sun) to encourage rooting without algae growth; sterilize containers between uses.
Protocol 9: leggy vine propagation · 87% confidence
Cause
Mature pothos develop bare lower stems due to age-related leaf senescence and apical dominance directing growth to vine tips. The existing vines contain dormant adventitious root primordia at every node, allowing cuttings to root rapidly and repopulate the mother pot.
Solutions
- Cut leggy vines into 4-6 inch sections with 2-3 nodes each
- Remove bottom 1-2 leaves to expose nodes; keep top 2-4 leaves
- Root in water: submerge nodes only, change water weekly, roots emerge in 2-4 weeks
- Replant 4-6 rooted cuttings back into mother pot, spacing evenly around perimeter
Prevention
Propagate every 6 months to prevent extreme legginess; trim vines before they exceed 3 feet; keep 2-3 rooted backup cuttings as insurance.
Protocol 10: oxygen requirements water propagation · 86% confidence
Cause
Water propagation fails when dissolved oxygen (DO) levels drop below 4mg/L, creating hypoxic conditions that trigger anaerobic bacterial proliferation (Pythium, Erwinia). Stagnant water loses oxygen through microbial consumption and lacks the aeration that occurs in soil through natural gas exchange. Cuttings release sugars and organic compounds during the initial wound response, which feed bacterial populations in oxygen-depleted water. Without the 6-8mg/L DO levels found in well-aerated systems, root cells cannot perform aerobic respiration required for energy production and growth.
Solutions
- Change water completely every 3-5 days with fresh room-temperature water
- Add 1-2 drops of 3% hydrogen peroxide per cup of water to temporarily boost oxygen and suppress anaerobes
- Use containers with wide openings to maximize air-water surface exchange
- Avoid overcrowding: maximum 2-3 cuttings per vessel to prevent oxygen depletion
- Position in bright indirect light which stimulates photosynthesis and oxygen release from cutting leaves
- If water turns cloudy or smells: discard immediately, rinse cutting, treat with diluted H2O2, start fresh
Prevention
Change propagation water every 3-5 days to replenish dissolved oxygen and remove bacterial biofilm precursors. Use clear glass containers to monitor water clarity—cloudiness indicates bacterial bloom.
Protocol 11: algae confusion water propagation · 86% confidence
Cause
Pothos propagators frequently misdiagnose light-induced algae on water roots as bacterial rot, leading to unnecessary interventions or discarded cuttings. Clear glass containers allow light penetration that triggers brown algae growth on root hairs - this appears as brownish discoloration but lacks the mushy texture, foul odor, and spreading pattern of true bacterial rot. The algae is superficial and non-pathogenic, while true rot affects the stem base and spreads upward.
Solutions
- Diagnostic test: Gently squeeze suspected roots - algae-covered roots remain firm; rotting roots are mushy and disintegrate
- Smell test: True bacterial rot produces distinct foul/sour odor; algae has no odor
- Progression check: Algae appears as uniform surface coating; rot spreads from stem base upward
- If algae confirmed: simply transfer to opaque container - no other treatment needed
- If rot confirmed: follow full H2O2 protocol and repot; discard if stem base is affected
Prevention
Use opaque containers, mason jars with sleeves, or cover clear vessels with paper/felt to block light. This prevents algae entirely while maintaining visibility for root monitoring. If using clear containers for observation, wrap with removable cover that can be removed briefly for checks then replaced.
Protocol 12: water propagation rot · 85% confidence
Cause
Static water propagation drops dissolved oxygen below 5mg/L after 2+ weeks. Root respiration depletes oxygen, creating anaerobic conditions favoring fungal pathogens distinct from Pythium soil rot.
Solutions
- 1. Rinse roots to remove debris
- 2. Cut brown/mushy roots with sanitized shears
- 3. Sterilize propagation jars
- 4. Use fresh filtered water with 1-2 drops H2O2 per cup
- 5. Add half-strength fertilizer; change water biweekly
Prevention
Use filtered water; change every 2 weeks; sanitize jars; maintain 65-75°F.
Protocol 13: propagation from diseased plants · 85% confidence
Cause
Propagation from diseased pothos requires identifying clean tissue nodes that have not been colonized by pathogens. Fungal spores colonize leaf tissue first, then move to stems; bacterial pathogens spread through vascular tissue but may not have reached all nodes. Virus is systemic and will transmit 100% to cuttings. Recovery success depends on selecting nodes with firm, healthy tissue showing no discoloration, spots, or softness.
Solutions
- Identify clean vine: Select stem with no spots, discoloration, or softness
- Cut well below disease: Make cutting 3-4 nodes below any visible infection
- Inspect node tissue: Cross-section should show white/green tissue, not brown or black
- Sterilize between cuts: Wipe blade with 70% alcohol between every cutting
- Root in clean medium: Use fresh perlite or sphagnum moss—not soil from diseased pot
- Isolate cuttings: Root in separate location from parent plant and main collection
- Monitor for 21 days: Watch for spot development on new growth; discard if symptoms appear
Prevention
Always propagate from healthy plants when possible; if disease present, select vines with newest growth furthest from infection; use sharp sterile blade to minimize tissue damage; avoid propagation during active disease outbreaks.
Protocol 14: propagation · 85% confidence
Cause
All cuttings taken from an infected mother plant inherit systemic pathogens (fungal or bacterial) present in the vascular tissue. Phyllosticta, Pseudomonas, and other pathogens colonize stems and propagate through cuttings even when leaves appear healthy. Water droplets from misting or poor air circulation accelerate spread between cuttings in propagation setups where plants are clustered closely together.
Solutions
- Inspect mother plant carefully: look for spots, discoloration, or lesions on leaves and stems before propagating
- Select cuttings ONLY from visibly healthy upper stems with no spots or discoloration
- Sterilize propagation tools with 70% isopropyl alcohol before EACH cutting and between plants
- Space cuttings minimum 3 inches apart in propagation vessel to prevent leaf contact and pathogen spread
- Monitor propagated cuttings daily for 14 days; discard any showing spots to prevent spread to healthy cuttings
Prevention
Inspect mother plants thoroughly for spots, lesions, or discoloration before taking cuttings. Choose healthy tissue from upper stems showing no symptoms. Take cuttings during dry conditions; avoid propagating from plants showing any disease signs. Space cuttings minimum 3 inches apart during propagation to prevent cross-contamination.
Protocol 15: propagation growth differential · 85% confidence
Cause
Pothos cuttings exhibit differential growth rates based on node origin due to auxin gradients and stored carbohydrate reserves. Tip cuttings contain established meristems with high auxin concentrations and aerial roots, enabling rapid transition to active growth. Middle-node cuttings must first establish new meristematic tissue and root systems before producing new vines, causing delayed apical dominance shift and slower visible growth.
Solutions
- 1. Select tip cuttings with 2-3 nodes and visible aerial roots
- 2. Place in bright indirect light (200-400 fc)
- 3. Root in water (change weekly) or directly in well-draining mix
- 4. Expect new vine growth within 2-4 weeks for tip cuttings vs 6-8 weeks for middle cuttings
- 5. Transplant when roots reach 2+ inches in length
Prevention
Always propagate pothos from tip cuttings with visible aerial roots when rapid establishment is desired; use bright indirect light during rooting to support photosynthesis.
Protocol 16: soil propagation · 84% confidence
Cause
Soil propagation provides immediate root-to-substrate contact and eliminates transplant shock, but requires precise moisture management to prevent rotting before roots develop. The ideal propagation medium balances water retention (to prevent cutting desiccation) with aeration (to provide oxygen to developing roots). Standard potting soil retains too much moisture for unrooted cuttings, leading to anaerobic conditions and bacterial soft rot. Specialized propagation mixes create the optimal air-to-water ratio (minimum 30% pore space) that supports cell division in root meristems while preventing pathogen proliferation.
Solutions
- Prepare sterile medium: Use 50% perlite or coarse sand mixed with 50% peat moss or coco coir for optimal drainage
- Pre-moisten substrate: Add water until medium feels like wrung-out sponge; avoid waterlogged conditions
- Planting depth: Insert cutting 1-2 inches deep; firm soil gently around stem for contact but avoid compaction
- Humidity maintenance: Cover with clear plastic dome or bag to maintain 70-80% humidity; vent daily for 10 minutes
- Watering technique: Mist surface lightly every 2-3 days; never saturate—cuttings lack roots to absorb excess moisture
- Root checking: Gently tug cutting after 2-3 weeks; resistance indicates root formation—do not disturb before
Prevention
Always use sterile containers and fresh medium; reuse of old potting soil introduces pathogens. Bottom-water only after roots establish (4+ weeks) to avoid stem rot. Maintain 65-75°F for optimal root cell division rates.
Protocol 17: water propagation · 82% confidence
Cause
Water propagation exposes developing root systems for real-time monitoring but creates a hypoxic environment that delays root initiation compared to soil. The lack of oxygen tension in stagnant water triggers anaerobic bacterial proliferation, while clear containers allow beneficial light exposure but also algae growth. Successful water propagation requires balancing visibility with oxygenation—roots need dissolved oxygen above 4mg/L for healthy development. The transparent medium enables early detection of root primordia emergence (typically 1-4 weeks depending on species), allowing precise timing for soil transition before water-adapted roots become too brittle for transplant.
Solutions
- Select appropriate vessels: Use clear glass containers to monitor root progress; avoid colored or opaque vessels
- Water quality management: Use room-temperature dechlorinated water; chlorine inhibits root cell division
- Node positioning: Submerge only the node and 1 inch of stem; keep leaves above water line to prevent rot
- Oxygenation protocol: Change water every 3-5 days completely; add air stone for continuous oxygenation if available
- Light management: Place in bright indirect light; avoid direct sun which promotes algae and overheats water
- Transition timing: Transfer to soil when roots reach 2-3 inches with visible root hairs; delay causes water-root brittleness
Prevention
Never leave cuttings in water longer than 8 weeks; roots adapted to water develop different cellular structure (thinner cell walls, no root hairs) that breaks easily in soil. Transition before roots become overcrowded or brown/soft.
Protocol 18: propagation shock · 78% confidence
Cause
Underdeveloped root systems from fresh cuttings cannot sustain full leaf mass. Natural leaf shedding balances root uptake capacity; firm roots indicate healthy propagation, not rot.
Solutions
- 1. Inspect roots: healthy = firm/white/bright yellow
- 2. Discard only mushy/brown sections
- 3. Repot in well-draining mix with perlite
- 4. Water only when pot feels very light (3-4 weeks)
- 5. Trim excessive leaves to reduce transpiration stress
Prevention
Start propagations in smaller pots or LECA/water until roots develop 2-4 weeks. Use perlite-amended soil.
Rooting Hormones: How to Use for Pothos
Rooting hormones contain synthetic auxins—primarily indole-3-butyric acid (IBA) and naphthaleneacetic acid (NAA)—that mimic natural plant hormones (indole-3-acetic acid) to accelerate adventitious root formation
87%
Rooting Hormones: How to Use for Pothos
Rooting hormones contain synthetic auxins—primarily indole-3-butyric acid (IBA) and naphthaleneacetic acid (NAA)—that mimic natural plant hormones (indole-3-acetic acid) to accelerate adventitious root formation
Cause
Rooting hormones contain synthetic auxins—primarily indole-3-butyric acid (IBA) and naphthaleneacetic acid (NAA)—that mimic natural plant hormones (indole-3-acetic acid) to accelerate adventitious root formation. These compounds stimulate cell elongation and division in the cambium layer, triggering the dedifferentiation of stem cells into root primordia. Scientific studies demonstrate that optimal concentrations (0.25-0.5 mg/L) significantly increase rooting percentage (up to 93% in pothos) compared to untreated cuttings. However, excessive concentrations cause hormone toxicity, inhibiting rather than promoting root growth through feedback inhibition mechanisms.
Solutions
- Select appropriate formulation: Use powder hormones for easy application; liquid concentrates for precise dilution
- Application technique: Dip cut end 1/2 inch into powder; tap excess—thick coating prevents proper stem-to-soil contact
- Concentration guidelines: 0.1-0.3% IBA for herbaceous houseplants (pothos, philodendron); 0.5-0.8% for woody stems
- Timing: Apply immediately after cutting—auxins degrade rapidly; do not store treated cuttings
- Storage of hormones: Keep powder dry and sealed; moisture causes clumping and reduced efficacy; replace annually
- Alternative natural option: Willow water contains salicylic acid and natural auxins—soak cuttings 24 hours before planting
Prevention
Never exceed recommended concentrations—auxin overdose inhibits rooting and causes stem necrosis. Wear gloves when handling concentrated liquid hormones. Discard cuttings that show blackening or softening after hormone application.
Care Methods (7 topics · 10 cases)
Hydrogen Peroxide Drench: How to Use for Pothos
The primary issue stems from using perlite in a wet-dry cycle during transition from water propagation, which retained uneven moisture and created anaerobic pockets fostering fungal mold and bacterial stem/root rot
3 protocols
89–90%
Hydrogen Peroxide Drench: How to Use for Pothos
The primary issue stems from using perlite in a wet-dry cycle during transition from water propagation, which retained uneven moisture and created anaerobic pockets fostering fungal mold and bacterial stem/root rot
Protocol 1: hydrogen peroxide drench · 90% confidence
Cause
The primary issue stems from using perlite in a wet-dry cycle during transition from water propagation, which retained uneven moisture and created anaerobic pockets fostering fungal mold and bacterial stem/root rot. Pothos (Epipremnum aureum) water roots lack the robust structure for such mechanical stress, leading to tissue breakdown rather than acclimation; indirect afternoon sun is suitable but insufficient to dry perlite fully, exacerbating stagnation.
Solutions
- Inspect all cuttings: Remove all soft, mushy, or discolored roots/stems with sterile scissors, making fresh cuts above rot lines.
- Clean survivors: Rinse firm roots under lukewarm water; optionally dip in 3% hydrogen peroxide diluted 1:4 with water for 1-2 minutes to kill pathogens without burning.
- Repropagate: Place cleaned cuttings in clean water (change weekly) or directly into moist, well-draining potting mix (e.g., 50% peat/perlite + orchid bark); avoid perlite-only.
- Monitor transition: Keep soil consistently moist (not soggy) for 2-3 weeks in bright indirect light; use bottom watering to encourage downward roots.
- Quarantine: Isolate affected plants to prevent spread via airborne spores or contaminated tools.
Prevention
Skip perlite transitions; move water-rooted pothos directly to airy, sterile soil mixes high in drainage (e.g., 30% perlite + coco coir). Ensure 50-70% humidity with good airflow (fan), weekly water changes in propagation, and sterilize tools. Acclimate gradually by reducing water volume over 1 week pre-planting.
Protocol 2: hydrogen peroxide drench · 90% confidence
Cause
The primary issue stems from using perlite in a wet-dry cycle during transition from water propagation, which retained uneven moisture and created anaerobic pockets fostering fungal mold and bacterial stem/root rot. Pothos (Epipremnum aureum) water roots lack the robust structure for such mechanical stress, leading to tissue breakdown rather than acclimation; indirect afternoon sun is suitable but insufficient to dry perlite fully, exacerbating stagnation.
Solutions
- Inspect all cuttings: Remove all soft, mushy, or discolored roots/stems with sterile scissors, making fresh cuts above rot lines.
- Clean survivors: Rinse firm roots under lukewarm water; optionally dip in 3% hydrogen peroxide diluted 1:4 with water for 1-2 minutes to kill pathogens without burning.
- Repropagate: Place cleaned cuttings in clean water (change weekly) or directly into moist, well-draining potting mix (e.g., 50% peat/perlite + orchid bark); avoid perlite-only.
- Monitor transition: Keep soil consistently moist (not soggy) for 2-3 weeks in bright indirect light; use bottom watering to encourage downward roots.
- Quarantine: Isolate affected plants to prevent spread via airborne spores or contaminated tools.
Prevention
Skip perlite transitions; move water-rooted pothos directly to airy, sterile soil mixes high in drainage (e.g., 30% perlite + coco coir). Ensure 50-70% humidity with good airflow (fan), weekly water changes in propagation, and sterilize tools. Acclimate gradually by reducing water volume over 1 week pre-planting.
Protocol 3: propagation hydrogen peroxide protocol · 89% confidence
Cause
Advanced bacterial soft rot in pothos water propagation occurs when anaerobic conditions allow Erwinia and Pythium species to colonize cut tissue. The rot produces characteristic mushy texture, yellowing stems, and foul odor. Unlike soil rot, water propagation rot spreads rapidly through the shared water medium, threatening all cuttings in the same container. The bacterial biofilm creates a protective layer resisting simple water changes.
Solutions
- Immediate triage: Remove all cuttings from contaminated water; do not return any to same vessel
- Sterilize propagation jars completely with 70% isopropyl alcohol or bleach solution
- Rinse all roots under lukewarm running water to dislodge bacterial biofilm
- Prepare 3% hydrogen peroxide solution (1:1 dilution with water) in clean container
- Soak affected roots for 20 minutes to oxygenate tissue and kill surface pathogens
- Repot survivors immediately in fresh, dry well-draining mix; avoid returning to water
- Discard cuttings with mushy stems - they will not recover even with treatment
Prevention
Preventive H2O2 protocol: Add 1 drop of 3% hydrogen peroxide per cup of propagation water weekly. This maintains oxygen levels and suppresses bacterial colonization without harming roots. Never use full-strength H2O2 on cuttings - it burns tender tissue.
Low Maintenance Care: Pothos Guide
Pothos (Epipremnum aureum) possesses exceptional adaptability to both soil-based and hydroponic cultivation, with a unique bacterial community that facilitates nutrient acquisition even in low-nutrient conditions
93%
Low Maintenance Care: Pothos Guide
Pothos (Epipremnum aureum) possesses exceptional adaptability to both soil-based and hydroponic cultivation, with a unique bacterial community that facilitates nutrient acquisition even in low-nutrient conditions
Cause
Pothos (Epipremnum aureum) possesses exceptional adaptability to both soil-based and hydroponic cultivation, with a unique bacterial community that facilitates nutrient acquisition even in low-nutrient conditions. The plant's fibrous adventitious roots and vining growth habit enable it to thrive across diverse light levels from low to bright indirect light.
Solutions
- 1. Water when top 2 inches of soil dry - typically every 7-14 days depending on light
- 2. Use bottom-watering for even saturation: place pot in water for 15-30 minutes, then drain
- 3. Provide bright indirect light (east/west window) for optimal growth; tolerates low light
- 4. Propagate easily from cuttings: 4-6 inch segments with nodes root in water within 1-2 weeks
Prevention
Avoid overwatering by checking full soil profile, not just surface - roots cluster at bottom and stay wet longer. Use well-draining mix (50% potting soil, 30% perlite, 20% orchid bark). Trim yellowing leaves promptly to redirect energy.
Pothos: Root Development Stages
Water propagation initiates three distinct root development phases in Pothos cuttings
88%
Pothos: Root Development Stages
Water propagation initiates three distinct root development phases in Pothos cuttings
Cause
Water propagation initiates three distinct root development phases in Pothos cuttings. Phase 1 (Days 1-7): Wound response activates cambium cells at the node to produce callus tissue, sealing the cut surface and preventing bacterial ingress. Phase 2 (Days 7-14): Meristematic cells in the callus differentiate into root primordia triggered by auxin accumulation and oxygen availability above 4mg/L. Phase 3 (Days 14-28): Root primordia elongate into functional water roots with specialized aerenchyma tissue for oxygen transport in aquatic environments.
Solutions
- Take 4-6 inch cuttings with minimum 2 nodes below water line
- Remove lower leaves to reduce transpiration load on developing roots
- Use room-temperature dechlorinated water (let tap water sit 24 hours)
- Change water every 3-5 days to maintain dissolved oxygen above 4mg/L threshold
- Position in bright indirect light (1000-2000 lux) to support photosynthesis without leaf burn
- Expect first visible root initials at 7-14 days; substantial root system by 3-4 weeks
Prevention
Use cuttings with at least 2-3 nodes to ensure sufficient meristematic tissue for root initiation. Maintain water temperature between 65-75°F (18-24°C) to optimize cellular respiration rates during root development.
Pothos: Root Surgery
The primary issue stems from using perlite in a wet-dry cycle during transition from water propagation, which retained uneven moisture and created anaerobic pockets fostering fungal mold and bacterial stem/root rot
2 protocols
90–90%
Pothos: Root Surgery
The primary issue stems from using perlite in a wet-dry cycle during transition from water propagation, which retained uneven moisture and created anaerobic pockets fostering fungal mold and bacterial stem/root rot
Protocol 1: root surgery · 90% confidence
Cause
The primary issue stems from using perlite in a wet-dry cycle during transition from water propagation, which retained uneven moisture and created anaerobic pockets fostering fungal mold and bacterial stem/root rot. Pothos (Epipremnum aureum) water roots lack the robust structure for such mechanical stress, leading to tissue breakdown rather than acclimation; indirect afternoon sun is suitable but insufficient to dry perlite fully, exacerbating stagnation.
Solutions
- Inspect all cuttings: Remove all soft, mushy, or discolored roots/stems with sterile scissors, making fresh cuts above rot lines.
- Clean survivors: Rinse firm roots under lukewarm water; optionally dip in 3% hydrogen peroxide diluted 1:4 with water for 1-2 minutes to kill pathogens without burning.
- Repropagate: Place cleaned cuttings in clean water (change weekly) or directly into moist, well-draining potting mix (e.g., 50% peat/perlite + orchid bark); avoid perlite-only.
- Monitor transition: Keep soil consistently moist (not soggy) for 2-3 weeks in bright indirect light; use bottom watering to encourage downward roots.
- Quarantine: Isolate affected plants to prevent spread via airborne spores or contaminated tools.
Prevention
Skip perlite transitions; move water-rooted pothos directly to airy, sterile soil mixes high in drainage (e.g., 30% perlite + coco coir). Ensure 50-70% humidity with good airflow (fan), weekly water changes in propagation, and sterilize tools. Acclimate gradually by reducing water volume over 1 week pre-planting.
Protocol 2: root surgery · 90% confidence
Cause
The primary issue stems from using perlite in a wet-dry cycle during transition from water propagation, which retained uneven moisture and created anaerobic pockets fostering fungal mold and bacterial stem/root rot. Pothos (Epipremnum aureum) water roots lack the robust structure for such mechanical stress, leading to tissue breakdown rather than acclimation; indirect afternoon sun is suitable but insufficient to dry perlite fully, exacerbating stagnation.
Solutions
- Inspect all cuttings: Remove all soft, mushy, or discolored roots/stems with sterile scissors, making fresh cuts above rot lines.
- Clean survivors: Rinse firm roots under lukewarm water; optionally dip in 3% hydrogen peroxide diluted 1:4 with water for 1-2 minutes to kill pathogens without burning.
- Repropagate: Place cleaned cuttings in clean water (change weekly) or directly into moist, well-draining potting mix (e.g., 50% peat/perlite + orchid bark); avoid perlite-only.
- Monitor transition: Keep soil consistently moist (not soggy) for 2-3 weeks in bright indirect light; use bottom watering to encourage downward roots.
- Quarantine: Isolate affected plants to prevent spread via airborne spores or contaminated tools.
Prevention
Skip perlite transitions; move water-rooted pothos directly to airy, sterile soil mixes high in drainage (e.g., 30% perlite + coco coir). Ensure 50-70% humidity with good airflow (fan), weekly water changes in propagation, and sterilize tools. Acclimate gradually by reducing water volume over 1 week pre-planting.
Systemic Granules: How to Use for Pothos
The primary issue stems from using perlite in a wet-dry cycle during transition from water propagation, which retained uneven moisture and created anaerobic pockets fostering fungal mold and bacterial stem/root rot
90%
Systemic Granules: How to Use for Pothos
The primary issue stems from using perlite in a wet-dry cycle during transition from water propagation, which retained uneven moisture and created anaerobic pockets fostering fungal mold and bacterial stem/root rot
Cause
The primary issue stems from using perlite in a wet-dry cycle during transition from water propagation, which retained uneven moisture and created anaerobic pockets fostering fungal mold and bacterial stem/root rot. Pothos (Epipremnum aureum) water roots lack the robust structure for such mechanical stress, leading to tissue breakdown rather than acclimation; indirect afternoon sun is suitable but insufficient to dry perlite fully, exacerbating stagnation.
Solutions
- Inspect all cuttings: Remove all soft, mushy, or discolored roots/stems with sterile scissors, making fresh cuts above rot lines.
- Clean survivors: Rinse firm roots under lukewarm water; optionally dip in 3% hydrogen peroxide diluted 1:4 with water for 1-2 minutes to kill pathogens without burning.
- Repropagate: Place cleaned cuttings in clean water (change weekly) or directly into moist, well-draining potting mix (e.g., 50% peat/perlite + orchid bark); avoid perlite-only.
- Monitor transition: Keep soil consistently moist (not soggy) for 2-3 weeks in bright indirect light; use bottom watering to encourage downward roots.
- Quarantine: Isolate affected plants to prevent spread via airborne spores or contaminated tools.
Prevention
Skip perlite transitions; move water-rooted pothos directly to airy, sterile soil mixes high in drainage (e.g., 30% perlite + coco coir). Ensure 50-70% humidity with good airflow (fan), weekly water changes in propagation, and sterilize tools. Acclimate gradually by reducing water volume over 1 week pre-planting.
What is the best soil mix for Pothos?
Water roots and soil roots are anatomically different organs
87%
What is the best soil mix for Pothos?
Water roots and soil roots are anatomically different organs
Cause
Water roots and soil roots are anatomically different organs. Water roots develop aerenchyma tissue—hollow channels for oxygen transport—and lack the root hairs essential for soil nutrient absorption. When transferred to soil, these adapted roots face mechanical damage, desiccation, and oxygen deprivation in dense substrate. The transition shock occurs because water roots cannot immediately absorb water from soil particles and lack the structural integrity to penetrate growing media. Additionally, beneficial soil microbes that support root function are absent, and the shift from aquatic to terrestrial environment triggers ethylene stress hormone production that temporarily halts growth.
Solutions
- Wait for roots to reach 2-3 inches with lateral branching before transitioning
- Prepare transition soil: 50% potting mix + 50% perlite for maximum aeration
- Plant cutting with roots fully covered but stem node at soil surface
- Water thoroughly after planting to settle soil around fragile water roots
- Enclose in humidity dome or plastic bag for 7-14 days to prevent desiccation stress
- Maintain 70-80% humidity during transition period
- Keep soil lightly moist (not soggy) for first 2 weeks—water roots need time to adapt
- Expect 1-2 weeks of wilt or stall while roots transition; new growth indicates successful adaptation
Prevention
Transition water-propagated cuttings to soil when roots reach 2-3 inches with visible lateral branches—this indicates sufficient structural development. Use a 50/50 mix of potting soil and perlite for the transition to maintain aeration.
What is the best soil mix for Pothos?
Water-to-soil transition shock occurs because water-developed roots (adventitious roots with aerenchyma tissue adapted to oxygen-rich water) lack the structural integrity and root hairs needed for soil anchoring and nutrient absorption
90%
What is the best soil mix for Pothos?
Water-to-soil transition shock occurs because water-developed roots (adventitious roots with aerenchyma tissue adapted to oxygen-rich water) lack the structural integrity and root hairs needed for soil anchoring and nutrient absorption
Cause
Water-to-soil transition shock occurs because water-developed roots (adventitious roots with aerenchyma tissue adapted to oxygen-rich water) lack the structural integrity and root hairs needed for soil anchoring and nutrient absorption. When transferred directly to soil, these fragile water roots break under mechanical stress, desiccate from air exposure during planting, or fail to interface with soil particles. Perlite-only transition attempts create additional problems—moisture inconsistency from perlite's hydrophobicity causes roots to dry out or suffocate in anaerobic pockets.
Solutions
- Timing: Transfer cuttings when water roots reach 2-3 inches long with visible root hairs emerging
- Prepare soil mix: Use 50% peat-based potting soil, 30% perlite, 20% orchid bark—avoid straight perlite transitions
- Minimize air exposure: Keep roots moist during transfer; work quickly to prevent desiccation
- Plant at proper depth: Bury 2-3 nodes with roots fully covered; gently firm soil around roots without compacting
- Post-planting care: Maintain consistently moist (not soggy) soil for 2-3 weeks; use bottom watering to encourage deep root establishment
- Humidity support: Maintain 50-70% humidity during transition period to reduce stress on water-adapted roots
Prevention
Skip perlite-only transition media; move water-rooted cuttings directly into well-draining potting mix when roots reach 2-3 inches long; ensure soil mix contains 50% peat-based potting soil for moisture retention plus 30% perlite and 20% orchid bark for aeration; maintain 50-70% humidity during the first 2-3 weeks to reduce transplant shock.
Maintenance (5 topics · 14 cases)
How do I prune my Pothos?
Clean pruning cuts promote faster healing and prevent the entry of pathogens
2 protocols
82–92%
How do I prune my Pothos?
Clean pruning cuts promote faster healing and prevent the entry of pathogens
Protocol 1: best pruning shears · 92% confidence
Cause
Clean pruning cuts promote faster healing and prevent the entry of pathogens. Dull or dirty blades crush plant tissue rather than slicing it, creating ragged edges that are prone to fungal infection and rot. Regular household scissors often lack the bypass design needed for clean tissue separation on thicker stems.
Solutions
- Upgrade to high-quality bypass pruners like Felco or ARS for long-term use and cleaner cuts
- Use precision snips for soft-stemmed plants like Pothos or Philodendron to minimize tissue damage
- Disassemble and clean tools monthly to prevent rust and mechanical binding
Prevention
Sterilize blades with 70% rubbing alcohol between every plant. Sharpen blades annually. Use bypass shears rather than anvil shears for living tissue to avoid crushing.
Protocol 2: pruning · 82% confidence
Cause
Improper leaf removal technique spreads pathogens by crushing infected tissue and releasing spores/bacteria onto healthy foliage and soil. Using non-sterilized tools transfers pathogens between plants. Removing leaves at the wrong angle leaves stubs that decay and become secondary infection sites. Incomplete removal leaves pathogen reservoirs that reinfect new growth.
Solutions
- Sterilize shears with 70% isopropyl alcohol before touching plant and between EACH cut on different plants
- Choose dry midday (10am-2pm) for pruning when humidity is lowest and pathogens are least active
- Cut petiole at 45-degree angle flush with main stem; do not leave stub that can decay
- Grasp removed leaf with gloved hand or tool; place directly in sealed plastic bag without touching other foliage
- Dispose of infected tissue in outdoor trash or sealed bag; never add to compost or leave near plants
Prevention
Sterilize pruners with 70% isopropyl alcohol before AND after each plant contact. Remove leaves during dry midday hours when pathogens are less active. Cut at 45-degree angle close to stem without leaving stub. Place removed tissue immediately in sealed bag; never compost infected material.
How do I set up a moss pole for my Pothos?
Pothos (Epipremnum aureum) is a hemiepiphytic climber native to tropical forests where it ascends tree trunks to reach the canopy
3 protocols
84–89%
How do I set up a moss pole for my Pothos?
Pothos (Epipremnum aureum) is a hemiepiphytic climber native to tropical forests where it ascends tree trunks to reach the canopy
Protocol 1: moss pole installation · 89% confidence
Cause
Pothos (Epipremnum aureum) is a hemiepiphytic climber native to tropical forests where it ascends tree trunks to reach the canopy. In indoor cultivation, the absence of vertical support triggers geotropic runner production—elongated stems with aborted leaf primordia— as the plant expends energy searching for an arboreal host. Installing a moss pole mimics this natural support structure, redirecting growth energy from horizontal extension to vertical development and larger leaf production.
Solutions
- Select extendable moss or coir pole 2-4 inches taller than current plant height, ensuring room for upward growth
- Pre-moisten pole thoroughly by soaking in water for 15-30 minutes before installation
- Insert pole 2-3 inches from plant stem, angling slightly toward the main vine base
- Secure pole base with additional potting mix packed firmly around the bottom 3 inches
- Attach vines using soft plant ties, velcro straps, or garden clips at 3-4 node intervals
- Mist pole surface daily for first 2 weeks to maintain humidity and encourage aerial root contact
Prevention
Install moss pole when plant reaches 12-18 inches in vine length or when internodes exceed 3 inches. Choose extendable poles for long-term growth. Maintain 60-80% humidity around the pole surface to encourage aerial root adhesion.
Protocol 2: moss pole training · 88% confidence
Cause
Pothos exhibits thigmotropic growth response when vertical support triggers auxin redistribution and ethylene signaling. In trailing/horizontal growth, apical dominance suppresses lateral bud activation. When vines encounter vertical substrate (moss pole, coir pole), tactile stimuli trigger cytokinin synthesis at nodes, breaking apical dominance and activating dormant axillary buds. This hemiepiphytic adaptation mimics natural tropical climbing behavior on tree trunks.
Solutions
- Install moss or coir pole 2-3 inches from main stem base, securing firmly in pot
- Identify nodes with aerial root primordia (small brown bumps) along vine
- Gently train vines upward using soft plant ties, avoiding stem constriction
- Mist pole surface 3-4 times weekly to maintain humidity for root attachment
- Expect new lateral shoot emergence from activated nodes within 3-6 weeks
Prevention
Install vertical support when plant reaches 12-18 inches in length. Maintain 50-70% humidity around pole surface through regular misting. Position in bright indirect light to support increased metabolic demands of vertical growth.
Protocol 3: moss pole maintenance · 84% confidence
Cause
Moss pole degradation occurs as sphagnum moss decomposes over 12-18 months, reducing humidity retention and structural integrity. Compacted, dry poles fail to trigger aerial root attachment and may harbor fungal pathogens in decaying organic matter. Poles also become root-bound as adventitious roots penetrate and anchor deeply, making removal difficult without root damage.
Solutions
- Assess pole condition: moss should remain springy and green-tan, not brown/compact
- Water pole by misting or pouring water down center PVC pipe if present
- Check moisture retention: squeeze pole - should release drops but not stream water
- Replace pole if roots penetrate deeply: gently unwind vines, soak pole to soften, tease roots free
- Install new pole using same training technique as initial setup
- Consider upgrading to taller pole (36-48 inch) as plant matures for continued vertical growth
Prevention
Replace moss poles every 12-18 months or when moss becomes compacted/brown. Use poles with removable outer layers for root access. Maintain pole hydration without oversaturation that accelerates decomposition.
Does my Pothos have a nutrient deficiency?
Container-grown houseplants experience accelerated nutrient depletion due to limited root volume and leaching from watering; optimal NPK ratio varies by growth phase - vegetative growth requires higher nitrogen (N), while reproductive phases demand increased phosphorus (P) and potassium (K) for cell division and carbohydrate translocation
3 protocols
82–88%
Does my Pothos have a nutrient deficiency?
Container-grown houseplants experience accelerated nutrient depletion due to limited root volume and leaching from watering; optimal NPK ratio varies by growth phase - vegetative growth requires higher nitrogen (N), while reproductive phases demand increased phosphorus (P) and potassium (K) for cell division and carbohydrate translocation
Protocol 1: nutrient-deficiency-prevention · 88% confidence
Cause
Container-grown houseplants experience accelerated nutrient depletion due to limited root volume and leaching from watering; optimal NPK ratio varies by growth phase - vegetative growth requires higher nitrogen (N), while reproductive phases demand increased phosphorus (P) and potassium (K) for cell division and carbohydrate translocation
Solutions
- For foliage houseplants during active growth: apply NPK at 100% recommended dose or 75% chemical NPK + 25% compost with bio-fertilizer supplementation
- Monitor leaf chlorophyll content as indicator - optimal fertilization achieves 10.9 mg/g chlorophyll a, 6.4 mg/g chlorophyll b, and 17.3 mg/g total chlorophyll
- Maintain leaf nitrogen at 3.0%, phosphorus at 0.25%, potassium at 2.7%, and micronutrients (Fe 265ppm, Mn 106ppm, Zn 69ppm) for deficiency prevention
Prevention
Reduce fertilization by 50% during dormancy periods (fall-winter); flush container substrate with distilled water monthly to prevent salt accumulation that creates nutrient lockout and root tip necrosis.
Protocol 2: nutrient needs · 87% confidence
Cause
Pothos evolved as epiphytes in nutrient-poor tropical forest canopies, developing low nutrient requirements and salt sensitivity compared to heavy-feeding terrestrial plants. Their CAM photosynthesis and efficient nutrient cycling enable survival with minimal inputs, while high fertilizer concentrations cause marginal leaf necrosis from osmotic stress and root burn.
Solutions
- 1. Select appropriate fertilizer: Use organic worm castings tea (steep 1 cup castings in 1 gallon water for 24-48 hours, strain, dilute 1:1) or fish emulsion diluted to 1/4 strength
- 2. Apply every 4-6 weeks during spring and summer active growth period; completely cease fertilizing during fall and winter dormancy
- 3. Pre-water with plain water before fertilizing to prevent root shock and ensure even distribution
- 4. Flush soil monthly with plain water between feedings to prevent salt accumulation and mineral buildup
- 5. Monitor leaf margins for crispy brown edges indicating fertilizer burn; if observed, flush soil immediately and skip next 2 scheduled feedings
Prevention
Fertilize at 1/4 to 1/2 strength during active growth (spring through late summer) only. Skip fertilizing in fall and winter. Use organic options like worm castings tea or diluted fish emulsion. Monitor for crispy brown leaf edges as early burn indicators.
Protocol 3: nutrient-deficiency · 82% confidence
Cause
Ethinyl estradiol at 0.1 ppm promotes cytoplasmic accumulation of nitrogen-containing compounds including ribosomal proteins and cytokinins associated with cellular proliferation, while enhancing phosphorus uptake for energy metabolism in expanding leaf biomass
Solutions
- 1. Apply 0.1 ppm ethinyl estradiol via root drenching to enhance nitrogen and phosphorus percentages in leaf tissue
- 2. Expect measurable increases in chlorophyll a at higher concentrations (0.2 ppm) and chlorophyll b at 1.5 ppm lynestrenol
- 3. Monitor carotenoid content which increases significantly at 0.2 ppm ethinyl estradiol (0.63 vs 0.51 mg/g F.W.)
Prevention
Combine hormone treatment with balanced fertilization program; the enhanced cellular proliferation increases nutrient demand requiring adequate nitrogen and phosphorus availability in substrate
When should I repot my Pothos?
Overwatering post-repotting combined with root teasing causes physical trauma and anaerobic conditions favoring Pythium
84%
When should I repot my Pothos?
Overwatering post-repotting combined with root teasing causes physical trauma and anaerobic conditions favoring Pythium
Cause
Overwatering post-repotting combined with root teasing causes physical trauma and anaerobic conditions favoring Pythium. Dense root balls provide structural integrity; teasing exposes roots to excess moisture.
Solutions
- 1. Ensure pot has drainage holes; elevate on pebbles
- 2. Fluff top 2-3 inches with chopstick for oxygen
- 3. Trim mushy stems with sterilized shears
- 4. Withhold water until top 2 inches bone-dry
- 5. Water sparingly with full drainage
Prevention
Never tease pothos roots—score outer layer lightly. Repot only when roots circle. Allow 70-80% soil dryout between waterings.
How should I fertilize my Pothos?
Pothos enters dormancy during fall and winter months (October-February) as day length decreases and indoor temperatures drop
5 protocols
85–90%
How should I fertilize my Pothos?
Pothos enters dormancy during fall and winter months (October-February) as day length decreases and indoor temperatures drop
Protocol 1: winter fertilizer dormancy · 90% confidence
Cause
Pothos enters dormancy during fall and winter months (October-February) as day length decreases and indoor temperatures drop. During this period, metabolic activity slows dramatically and nutrient requirements diminish to maintenance levels. Continued fertilization during dormancy forces the plant to process excess nutrients it cannot utilize, resulting in salt accumulation in soil, root burn, and potential leaf damage. Community reports consistently show that plants fertilized during winter dormancy exhibit higher rates of fertilizer burn and stress symptoms.
Solutions
- 1. Cease all fertilization when fall begins and growth visibly slows (typically October)
- 2. Continue normal watering but allow soil to dry completely between applications
- 3. Resume fertilizing only when new spring growth appears (March-April)
- 4. If concerned about nutrient depletion: top-dress with compost or worm castings in late winter (February) for slow-release organic nutrition
- 5. Monitor soil EC (electrical conductivity) with meter if available—should remain below 1.0 mS/cm during dormancy
Prevention
Completely suspend fertilization from October through February; maintain minimal watering schedule allowing soil to dry 2-3 inches between waterings; provide consistent bright indirect light to support healthy dormancy transition.
Protocol 2: fertilizer schedule · 88% confidence
Cause
Pothos (Epipremnum aureum) as a tropical understory aroid exhibits seasonal growth patterns tied to light availability and temperature. During spring and summer months (March-September in Northern Hemisphere), increased photoperiod and warmth trigger active metabolic phases where nutrient uptake peaks. Community reports indicate that fertilizing during this active growth window supports vine extension, leaf development, and variegation intensity. Application every 4-6 weeks aligns with the plant's natural nutrient cycling without overwhelming its epiphytic-adapted root system.
Solutions
- 1. Begin fertilizing in early spring when new growth appears (typically March-April)
- 2. Apply balanced liquid fertilizer at 1/4 strength every 4-6 weeks during active growth
- 3. Use organic options like worm castings tea (1 cup castings steeped in 1 gallon water for 24-48 hours, then diluted 1:1) or fish emulsion diluted to 1/4 label strength
- 4. Water with plain water between feedings to flush excess salts
- 5. Monitor for yellow leaf tips or crispy edges as burn indicators and adjust strength accordingly
Prevention
Apply fertilizer only during spring through late summer when active growth is visible; suspend all feeding during fall and winter dormancy periods; always dilute to 1/4-1/2 strength of manufacturer recommendations to prevent salt accumulation.
Protocol 3: fertilizer burn recovery · 87% confidence
Cause
Fertilizer burn in pothos occurs when excessive salt concentration in soil creates osmotic stress that prevents roots from absorbing water, mimicking drought conditions despite adequate soil moisture. This manifests as crispy brown leaf edges and tips, often accompanied by yellowing. The condition is distinct from root rot (which produces mushy, black roots and overall wilting) and from natural senescence (which affects oldest leaves only). Community reports indicate that recovery is possible if caught early through aggressive soil flushing and temporary nutrient withholding.
Solutions
- 1. Immediately flush soil with 3x pot volume of room-temperature plain water (no fertilizer) to leach excess salts
- 2. Withhold all fertilization for 4-6 weeks to allow root recovery
- 3. Trim affected brown/crispy leaf edges with sterilized scissors to improve aesthetics
- 4. Apply Superthrive or similar root stimulant (1 drop per gallon) biweekly to encourage recovery without adding salts
- 5. Resume fertilizing at 1/4 strength only after 4-6 weeks and new growth appears healthy
Prevention
Never exceed 1/2 strength fertilizer dilutions; avoid fertilizing during dormancy or plant stress; use distilled or rainwater to minimize salt accumulation from tap water; maintain EC levels below 1.0 mS/cm with periodic testing.
Protocol 4: organic vs synthetic fertilizer · 86% confidence
Cause
Organic fertilizers (worm castings, fish emulsion, compost) and synthetic formulations (Miracle-Gro, liquid NPK blends) offer different advantages for pothos care. Organic options provide micronutrients and beneficial microbes while being gentler and less prone to salt buildup. Synthetic fertilizers offer precise NPK ratios and rapid nutrient availability but require careful dilution. Community reports suggest organic methods align better with pothos' epiphytic adaptation to nutrient cycling through decomposing organic matter in natural habitats. Both approaches succeed when properly diluted and timed to growth cycles.
Solutions
- 1. Organic option - Worm castings: Mix 1/4 cup into top 2 inches of soil every 6-8 weeks, or brew tea (1 cup castings per gallon water, steep 24-48 hours, dilute 1:1)
- 2. Organic option - Fish emulsion: Dilute to 1/4 label strength, apply every 4-6 weeks during active growth
- 3. Synthetic option - Balanced liquid NPK (10-10-10 or 20-20-20): Dilute to 1/4 strength, apply every 4-6 weeks
- 4. Synthetic option - Slow-release pellets: Apply according to package directions (typically every 3-4 months) for low-maintenance feeding
- 5. Aquarium water: Dilute filter rinse water thoroughly and apply monthly as gentle organic alternative
Prevention
Choose organic for gentle, slow-release nutrition with lower burn risk; select synthetic for precise control and rapid results; always dilute either type to 1/4-1/2 strength; avoid combining multiple fertilizer types simultaneously to prevent nutrient overload.
Protocol 5: fertilizer dilution strength · 85% confidence
Cause
Pothos evolved as an epiphytic climber in nutrient-poor tropical environments where nitrogen, phosphorus, and potassium availability is limited. The plant's root system and CAM photosynthesis adaptations allow survival in low-nutrient conditions, making it highly susceptible to osmotic stress from concentrated fertilizers. Community reports demonstrate that diluting fertilizers to 1/4-1/2 label strength prevents salt accumulation that inhibits water uptake and causes marginal leaf necrosis. The weakly weekly approach—frequent light feeding rather than infrequent heavy doses—mimics natural nutrient availability in the plant's native understory habitat.
Solutions
- 1. For liquid synthetic fertilizers: dilute to 1/4 label strength (example: if label says 1 tsp per gallon, use 1/4 tsp per gallon)
- 2. For fish emulsion: dilute to 1/4 strength or approximately 1 tablespoon per gallon of water
- 3. For worm castings tea: steep 1 cup castings in 1 gallon water for 24-48 hours, strain, then dilute 1:1 with additional water
- 4. Apply diluted fertilizer every 2-4 weeks during active growth rather than full strength every 6-8 weeks
- 5. Test soil EC with meter if available—keep readings under 1.0 mS/cm for optimal root health
Prevention
Always dilute liquid fertilizers to 1/4-1/2 manufacturer recommended strength; use organic slow-release options like worm castings for gentler nutrient delivery; maintain EC levels below 1.0-1.5 mS/cm; flush soil monthly with plain water during active feeding periods.
Variety Guides (6 topics · 6 cases)
Cebu Blue Pothos Care: Pothos Guide
Cebu Blue Pothos (Epipremnum pinnatum 'Cebu Blue') is a different species from standard E
89%
Cebu Blue Pothos Care: Pothos Guide
Cebu Blue Pothos (Epipremnum pinnatum 'Cebu Blue') is a different species from standard E
Cause
Cebu Blue Pothos (Epipremnum pinnatum 'Cebu Blue') is a different species from standard E. aureum varieties, featuring silvery-blue iridescent foliage and distinct fenestration (leaf splitting) when mature. Unlike other pothos, Cebu Blue requires higher humidity (70-80%) to maintain turgidity in its thin, elongated leaves. Lower humidity causes leaf curling and reduced fenestration development. The species also climbs more aggressively, with internodes shortening by 40% when provided vertical support.
Solutions
- Install moss pole or cork board climbing structure immediately upon purchase
- Maintain 70-80% humidity with humidifier—thin leaves desiccate rapidly in dry air
- Provide bright indirect light (west window with sheer curtain ideal) for fenestration development
- Allow soil to dry 50% between waterings—susceptible to root rot if chronically wet
- Expect mature fenestrated leaves after 12-18 months with proper climbing support
Prevention
Maintain humidity 70-80% using humidifiers or pebble trays; provide climbing support immediately—moss poles trigger rapid upward growth and leaf fenestration; bright indirect light (300-500 foot-candles) encourages mature leaf development; avoid temperatures below 65°F which inhibits metabolic activity.
Golden Pothos Care: Pothos Guide
Golden Pothos (Epipremnum aureum 'Aureum') has the highest chlorophyll density of all variegated pothos varieties due to its predominantly golden-yellow variegation
88%
Golden Pothos Care: Pothos Guide
Golden Pothos (Epipremnum aureum 'Aureum') has the highest chlorophyll density of all variegated pothos varieties due to its predominantly golden-yellow variegation
Cause
Golden Pothos (Epipremnum aureum 'Aureum') has the highest chlorophyll density of all variegated pothos varieties due to its predominantly golden-yellow variegation. While highly adaptable to low light, insufficient illumination (below 100 foot-candles) triggers rapid etiolation with 40-60% internode elongation compared to medium-light specimens. The variety's vigorous growth rate (2-3x faster than Marble Queen) requires 15-20% more nitrogen to maintain leaf color intensity and prevent chlorotic fading of golden sectors.
Solutions
- Move to brighter location (east/west window with sheer curtain)
- Prune leggy vines to 4-6 inch segments, root in water weekly
- Increase fertilizer frequency to compensate for rapid growth
- Provide climbing support (moss pole) to trigger larger leaf production
- Maintain soil moisture: water when top 2 inches dry (7-10 day cycle)
Prevention
Position in bright indirect light (200-400 foot-candles); rotate quarterly for even exposure; maintain 60-70% humidity to reduce metabolic stress in high-light conditions; fertilize every 14 days during active growth with balanced 10-10-10 at half strength.
Jessenia Pothos Care: Pothos Guide
Jessenia Pothos displays mottled yellow-green variegation with sectoral chlorophyll distribution (30-50% non-photosynthetic tissue)
85%
Jessenia Pothos Care: Pothos Guide
Jessenia Pothos displays mottled yellow-green variegation with sectoral chlorophyll distribution (30-50% non-photosynthetic tissue)
Cause
Jessenia Pothos displays mottled yellow-green variegation with sectoral chlorophyll distribution (30-50% non-photosynthetic tissue). The irregular variegation pattern creates uneven light absorption across leaf surfaces, causing photoinhibition in high light and chlorophyll degradation in low light. This variety exhibits slower propagation rooting (14-21 days vs 7-10 for Golden) due to reduced energy reserves in cuttings.
Solutions
- Provide consistent light without hot spots—dappled sunlight through sheer curtain ideal
- Root cuttings in perlite-vermiculite mix (50:50) for better aeration during extended rooting period
- Apply rooting hormone (IBA 0.1%) to compensate for lower carbohydrate reserves
- Maintain 75-80°F temperature during propagation to accelerate metabolic activity
- Limit fertilizer to 1/4 strength monthly—sensitive to salt buildup due to reduced vigor
Prevention
Position in medium-bright indirect light (200-350 foot-candles); avoid direct sun on variegated sectors; maintain humidity 65-75% to compensate for reduced transpiration efficiency; use clear propagation containers to monitor root development without disturbing cuttings.
Manjula Pothos Care: Pothos Guide
Manjula Pothos (patented variety 'HANSOTA14') exhibits broad, heart-shaped leaves with high-contrast variegation (white, cream, and green marbling)
88%
Manjula Pothos Care: Pothos Guide
Manjula Pothos (patented variety 'HANSOTA14') exhibits broad, heart-shaped leaves with high-contrast variegation (white, cream, and green marbling)
Cause
Manjula Pothos (patented variety 'HANSOTA14') exhibits broad, heart-shaped leaves with high-contrast variegation (white, cream, and green marbling). The wider leaf morphology (2-3x larger than standard pothos) requires structural support during development—unsupported leaves droop and tear at petiole bases. The variety shows 20-25% slower growth than Golden Pothos but maintains variegation better in lower light than other high-white varieties.
Solutions
- Install moss pole early—attach vines at nodes using soft plant ties
- Mist moss pole daily to encourage aerial root attachment for structural support
- Prune congested growth to improve airflow between large overlapping leaves
- Water when top 2-3 inches dry—larger leaves transpire more but root system compensates
- Repot every 12-18 months into 2-inch larger pot to accommodate expanding root ball
Prevention
Provide climbing support (moss pole or trellis) when leaves exceed 4 inches wide; maintain bright indirect light (250-400 foot-candles); humidity above 60% prevents leaf edge crisping on large white sectors; avoid overcrowding—leaves need 6+ inch spacing for proper expansion.
Marble Queen Pothos Care: Pothos Guide
Marble Queen Pothos (Epipremnum aureum 'Marble Queen') exhibits high white variegation (40-60% of leaf surface) with zero chlorophyll in cream sectors
87%
Marble Queen Pothos Care: Pothos Guide
Marble Queen Pothos (Epipremnum aureum 'Marble Queen') exhibits high white variegation (40-60% of leaf surface) with zero chlorophyll in cream sectors
Cause
Marble Queen Pothos (Epipremnum aureum 'Marble Queen') exhibits high white variegation (40-60% of leaf surface) with zero chlorophyll in cream sectors. This reduces photosynthetic capacity by 35-45% compared to Golden Pothos, requiring 30-40% brighter light to maintain equivalent growth rates. The white tissue is also more susceptible to photodamage—direct sun causes irreversible cellular damage within 2-4 hours, appearing as brown crispy patches on variegated areas only.
Solutions
- Move 2-3 feet back from window if brown spots appear on white areas
- Rotate plant weekly to distribute light evenly across variegated sectors
- Increase humidity to 70-80% with pebble trays or humidifiers
- Avoid misting—water droplets act as lenses and burn white tissue
- Expect slower growth; reduce fertilizer to 1/4 strength to prevent salt burn on sensitive roots
Prevention
Provide bright indirect light (300-500 foot-candles)—20% more than Golden Pothos; maintain north-facing window distance of 2-3 feet or east window with sheer curtain; never expose to direct sunlight; humidity above 60% reduces transpiration stress on low-chlorophyll tissue.
Neon Pothos Care: Pothos Guide
Neon Pothos (Epipremnum aureum 'Neon') displays unique chartreuse/lime green foliage due to reduced chlorophyll b concentration and altered carotenoid ratios
86%
Neon Pothos Care: Pothos Guide
Neon Pothos (Epipremnum aureum 'Neon') displays unique chartreuse/lime green foliage due to reduced chlorophyll b concentration and altered carotenoid ratios
Cause
Neon Pothos (Epipremnum aureum 'Neon') displays unique chartreuse/lime green foliage due to reduced chlorophyll b concentration and altered carotenoid ratios. The high-visibility pigmentation requires 25-30% more light than standard green pothos to achieve comparable photosynthetic efficiency. In low light, Neon reverts toward darker green within 4-6 weeks as the plant upregulates chlorophyll production—a reversible but undesirable aesthetic change.
Solutions
- Move to brighter east or west window immediately if color dulls
- Prune any reverted green branches to encourage new neon growth
- Provide 2000-3000K LED grow light 12-16 inches above plant for 12 hours daily
- Maintain consistent light levels—sudden changes trigger chlorophyll fluctuations
- Fertilize with iron-rich formula (chelated iron 0.1%) to support chloroplast development
Prevention
Maintain bright indirect light (250-450 foot-candles) year-round; avoid north-facing windows without supplemental lighting; rotate monthly to prevent uneven color reversion; supplement with 12-hour grow light cycle (2000-3000K) during winter months in northern latitudes.
Biology & Advanced (5 topics · 5 cases)
Pothos: Air Purification
Pothos air purification is traditionally attributed to leaf surface area, but a 2025 analysis of 1,200 cases and PMID 344567 reveals the primary mechanism is actually root-associated bacteria, specifically Lysinibacillus
95%
Pothos: Air Purification
Pothos air purification is traditionally attributed to leaf surface area, but a 2025 analysis of 1,200 cases and PMID 344567 reveals the primary mechanism is actually root-associated bacteria, specifically Lysinibacillus
Cause
Pothos air purification is traditionally attributed to leaf surface area, but a 2025 analysis of 1,200 cases and PMID 344567 reveals the primary mechanism is actually root-associated bacteria, specifically Lysinibacillus. This microbiome, not the foliage alone, is responsible for the majority of volatile organic compound (VOC) removal. Misdiagnosing air quality issues as simple light or watering problems often ignores the health of this vital root ecosystem.
Solutions
- Use the Plant Health Scanner to evaluate root zone health and microbiome balance.
- Transition to an aerated aroid mix (orchid bark, perlite, charcoal) to increase root oxygen levels.
- Avoid synthetic fertilizers with high salt content that can suppress beneficial root bacteria.
Prevention
Maintain a healthy root microbiome by using high-quality, aerated soil mixes and avoiding over-fertilization which can disrupt bacterial colonies. Ensure adequate root oxygenation to support aerobic Lysinibacillus activity.
Pothos: Bathroom Air Purification
Epipremnum aureum (pothos) demonstrates exceptional VOC removal efficiency through phytoremediation, with demonstrated capability to metabolize formaldehyde, benzene, toluene, and other indoor air pollutants
93%
Pothos: Bathroom Air Purification
Epipremnum aureum (pothos) demonstrates exceptional VOC removal efficiency through phytoremediation, with demonstrated capability to metabolize formaldehyde, benzene, toluene, and other indoor air pollutants
Cause
Epipremnum aureum (pothos) demonstrates exceptional VOC removal efficiency through phytoremediation, with demonstrated capability to metabolize formaldehyde, benzene, toluene, and other indoor air pollutants. The plant's associated phylloplane microbiome (particularly Proteobacteria and Actinobacteriota) enhances pollutant breakdown. Pothos also shows significant particulate matter (PM) capture, making it ideal for bathrooms with cleaning product fumes and humidity.
Solutions
- Position pothos in bathroom with bright indirect light (east or west window) for optimal air purification performance
- Water when top 2-3 inches of soil dry; bathroom humidity extends watering intervals to every 7-14 days
- Clean leaves monthly with damp cloth to remove dust and maximize stomatal pollutant uptake
- Provide climbing support (moss pole or trellis) to increase leaf surface area for enhanced air purification
- Propagate stem cuttings in water or perlite to expand air-purifying coverage in larger bathrooms
Prevention
Maintain bright indirect light to support photosynthetic capacity for air purification. Keep soil evenly moist but not waterlogged—pothos tolerate bathroom humidity well but require drainage to prevent root rot. Clean leaves monthly with damp cloth to maximize stomatal air exchange.
Pothos: Chemical Defense
Plants produce hundreds of defensive chemical compounds including alkaloids, terpenes, and phenolics
90%
Pothos: Chemical Defense
Plants produce hundreds of defensive chemical compounds including alkaloids, terpenes, and phenolics
Cause
Plants produce hundreds of defensive chemical compounds including alkaloids, terpenes, and phenolics. When attacked by herbivores, plants release jasmonic acid which makes leaves taste terrible and attracts the herbivore's predators
Solutions
- Avoid overwatering to maintain strong cell walls
- Provide appropriate light levels
- Use balanced fertilizer during growing season
- Allow some pest exposure to prime immune response
Prevention
Healthy plants produce stronger defense chemicals - maintain optimal growing conditions
Pothos: Historical Lore
Epipremnum aureum (pothos) is endemic to Mo'orea, an island in the Society Islands of French Polynesia
92%
Pothos: Historical Lore
Epipremnum aureum (pothos) is endemic to Mo'orea, an island in the Society Islands of French Polynesia
Cause
Epipremnum aureum (pothos) is endemic to Mo'orea, an island in the Society Islands of French Polynesia. This native origin was only confirmed in 2004 by aroid botanist Peter Boyce. The plant's widespread naturalization across tropical regions (Solomon Islands, Southeast Asia) historically led botanists to incorrectly assume these were native populations rather than invasive spread.
Solutions
- Grow pothos in temperatures between 65-85°F (18-29°C), matching its native tropical climate
- Provide bright indirect light rather than direct sun—the plant evolved under forest canopies
- Maintain humidity levels above 50% to replicate the humid air of the Society Islands
- Protect from cold drafts and temperatures below 50°F—the plant lacks cold hardiness from its equatorial origins
Prevention
Understanding native provenance helps explain why pothos thrives in warm, humid conditions with bright indirect light—conditions mimicking its tropical island origin. This knowledge prevents misguided care attempts in unsuitable climates.
Pothos: Physics Thresholds Environmental Limits
Pothos (Epipremnum aureum) has specific environmental thresholds beyond which physiological damage occurs
88%
Pothos: Physics Thresholds Environmental Limits
Pothos (Epipremnum aureum) has specific environmental thresholds beyond which physiological damage occurs
Cause
Pothos (Epipremnum aureum) has specific environmental thresholds beyond which physiological damage occurs. Light below 100-200 foot-candles triggers etiolation (leggy growth) due to shade avoidance response. Temperatures below 50-55°F (10-13°C) cause cold shock and cellular membrane damage, while direct sunlight above 1000 foot-candles causes photooxidative stress and leaf scorch. Low humidity below 40% exacerbates transpiration stress, particularly under intense lighting.
Solutions
- Measure light with phone lux app: minimum 500 lux (50 fc) for green varieties; 1000+ lux for variegated types
- Position 3-5 feet from east/west windows for bright indirect light; avoid direct sun exposure
- Maintain temperatures between 65-85°F (18-29°C); protect from drafts and windows during cold snaps
- Monitor with thermometer: relocate immediately if temperatures drop below 55°F (13°C)
- Maintain humidity between 50-70% via pebble trays or humidifiers, especially under grow lights
- Water only when top 2-3 inches of soil are completely dry
Prevention
Use light meter apps to verify 200-1000 foot-candles at plant position; install smart thermometers with alerts for temperatures below 60°F; maintain 50-70% humidity via environmental methods; group plants to create microclimate; avoid placing near heating/cooling vents or drafty windows.
Other Topics (21 topics · 23 cases)
Pothos: Air Quality
Epipremnum aureum leaves actively capture indoor particulate matter (PM2
94%
Pothos: Air Quality
Epipremnum aureum leaves actively capture indoor particulate matter (PM2
Cause
Epipremnum aureum leaves actively capture indoor particulate matter (PM2.5 and PM10), including lead-bound particles, through phylloplane deposition. The phylloplane microbiome (dominated by Pseudomonadales and Micrococcales) adapts to pollution exposure and may facilitate pollutant sequestration. This makes pothos an effective biological air filtration system for indoor environments with airborne contaminants.
Solutions
- Position pothos within 1-2 meters of pollution sources (windows near traffic, home workshops)
- Maintain 3-5 mature leaves per square meter of room space for measurable filtration
- Clean leaves monthly with damp microfiber cloth to remove accumulated particles
- Rotate plant orientation monthly for even exposure across all leaf surfaces
- Monitor leaf darkening as indicator of particle accumulation—darker leaves signal cleaning needed
Prevention
Place pothos in high-traffic or pollution-prone areas for maximum benefit. Avoid disturbing settled particles on leaves; use gentle damp cloth to clean rather than vigorous wiping.
Why is my Pothos's stem turning black?
Black lines on newly repotted pothos stems are normal post-transplant desiccation and crisping of thinner vascular or lenticel areas from handling stress
90%
Why is my Pothos's stem turning black?
Black lines on newly repotted pothos stems are normal post-transplant desiccation and crisping of thinner vascular or lenticel areas from handling stress
Cause
Black lines on newly repotted pothos stems are normal post-transplant desiccation and crisping of thinner vascular or lenticel areas from handling stress. Distinct from bacterial soft rot which shows mushy spreading ooze.
Solutions
- 1. Water thoroughly until drainage from bottom
- 2. Position in bright indirect light with 40-60% humidity
- 3. Avoid pruning or fertilizing for 2 weeks
- 4. Monitor weekly for new growth as recovery sign
- 5. Differentiate from rot: dry crisping vs mushy spreading
Prevention
Pre-water soil before repotting. Use airy aroid mix. Maintain consistent moisture post-transplant without overwatering.
Clove Oil Nanoemulsion Treatment: How to Use for Pothos
Clove essential oil nanoemulsion contains eugenol (65
90%
Clove Oil Nanoemulsion Treatment: How to Use for Pothos
Clove essential oil nanoemulsion contains eugenol (65
Cause
Clove essential oil nanoemulsion contains eugenol (65.67% of oil composition) as the primary antifungal compound, along with eugenyl acetate and caryophyllene. Eugenol targets cellobiose dehydrogenase and pectate lyase enzymes in fungal pathogens through molecular binding. Eugenol forms five pi-alkyl interactions with cellobiose dehydrogenase residues (Phe278, Leu312, Gly310, Pro773, His689) and hydrogen bonds with Asn309, disrupting fungal cell wall integrity and nutrient cycling. Research demonstrates 86.11% reduction in R. solani and 88.83% reduction in S. rolfsii growth at 3000 ppm concentration.
Solutions
- 1. Prepare nanoemulsion formulation: Create oil-in-water nanoemulsion using clove essential oil with Tween 80 surfactant through sonication at 700W for 30 minutes, achieving 73.76 nm droplet size with polydispersity index of 0.227 for optimal uniformity and stability
- 2. Apply at therapeutic concentration: Use 3000 ppm (0.3%) concentration for significant pathogen suppression; expect 25-50% disease incidence reduction in treated pothos plants compared to untreated controls
- 3. Root zone saturation: Apply 100 mL per 30cm pot directly to soil ensuring complete root contact; documented results show 1.87-fold to 4.12-fold root length improvement and 11.09-fold to 21.31-fold fresh weight increases
- 4. Combine with thyme for enhanced efficacy: Use in rotation or combination with thyme oil nanoemulsion as combined essential oil treatments target multiple enzyme pathways simultaneously, reducing risk of pathogen adaptation
- 5. Monitor recovery timeline: Evaluate progress over 2-3 weeks; clove oil nanoemulsion demonstrates slower but consistent improvement in root attributes compared to thyme oil, making it suitable for maintenance therapy after initial aggressive thyme treatment
Prevention
Apply 1000-2000 ppm clove oil nanoemulsion as monthly preventive treatment during periods of environmental stress; store nanoemulsion in opaque containers to prevent photosensitivity degradation; integrate with proper cultural practices including appropriate watering and drainage management
Why are my Pothos leaves curling?
Pothos leaf curling in variegated cultivars (Marble Queen, N'Joy) results from low relative humidity (<40% RH) causing excessive transpiration
2 protocols
87–88%
Why are my Pothos leaves curling?
Pothos leaf curling in variegated cultivars (Marble Queen, N'Joy) results from low relative humidity (<40% RH) causing excessive transpiration
Protocol 1: curling leaves · 88% confidence
Cause
Pothos leaf curling in variegated cultivars (Marble Queen, N'Joy) results from low relative humidity (<40% RH) causing excessive transpiration. The thin variegated leaves lose water faster than roots can replenish, triggering hyponastic leaf curling to minimize surface area and reduce water loss. This is particularly pronounced in hot summer conditions or air-conditioned environments with dry air.
Solutions
- Measure current humidity with hygrometer—target 50-60% minimum
- Install humidifier within 3 feet of plant or use pebble tray with water reservoir
- Mist leaves in morning to temporarily boost humidity (supplemental only)
- Relocate away from AC vents or heating sources causing rapid air exchange
- Monitor new leaf unfurling—curling should resolve within 7-14 days of humidity correction
Prevention
Maintain indoor humidity at 50-70% using humidifiers, pebble trays, or plant grouping; avoid placement near AC vents, heaters, or drafty windows; increase ambient moisture during summer heat waves; use well-draining soil to prevent waterlogging while maintaining humidity.
Protocol 2: curling leaves · 87% confidence
Cause
Pothos leaves curl for different reasons: 1) Underwatering/low humidity - leaves curl inward to reduce surface area and conserve moisture, 2) Water-to-soil transplant shock - water roots need time to adapt to soil, causing temporary curling, 3) Normal phototropism - leaves may curl to capture more light, 4) Rootbound conditions limiting water uptake. Check soil moisture and recent care changes to identify the cause.
Solutions
- For underwatering: water thoroughly and increase humidity to 50-60%
- For transplant shock: keep soil consistently moist (not soggy) for 2-3 weeks
- For rootbound: repot into slightly larger container
- For light response: rotate plant weekly for even exposure
- Be patient - water-to-soil transitions can take 1-2 weeks for leaves to unfurl
Prevention
Maintain consistent watering schedules. Use humidifiers in dry climates. Minimize root disturbance during transplant. Repot before plants become severely rootbound.
How much light does my Pothos need?
Indoor environments frequently provide only 50-100 foot-candles of ambient light, insufficient for Epipremnum aureum's optimal growth threshold of 200-500 foot-candles
85%
How much light does my Pothos need?
Indoor environments frequently provide only 50-100 foot-candles of ambient light, insufficient for Epipremnum aureum's optimal growth threshold of 200-500 foot-candles
Cause
Indoor environments frequently provide only 50-100 foot-candles of ambient light, insufficient for Epipremnum aureum's optimal growth threshold of 200-500 foot-candles. Low light triggers etiolation hormone cascades (brassinosteroid synthesis) while reducing photosynthetic output, causing plants to stretch toward even weak light sources.
Solutions
- Select appropriate fixture: Use full-spectrum LED grow light (40-60 watts actual draw, 5000-6500K color temperature) positioned 12-18 inches above canopy
- Establish photoperiod: Run lights 12-14 hours daily using timer; extend to 16 hours in winter when natural daylight drops below 10 hours
- Position correctly: Suspend light directly above plant (not side-angle) to prevent directional stretching; ensure coverage spans entire pot diameter
- Monitor PAR levels: Target 100-150 µmol/m²/s at leaf surface using PAR meter or lux meter app (1000-2000 lux minimum)
- Adjust gradually: Increase light exposure by 30 minutes every 3 days to prevent photobleaching; watch for leaf yellowing as sign of excess intensity
Prevention
Install permanent grow light setup in low-light rooms; use smart plugs with scheduling automation; combine with sheer curtains on south windows to filter harsh midday sun while maintaining brightness.
Pothos: Hydroponic Transition
Pothos adapts to hydroponic cultivation through significant shifts in bacterial community composition over 86 days
91%
Pothos: Hydroponic Transition
Pothos adapts to hydroponic cultivation through significant shifts in bacterial community composition over 86 days
Cause
Pothos adapts to hydroponic cultivation through significant shifts in bacterial community composition over 86 days. Proteobacteria dominate root tissues and hydroponic solutions, with Actinobacteriota as secondary colonizers. This microbiome transition supports nutrient acquisition and stress tolerance during the soil-to-water adaptation, with specific taxa associated with hydroponic success identified through 16S rRNA sequencing.
Solutions
- Begin transition by removing soil and gently rinsing roots in lukewarm water
- Place in hydroponic system with partial root submersion for 14 days
- Monitor bacterial bloom: expect initial cloudiness, then clearing by day 30-45
- Use filtered water to minimize chloramine damage to developing aquatic roots
- Add diluted liquid fertilizer (half-strength) once new water roots appear white and fuzzy
Prevention
Transition gradually: maintain partial soil contact for first 2 weeks before full submersion. Ensure hydroponic solution contains adequate oxygenation (air stones) to prevent anaerobic conditions.
Why is my Pothos losing its variegation?
Variegated pothos cultivars (Marble Queen, N'Joy, Manjula) exhibit chimeric tissue instability where white sectors lack chlorophyll for photosynthesis
2 protocols
81–91%
Why is my Pothos losing its variegation?
Variegated pothos cultivars (Marble Queen, N'Joy, Manjula) exhibit chimeric tissue instability where white sectors lack chlorophyll for photosynthesis
Protocol 1: loss of variegation · 91% confidence
Cause
Variegated pothos cultivars (Marble Queen, N'Joy, Manjula) exhibit chimeric tissue instability where white sectors lack chlorophyll for photosynthesis. Under low light conditions (<1000 lux), the plant selectively favors green tissue growth as a survival adaptation, triggering epigenetic reversion where variegated meristems revert to chlorophyll-dominant expression. This is not disease but a physiological optimization response.
Solutions
- Identify current light levels using phone lux meter or dedicated PAR meter
- Relocate to brighter indirect light location—east-facing window with sheer curtain is optimal
- Gradually acclimate over 7-10 days to prevent sunburn on white sectors
- Prune reverting all-green shoots at base to prevent chlorophyll-dominant tissue from overtaking plant
- Propagate healthy variegated cuttings in water as backup if reversion progresses
Prevention
Maintain bright indirect light at 2000-5000 lux (measured with light meter) to support white tissue viability; avoid placement more than 3 feet from east/west windows; supplement with grow lights (12-16 hours daily) during winter months; propagate only from visibly variegated stem nodes to maintain genetic expression.
Protocol 2: variegated transplant shock · 81% confidence
Cause
Variegated cultivars like Pearls and Jade demand 2-3x more light than green pothos. Low-light transitions trigger shock-induced necrosis on leaf edges, distinct from overwatering root rot.
Solutions
- 1. Gradually increase to medium-bright indirect light
- 2. Maintain 50-60% humidity and 65-80°F
- 3. Avoid repotting during acclimation
- 4. Monitor for new healthy growth within 2-4 weeks
- 5. Prune damaged leaves sparingly once established
Prevention
Acclimate new plants in bright quarantine area 1-2 weeks. Match cultivars to home light levels using light meters.
Pothos: Mosaic Virus
Potyvirus infection in pothos (most commonly Dasheen Mosaic Virus, DMV) produces characteristic mosaic patterning with alternating light and dark green patches, leaf distortion, and stunted growth
85%
Pothos: Mosaic Virus
Potyvirus infection in pothos (most commonly Dasheen Mosaic Virus, DMV) produces characteristic mosaic patterning with alternating light and dark green patches, leaf distortion, and stunted growth
Cause
Potyvirus infection in pothos (most commonly Dasheen Mosaic Virus, DMV) produces characteristic mosaic patterning with alternating light and dark green patches, leaf distortion, and stunted growth. Unlike nutrient deficiencies or environmental stress, mosaic virus shows irregular color mottling across leaf surfaces, often accompanied by puckering or curling. Virus spreads through sap transmission via contaminated tools, insect vectors (aphids), and vegetative propagation from infected stock.
Solutions
- Confirm diagnosis: Look for irregular light/dark green mosaic patterning across leaves
- Check for distortion: Virus-infected leaves often show puckering, curling, or stunting
- Isolate immediately: Move plant away from all others to prevent vector transmission
- Sterilize all tools: Wipe scissors with alcohol before and after contact
- Remove severely affected leaves: Cut at base with sterile tools; dispose in sealed bag
- No cure available: Virus is systemic—plant will carry it for life; manage or dispose
Prevention
Purchase certified virus-free plants from reputable sources; quarantine all new plants for 14 days minimum; sterilize tools with 70% isopropyl alcohol between every cut; control aphids and other sap-sucking insects.
Pothos: Perlite Transition Failure
Water propagation roots lack structural strength for perlite transitions
83%
Pothos: Perlite Transition Failure
Water propagation roots lack structural strength for perlite transitions
Cause
Water propagation roots lack structural strength for perlite transitions. Perlite's hydrophobicity causes uneven oxygenation, collapsing water-adapted aerenchymatous roots and fostering bacterial rot.
Solutions
- 1. Remove soft/mushy roots/stems with sterile scissors
- 2. Rinse firm roots; dip in 3% H2O2 1:4 dilution for 1-2 min
- 3. Repropagate in clean water changing weekly
- 4. Keep soil moist 2-3 weeks with bottom watering
- 5. Quarantine affected plants
Prevention
Move water-rooted pothos directly to soil with 30% perlite + coco coir. Skip perlite-only transitions.
Pothos: Poor Vascular Development
Ethinyl estradiol at 0
85%
Pothos: Poor Vascular Development
Ethinyl estradiol at 0
Cause
Ethinyl estradiol at 0.1 ppm stimulates neovascularization in pothos midrib and petiole through potential estrogen/progesterone receptor activation in vascular cambium meristematic cells, increasing vascular bundle formation to support enhanced biomass
Solutions
- 1. Apply 0.1 ppm ethinyl estradiol drenching treatment at 200-day growth stage
- 2. Expect 150% increase in midrib vascular bundles (15 vs 6 in control) and 118% increase in petiole bundles (48 vs 22)
- 3. Cross-sectional area of midrib increases 256% and petiole increases 174% to accommodate larger vascular infrastructure
Prevention
Begin hormone treatment early in vegetative stage to allow sufficient time for vascular cambium differentiation and vascular bundle proliferation before maturity
Pothos: Pot Too Small
Orchid bark provides excessive drainage and aeration but insufficient water/nutrient retention for pothos' fibrous roots
85%
Pothos: Pot Too Small
Orchid bark provides excessive drainage and aeration but insufficient water/nutrient retention for pothos' fibrous roots
Cause
Orchid bark provides excessive drainage and aeration but insufficient water/nutrient retention for pothos' fibrous roots. Small propagule roots lack capacity to exploit bark's fast drainage, causing chronic desiccation despite dry topsoil checks.
Solutions
- 1. Gently remove plant from bark and rinse roots under lukewarm water
- 2. Inspect for remaining rot and trim any compromised tissue
- 3. Repot into equal parts peat/perlite mix or standard aroid mix
- 4. If soil unavailable, propagate in clean water changing weekly
- 5. Place in bright indirect light; water only when top 1 inch is dry
Prevention
Match substrate to plant type: use peat-based potting mix for pothos instead of epiphytic media. In winter, reduce watering 50% and maintain 65-75°F with >40% humidity.
Is my Pothos rootbound?
When root mass occupies 80%+ of container volume, Epipremnum aureum enters resource conservation mode, redirecting photosynthates from aerial growth to root expansion in search of new substrate
82%
Is my Pothos rootbound?
When root mass occupies 80%+ of container volume, Epipremnum aureum enters resource conservation mode, redirecting photosynthates from aerial growth to root expansion in search of new substrate
Cause
When root mass occupies 80%+ of container volume, Epipremnum aureum enters resource conservation mode, redirecting photosynthates from aerial growth to root expansion in search of new substrate. This creates etiolated, thin vines with reduced leaf size as the plant attempts to escape confinement rather than invest in dense foliage production.
Solutions
- Inspect root system: Gently slide plant from pot; root-bound condition shows dense circling roots at bottom, white roots visible at drainage holes, or solid root mat
- Select new container: Choose pot 2-3 inches larger in diameter with drainage holes; avoid excessive sizing which causes waterlogging
- Prepare aroid mix: Blend 50% peat-based potting soil, 30% perlite, 20% orchid bark for optimal aeration and drainage
- Tease root ball: Gently loosen outer circling roots with fingers or fork to encourage outward growth into new soil
- Post-repot care: Water thoroughly until drainage, place in bright indirect light, hold fertilizer 4-6 weeks to prevent root burn; expect growth resumption in 2-4 weeks
Prevention
Repot annually in spring for actively growing pothos; monitor for reduced growth rate or water running straight through pot (indicates dense root mass); use terra cotta pots which dry faster and signal when root mass has consumed available moisture.
Is my Pothos rootbound?
Roots escaping drainage holes to access standing water in decorative cachepots indicate hidden rootbound condition with roots circling inside
86%
Is my Pothos rootbound?
Roots escaping drainage holes to access standing water in decorative cachepots indicate hidden rootbound condition with roots circling inside
Cause
Roots escaping drainage holes to access standing water in decorative cachepots indicate hidden rootbound condition with roots circling inside. Pothos exhibit geotropic behavior seeking moisture via hydrotropism.
Solutions
- 1. Trim escaping aerial roots at pot base
- 2. Inspect root ball via drainage holes for circling
- 3. Repot into larger pot with fresh well-draining soil
- 4. Elevate inner pot on feet/pebbles
- 5. Resume normal watering when top 2 inches are dry
Prevention
Monitor large pothos quarterly for root crowding; adjust pot size to match 1.5x canopy width. Use pots with drainage; water over sink.
Why is my Pothos growing so slowly?
Pothos (Epipremnum aureum) responds to exogenous estrogenic compounds via cytokinin-like action, triggering enhanced morphological development
92%
Why is my Pothos growing so slowly?
Pothos (Epipremnum aureum) responds to exogenous estrogenic compounds via cytokinin-like action, triggering enhanced morphological development
Cause
Pothos (Epipremnum aureum) responds to exogenous estrogenic compounds via cytokinin-like action, triggering enhanced morphological development. Research demonstrates ethinyl estradiol at 0.1 ppm increases plant height, leaf area, and fresh/dry weights of above-ground parts through activation of estrogen receptors in plant tissue or induction of endogenous cytokinins. Optimal BA (2.5 mg/L) + Kn (1.0 mg/L) combinations produce 2.86 shoots per explant with 1.87 cm shoot length for mass propagation.
Solutions
- For enhanced growth: Apply ethinyl estradiol at 0.1 ppm via drenching during peak growth periods
- For propagation: Use MS medium with 2.5 mg/L BA + 1.0 mg/L Kn for optimal shoot proliferation
- Transfer micro-shoots to MS + 0.25 mg/L α-NAA + 0.5 g/L activated carbon for 93.33% rooting success
- Acclimate in 1:1 loamy garden soil and coconut coir mix for 75% survival after 40 days
Prevention
Apply diluted growth regulators only during active growth seasons (spring-summer). Maintain consistent nitrogen and phosphorus levels to support enhanced metabolic demands from hormonal stimulation.
Pothos: Slow Growth
Ethinyl estradiol (estrogenic hormone) at 0
85%
Pothos: Slow Growth
Ethinyl estradiol (estrogenic hormone) at 0
Cause
Ethinyl estradiol (estrogenic hormone) at 0.1 ppm activates growth-promoting pathways in pothos through potential estrogen receptor binding or cytokinin-like morphogenetic action, triggering enhanced cellular proliferation in meristematic tissues
Solutions
- 1. Apply ethinyl estradiol at 0.1 ppm concentration via drenching solution
- 2. Monitor plant height biweekly - expect 43-63% increase over control within 200 days
- 3. Measure leaf count and area - anticipate 65-176% expansion in surface area per leaf
Prevention
Maintain consistent 0.1 ppm ethinyl estradiol treatment throughout active growing season; avoid exceeding 0.2 ppm as higher concentrations show diminishing returns on morphological parameters
What is the best soil mix for Pothos?
Pothos soil chemistry involves maintaining pH between 6
82%
What is the best soil mix for Pothos?
Pothos soil chemistry involves maintaining pH between 6
Cause
Pothos soil chemistry involves maintaining pH between 6.1-6.5 for optimal nutrient availability, while electrical conductivity (EC) must remain below 1.0 mS/cm to prevent salt-induced osmotic stress. Organic-rich soils support beneficial fungal ecosystems but chronic overwatering shifts conditions from aerobic to anaerobic, promoting pathogenic fungi and root suffocation.
Solutions
- 1. Test soil pH: Target 6.1-6.5 using pH meter or test strips; adjust with dolomitic lime if too acidic, sulfur if too alkaline
- 2. Monitor EC levels: Keep electrical conductivity under 1.0 mS/cm using an EC meter; high readings indicate salt buildup
- 3. Flush accumulated salts: Run 3x pot volume of pH-balanced plain water through soil, allowing complete drainage; repeat monthly
- 4. Address surface mold: Scrape top 1-2 inches of affected soil, apply cinnamon powder or diluted hydrogen peroxide (1:4 ratio) as natural antifungal
- 5. Improve drainage amendments: Add 20-30% perlite and 10% horticultural charcoal to enhance aeration and pH buffering capacity
Prevention
Monitor soil pH and EC with affordable meters. Use rainwater or distilled water to minimize mineral buildup. Incorporate horticultural charcoal and perlite to maintain aeration and buffer pH fluctuations. Flush soil monthly with plain water to leach accumulated salts.
What is the best soil mix for Pothos?
Pothos (Epipremnum aureum) requires a well-draining, aerated soil mix that mimics their epiphytic native habitat in tropical forests where roots cling to bark and organic debris with constant airflow
85%
What is the best soil mix for Pothos?
Pothos (Epipremnum aureum) requires a well-draining, aerated soil mix that mimics their epiphytic native habitat in tropical forests where roots cling to bark and organic debris with constant airflow
Cause
Pothos (Epipremnum aureum) requires a well-draining, aerated soil mix that mimics their epiphytic native habitat in tropical forests where roots cling to bark and organic debris with constant airflow. Dense, moisture-retaining soils create anaerobic conditions that suffocate roots and promote fungal growth despite the plant's resilience.
Solutions
- 1. Inspect current soil: If dense or moldy, gently remove plant and check roots for rot (black/mushy = remove with sterile shears)
- 2. Mix fresh aroid substrate: 40% quality potting soil + 30% perlite + 20% orchid bark + 10% horticultural charcoal
- 3. Repot in appropriately sized container with drainage holes—avoid oversized pots that retain excess moisture
- 4. Allow top 2-3 inches of soil to dry completely between waterings (finger test or moisture meter)
- 5. Provide bright indirect light (2000-5000 lux) and 40-60% humidity with good airflow to enhance soil drying
Prevention
Use a chunky aroid mix with 40% potting soil, 30% perlite, 20% orchid bark, and 10% horticultural charcoal. Ensure pots have drainage holes and match root ball size. Bottom-water to encourage deep rooting and prevent surface mold.
What is the best soil mix for Pothos?
Pothos (Epipremnum aureum) thrives in well-draining, aerated soil that balances moisture retention with oxygen availability
88%
What is the best soil mix for Pothos?
Pothos (Epipremnum aureum) thrives in well-draining, aerated soil that balances moisture retention with oxygen availability
Cause
Pothos (Epipremnum aureum) thrives in well-draining, aerated soil that balances moisture retention with oxygen availability. Dense, moisture-retentive soils create anaerobic conditions that promote root rot pathogens (Pythium spp.), while overly gritty mixes (pure bark/perlite) cause desiccation stress in young plants. The ideal soil chemistry maintains 20-30% air porosity while holding sufficient moisture for epiphytic-adapted roots. Soil pH of 6.1-6.5 optimizes nutrient availability for aroid physiology.
Solutions
- Use chunky aroid mix: 40-50% peat-based potting soil, 30% perlite or pumice, 20% orchid bark, optional 10% horticultural charcoal for aeration and pH buffering
- Test soil moisture with finger test (top 2-3 inches should dry) or moisture meter before watering to prevent anaerobic conditions
- For severely rootbound plants, gently loosen outer root layer before repotting into fresh mix 1-2 inches larger in diameter
- Water thoroughly until drainage flows freely, then allow soil to approach dryness before next watering
- In winter (dormancy), extend dry periods to 2-3 weeks as metabolic slowdown reduces water demand
Prevention
Select pots with drainage holes; avoid decorative cachepots that trap standing water. Maintain 40-60% ambient humidity to reduce soil moisture demands. Repot annually or when roots circle the pot. Use filtered water to minimize salt buildup that alters soil chemistry over time.
Thyme Oil Nanoemulsion Treatment: How to Use for Pothos
Thyme essential oil nanoemulsion contains thymol as the primary active compound (along with carvacrol, p-cymene, and ɣ-terpinene) which targets fungal cell wall-degrading enzymes
91%
Thyme Oil Nanoemulsion Treatment: How to Use for Pothos
Thyme essential oil nanoemulsion contains thymol as the primary active compound (along with carvacrol, p-cymene, and ɣ-terpinene) which targets fungal cell wall-degrading enzymes
Cause
Thyme essential oil nanoemulsion contains thymol as the primary active compound (along with carvacrol, p-cymene, and ɣ-terpinene) which targets fungal cell wall-degrading enzymes. At 3000 ppm concentration, thymol forms five pi-alkyl interactions with pectate lyase enzyme residues (Val308, Phe294, Trp290, Phe282, His689) and hydrogen bonds with Asp688, completely inhibiting Rhizoctonia solani and Sclerotium rolfsii growth through enzymatic disruption. Nanoemulsion droplet size of 94.82 nm with polydispersity index 0.436 ensures uniform distribution.
Solutions
- 1. Prepare nanoemulsion: Mix thyme essential oil with Tween 80 surfactant and water using high-energy ultrasonication at 700W output for 30 minutes to create stable nanoemulsion with droplet size under 95 nm
- 2. Apply at therapeutic concentration: Use 3000 ppm (0.3% v/v) thyme oil nanoemulsion for complete fungal inhibition; lower concentrations of 1000-2000 ppm provide partial suppression of pathogen growth
- 3. Soil drench application: Apply prepared nanoemulsion directly to infected soil at rate of 100 mL per 30cm pot diameter, ensuring thorough saturation of the entire root zone
- 4. Repeat treatment cycle: Reapply every 7-10 days for 3-4 consecutive treatments to maintain therapeutic levels and prevent pathogen recovery between applications
- 5. Monitor recovery metrics: Expect 4.61-fold to 11.18-fold increase in root length and 28.59-fold to 45.62-fold increase in root fresh weight compared to untreated infected plants after complete treatment cycle
Prevention
Apply 1000 ppm thyme oil nanoemulsion as preventive soil drench monthly during high-risk periods including winter dormancy and post-repotting stress; store nanoemulsion properly as nano-formulations maintain stability longer than bulk oils but still require appropriate storage conditions
Pothos: Timing
Propagation success correlates directly with the parent plant's natural growth cycle
83%
Pothos: Timing
Propagation success correlates directly with the parent plant's natural growth cycle
Cause
Propagation success correlates directly with the parent plant's natural growth cycle. During spring and early summer (March-July in Northern Hemisphere), increasing photoperiod and temperatures trigger elevated metabolic activity and carbohydrate production—essential energy reserves for root development. Cuttings taken during dormancy (late fall/winter) lack sufficient stored energy and face environmental conditions (low light, cool temperatures) that slow cell division, extending rooting time from 2-4 weeks to 8-12 weeks and increasing failure rates. Hormone levels naturally peak during active growth, providing endogenous auxins that complement synthetic rooting compounds.
Solutions
- Optimal window: Take cuttings March through July when day length exceeds 12 hours and temperatures stabilize above 65°F
- Pre-propagation preparation: Fertilize parent plant 2 weeks before taking cuttings to boost nutrient reserves
- Time of day: Take cuttings in morning when plant turgor pressure is highest—cells are fully hydrated
- Avoid stress periods: Do not propagate during flowering, fruiting, or within 4 weeks of repotting
- Regional adjustments: In tropical climates, propagate year-round; in temperate zones, strictly limit to spring-early summer
- Emergency off-season propagation: Use grow lights (14-hour photoperiod) and heating mats (75°F) to simulate spring conditions
Prevention
Never propagate during temperature extremes (below 60°F or above 85°F); cell division rates decrease significantly outside optimal range. Monitor parent plant health—stressed plants produce weaker cuttings with reduced rooting capacity.
Treatment: How to Use for Pothos
Fungal and bacterial pathogens require fundamentally different treatment approaches due to biological differences
81%
Treatment: How to Use for Pothos
Fungal and bacterial pathogens require fundamentally different treatment approaches due to biological differences
Cause
Fungal and bacterial pathogens require fundamentally different treatment approaches due to biological differences. Bacteria (Xanthomonas, Pseudomonas) are single-celled prokaryotes susceptible to copper-based bactericides that disrupt cell membranes; they spread rapidly via water splash in high humidity. Fungi (Phyllosticta, Cercospora) are eukaryotes with cell walls targeted by systemic fungicides that inhibit ergosterol synthesis; they spread slower via spores and persist in soil.
Solutions
- Diagnose correctly: water-soaked translucent lesions with ooze = bacterial; dry dark spots with rings = fungal
- For bacterial infections: apply copper-based bactericide (copper sulfate/hydroxide) every 7-10 days; remove severely affected leaves
- For fungal infections: apply systemic fungicide (propiconazole or thiophanate-methyl) following label rates every 14 days
- Improve air circulation immediately for bacterial issues; allow soil to dry between waterings for fungal issues
- Continue treatments for 3-4 weeks after symptoms disappear to ensure complete pathogen elimination
Prevention
Apply preventive copper spray monthly for bacterial protection; rotate with fungicide quarterly for fungal prevention. Maintain 40-60% humidity (not higher) to suppress both bacterial multiplication and fungal spore germination. Water at soil level only; never mist foliage. Sterilize tools between plants to prevent cross-contamination.
Further Reading
Related Articles
Common Questions
Frequently Asked Questions
Why does my pothos have Yellow leaves?
Cause: Pothos exhibits natural basal leaf senescence as vines mature, redirecting energy from oldest leaves to new growth. However, multiple simultaneous yellow leaves indicate root oxygen deprivation from waterlogged soil, where anaerobic bacteria break down root tissue, blocking nutrient transport and causing systemic chlorosis.
Solution: Inspect pattern: Single bottom leaf yellowing over weeks = natural; multiple leaves rapidly yellowing = root crisis
Prevention: Water only when top 2 inches of soil are dry; use well-draining aroid mix with 30%+ perlite; ensure pot has drainage holes; avoid oversized pots that retain excess moisture; bottom-water only when necessary to control saturation levels.
91% confidence · View full protocol →
Why does my pothos have Node selection propagation?
Cause: Successful pothos propagation requires selecting stem segments containing 2-3 nodes (the brown lines where leaves meet stem) because adventitious roots emerge exclusively from nodal tissue, not from internodal stem sections. Single-node cuttings have limited root primordia and slower establishment, while leaf-only cuttings without nodes cannot root at all. The timing of node selection also matters—nodes on actively growing spring/summer vines root 2-3x faster than dormant winter growth.
Solution: Identify nodes correctly: Look for brown lines perpendicular to stem where leaves attach, or small bumps where aerial roots emerge
Prevention: Take cuttings during active growing season (spring through early fall) for fastest rooting; always verify 2-3 visible nodes per cutting by looking for brown lines or aerial root bumps; avoid taking cuttings from flowering vines as energy is diverted to bloom production; sterilize shears between cuts to prevent disease transmission.
92% confidence · View full protocol →
Why does my pothos have Rhizoctonia root rot?
Cause: Rhizoctonia solani is a soil-borne fungal pathogen that causes root rot in pothos (Epipremnum aureum) by secreting pectate lyase enzymes that break down plant cell walls. The fungus persists as vegetative mycelium in soil and attacks root tissue directly, causing vascular collapse and reducing root length, fresh weight, and dry weight significantly.
Solution: Prepare thyme oil nanoemulsion at 3000 ppm using 10% v/v oil emulsified with Tween 80 surfactant (2:1 ratio), sonicated for 30 minutes to achieve particle size ~94.82 nm
Prevention: Pre-treat pothos cuttings by soaking basal stems in thyme oil nanoemulsion (3000 ppm) for 30 minutes before planting in pathogen-contaminated soil. Nanoemulsions provide superior bioavailability compared to standard emulsions.
95% confidence · View full protocol →
Why does my pothos have Disease quarantine protocol?
Cause: Quarantine protocols prevent pathogen spread through two mechanisms: physical isolation (preventing airborne spore transmission and insect vector movement) and temporal monitoring (allowing latent infections to manifest before introducing plants to established collections). Fungal spores travel 3-6 feet via air currents; bacterial pathogens spread through water splash and contaminated tools. Mosaic virus requires 7-14 days incubation before symptoms appear.
Solution: Step 1: Place new/ailing plant in separate room or 6+ feet from collection
Prevention: Establish dedicated quarantine zone minimum 6 feet from other plants; maintain separate tools for quarantine plants; document arrival date and monitor daily for symptom development.
92% confidence · View full protocol →
Why does my pothos have Leggy growth pruning techniques?
Cause: Pothos exhibits strong apical dominance where the terminal bud at the vine tip produces auxin that suppresses lateral bud development along the stem. This evolutionary adaptation prioritizes vertical climbing in forest understories but results in sparse, leggy indoor growth when not managed. The suppression persists indefinitely without intervention, causing the plant to maintain single-vine architecture even after years of growth.
Solution: Identify vine tip and trace back 6-12 inches to locate 3-4 healthy nodes with visible aerial root bumps
Prevention: Prune every 6-12 months regardless of appearance to regularly break apical dominance; combine pruning with spring fertilization to maximize new shoot energy; propagate cuttings immediately to maintain genetic backup plants.
91% confidence · View full protocol →
Common Questions
Frequently Asked About Pothos
Are Pothos toxic to cats and dogs?
Yes, Pothos are toxic to both cats and dogs. Contains calcium oxalate crystals.
Can Pothos grow in water?
Yes. We have 8 documented protocols for water-based Pothos care, including propagation and long-term hydroponic transition.
How fast do Pothos grow?
Pothos have a fast growth rate under optimal indoor conditions. They can reach Trailing vines up to 10 ft indoors.
How do I propagate Pothos?
The primary propagation method for Pothos is stem cutting. We have 22 documented propagation protocols covering success rates, failure points, and advanced techniques.
Are Pothos easy to care for?
Pothos are rated as "beginner" difficulty. They are excellent choices for beginners.
What problems can Pothos get?
Our database contains 181 documented Pothos cases covering 85 distinct topics, including diseases, pest identification, environmental stress, propagation, and advanced care protocols — each with verified solutions.
Master This Plant
Want the Complete Protocol?
Get the Pothos Blueprint Pack with video walkthroughs, seasonal calendars, and advanced rescue techniques not covered in the free guides.